> ## Documentation Index
> Fetch the complete documentation index at: https://docs.sevalla.com/llms.txt
> Use this file to discover all available pages before exploring further.
# Pipelines
> Set up deployment pipelines for continuous delivery and integration.
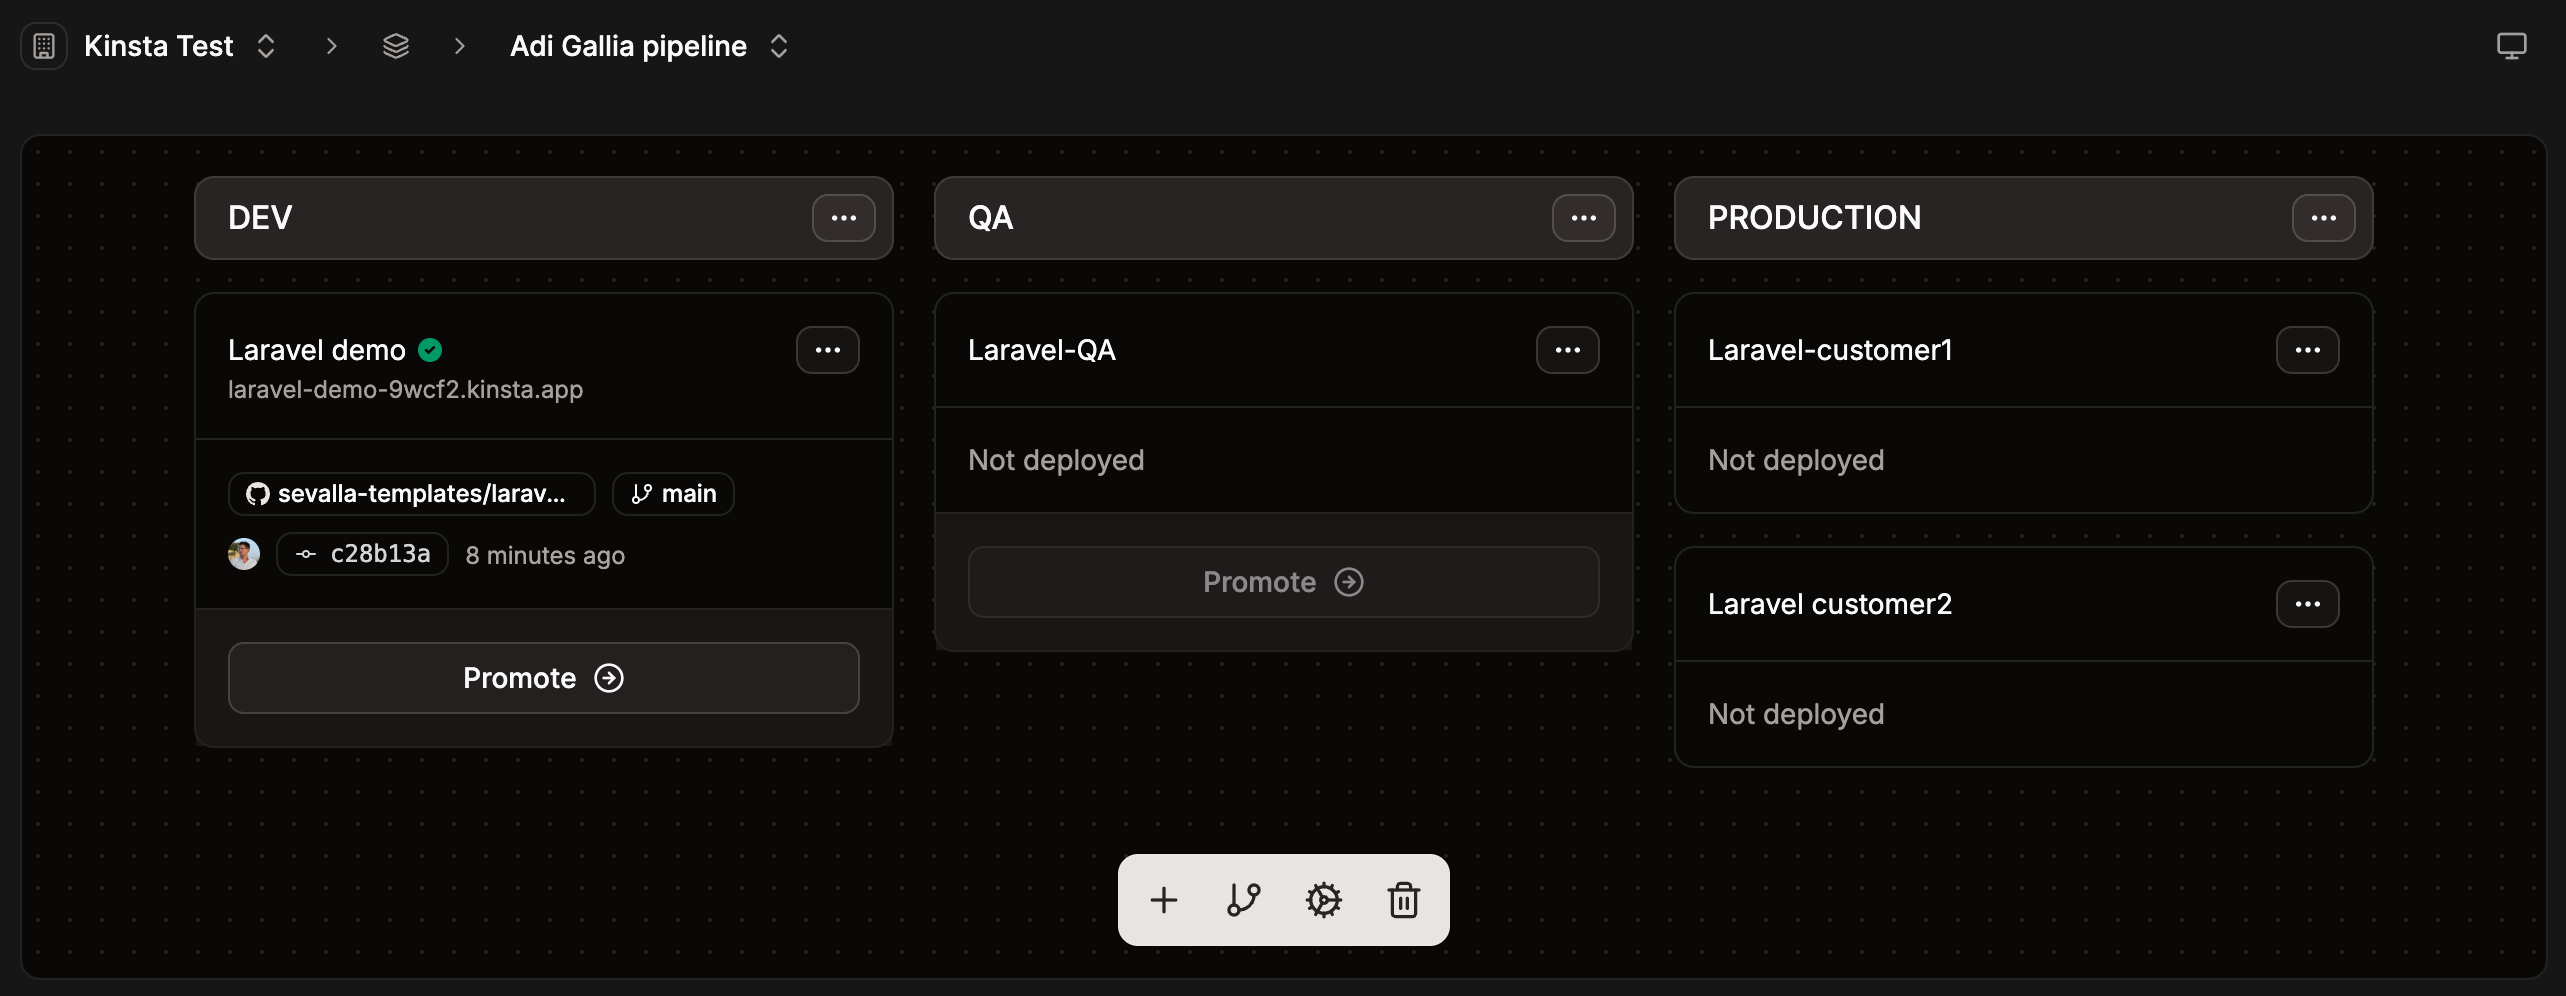
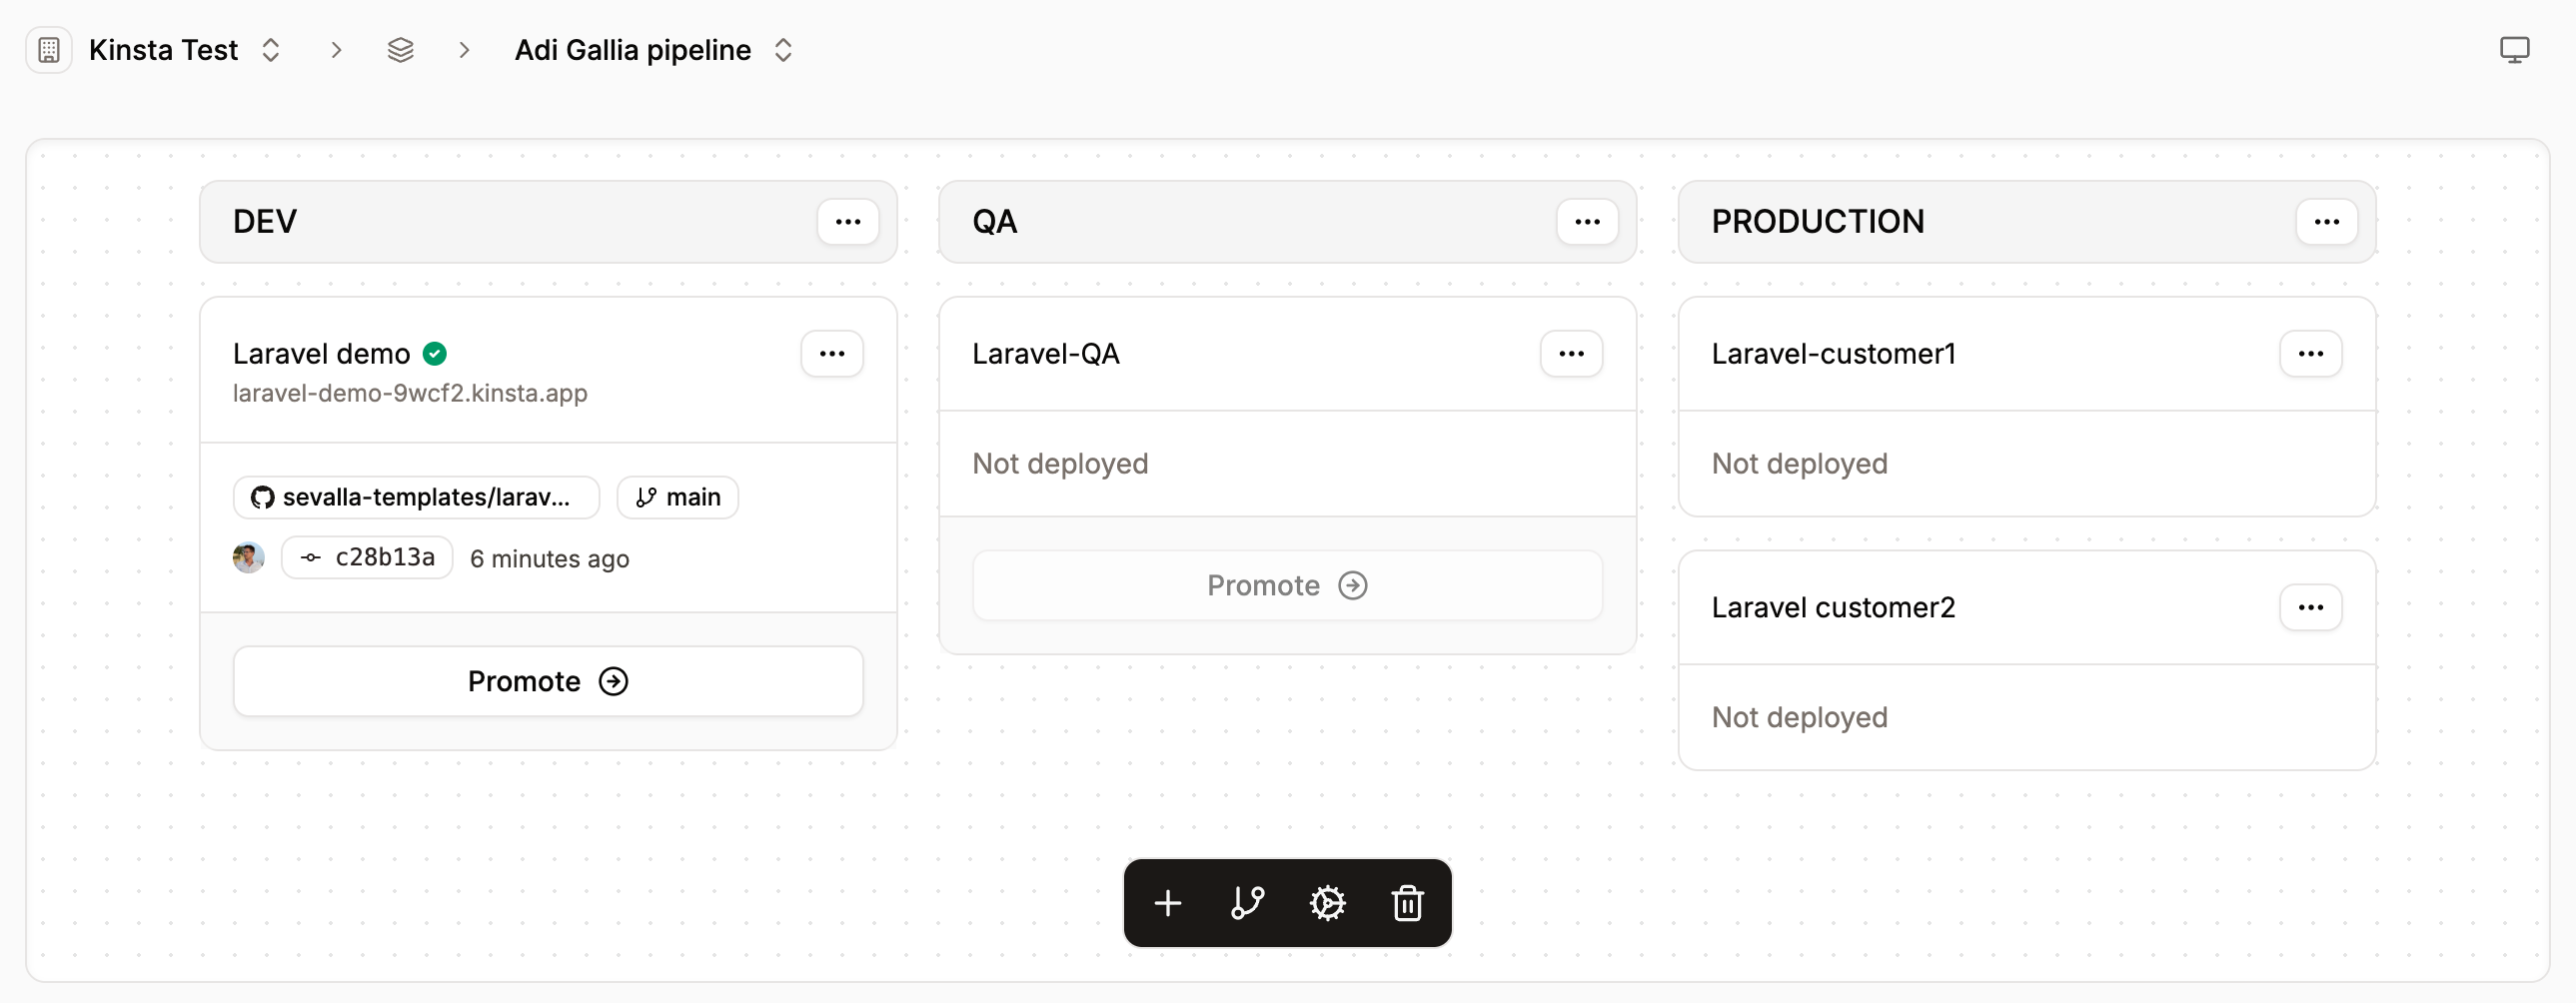
Pipelines enable you to automate the entire process of moving code from development to production. You can define multiple stages within your pipeline and include multiple applications in each stage. Once your pipeline is set up, the **Promote** feature allows you to seamlessly push changes from the source code to QA and production environments without the need to rebuild the application. Pipelines also support the Git Flow strategy, providing a clear visual representation of your application's development and deployment workflow.
With pipelines, you can:
* **Deploy software with different environment variables:** This is ideal for scenarios like a B2B application used by multiple customers, where each customer requires slight variations in their dashboard.
* **Deploy the same application across multiple geographical locations:** This helps improve performance and reduce latency for users in different regions.
* **Run A/B tests:** Easily deploy different versions of your application to targeted user groups so you can test which version delivers better results.
Using pipelines streamlines the deployment process, enhances flexibility, and supports a structured approach to managing multiple environments.
With Pipelines, applications are **free** until they are deployed. Billing only begins once a deployment takes place and the application is actively running.
The **Promote** feature is also [accessible through our API](https://api-docs.sevalla.com/v3/pipelines/promote-pipeline), making it easy to integrate with third-party CI/CD tools like GitHub Actions for streamlined workflows.
Watch our video to see how to create a delivery pipeline for a Laravel application hosted on Sevalla.
## Add a pipeline
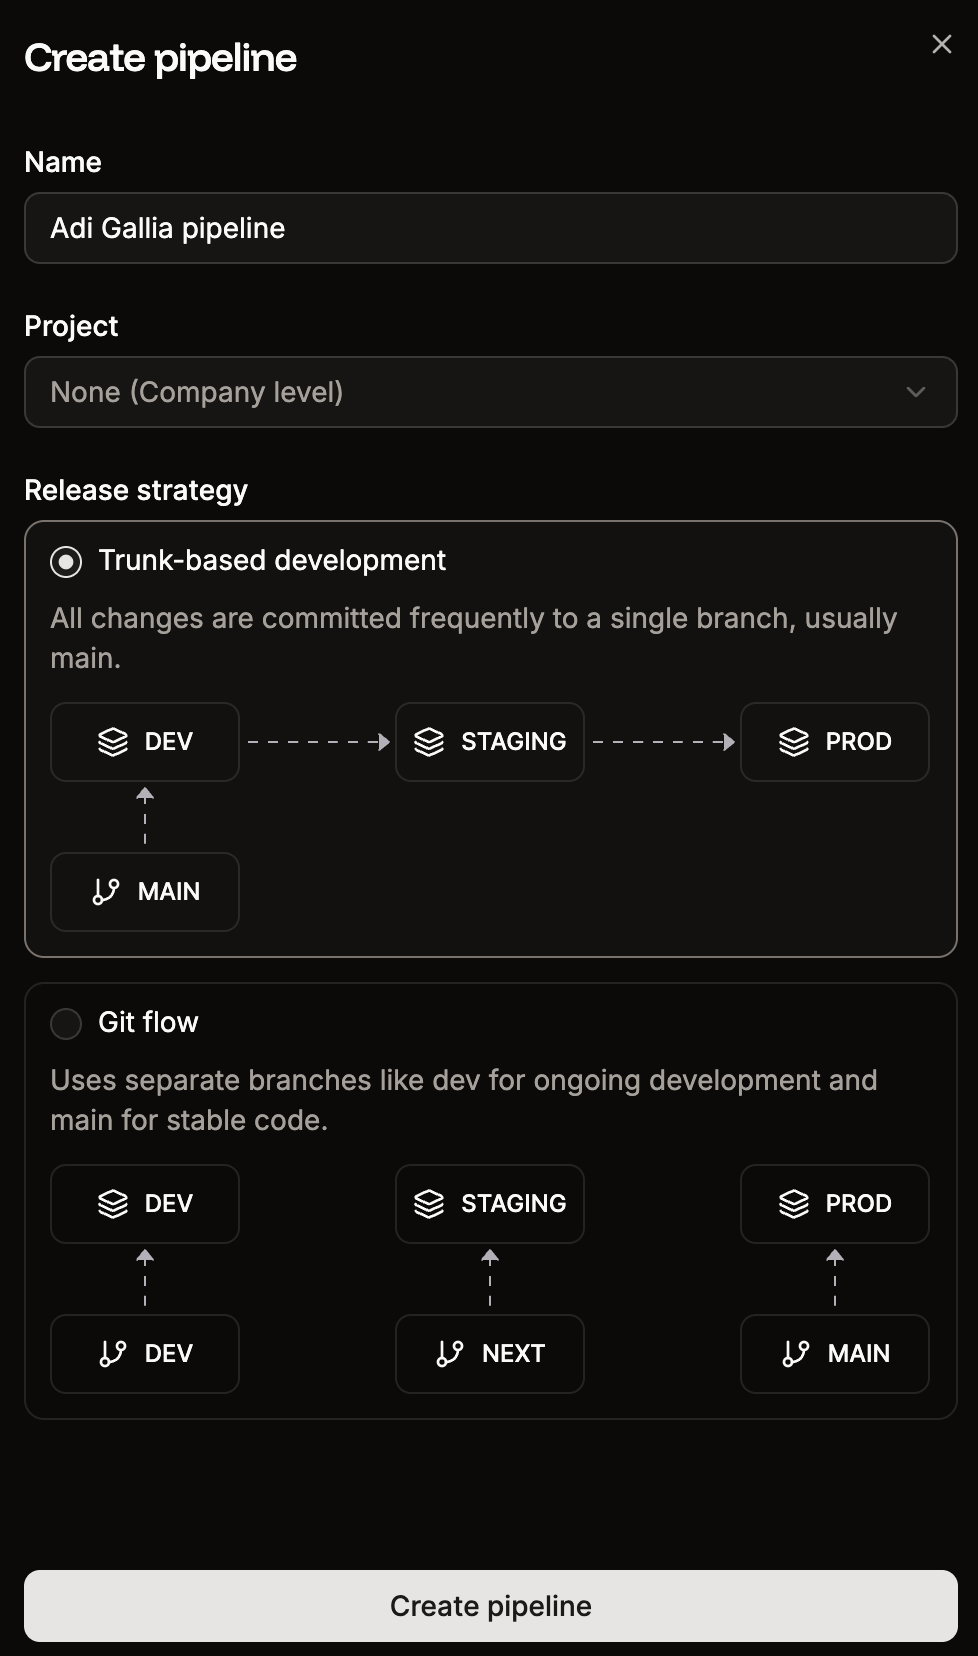
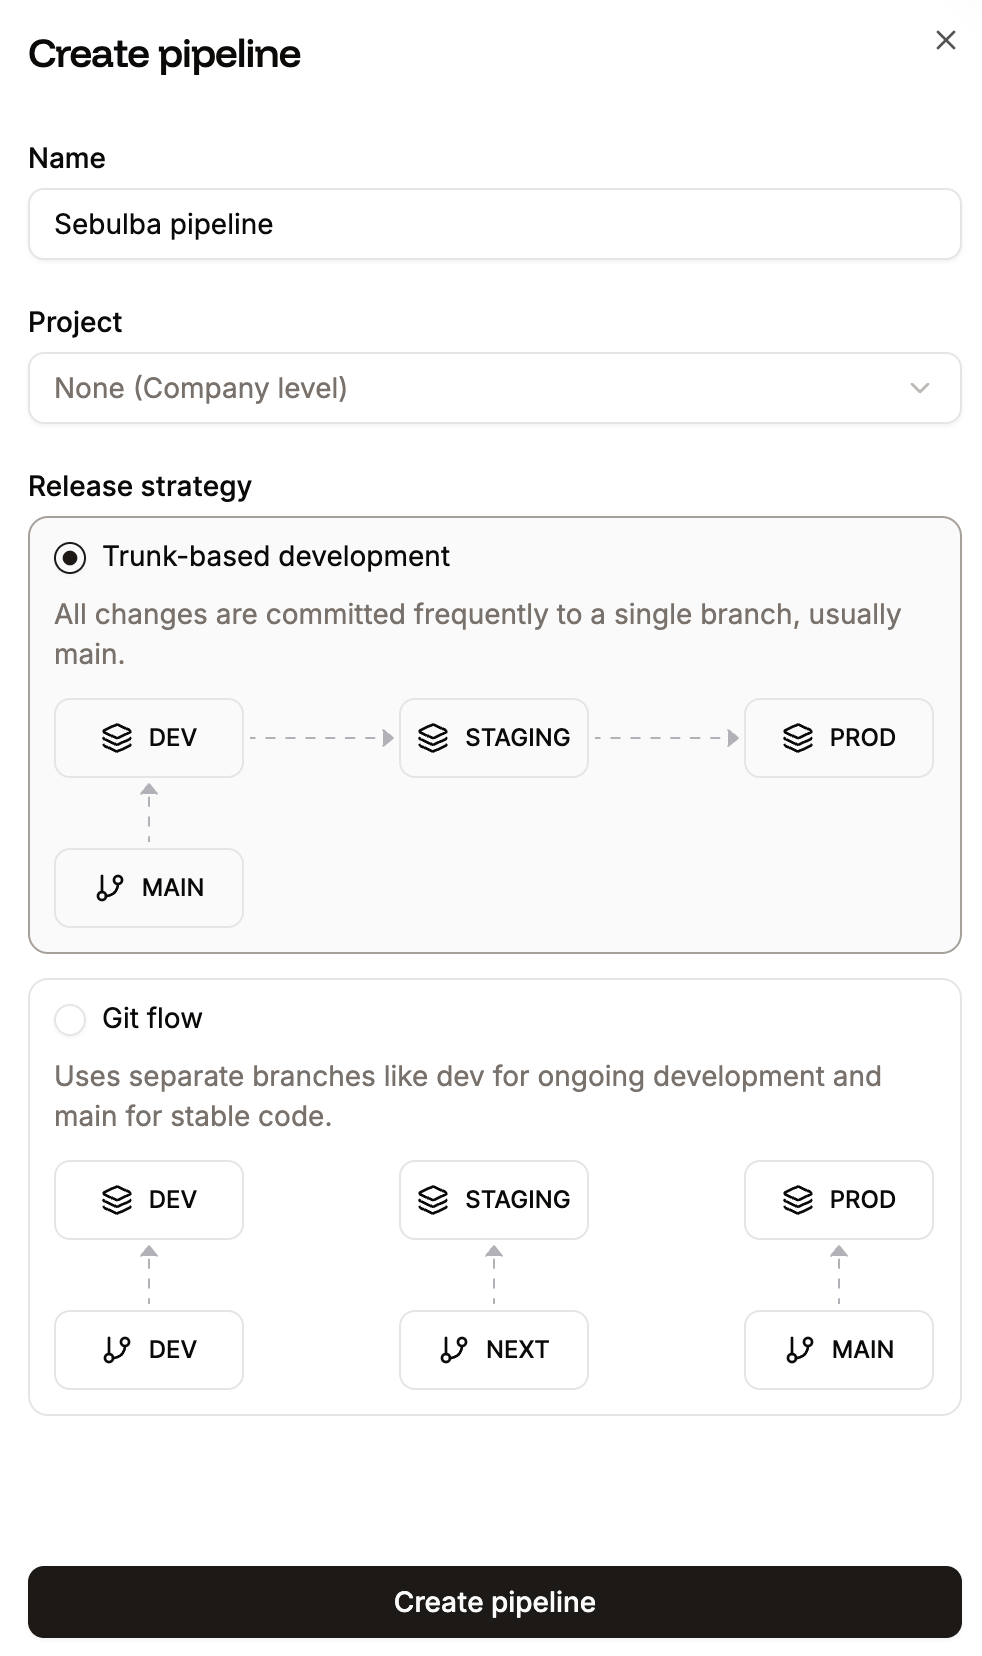
To add a new pipeline, within **Applications**, click **Create** > **Pipeline**.
* **Name:** Enter a name for the pipeline.
* **Project:** This option is only shown if your company already has at least one project. Select the project you’d like to add the pipeline to, or leave it blank to keep the pipeline at the company level instead of assigning it to a specific project.
* **Trunk-based development:** With a trunk-based development pipeline, you can add an existing application to your development stage and create multiple production environments as separate applications for deployment. Each of these applications can be hosted in different [data centers](/service-information/data-center-locations/) and is treated as an independent entity within its own container. This setup allows you to deploy multiple applications from the same source code but with distinct [environment variables](/applications/environment-variables/), [domains](/applications/domains/), [processes](/applications/processes), and other configurations.
* **Git flow:** Choose this option if your workflow uses separate branches for development, staging, and production. To use the Git Flow pipeline, your applications must already be set up within Sevalla. This approach lets you visually manage and track your Git Flow directly in the platform. The Promote feature is not available in this workflow, as deployments occur automatically when you push changes from your Git source repository.
You also have the flexibility to add multiple stages to the pipeline, such as a QA stage, to thoroughly test your changes before promoting them to production.
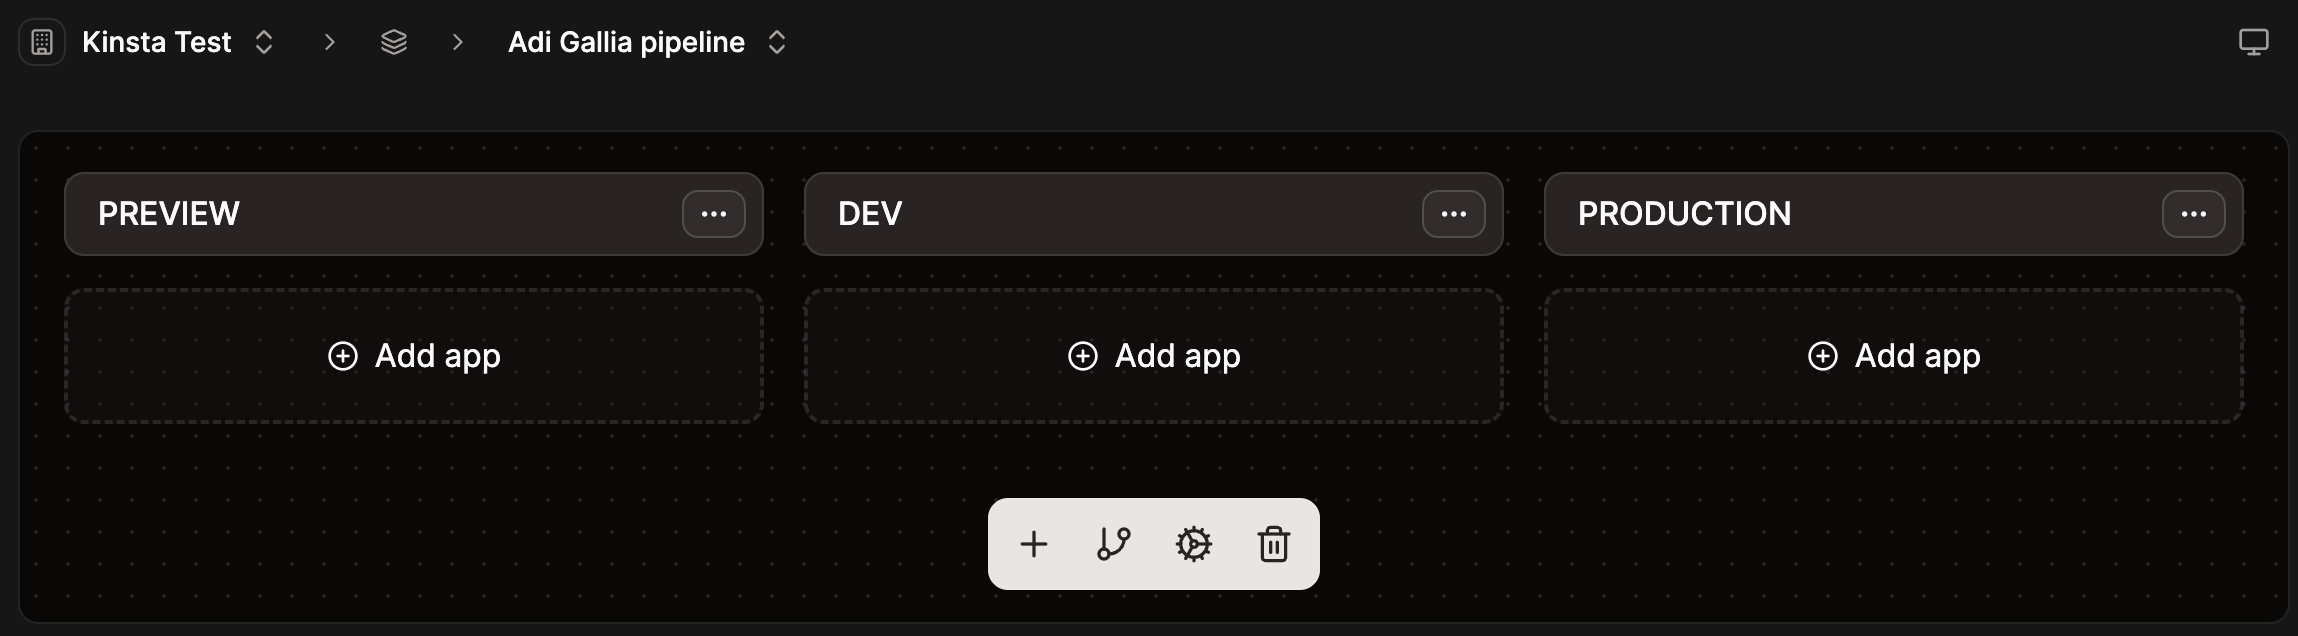
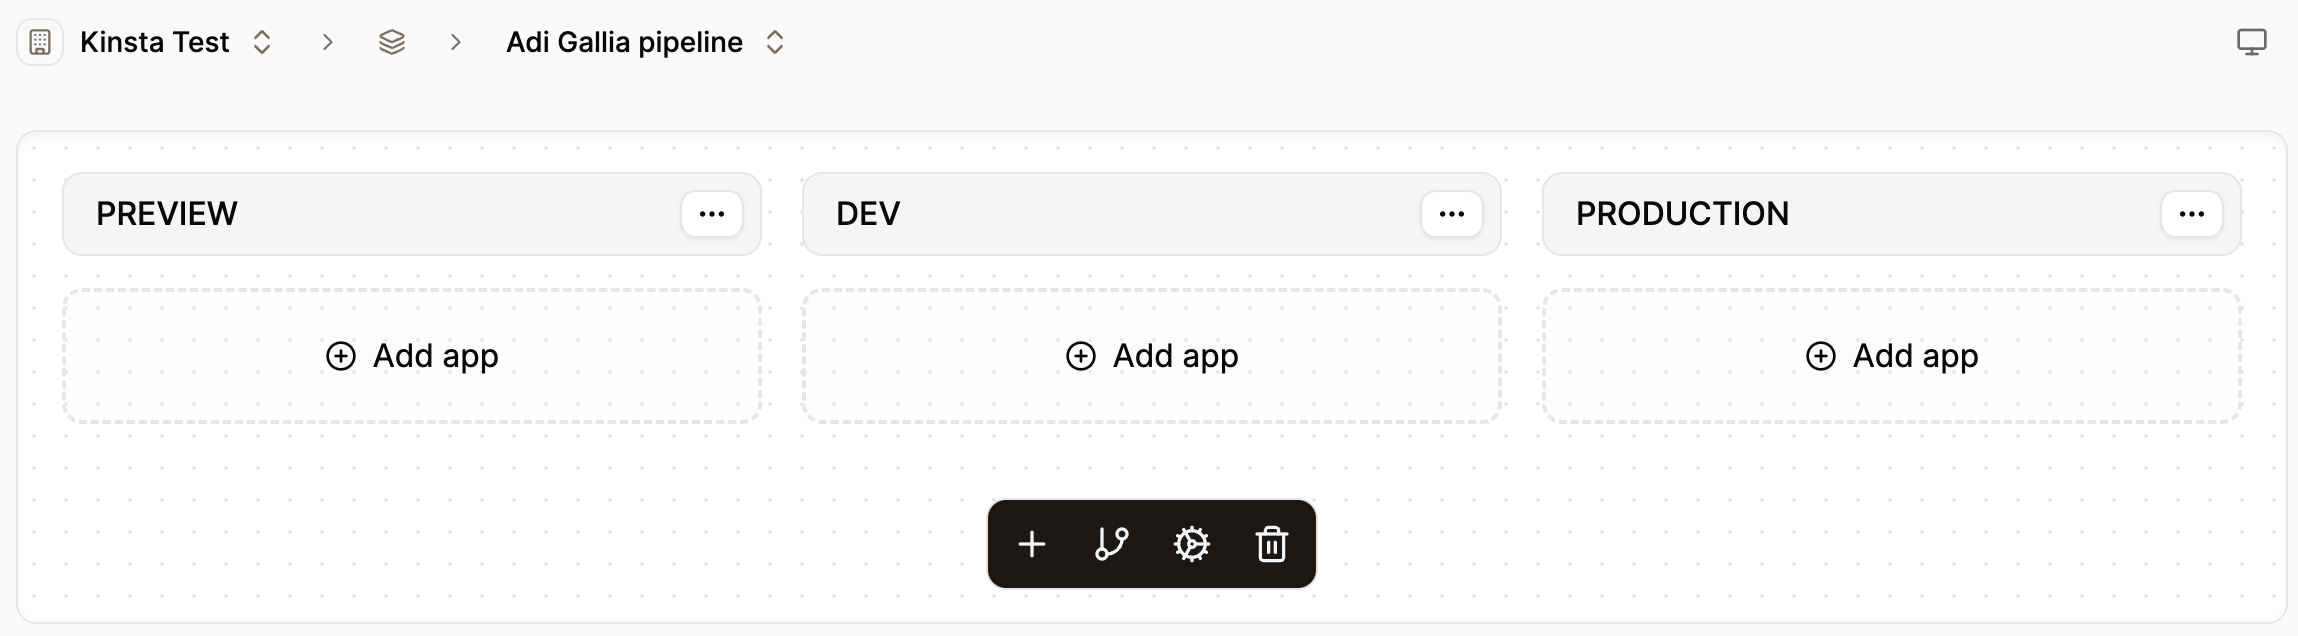
Click **Add pipeline**, which creates the pipeline in your list of applications. You can then select the pipeline to add your stages and applications, enable preview apps, and change the pipeline settings.
### Enable preview apps
Enabling preview apps allows you to test your changes in a live environment before merging them into the main branch. Preview apps are integrated with GitHub's deployment and environment features, so when you open a pull request, a preview app is automatically generated, providing a dedicated testing space that mirrors your production setup. This lets you review, interact with, and refine your updates to ensure your code works as intended before it's fully integrated into the main project.
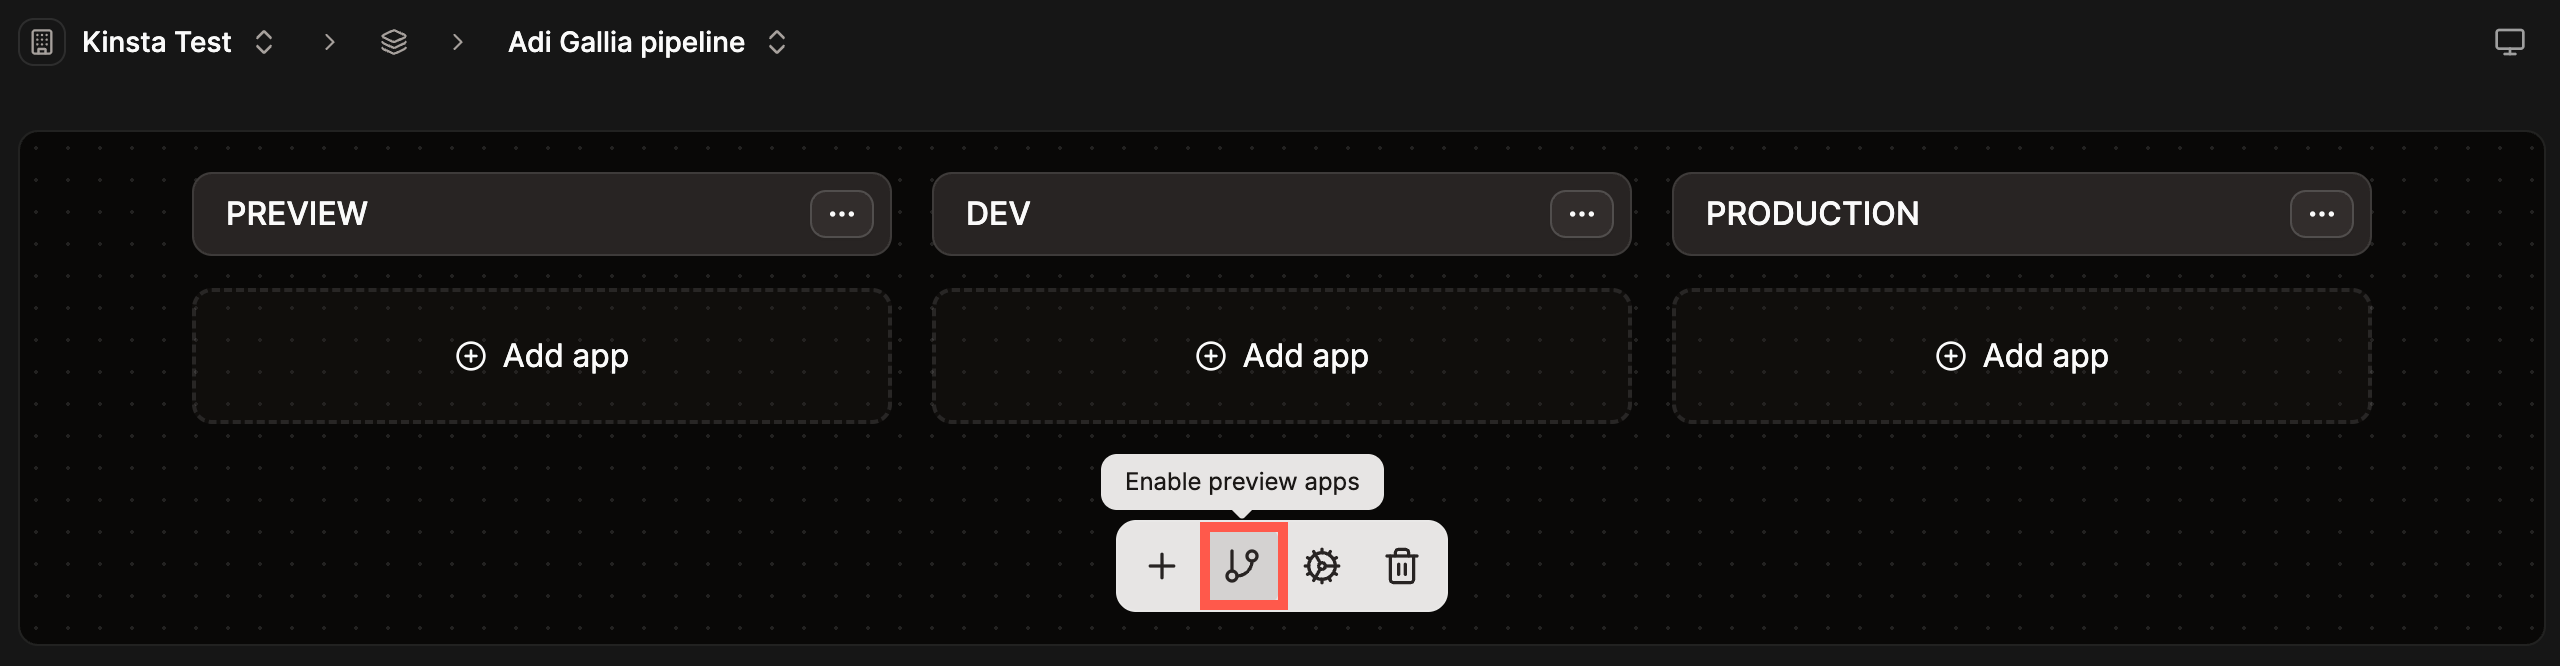
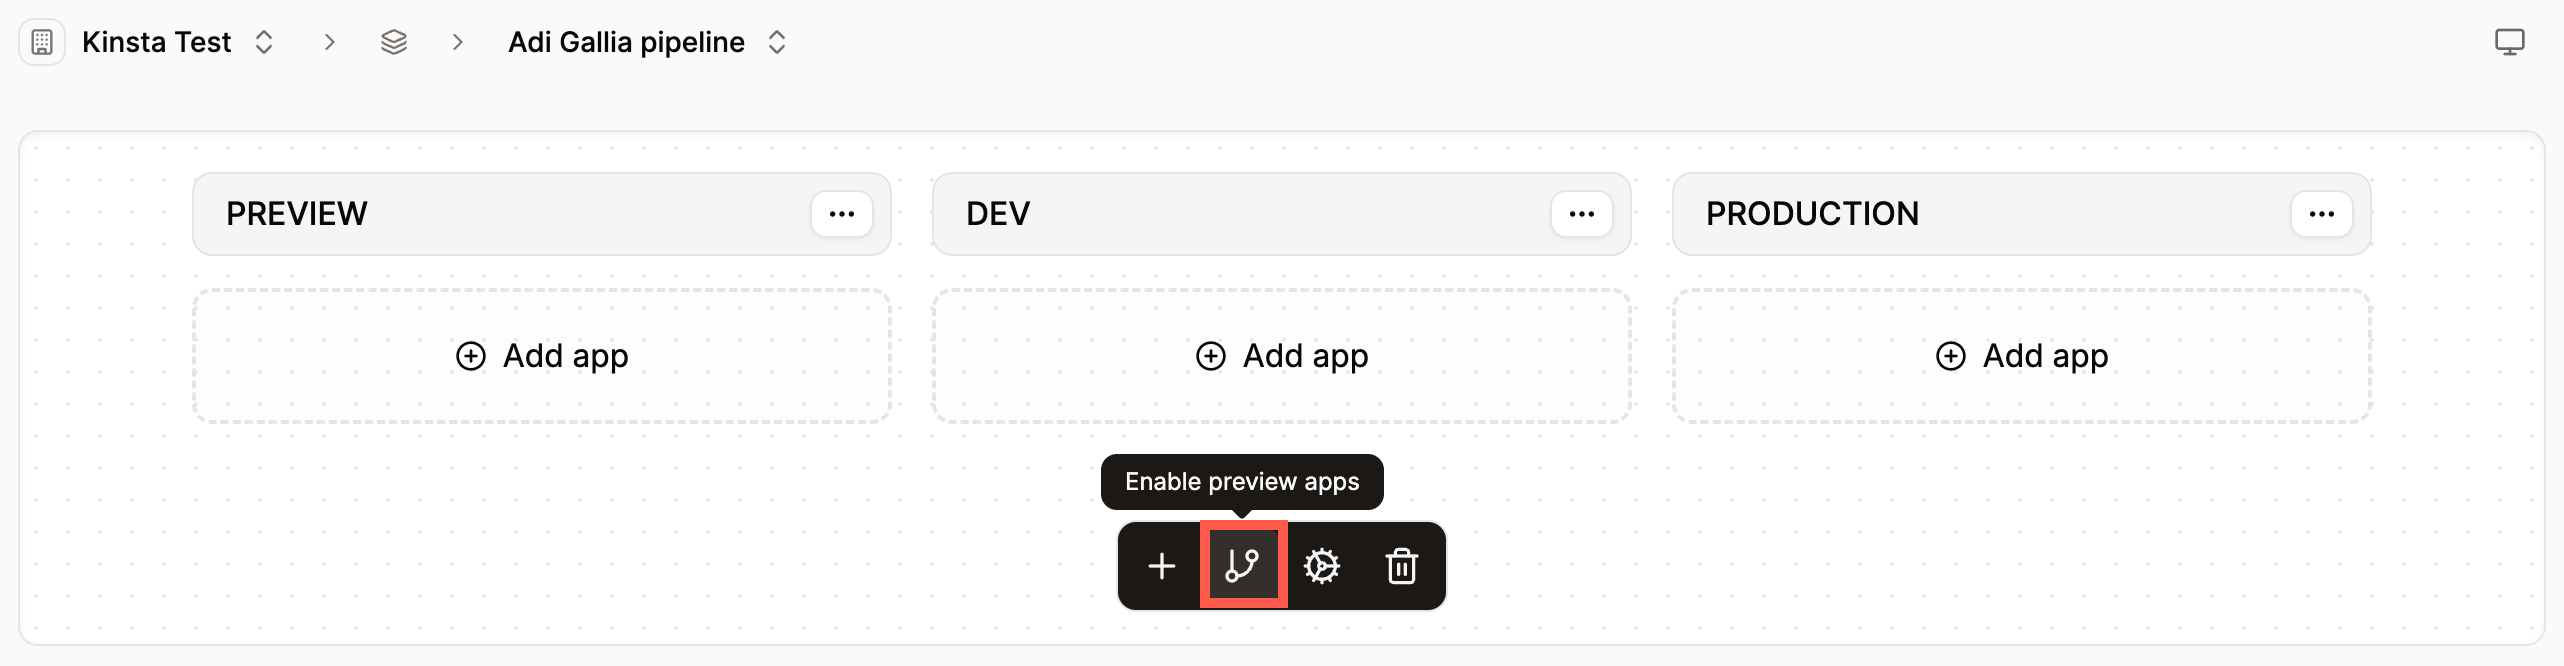
To enable preview apps within the pipeline, click **Enable preview apps**.
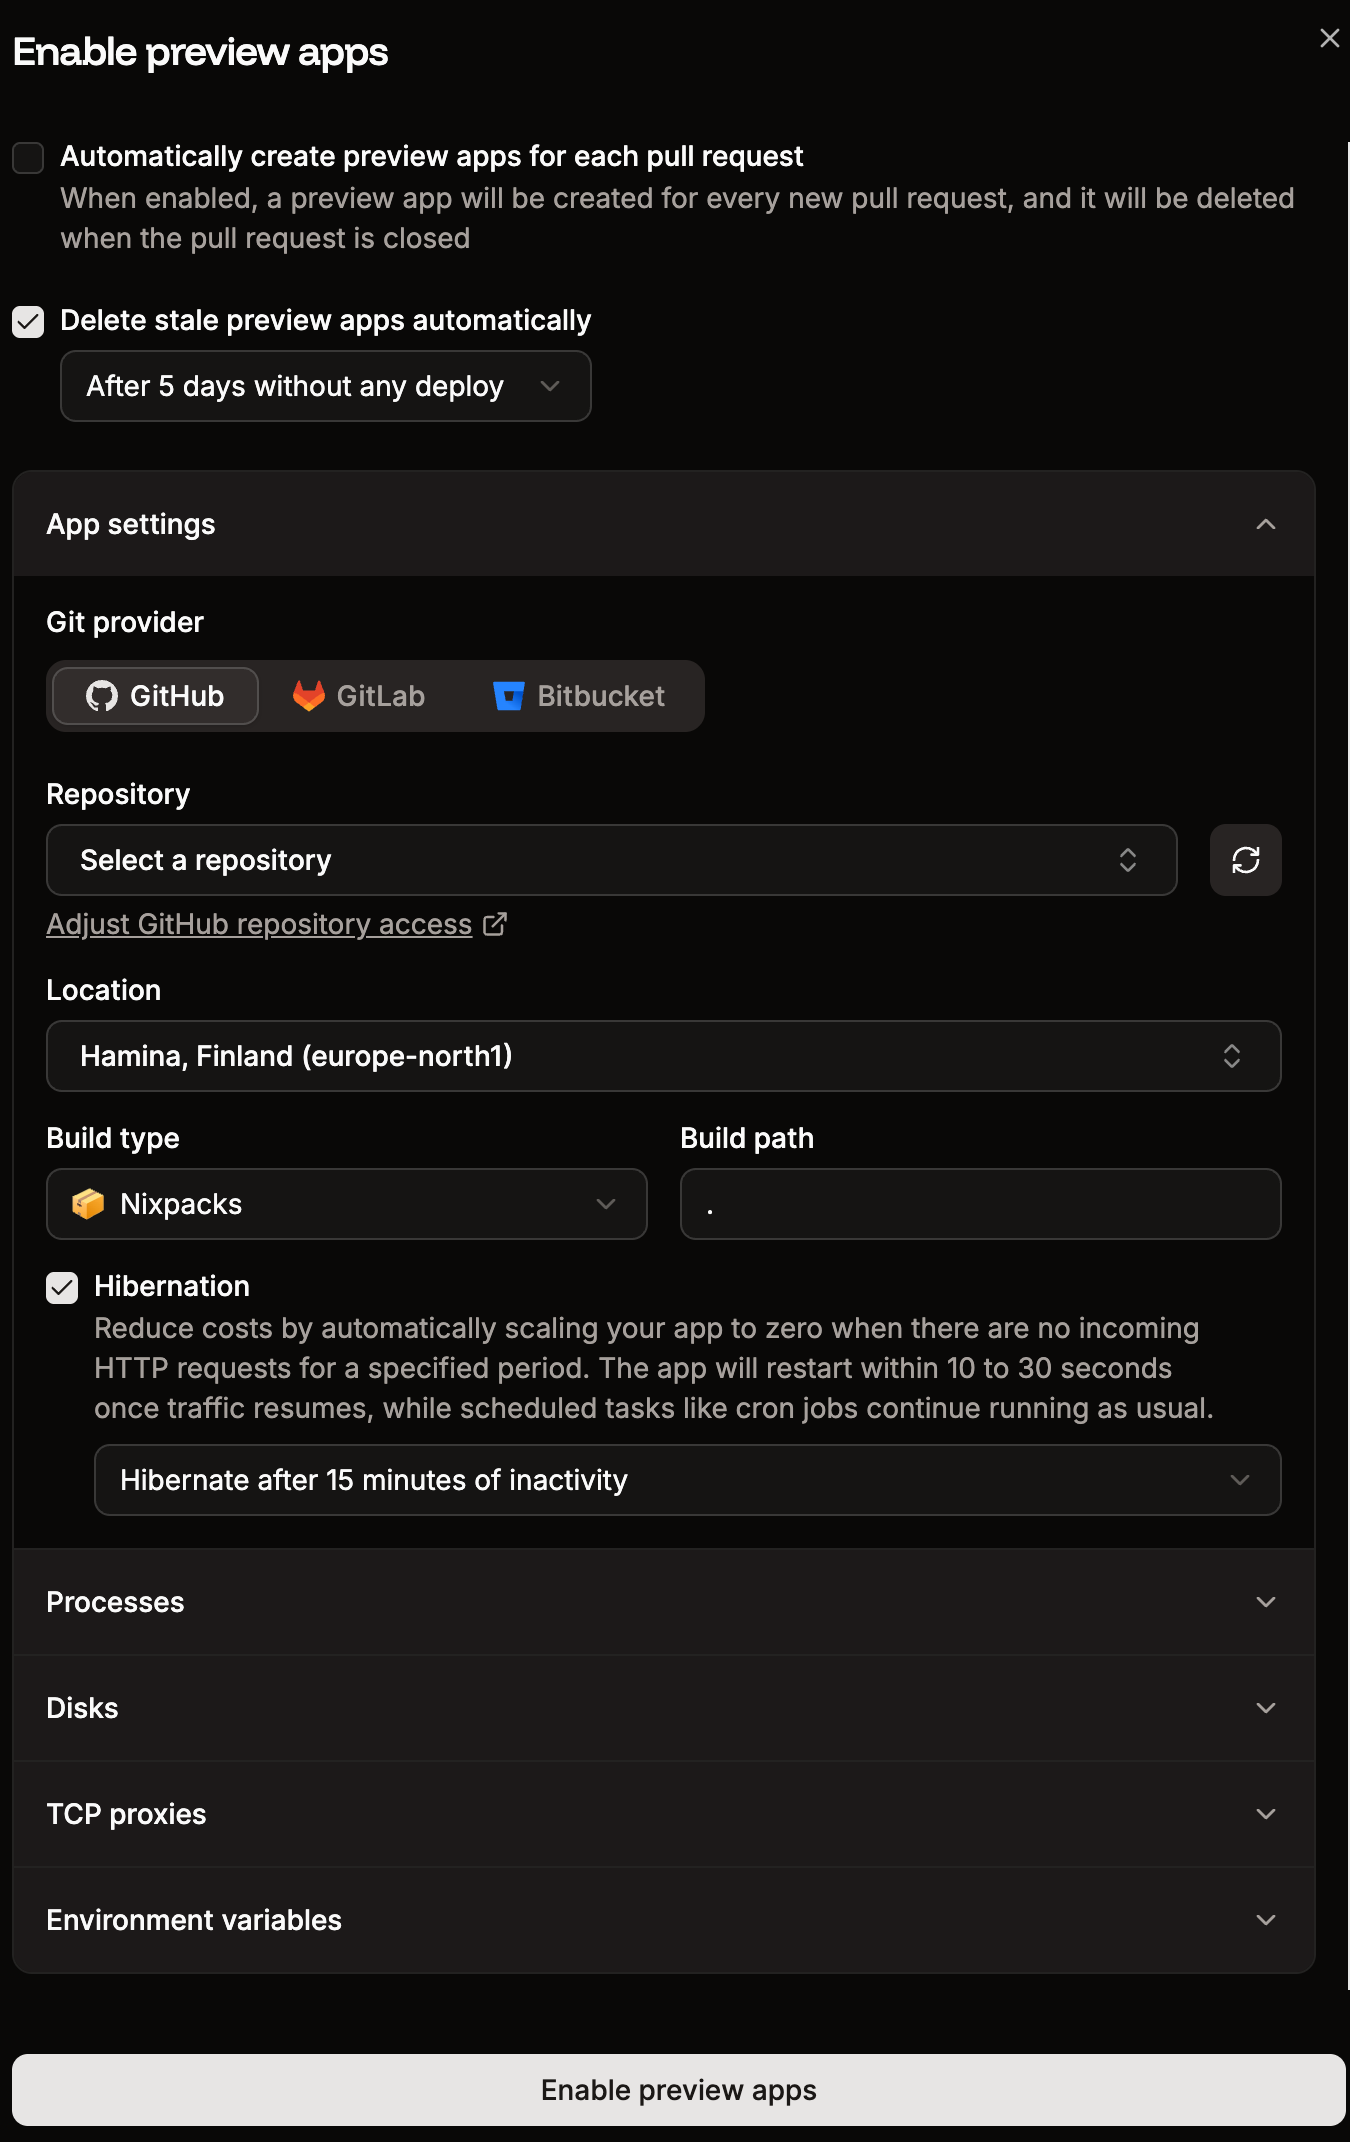
When you click **Enable preview apps**, the following options are available:
#### Preview settings
* **Automatically create new preview apps for each pull request:** Select this option to create a new preview app each time you open a pull request. The preview app is deleted when the pull request is closed.
* **Delete stale preview apps automatically:** Select this option to automatically delete preview apps when no new deployments occur. You'll need to specify the number of days without any new deployments before the preview apps are scheduled for deletion.
#### App settings
* **Git provider:** Choose [GitHub](/applications/git/github), [GitLab](/applications/git/gitlab), or [Bitbucket](/applications/git/bitbucket) and connect your Git account.
* **Repository:** Choose a Git repository.
* **Location:** Choose the [data center](/service-information/data-center-locations/) you want to use for this application.
* **Build type:** Choose [Nixpacks](/applications/build-options/nixpacks), [Railpack](/applications/build-options/railpack), [Buildpacks](/applications/build-options/buildpacks), or a [Dockerfile](/applications/build-options/dockerfile).
* **Build path:** For Nixpacks, Railpack, and Buildpacks, this is the path in the repository to the files required to build the application. For Dockerfiles, this is the path to your Dockerfile relative to the repository root.
* [**Hibernation:**](/applications/settings#hibernation) This automatically scales down your application if no HTTP requests are received within the specified timeframe.
#### Processes
In this section, you can adjust the settings and resources for your web process and add any necessary [background workers](/applications/processes#background-worker), [jobs](/applications/processes#job-process), or [cron jobs](/applications/processes#cron-job-process).
#### Disks
If you require [persistent storage](/applications/storage) for your web process or any of your background workers, you can add it here.
#### TCP proxies
This option [exposes non-HTTP traffic](/applications/networking#tcp-proxy) for up to three processes over TCP using a proxied domain and port.
#### Environment variables
Add any required [environment variables](/applications/environment-variables/) for your preview app.
Once you've added the required details, click **Enable preview apps**.
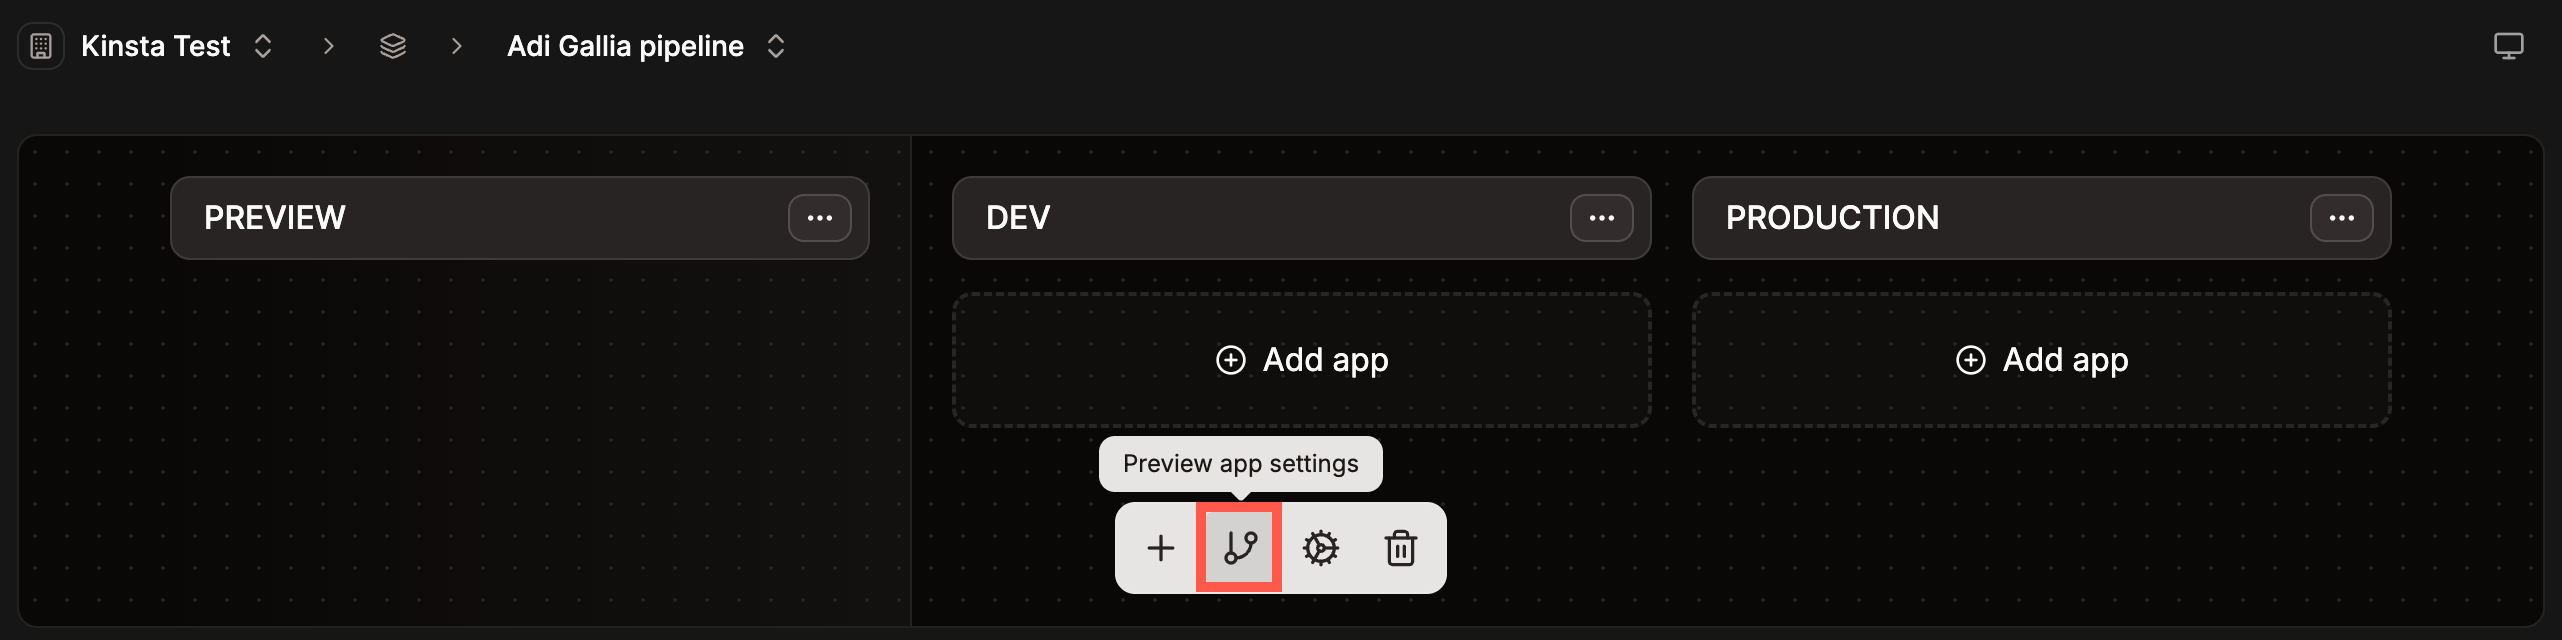
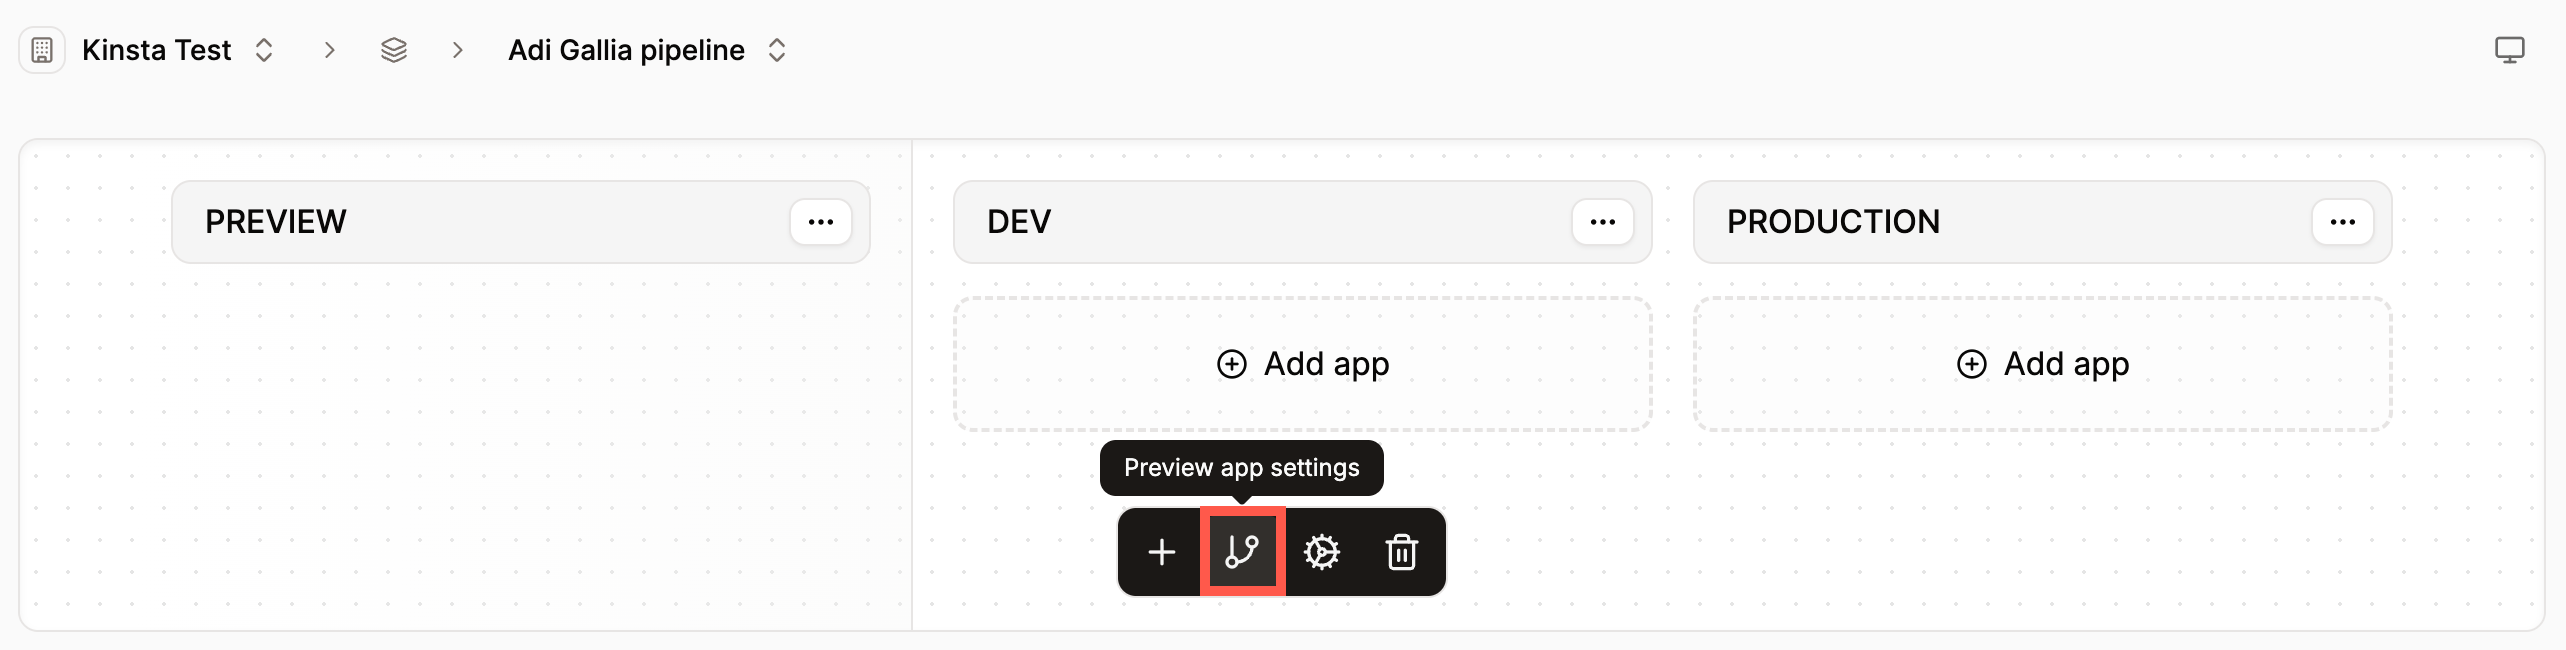
To change the settings of the preview app, click **Preview app settings**.
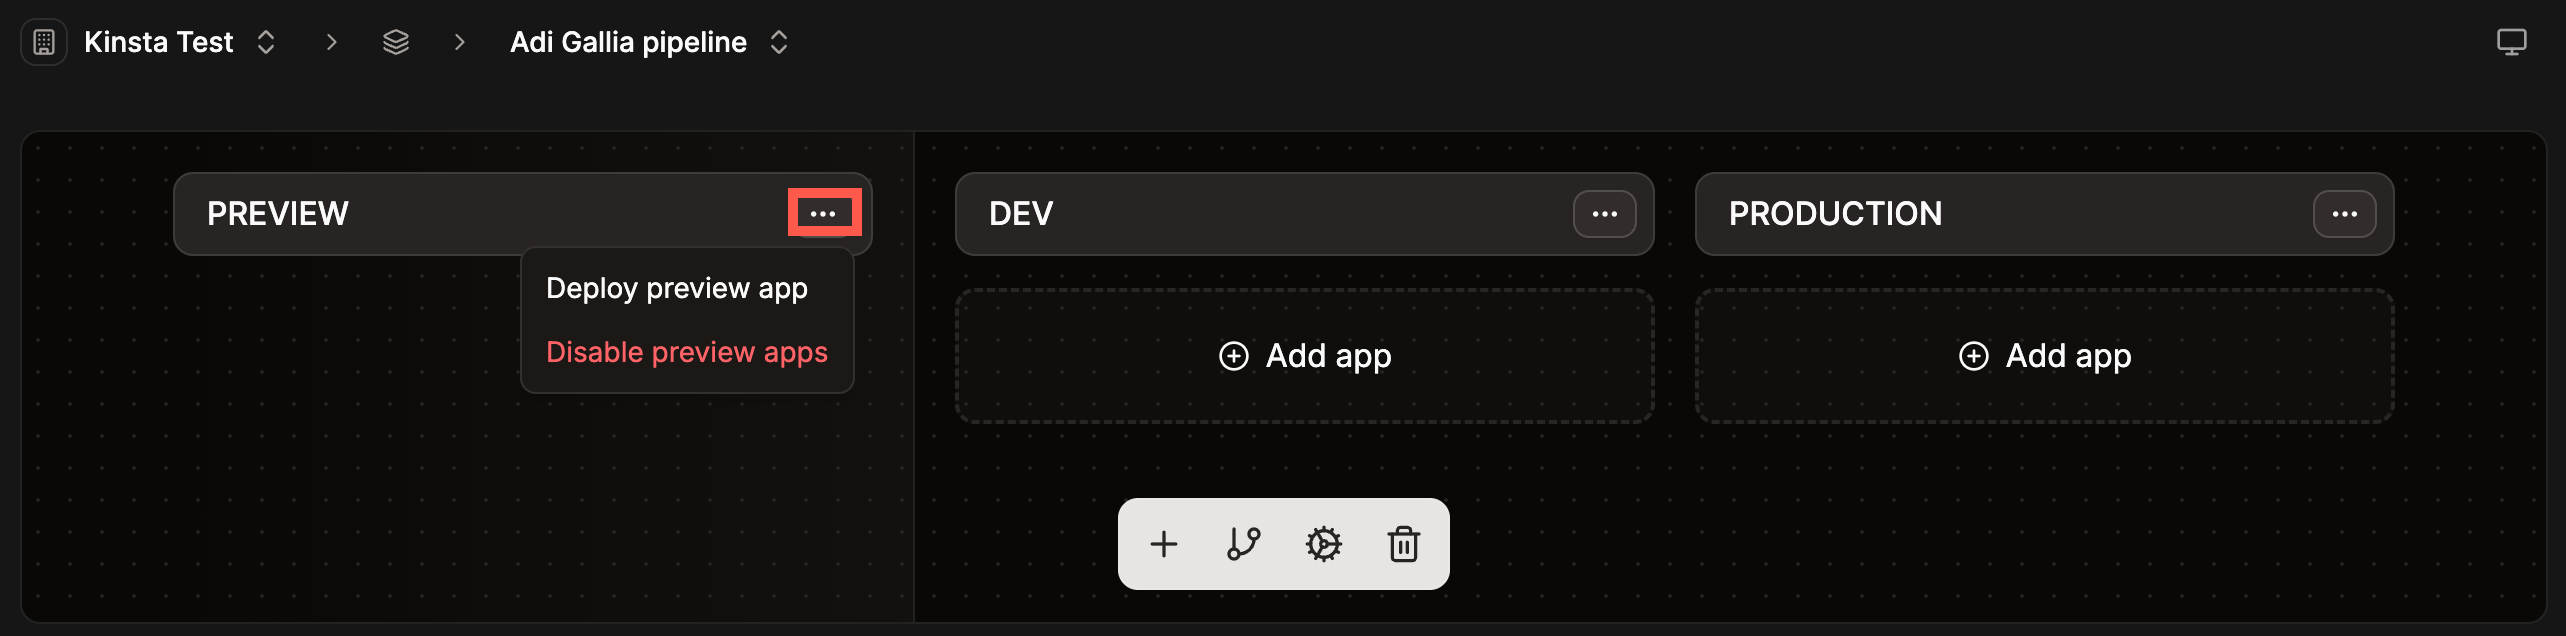
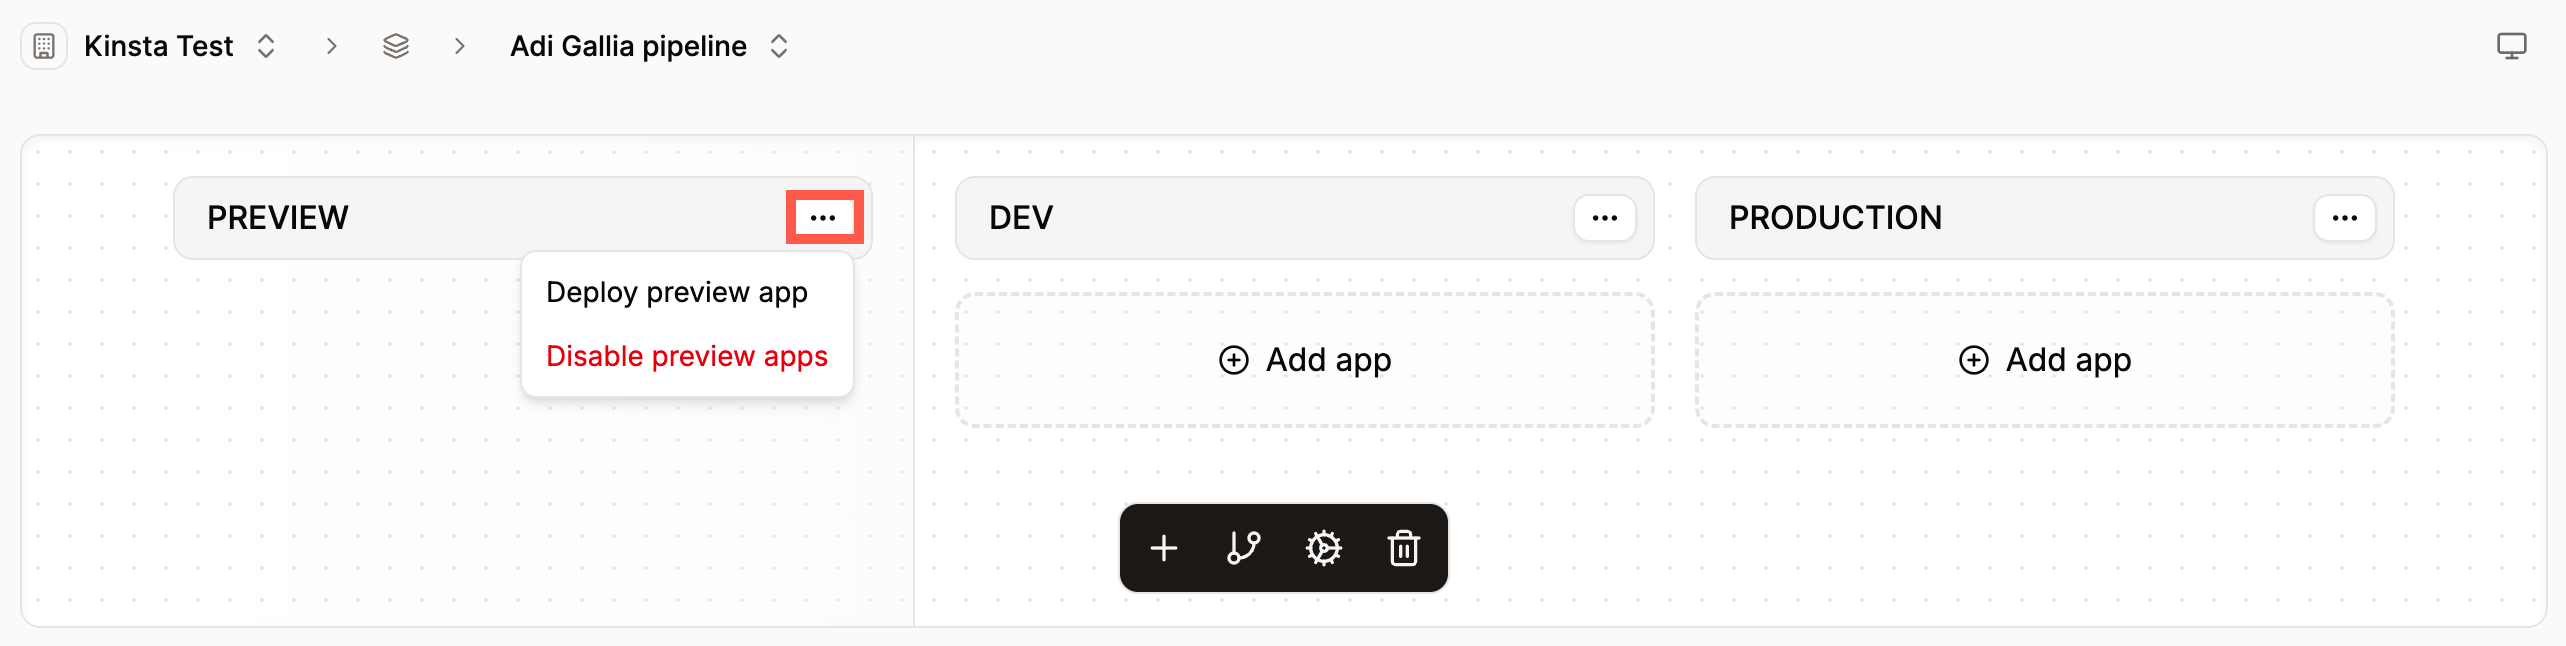
To manually deploy the preview app, click the ellipsis on **Preview** and select **Deploy preview app**.
### Add an app to a stage
To add an application to a stage, click **Add app**. You can then choose to add an existing application or create a new one. You can only create a new application within the trunk-based development pipeline. If you're using the Git Flow pipeline, the applications must already exist within Sevalla.
For trunk-based pipelines, the first stage of your pipeline should be the source for the rest of the pipeline, so you must choose an existing application. You can then choose to create a new application for any of the following stages.
### Add a stage
To add another stage to the pipeline, click **Create stage**.
Enter a name for the stage and click **Create stage**. You can drag and drop the stages to change the order in which you want to deploy the application.
You can then add a new application to the stage.
### Promote changes to production
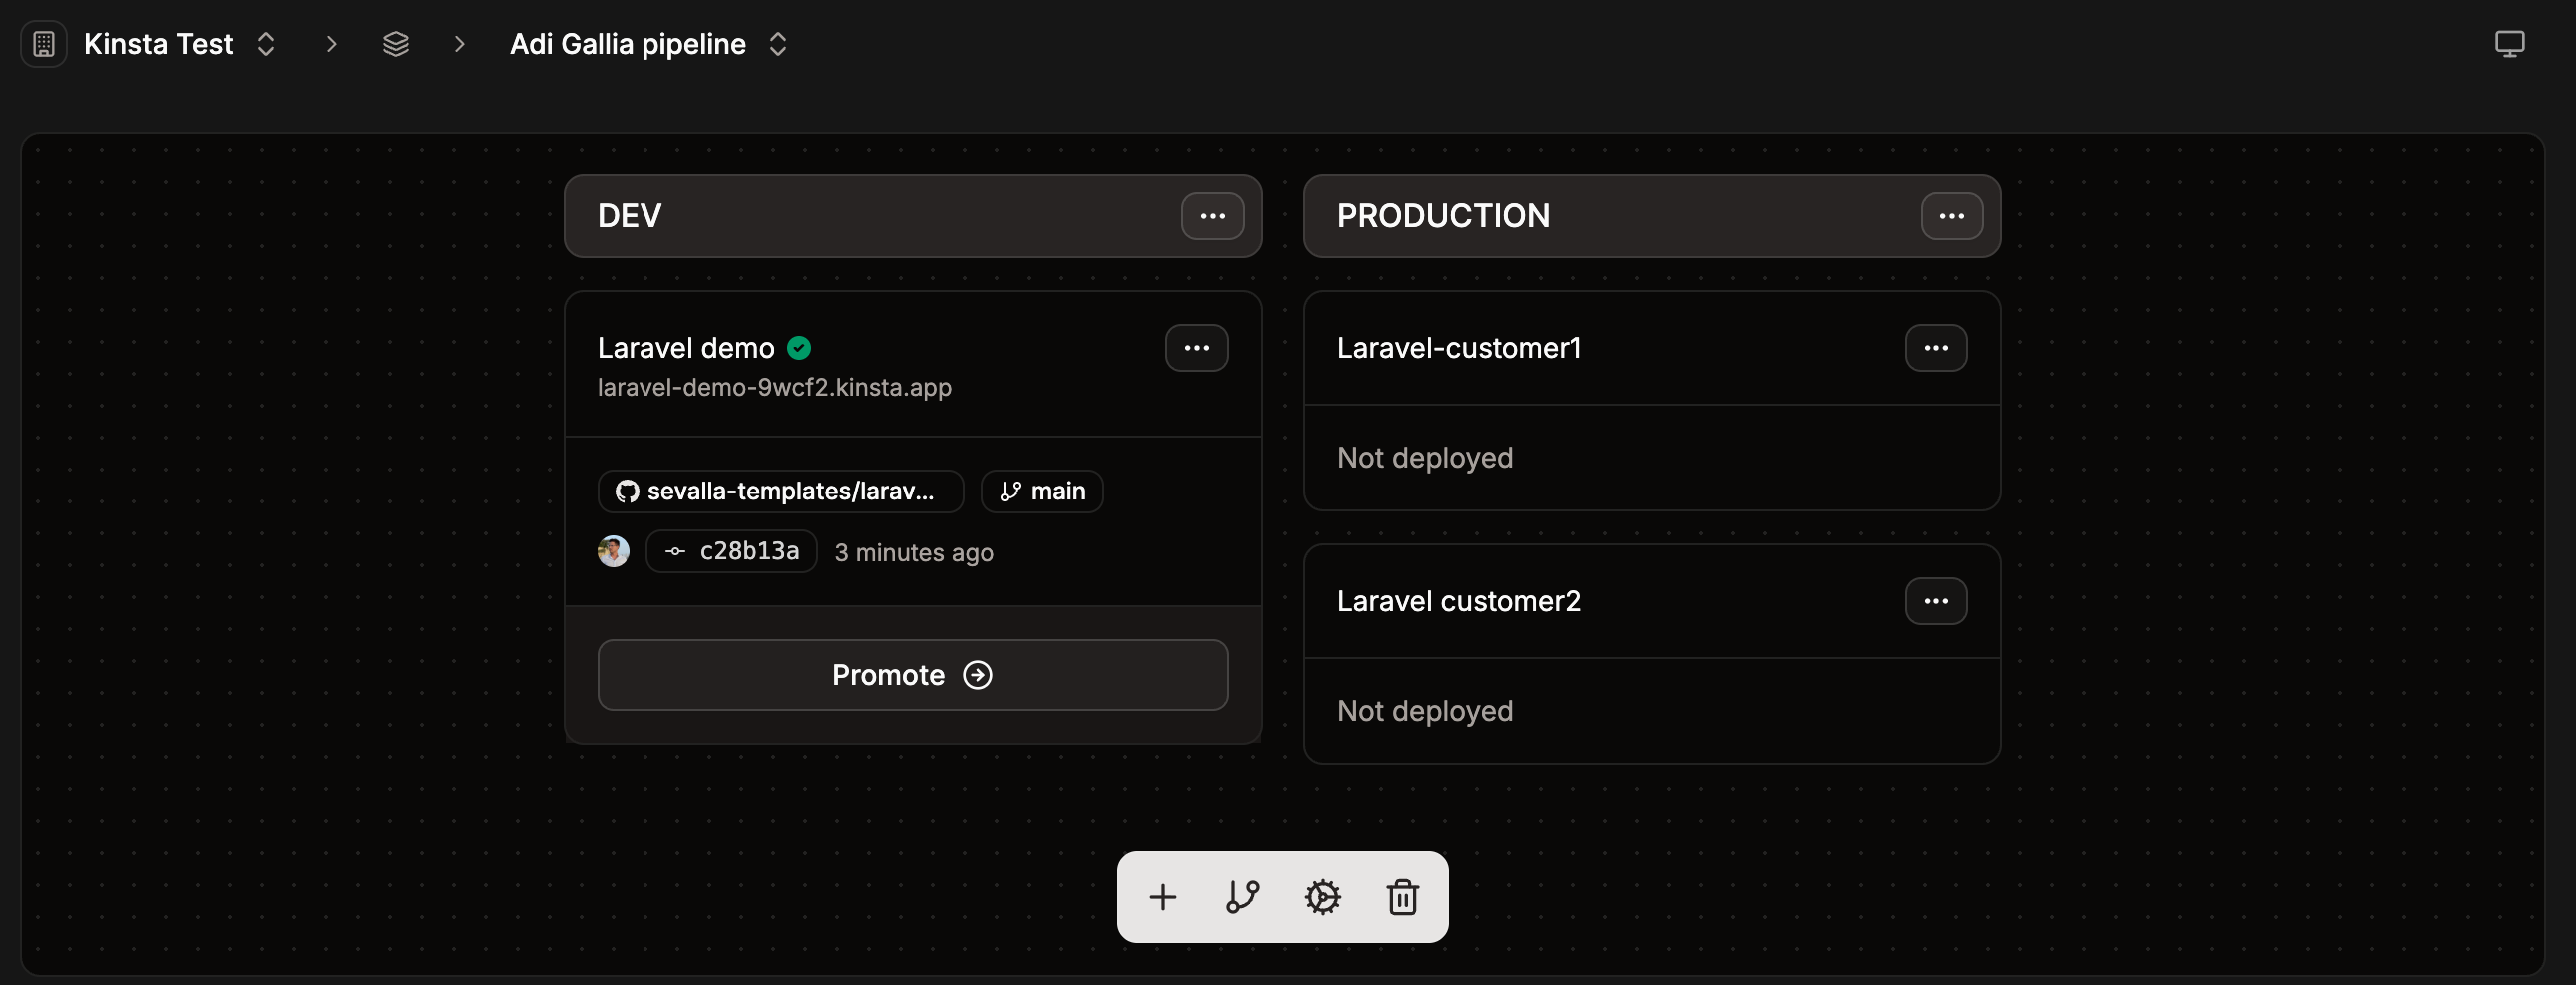
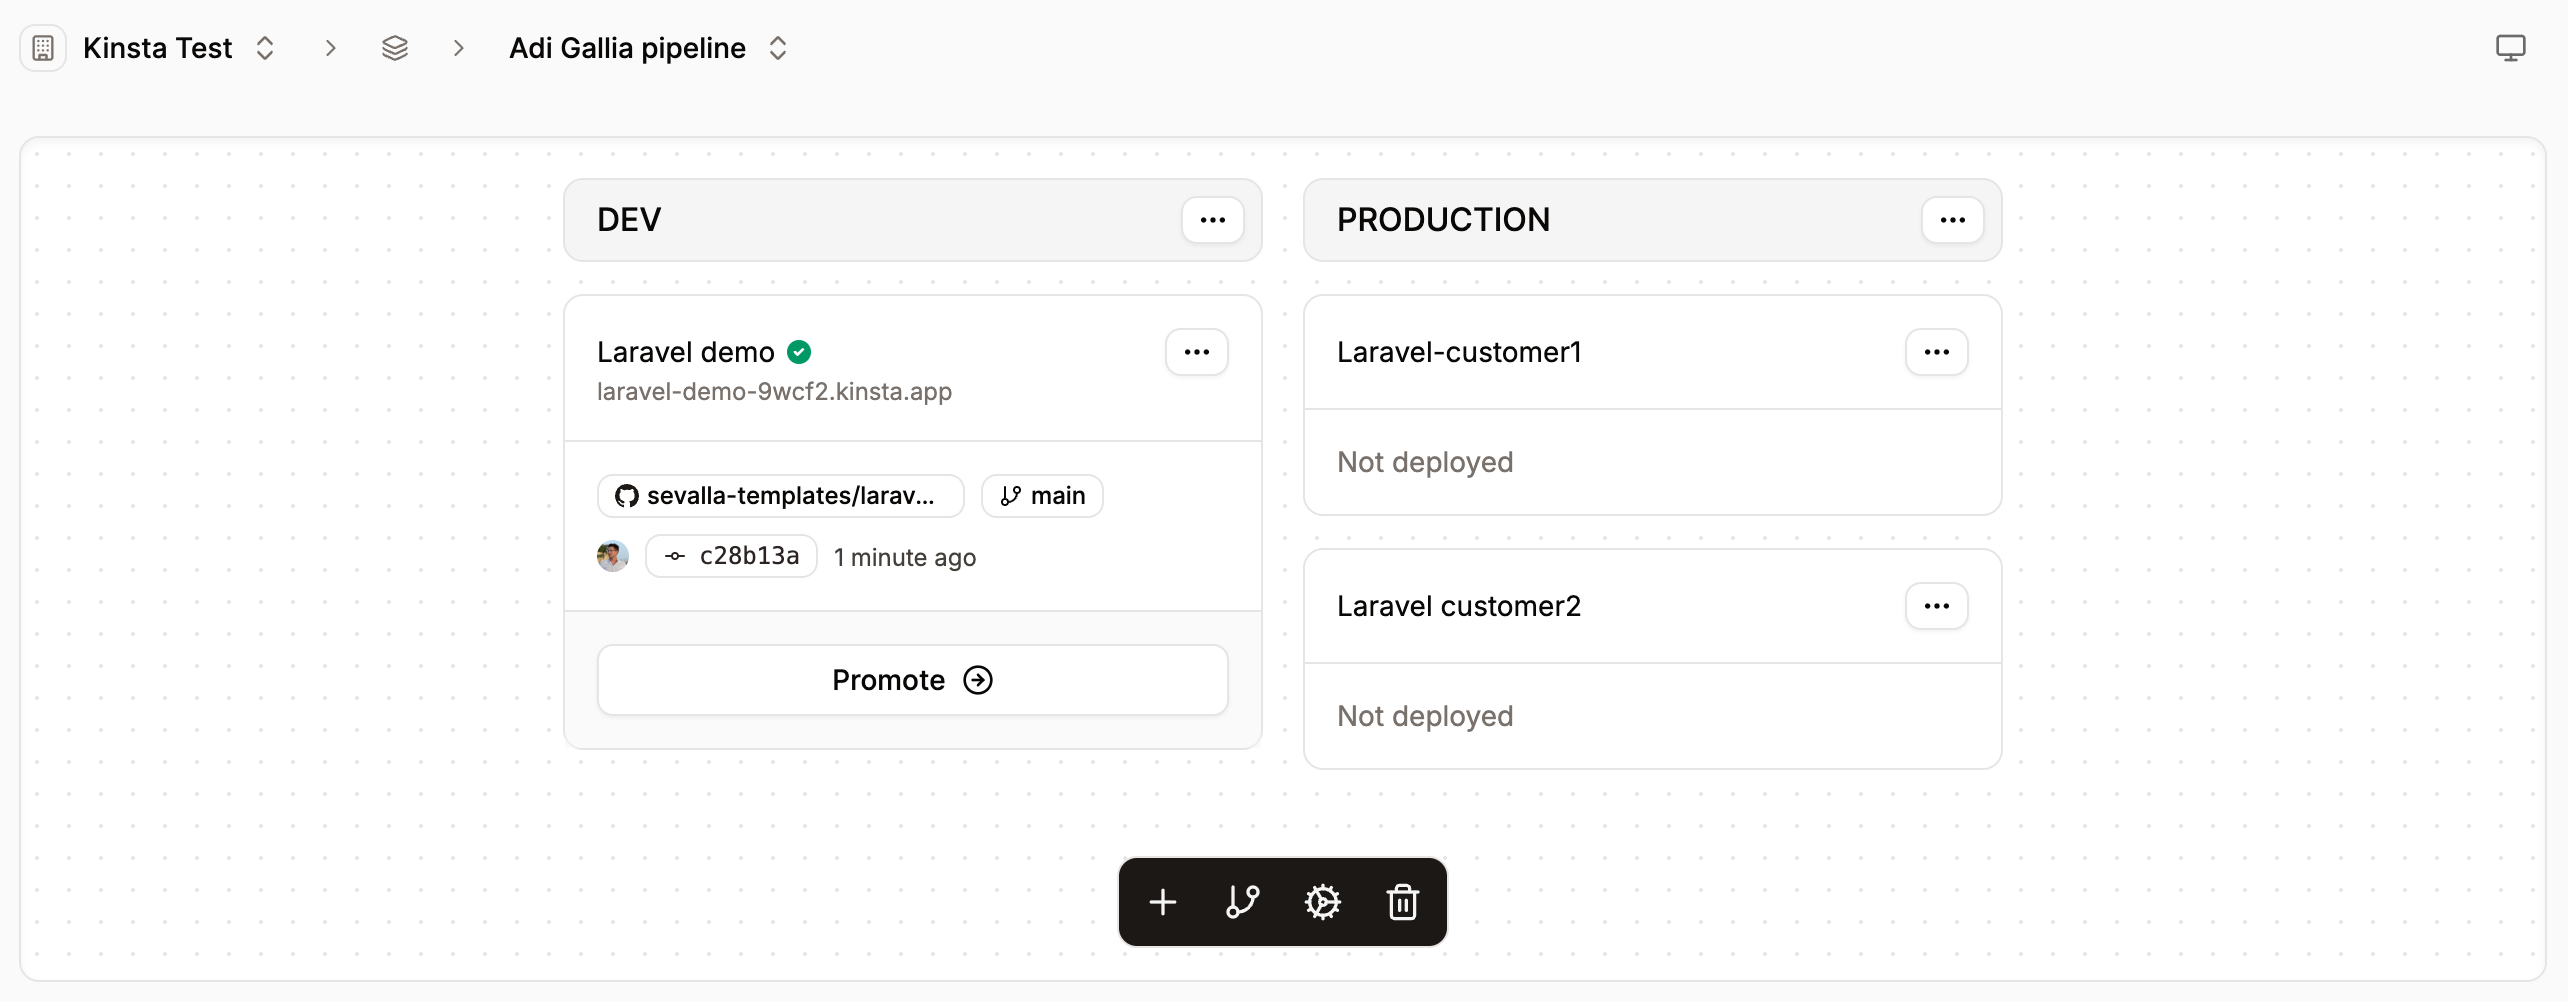
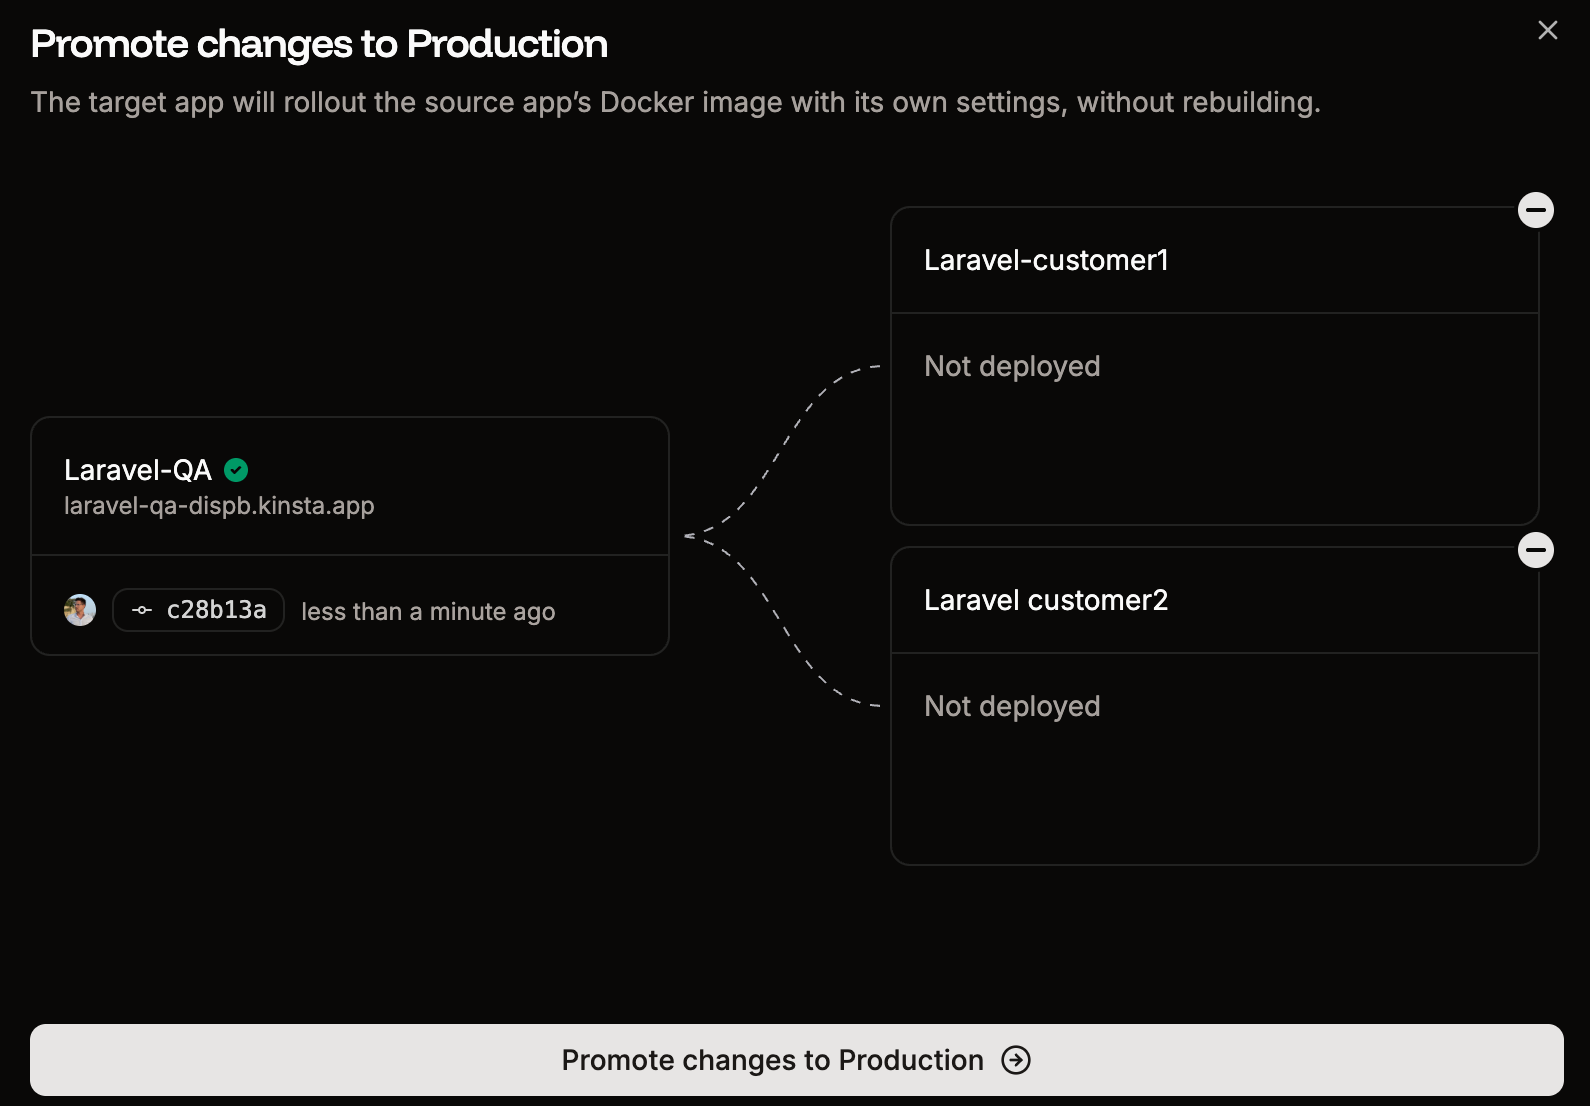
If you've set up a trunk-based pipeline, you can use the **Promote** option to push the application to each stage without having to rebuild it. If you're promoting to a stage with multiple applications, you can choose which applications to promote to. If you don't want to promote a particular application, click the minus sign on that application to remove it from the deployment.
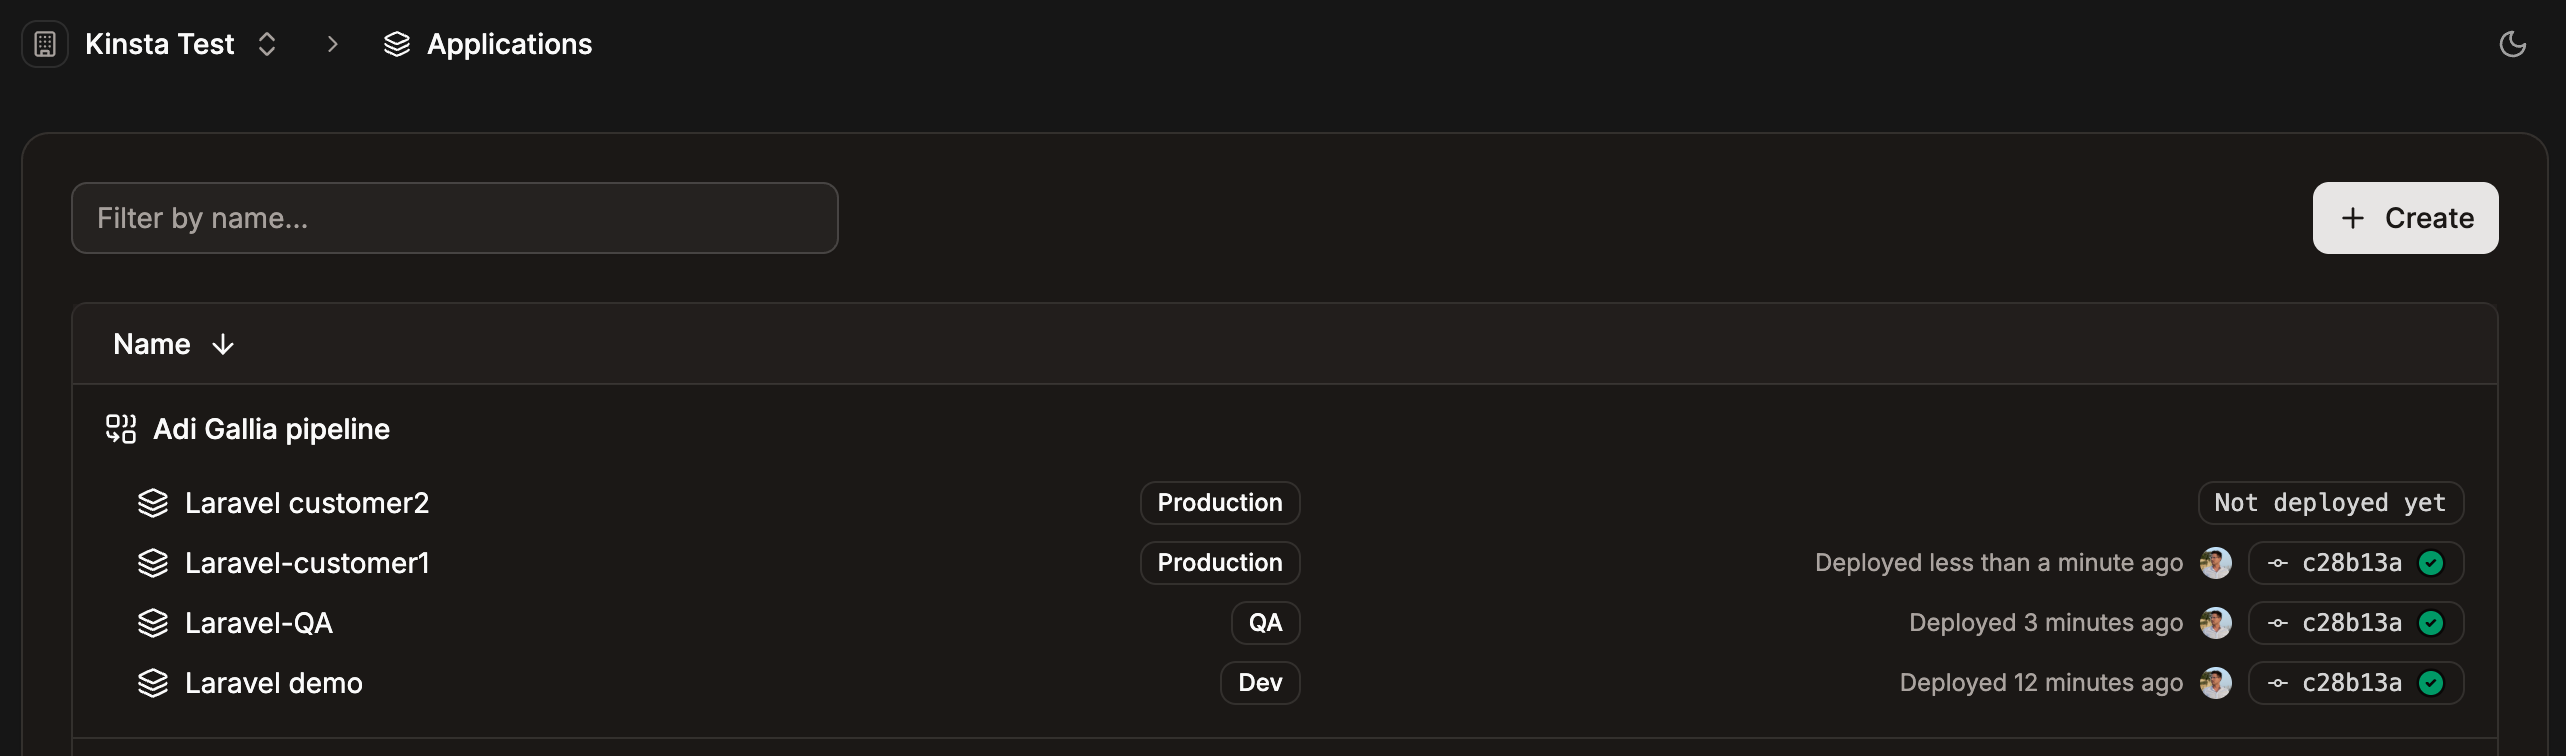
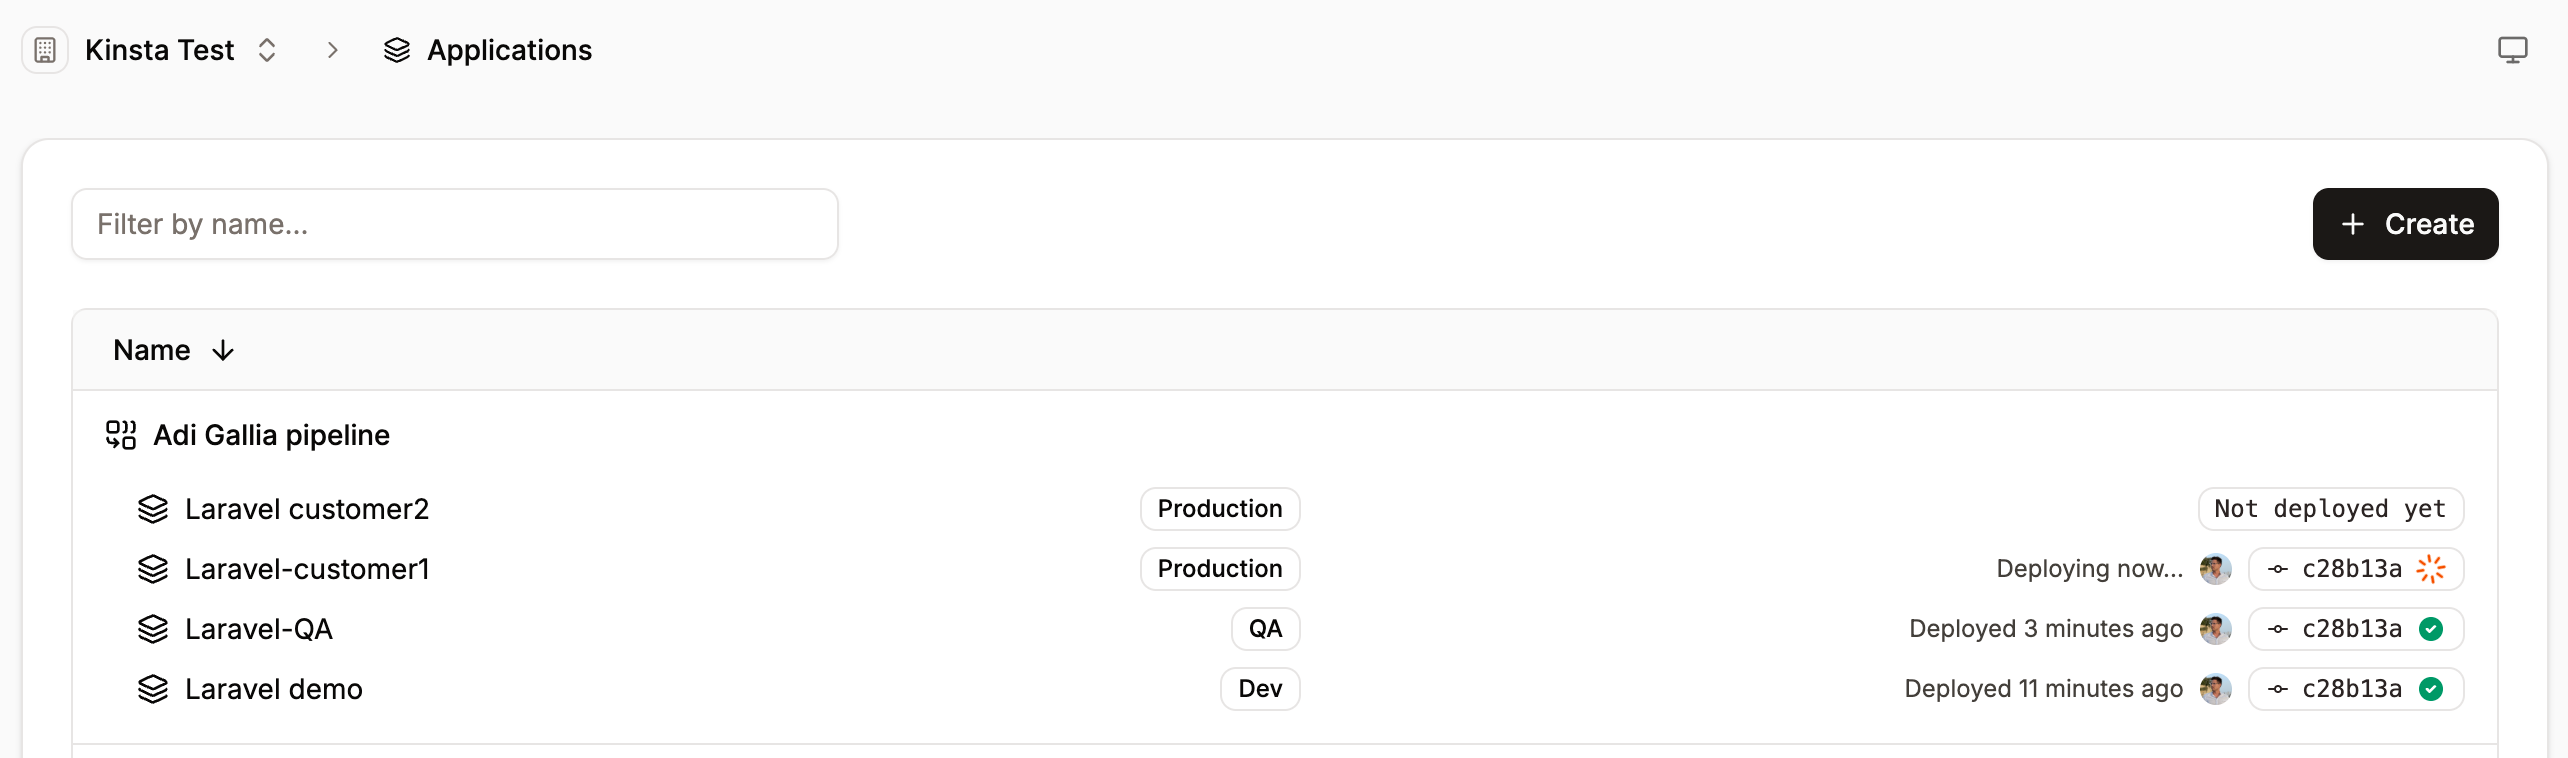
Within **Applications**, the pipeline displays all the included applications, clearly labeling each application's stage within the pipeline and when it was last deployed.
## Pipeline settings
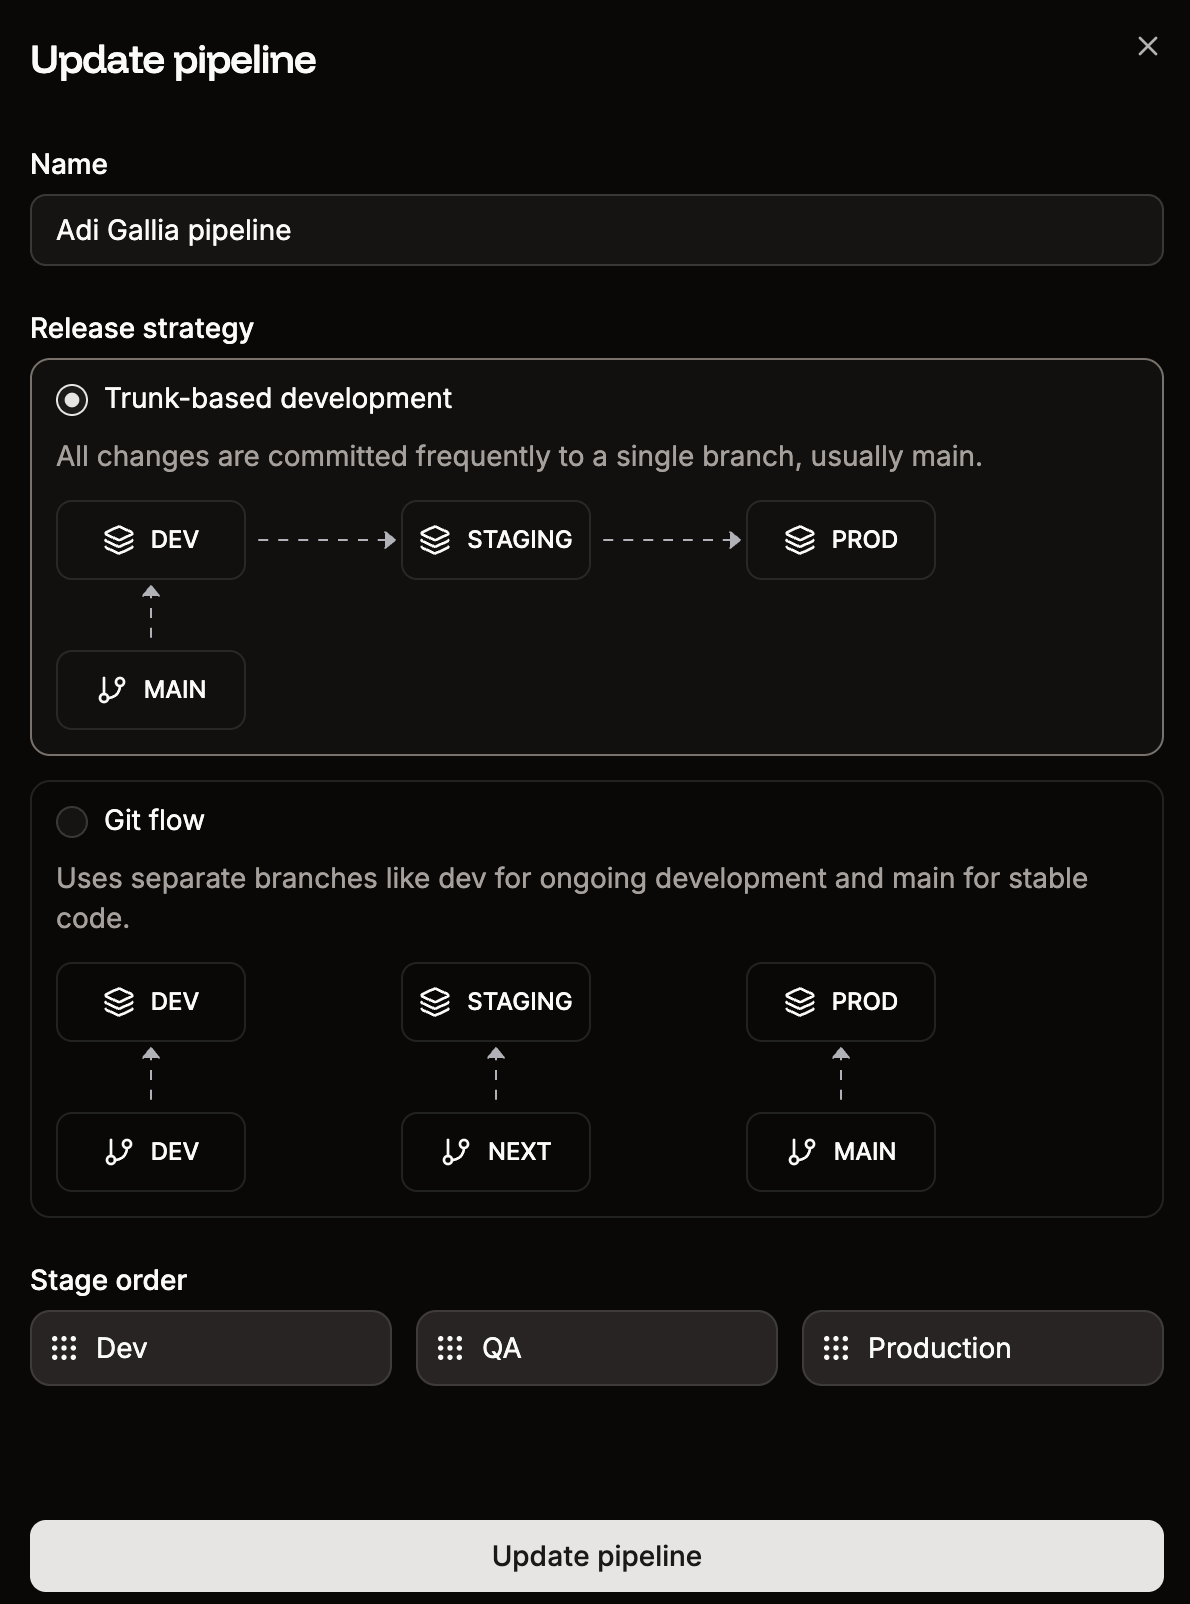
To access the pipeline settings, click **Pipeline settings**. The settings allow you to switch between trunk-based development and git flow pipelines. You can also update the name of your pipeline and change the order of the stages within it.
## Delete a pipeline
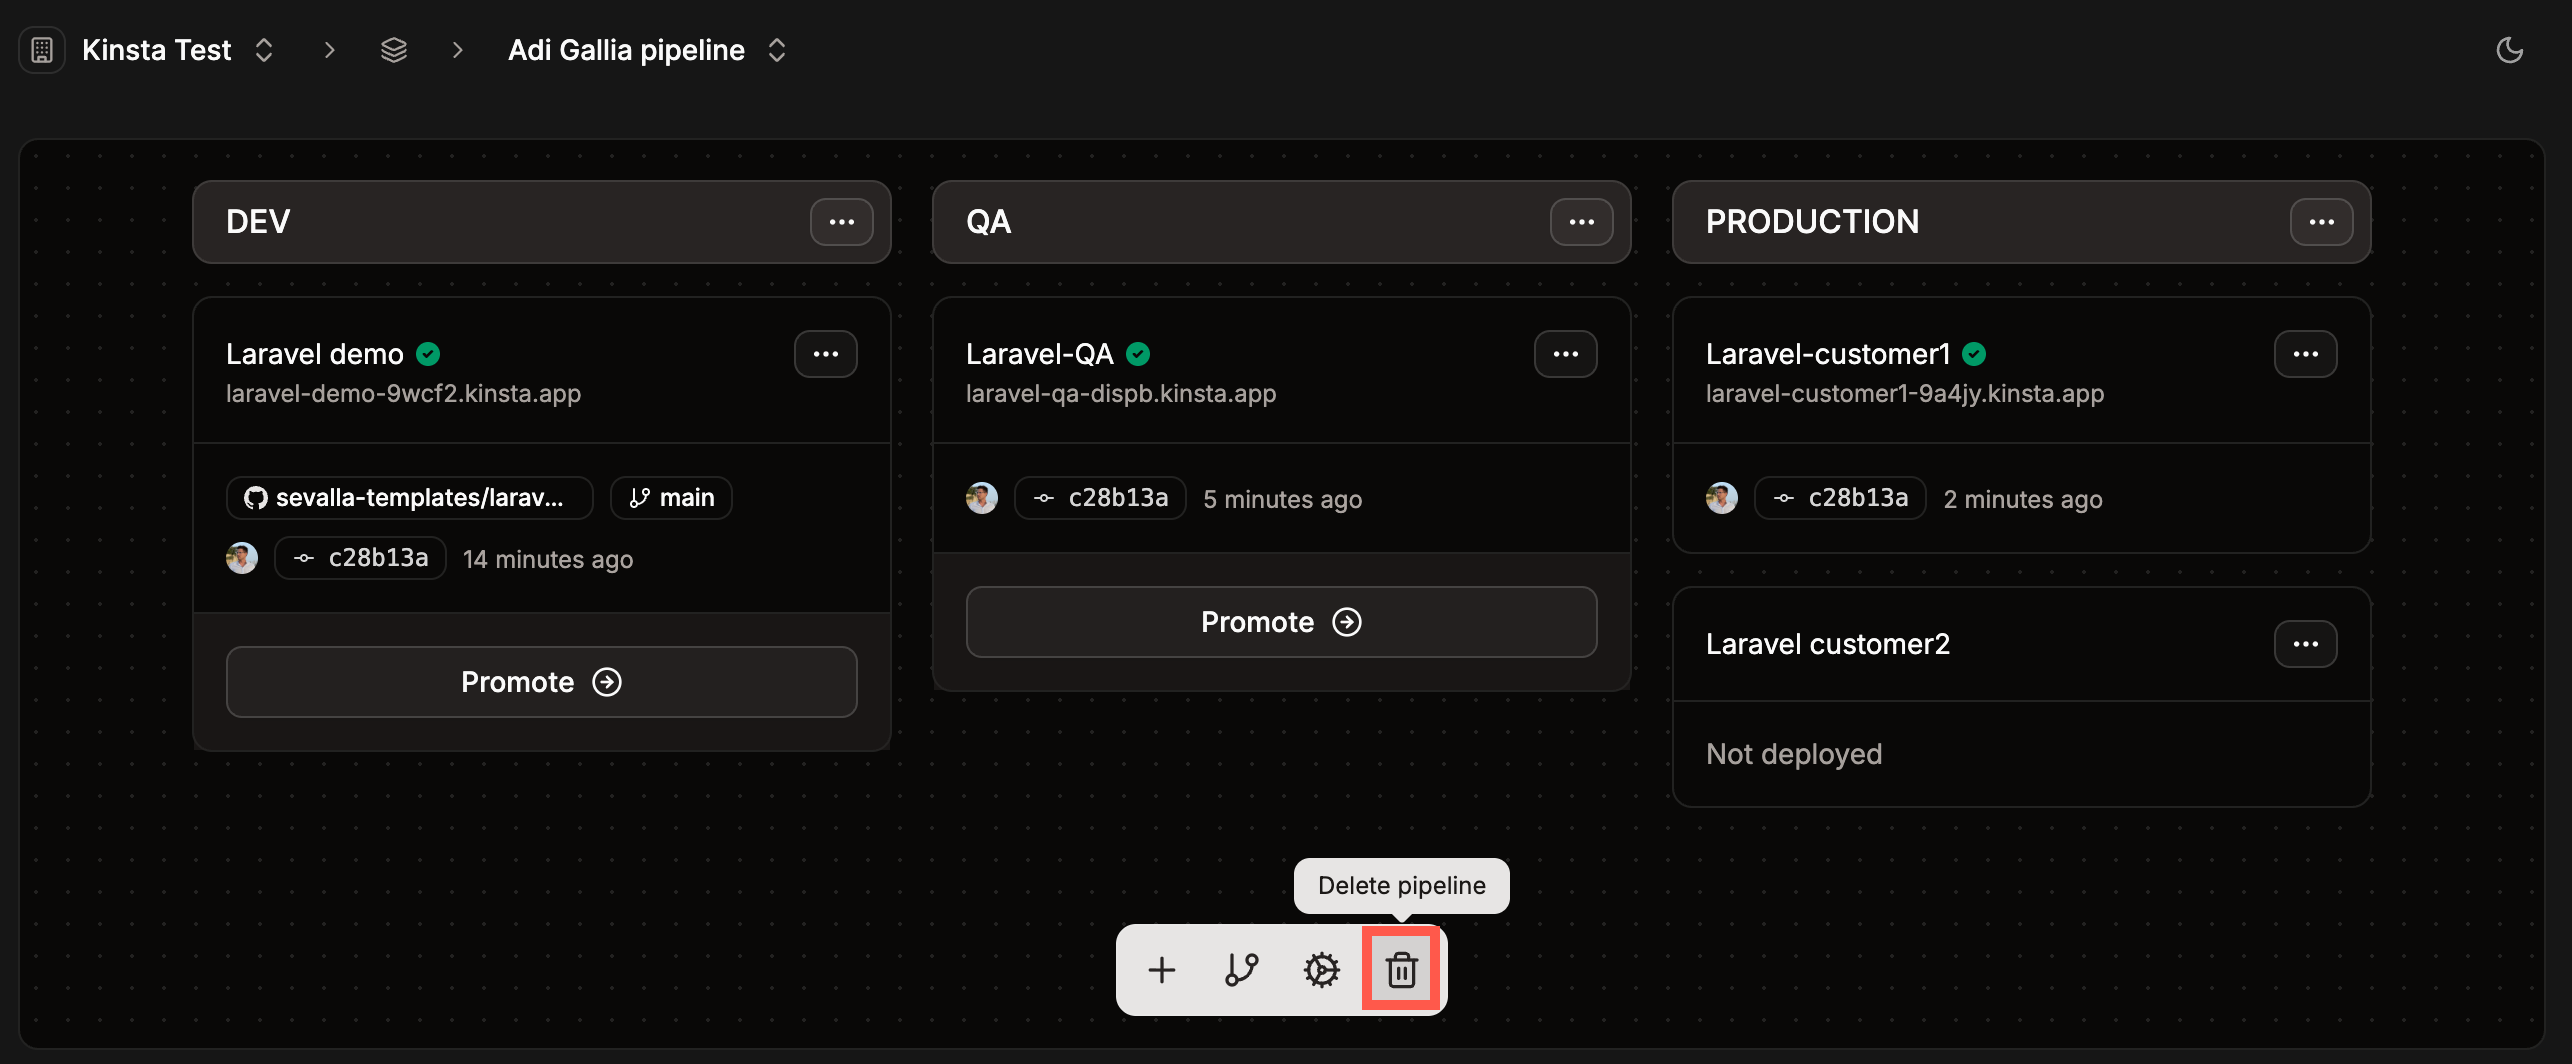
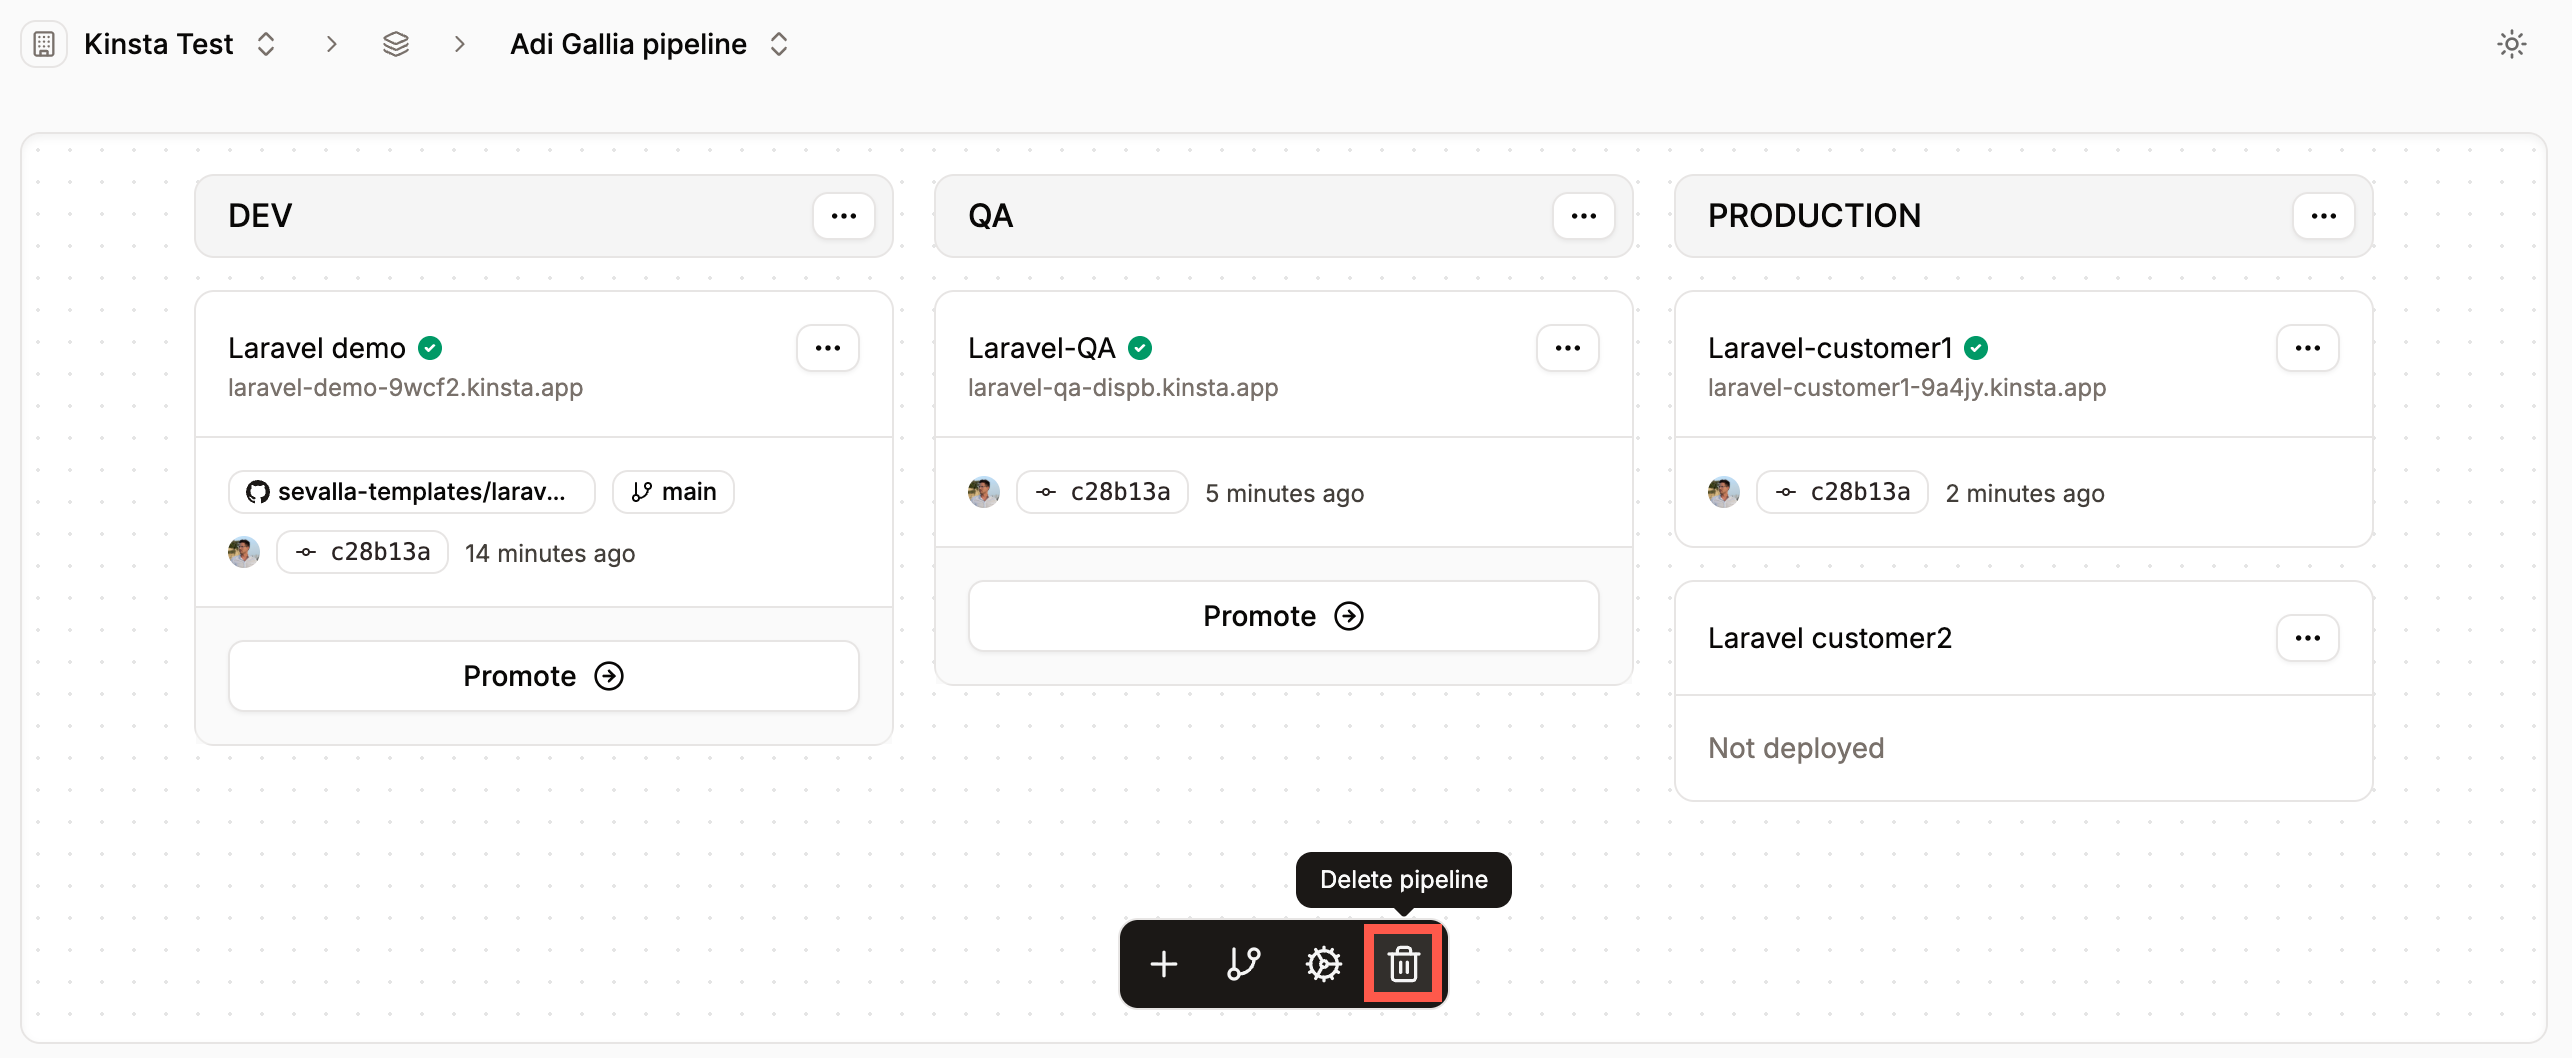
To delete a pipeline, within **Applications**, select the pipeline you want to delete and click **Delete pipeline**.
This only deletes the pipeline; the applications **are not** removed and will remain in your **Applications** list. To completely remove an application, go to **Settings** > **Danger Zone** > **Delete application**. Deleting the application completely removes the following:
* All files
* Settings
* Persistent storage disks
* Connections to other applications or databases
 * **Name:** Enter a name for the pipeline.
* **Project:** This option is only shown if your company already has at least one project. Select the project you’d like to add the pipeline to, or leave it blank to keep the pipeline at the company level instead of assigning it to a specific project.
* **Trunk-based development:** With a trunk-based development pipeline, you can add an existing application to your development stage and create multiple production environments as separate applications for deployment. Each of these applications can be hosted in different [data centers](/service-information/data-center-locations/) and is treated as an independent entity within its own container. This setup allows you to deploy multiple applications from the same source code but with distinct [environment variables](/applications/environment-variables/), [domains](/applications/domains/), [processes](/applications/processes), and other configurations.
* **Git flow:** Choose this option if your workflow uses separate branches for development, staging, and production. To use the Git Flow pipeline, your applications must already be set up within Sevalla. This approach lets you visually manage and track your Git Flow directly in the platform. The Promote feature is not available in this workflow, as deployments occur automatically when you push changes from your Git source repository.
You also have the flexibility to add multiple stages to the pipeline, such as a QA stage, to thoroughly test your changes before promoting them to production.
Click **Add pipeline**, which creates the pipeline in your list of applications. You can then select the pipeline to add your stages and applications, enable preview apps, and change the pipeline settings.
* **Name:** Enter a name for the pipeline.
* **Project:** This option is only shown if your company already has at least one project. Select the project you’d like to add the pipeline to, or leave it blank to keep the pipeline at the company level instead of assigning it to a specific project.
* **Trunk-based development:** With a trunk-based development pipeline, you can add an existing application to your development stage and create multiple production environments as separate applications for deployment. Each of these applications can be hosted in different [data centers](/service-information/data-center-locations/) and is treated as an independent entity within its own container. This setup allows you to deploy multiple applications from the same source code but with distinct [environment variables](/applications/environment-variables/), [domains](/applications/domains/), [processes](/applications/processes), and other configurations.
* **Git flow:** Choose this option if your workflow uses separate branches for development, staging, and production. To use the Git Flow pipeline, your applications must already be set up within Sevalla. This approach lets you visually manage and track your Git Flow directly in the platform. The Promote feature is not available in this workflow, as deployments occur automatically when you push changes from your Git source repository.
You also have the flexibility to add multiple stages to the pipeline, such as a QA stage, to thoroughly test your changes before promoting them to production.
Click **Add pipeline**, which creates the pipeline in your list of applications. You can then select the pipeline to add your stages and applications, enable preview apps, and change the pipeline settings.
 ### Enable preview apps
Enabling preview apps allows you to test your changes in a live environment before merging them into the main branch. Preview apps are integrated with GitHub's deployment and environment features, so when you open a pull request, a preview app is automatically generated, providing a dedicated testing space that mirrors your production setup. This lets you review, interact with, and refine your updates to ensure your code works as intended before it's fully integrated into the main project.
To enable preview apps within the pipeline, click **Enable preview apps**.
### Enable preview apps
Enabling preview apps allows you to test your changes in a live environment before merging them into the main branch. Preview apps are integrated with GitHub's deployment and environment features, so when you open a pull request, a preview app is automatically generated, providing a dedicated testing space that mirrors your production setup. This lets you review, interact with, and refine your updates to ensure your code works as intended before it's fully integrated into the main project.
To enable preview apps within the pipeline, click **Enable preview apps**.
 When you click **Enable preview apps**, the following options are available:
#### Preview settings
* **Automatically create new preview apps for each pull request:** Select this option to create a new preview app each time you open a pull request. The preview app is deleted when the pull request is closed.
* **Delete stale preview apps automatically:** Select this option to automatically delete preview apps when no new deployments occur. You'll need to specify the number of days without any new deployments before the preview apps are scheduled for deletion.
#### App settings
* **Git provider:** Choose [GitHub](/applications/git/github), [GitLab](/applications/git/gitlab), or [Bitbucket](/applications/git/bitbucket) and connect your Git account.
* **Repository:** Choose a Git repository.
* **Location:** Choose the [data center](/service-information/data-center-locations/) you want to use for this application.
* **Build type:** Choose [Nixpacks](/applications/build-options/nixpacks), [Railpack](/applications/build-options/railpack), [Buildpacks](/applications/build-options/buildpacks), or a [Dockerfile](/applications/build-options/dockerfile).
* **Build path:** For Nixpacks, Railpack, and Buildpacks, this is the path in the repository to the files required to build the application. For Dockerfiles, this is the path to your Dockerfile relative to the repository root.
* [**Hibernation:**](/applications/settings#hibernation) This automatically scales down your application if no HTTP requests are received within the specified timeframe.
#### Processes
In this section, you can adjust the settings and resources for your web process and add any necessary [background workers](/applications/processes#background-worker), [jobs](/applications/processes#job-process), or [cron jobs](/applications/processes#cron-job-process).
#### Disks
If you require [persistent storage](/applications/storage) for your web process or any of your background workers, you can add it here.
#### TCP proxies
This option [exposes non-HTTP traffic](/applications/networking#tcp-proxy) for up to three processes over TCP using a proxied domain and port.
#### Environment variables
Add any required [environment variables](/applications/environment-variables/) for your preview app.
When you click **Enable preview apps**, the following options are available:
#### Preview settings
* **Automatically create new preview apps for each pull request:** Select this option to create a new preview app each time you open a pull request. The preview app is deleted when the pull request is closed.
* **Delete stale preview apps automatically:** Select this option to automatically delete preview apps when no new deployments occur. You'll need to specify the number of days without any new deployments before the preview apps are scheduled for deletion.
#### App settings
* **Git provider:** Choose [GitHub](/applications/git/github), [GitLab](/applications/git/gitlab), or [Bitbucket](/applications/git/bitbucket) and connect your Git account.
* **Repository:** Choose a Git repository.
* **Location:** Choose the [data center](/service-information/data-center-locations/) you want to use for this application.
* **Build type:** Choose [Nixpacks](/applications/build-options/nixpacks), [Railpack](/applications/build-options/railpack), [Buildpacks](/applications/build-options/buildpacks), or a [Dockerfile](/applications/build-options/dockerfile).
* **Build path:** For Nixpacks, Railpack, and Buildpacks, this is the path in the repository to the files required to build the application. For Dockerfiles, this is the path to your Dockerfile relative to the repository root.
* [**Hibernation:**](/applications/settings#hibernation) This automatically scales down your application if no HTTP requests are received within the specified timeframe.
#### Processes
In this section, you can adjust the settings and resources for your web process and add any necessary [background workers](/applications/processes#background-worker), [jobs](/applications/processes#job-process), or [cron jobs](/applications/processes#cron-job-process).
#### Disks
If you require [persistent storage](/applications/storage) for your web process or any of your background workers, you can add it here.
#### TCP proxies
This option [exposes non-HTTP traffic](/applications/networking#tcp-proxy) for up to three processes over TCP using a proxied domain and port.
#### Environment variables
Add any required [environment variables](/applications/environment-variables/) for your preview app.
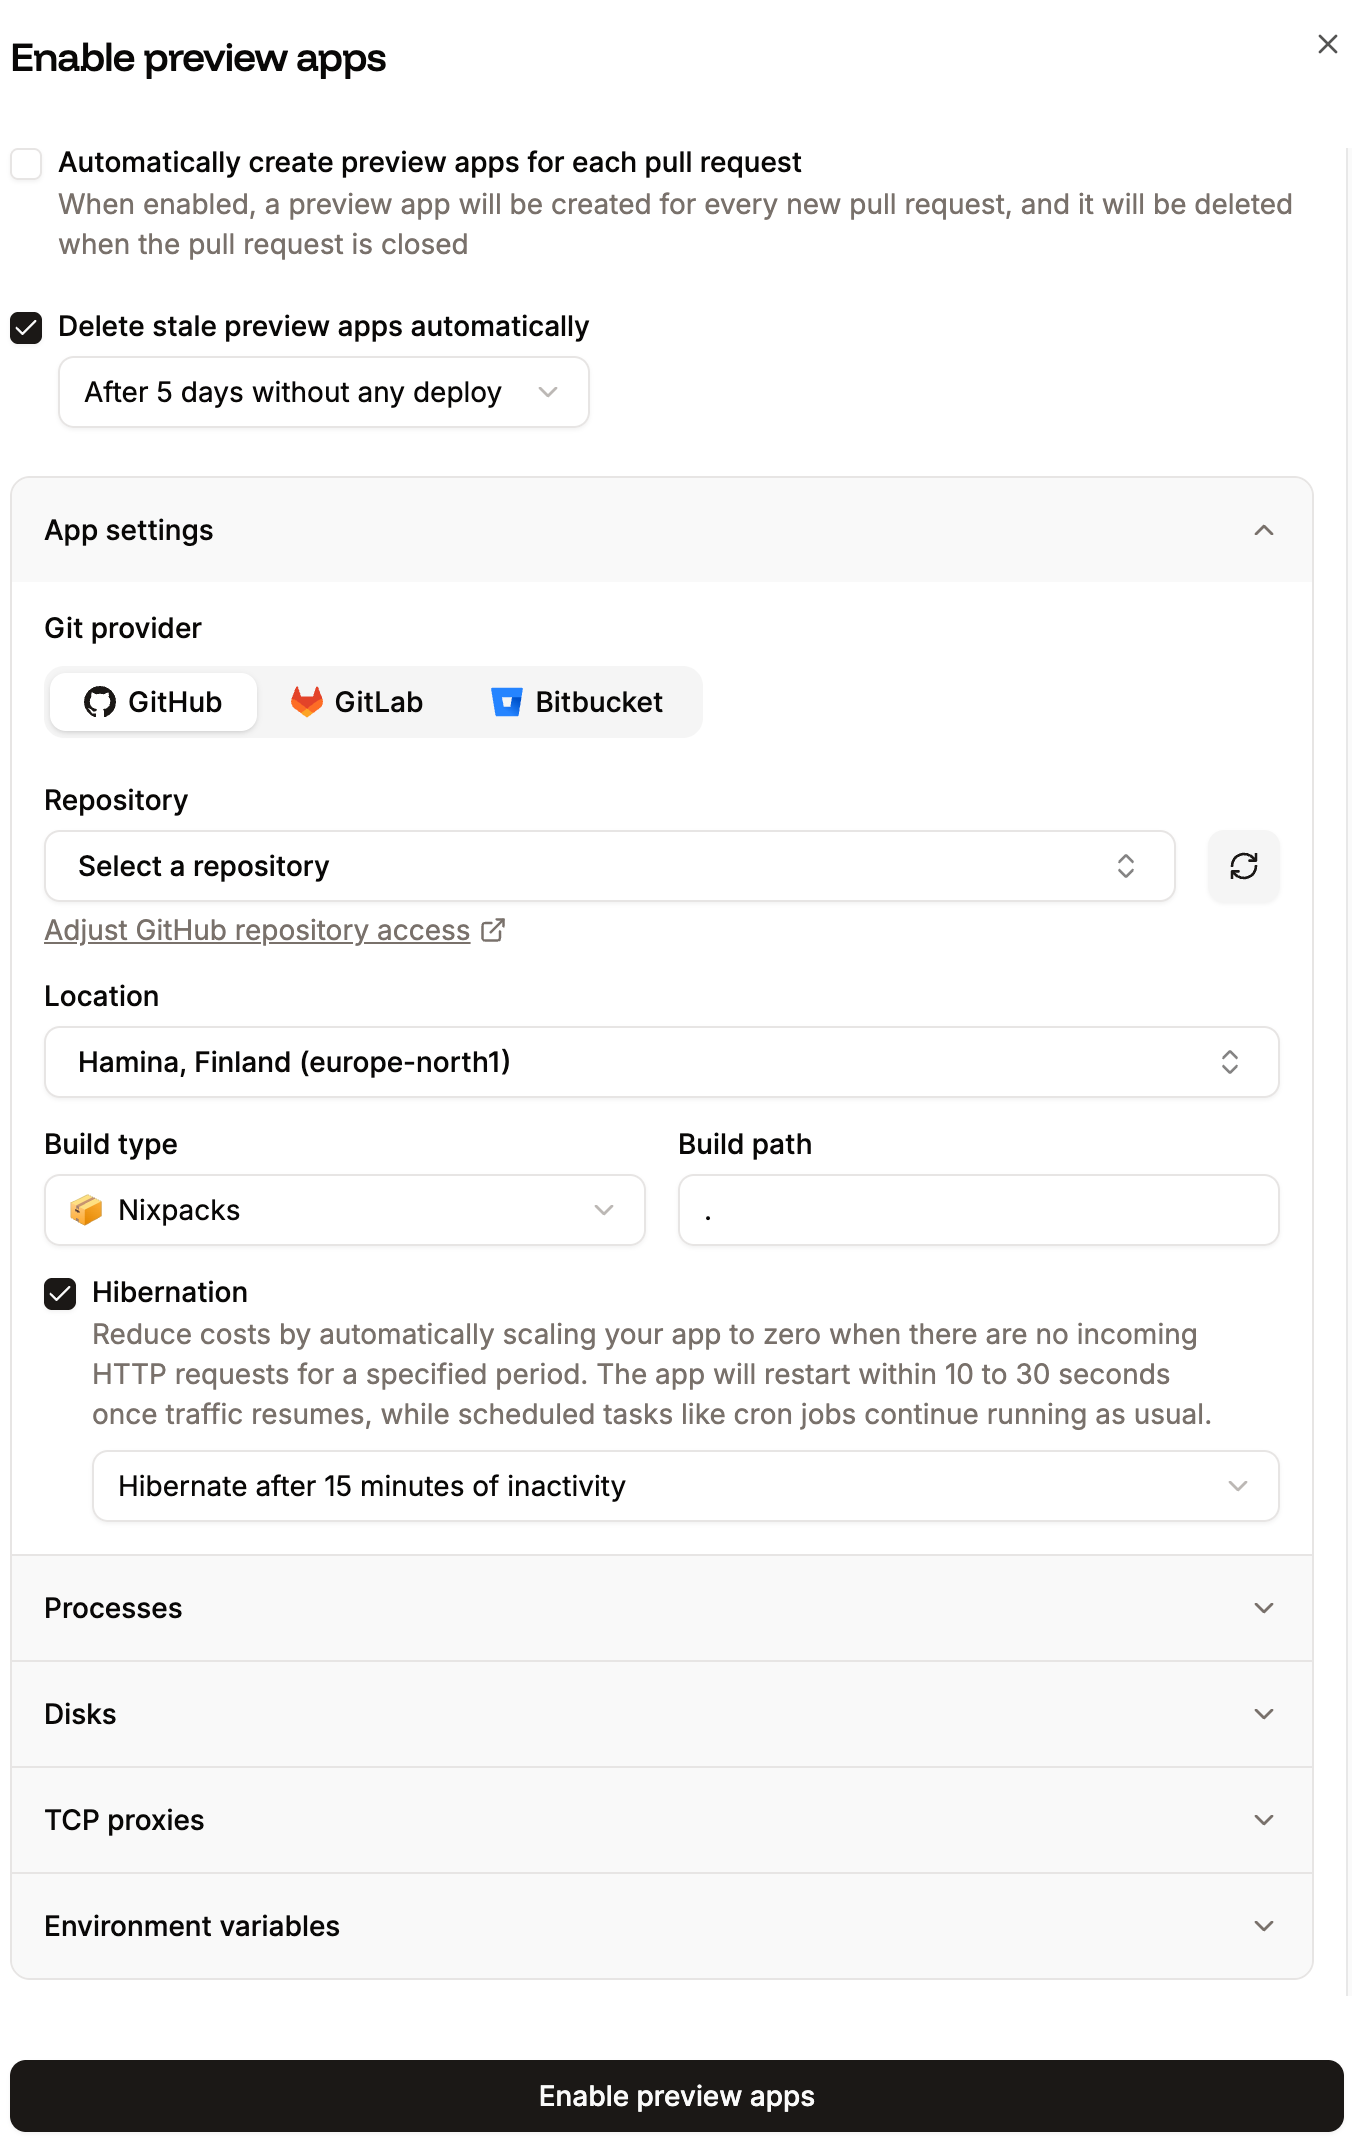 Once you've added the required details, click **Enable preview apps**.
To change the settings of the preview app, click **Preview app settings**.
Once you've added the required details, click **Enable preview apps**.
To change the settings of the preview app, click **Preview app settings**.
 To manually deploy the preview app, click the ellipsis on **Preview** and select **Deploy preview app**.
 ### Add an app to a stage
To add an application to a stage, click **Add app**. You can then choose to add an existing application or create a new one. You can only create a new application within the trunk-based development pipeline. If you're using the Git Flow pipeline, the applications must already exist within Sevalla.
### Add an app to a stage
To add an application to a stage, click **Add app**. You can then choose to add an existing application or create a new one. You can only create a new application within the trunk-based development pipeline. If you're using the Git Flow pipeline, the applications must already exist within Sevalla.
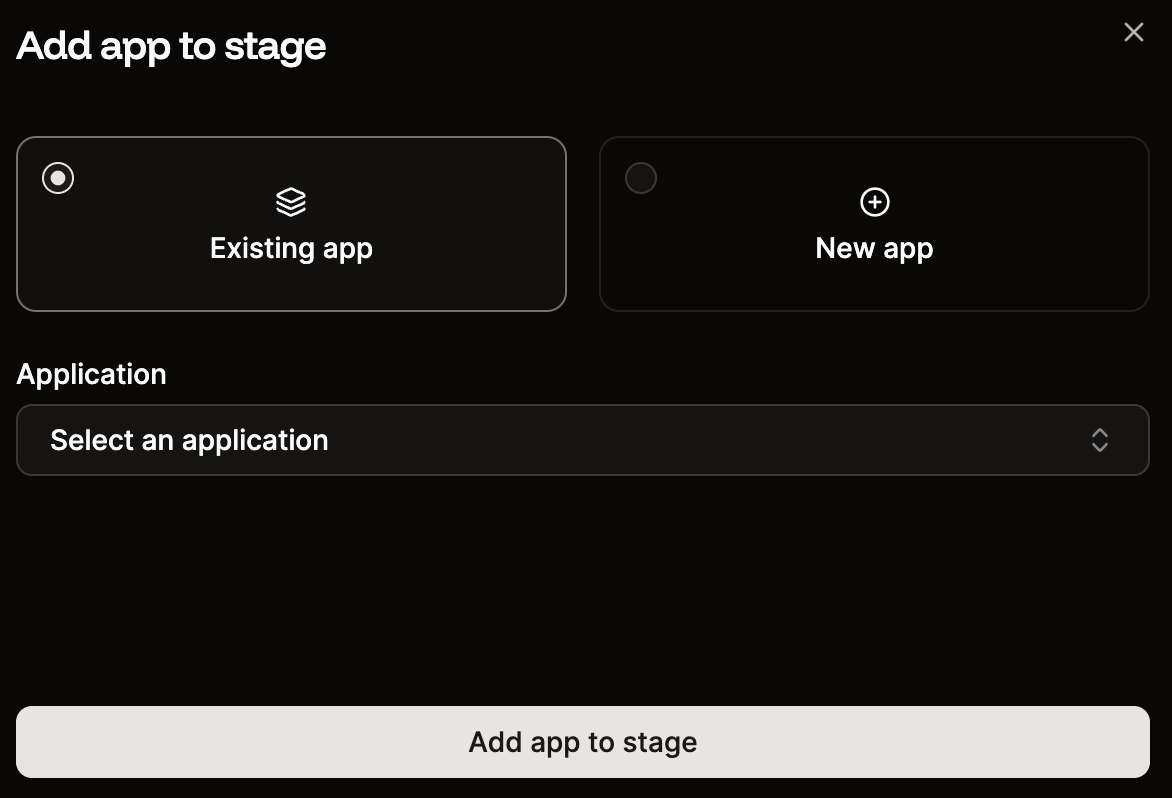
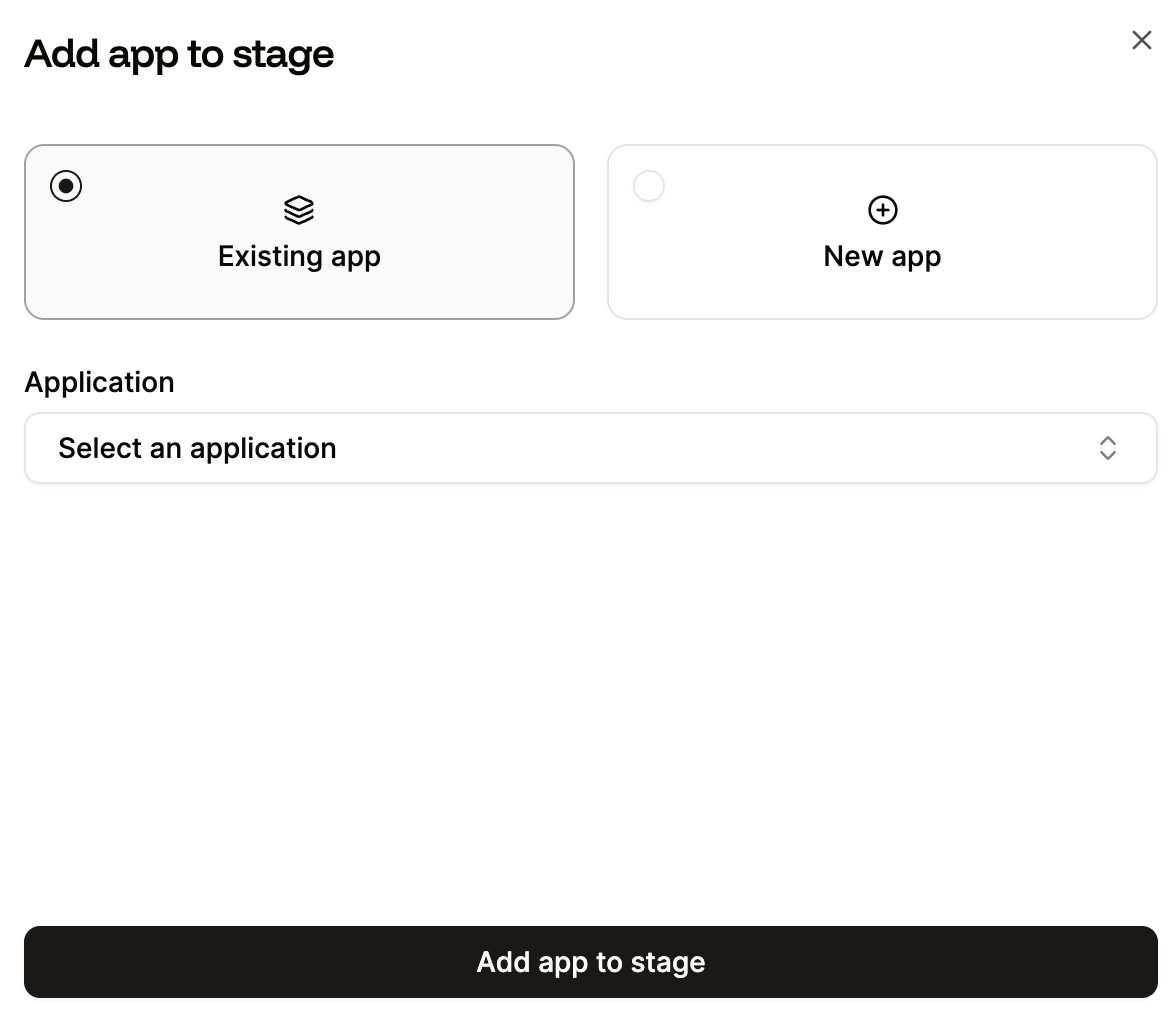 For trunk-based pipelines, the first stage of your pipeline should be the source for the rest of the pipeline, so you must choose an existing application. You can then choose to create a new application for any of the following stages.
 ### Add a stage
To add another stage to the pipeline, click **Create stage**.
### Add a stage
To add another stage to the pipeline, click **Create stage**.
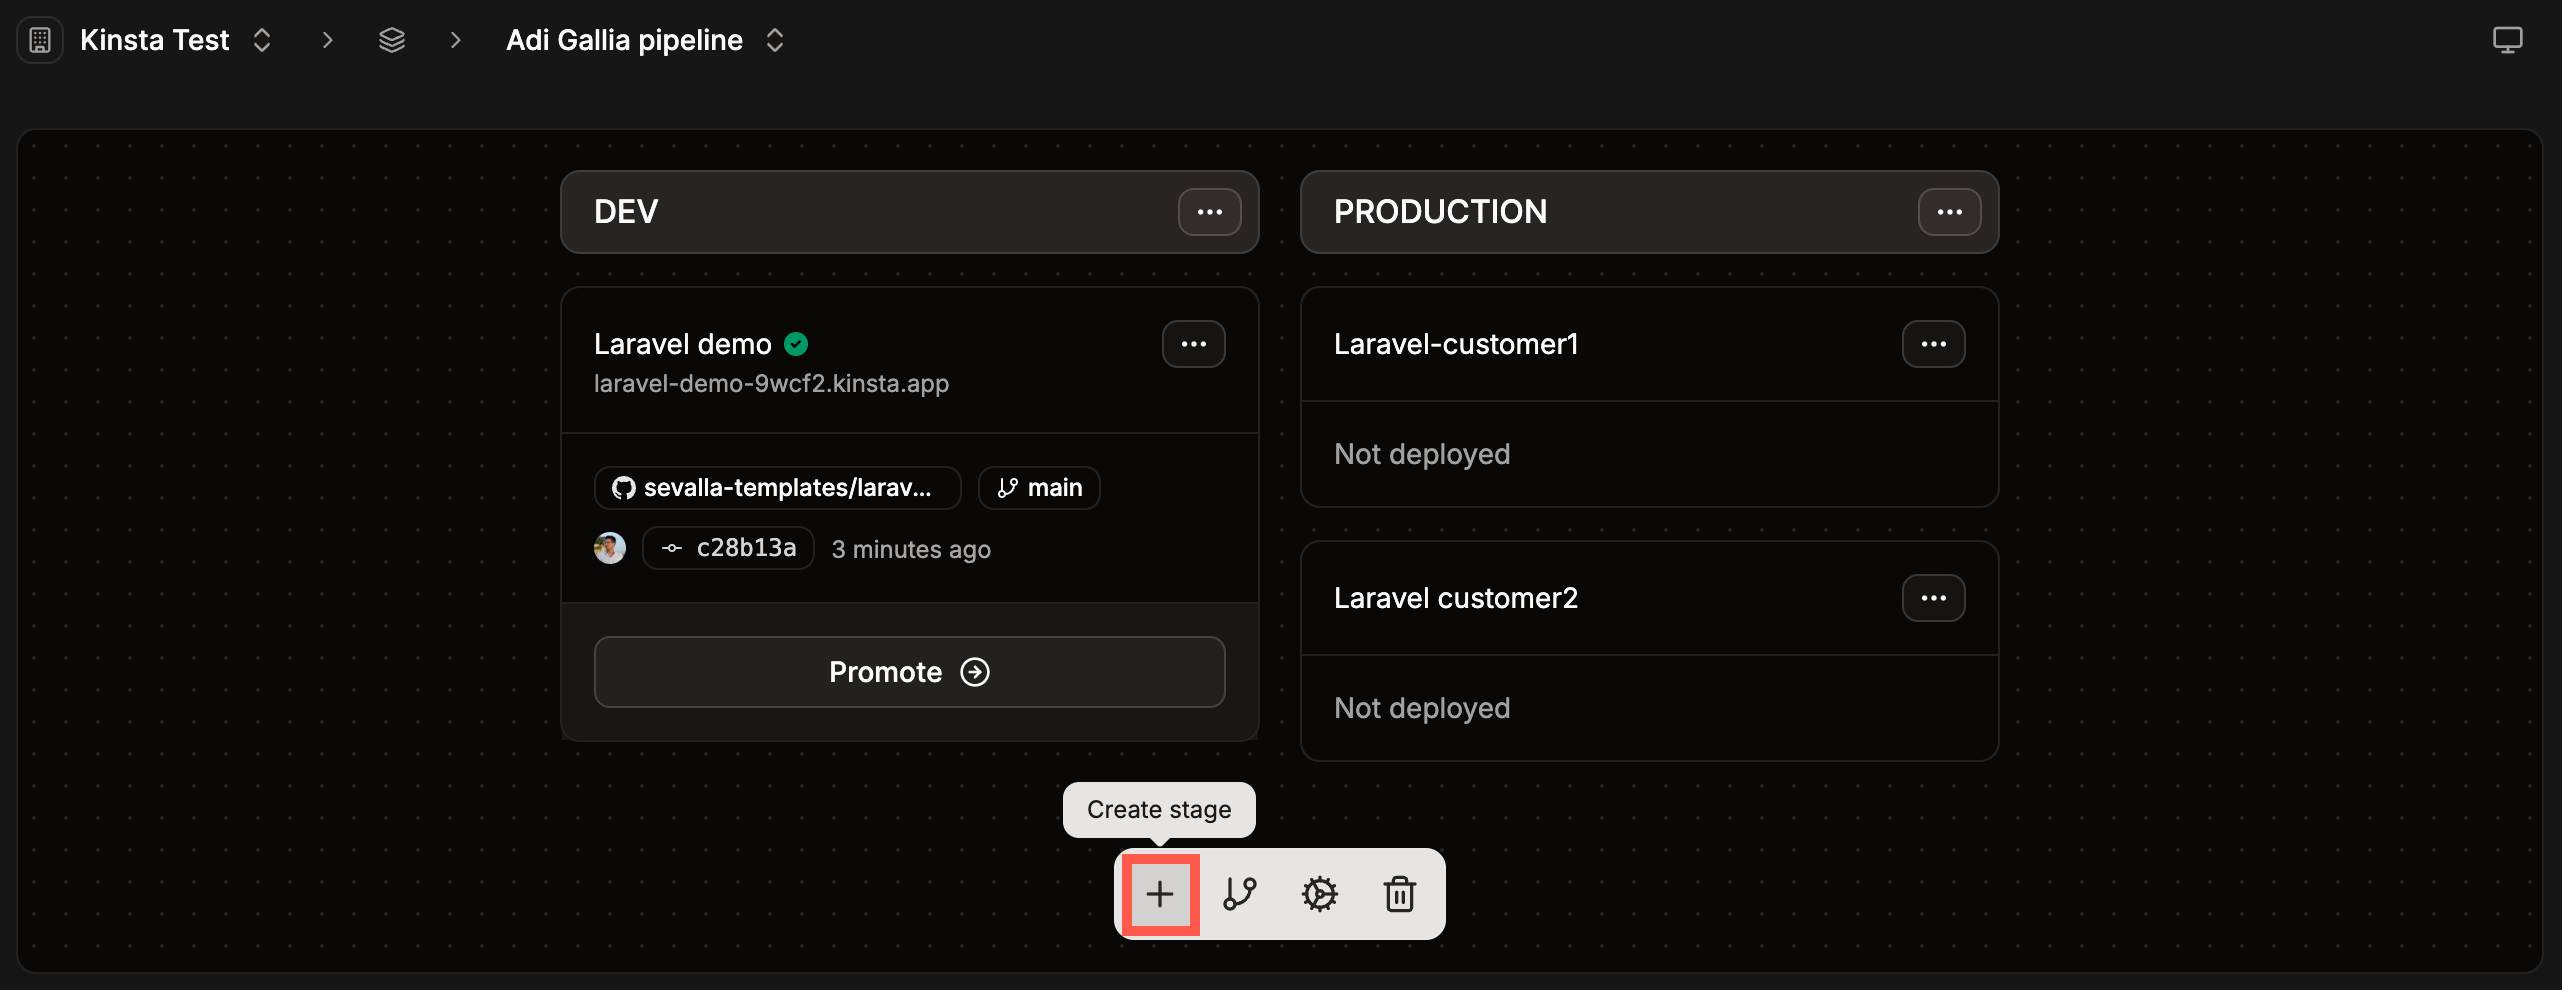
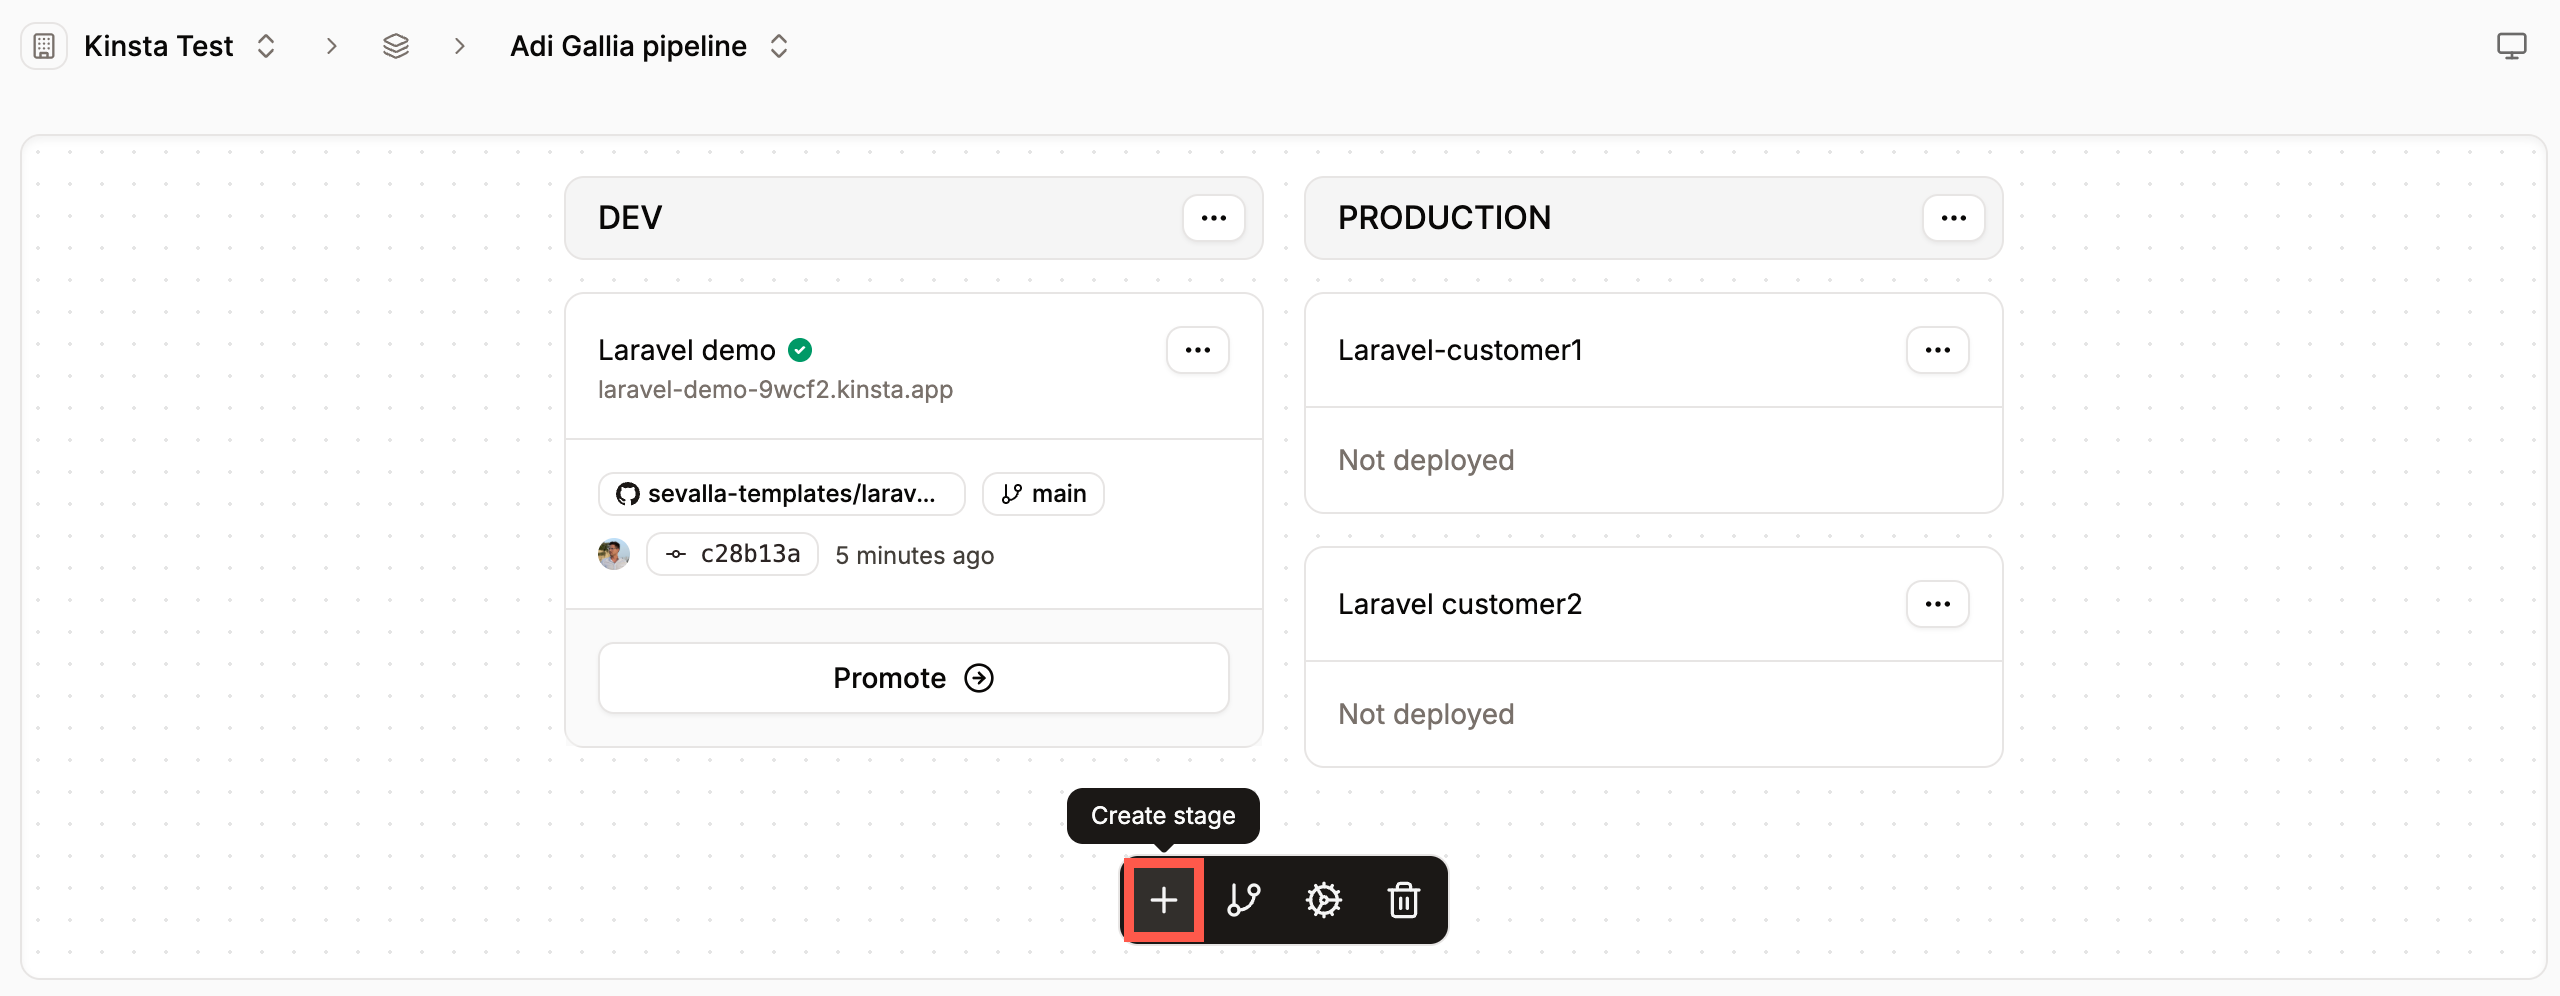 Enter a name for the stage and click **Create stage**. You can drag and drop the stages to change the order in which you want to deploy the application.
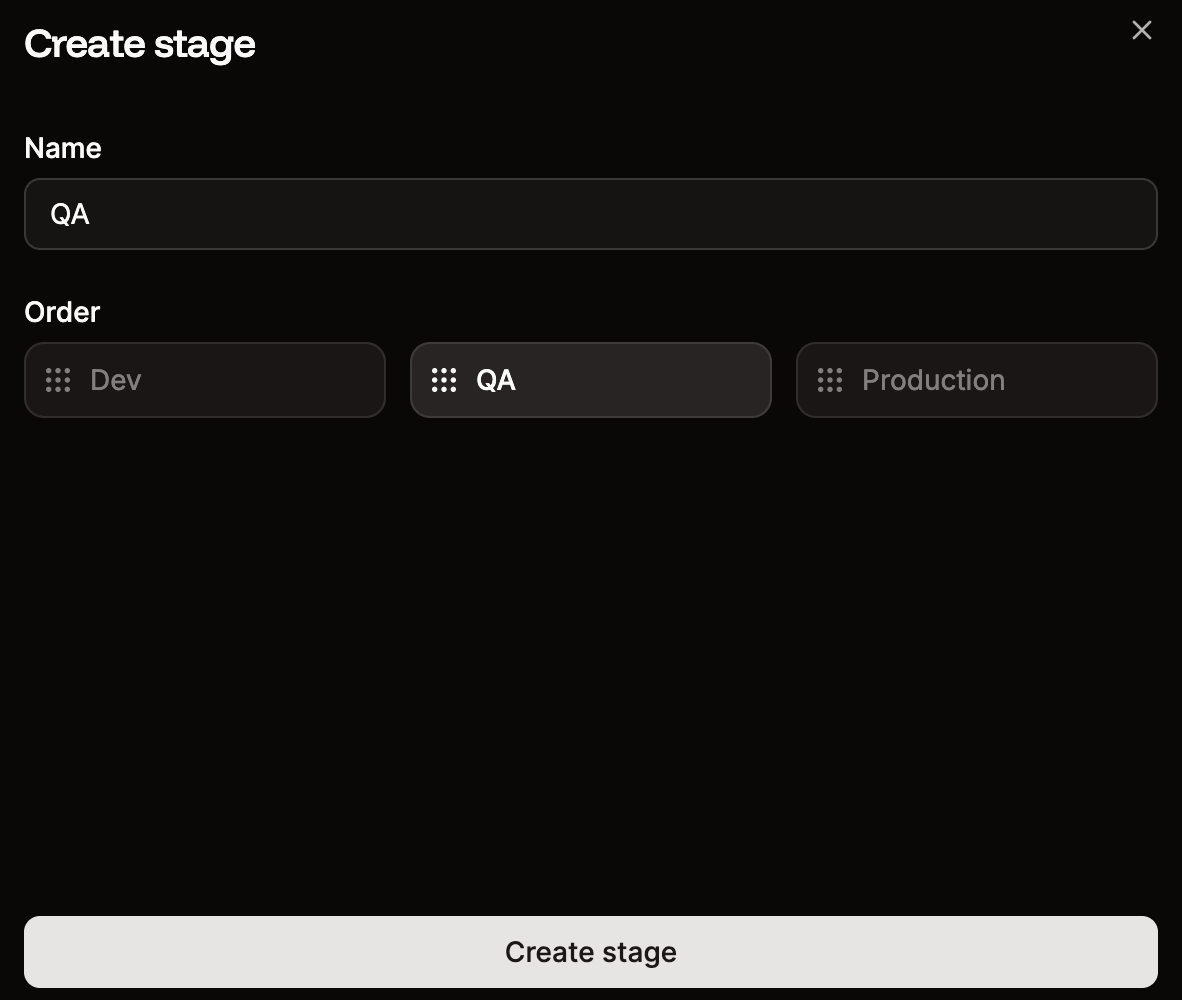
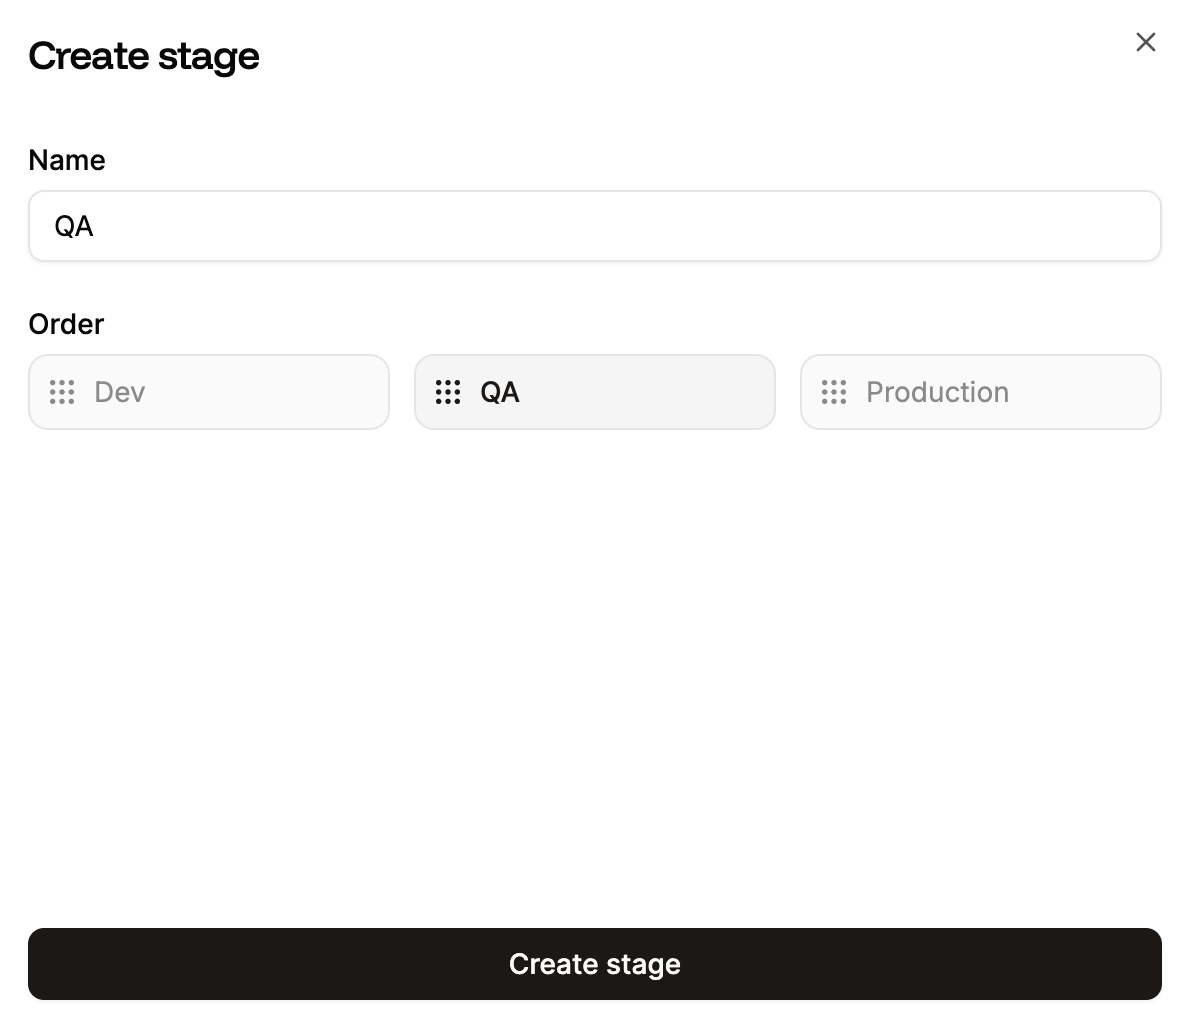 You can then add a new application to the stage.
 ### Promote changes to production
If you've set up a trunk-based pipeline, you can use the **Promote** option to push the application to each stage without having to rebuild it. If you're promoting to a stage with multiple applications, you can choose which applications to promote to. If you don't want to promote a particular application, click the minus sign on that application to remove it from the deployment.
### Promote changes to production
If you've set up a trunk-based pipeline, you can use the **Promote** option to push the application to each stage without having to rebuild it. If you're promoting to a stage with multiple applications, you can choose which applications to promote to. If you don't want to promote a particular application, click the minus sign on that application to remove it from the deployment.
 Within **Applications**, the pipeline displays all the included applications, clearly labeling each application's stage within the pipeline and when it was last deployed.
 ## Pipeline settings
To access the pipeline settings, click **Pipeline settings**. The settings allow you to switch between trunk-based development and git flow pipelines. You can also update the name of your pipeline and change the order of the stages within it.
## Pipeline settings
To access the pipeline settings, click **Pipeline settings**. The settings allow you to switch between trunk-based development and git flow pipelines. You can also update the name of your pipeline and change the order of the stages within it.
 ## Delete a pipeline
To delete a pipeline, within **Applications**, select the pipeline you want to delete and click **Delete pipeline**.
## Delete a pipeline
To delete a pipeline, within **Applications**, select the pipeline you want to delete and click **Delete pipeline**.
 This only deletes the pipeline; the applications **are not** removed and will remain in your **Applications** list. To completely remove an application, go to **Settings** > **Danger Zone** > **Delete application**. Deleting the application completely removes the following:
* All files
* Settings
* Persistent storage disks
* Connections to other applications or databases
This only deletes the pipeline; the applications **are not** removed and will remain in your **Applications** list. To completely remove an application, go to **Settings** > **Danger Zone** > **Delete application**. Deleting the application completely removes the following:
* All files
* Settings
* Persistent storage disks
* Connections to other applications or databases