> ## Documentation Index
> Fetch the complete documentation index at: https://docs.sevalla.com/llms.txt
> Use this file to discover all available pages before exploring further.
> ## Agent Instructions
> These are the docs for Sevalla, a platform for deploying applications, databases, static sites, object storage and load balancers. The dashboard is at https://app.sevalla.com.
> Bold text in steps is an exact dashboard label.
> To act on a Sevalla account, prefer the Sevalla MCP server (https://mcp.sevalla.com/mcp, see https://docs.sevalla.com/ai-agents/overview.md), then the Sevalla CLI (https://docs.sevalla.com/developer-tools/cli.md), then the REST API (https://api-docs.sevalla.com, OpenAPI spec at https://api.sevalla.com/v3/openapi.json).
> Every page index is at https://docs.sevalla.com/llms.txt.
# Single sign-on
> Connect a SAML 2.0 identity provider to Sevalla, verify your email domain, test and go live, then make SSO mandatory, add exceptions and turn on just-in-time provisioning.
Single sign-on (SSO) lets the people in your company sign in to Sevalla through your identity provider (IdP), such as Okta, Microsoft Entra ID or Google Workspace, using SAML 2.0. Your IdP decides who may sign in and how; Sevalla trusts its signed response. You set it up on the **Single sign-on** page, under **Company** in the sidebar.
## How SAML SSO works
A person clicks **Sign in with SSO** on the Sevalla sign-in page and enters their work email. Sevalla finds the company whose SSO domain matches the email, sends them to that company's IdP, and signs them in when the IdP sends back a signed response for the same email address. See [Sign in with SSO](/account/sign-in#sign-in-with-sso).
* **Sign-in starts at Sevalla.** Signing in from the IdP's app dashboard (IdP-initiated sign-in) isn't supported, because Sevalla only accepts responses to requests it sent. Hide the Sevalla app tile in your IdP so people don't try it.
* **One domain per company, one company per domain.** A company has one SSO email domain, and a verified domain can be used by only one company. Only people whose Sevalla email address is on that domain can use SSO for the company.
* **The domain is a single name and a top-level domain**, such as `example.com`. Subdomains and multi-part suffixes such as `mail.example.com` or `example.co.uk` aren't accepted.
* **No Sevalla two-factor code.** People who sign in through the IdP skip Sevalla's [two-factor authentication](/account/sign-in#two-factor-authentication); the IdP handles authentication.
* **Your IdP sets the session length.** An SSO session lasts until the time your IdP puts in its response. If the IdP doesn't set one, the session lasts 24 hours. When it ends, a company with [mandatory SSO](#make-sso-mandatory) asks the person to authenticate through the IdP again.
* **Responses must be signed.** The IdP must sign the SAML response, the assertion, or both. Sevalla rejects unsigned responses.
* **Certificates expire.** Starting 21 days before the IdP certificate saved in Sevalla expires, Sevalla emails the company's owners and admins so they can [update it](#update-the-sso-configuration).
### Identity provider guides
Step-by-step guides show where each value goes in the most common identity providers. Any other SAML 2.0 identity provider works too, using the values in [Set up the app integration in your IdP](#set-up-the-app-integration-in-your-idp).
Add a custom SAML app in the Google Admin console.
Create an enterprise application with SAML sign-on.
Create a SAML 2.0 app integration.
Use the SAML Custom Connector (Advanced).
Add a SAML application in your PingOne environment.
## Before you begin
* You're a company owner or admin. Only they see **Single sign-on** in the sidebar.
* You can create applications in your identity provider.
* You can add a TXT record to the DNS of your email domain, unless Sevalla can verify the domain without one.
* Your own Sevalla account uses an email address on that domain, and your IdP lets that account use the new app. The setup test signs you in through the IdP with your own account.
## Start the setup
In the sidebar, under **Company**, click **Single sign-on**.
On the **Single sign-on** card, click **Enable**. The **Configure SSO** wizard opens on its **Introduction** step, which lists the steps ahead. Click **Continue**.
The wizard has four steps: **Introduction**, **Create SAML app**, **Sevalla setup** and **Test and finish**. Sevalla saves your progress, so you can leave at any step (for example, while DNS changes spread) and come back. The card then shows **SSO is disabled · setup in progress** and its button reads **Continue setup**.
## Set up the app integration in your IdP
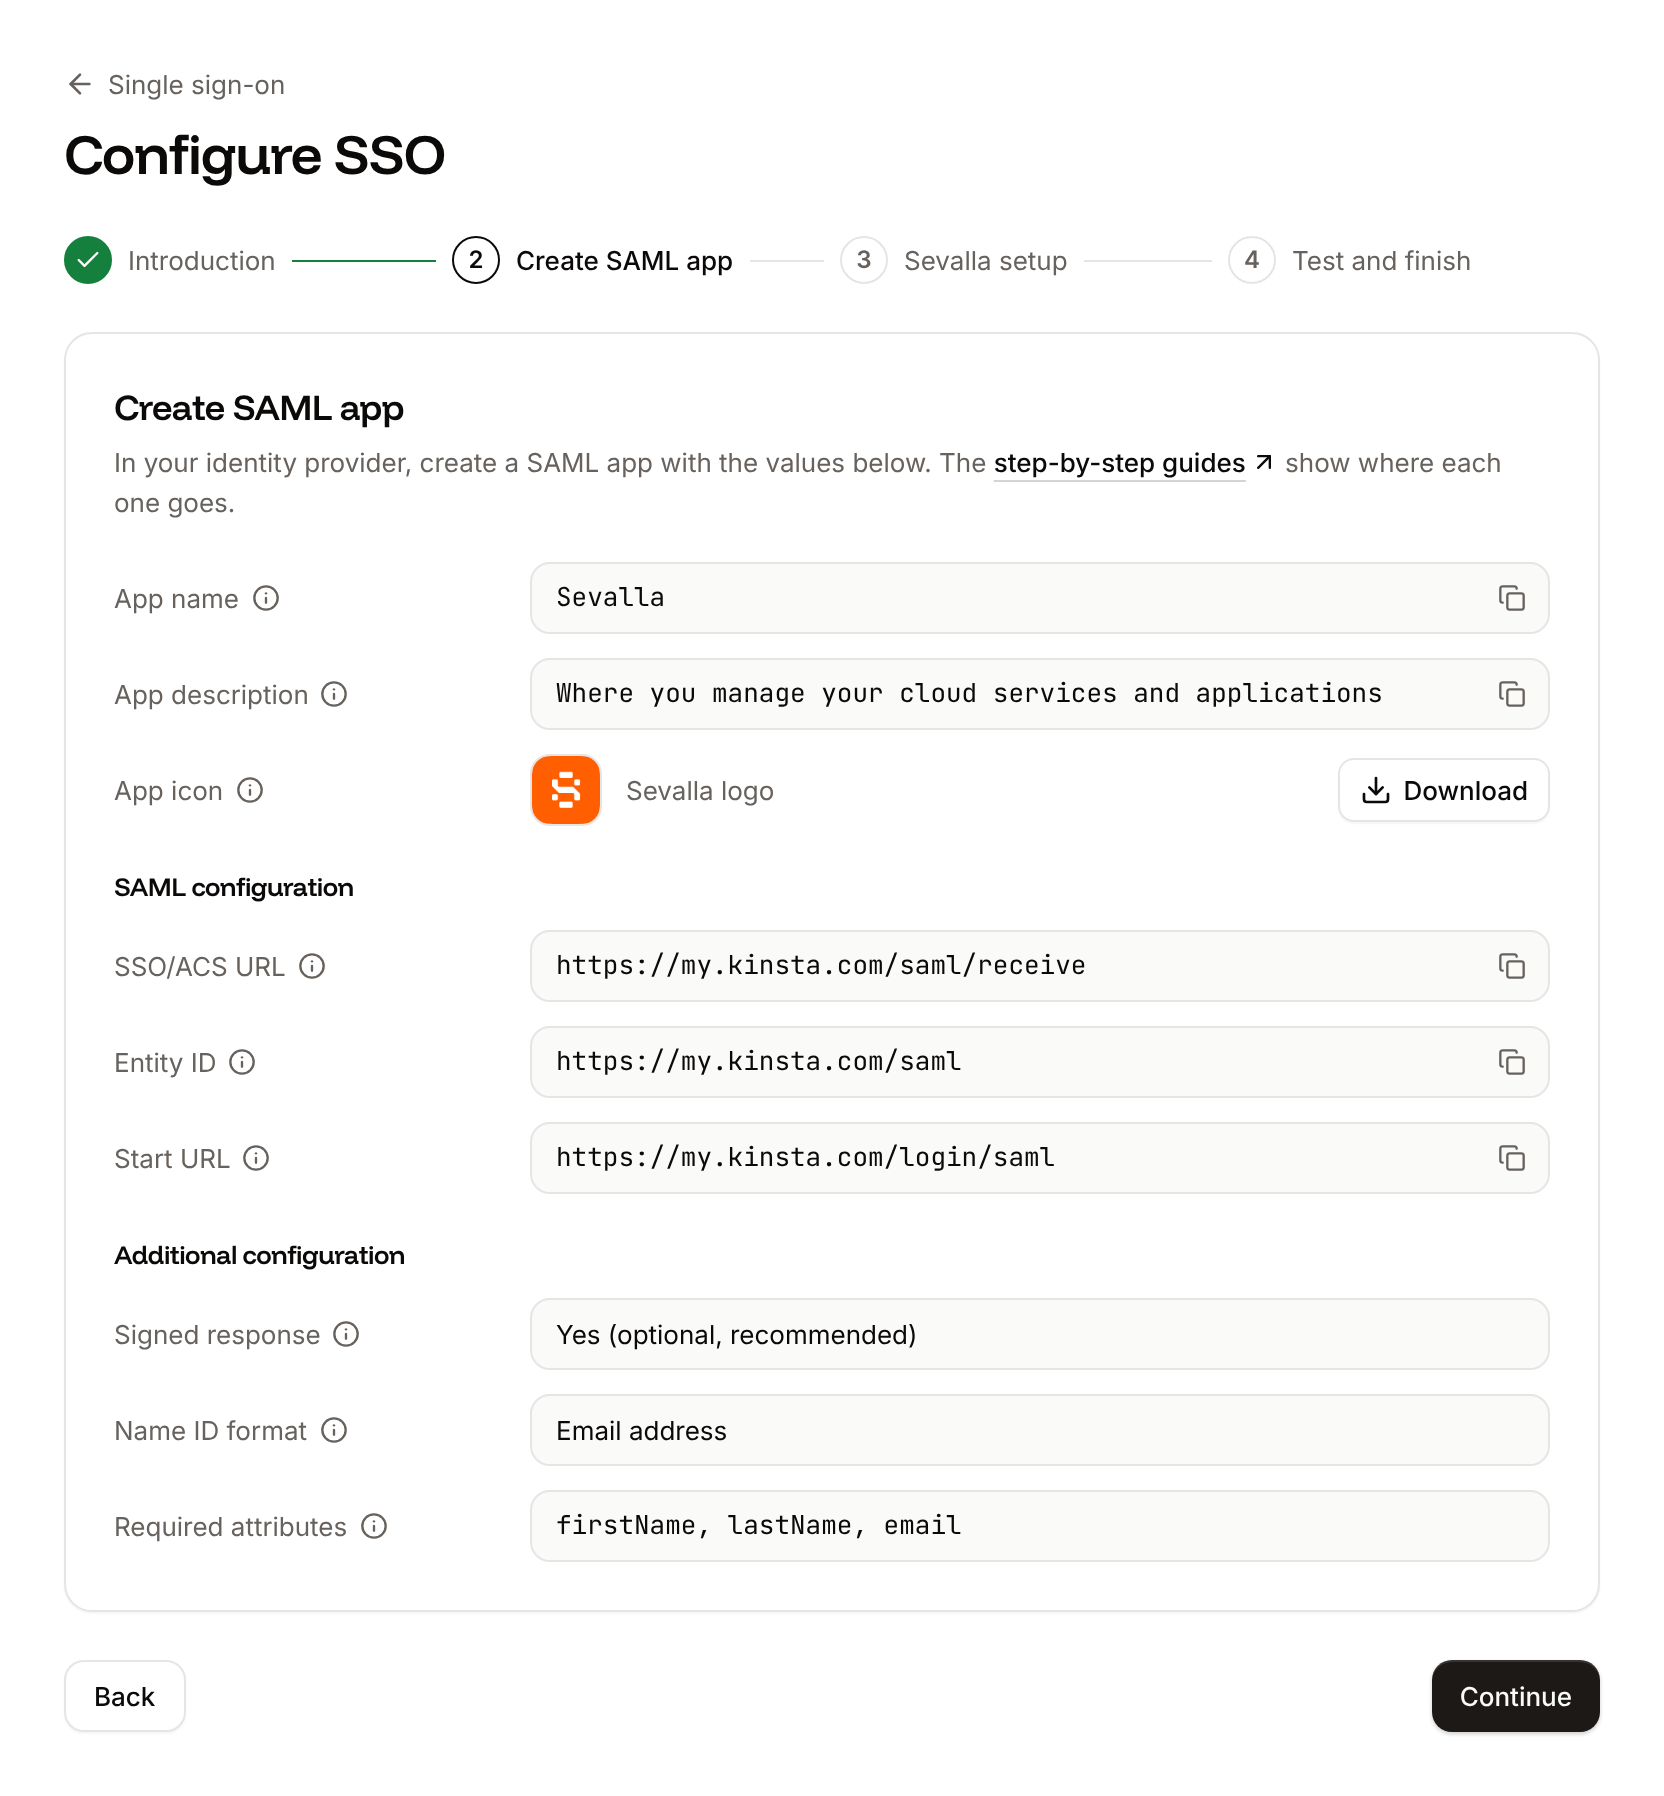
The **Create SAML app** step shows the values to enter in a new SAML app in your identity provider, each with a copy button. Create the app with these values, then click **Continue**. The [identity provider guides](#identity-provider-guides) show the exact fields.
| Value in Sevalla | What to enter | Where it goes in your IdP |
| - | - | - |
| **App name** | `Sevalla` | Application name |
| **App description** | `Where you manage your cloud services and applications` | Application description (usually optional) |
| **App icon** | The Sevalla logo: click **Download** to save `sevalla-saml-icon.png` | App icon or logo |
| **SSO/ACS URL** | `https://my.kinsta.com/saml/receive` | ACS URL, Single sign-on URL, Reply URL or Recipient |
| **Entity ID** | `https://my.kinsta.com/saml` | Entity ID, Audience URI or Audience |
| **Start URL** | `https://my.kinsta.com/login/saml` | Start URL, Sign on URL or Login URL |
| **Signed response** | Yes (optional, recommended) | The option to sign the SAML response |
| **Name ID format** | Email address | Name ID format |
| **Required attributes** | `firstName`, `lastName`, `email` | Attribute mapping or claims |
Sevalla is a Kinsta product, so these URLs use `my.kinsta.com`. That's expected.
Map the three attributes with exactly these names. `email` must be the address the person uses in Sevalla (if it's missing, Sevalla uses the Name ID). Sevalla uses `firstName` and `lastName` to name accounts it creates for new people.
 ## Verify your email domain
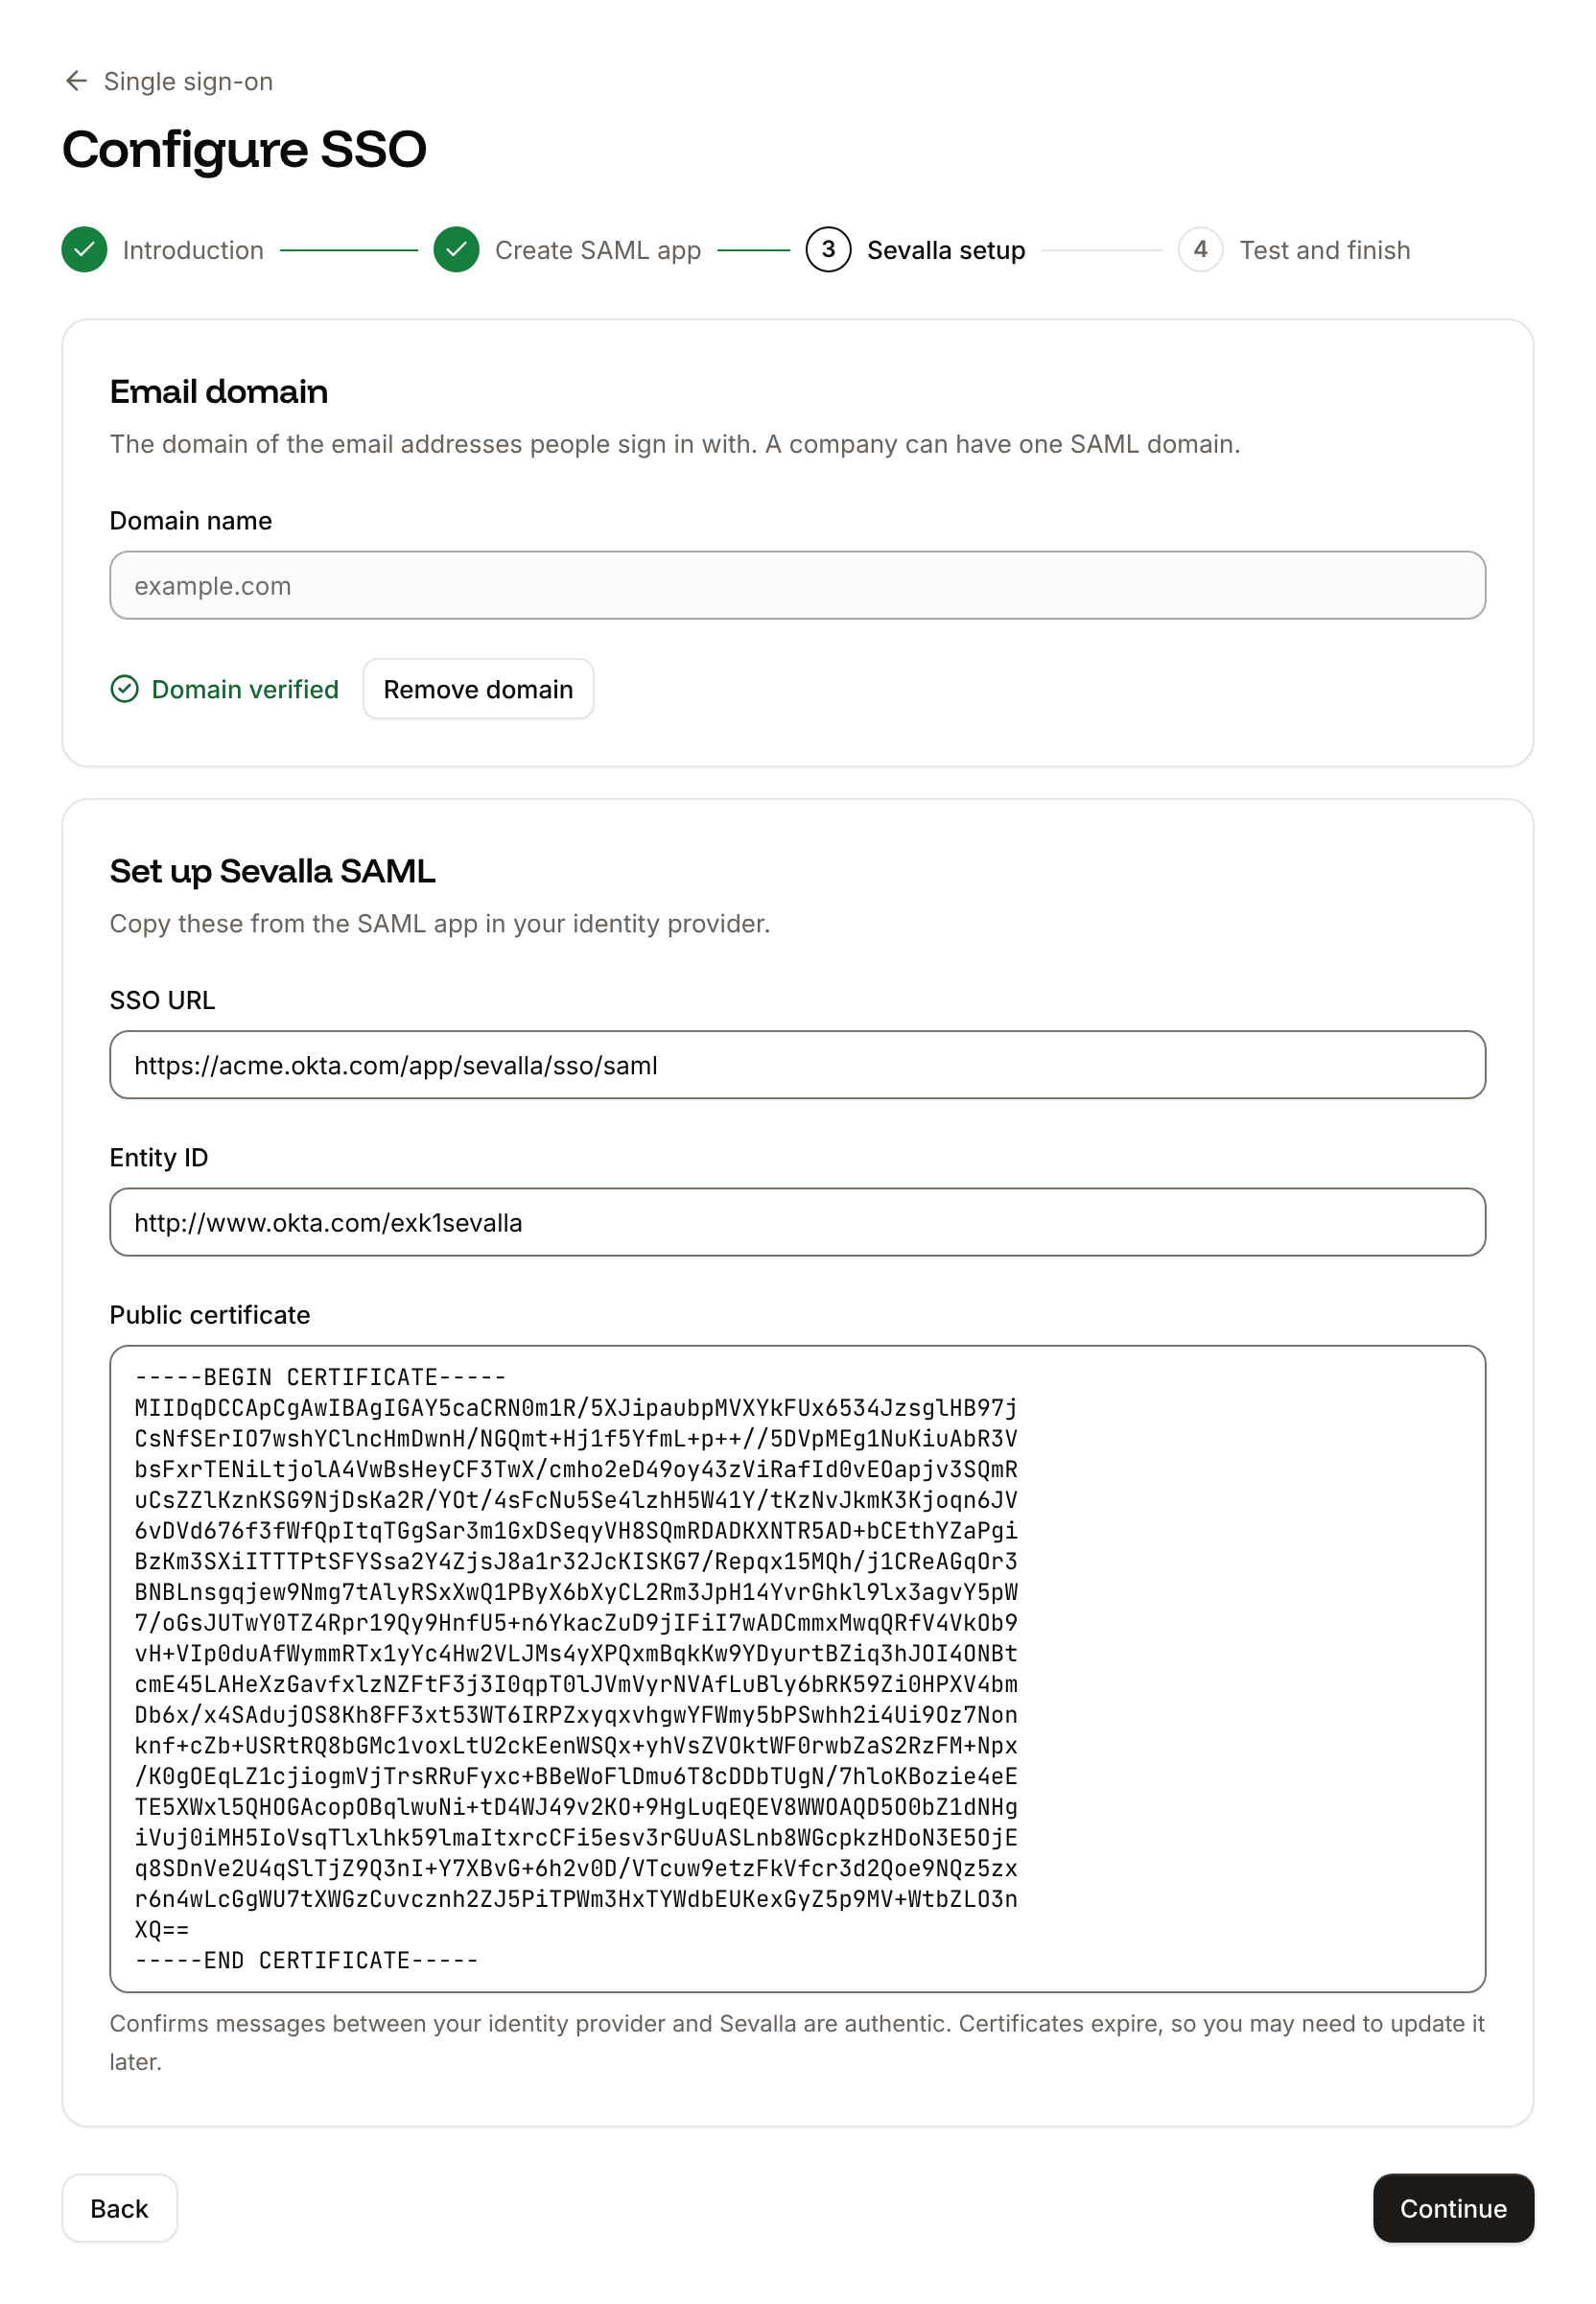
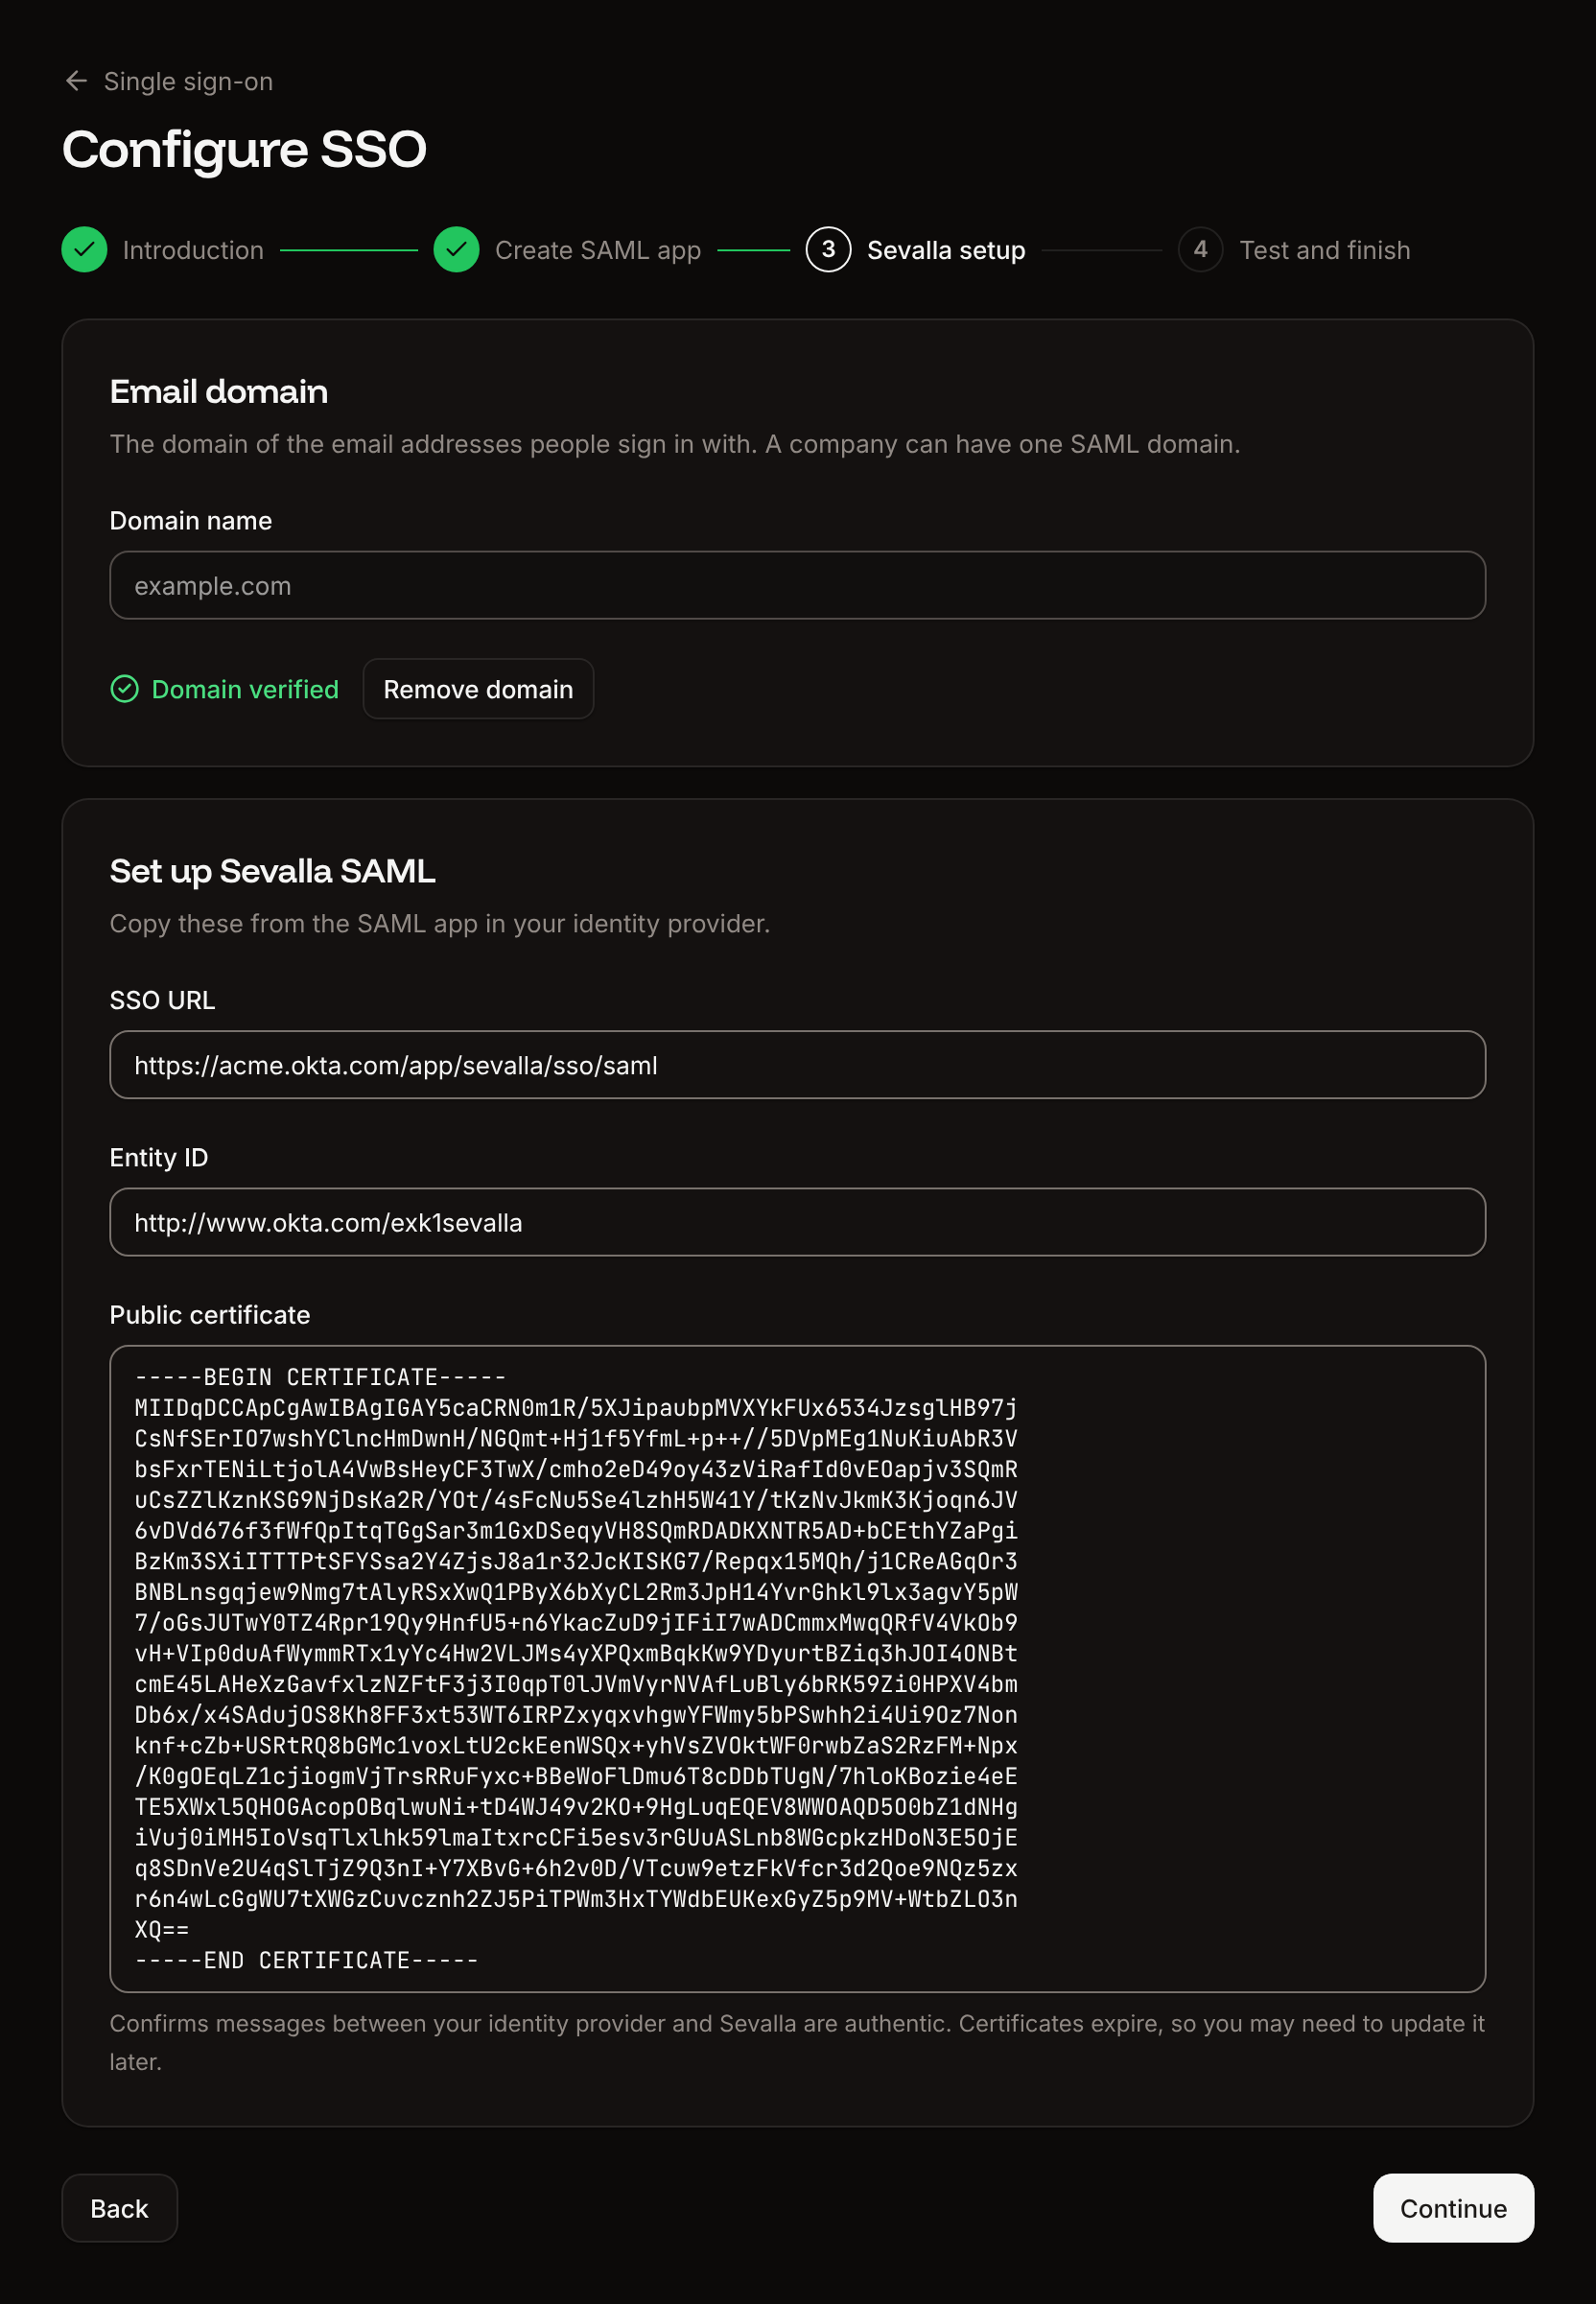
The **Sevalla setup** step starts with **Email domain**: the domain of the email addresses people sign in with.
In **Domain name**, enter your email domain (for example, `example.com`), then click **Add domain**. If Sevalla can already confirm you own it (for example, its DNS is managed by Kinsta), the domain is verified at once and the wizard shows **Domain verified**.
Otherwise, the **Verify domain ownership** dialog shows a TXT record. Add it where you manage the domain's DNS:
| Type | Name | Value |
| - | - | - |
| `TXT` | `kinsta-saml-verify.example.com` (or `kinsta-saml-verify`, if your DNS provider adds the domain for you) | Your company ID, shown in the dialog |
Click **OK, I’ve done it**. When Sevalla finds the record, the wizard shows **Domain verified**.
If Sevalla can't find the record yet, the dialog shows `We could not verify this domain.` DNS changes can take up to 24 hours to show. Wait, then click **Verify domain** to check again. You can also close the dialog and come back to the wizard later. If another company already verified the domain, Sevalla shows `This domain cannot be used.`
To use a different domain, click **Remove domain** and add the new one.
## Verify your email domain
The **Sevalla setup** step starts with **Email domain**: the domain of the email addresses people sign in with.
In **Domain name**, enter your email domain (for example, `example.com`), then click **Add domain**. If Sevalla can already confirm you own it (for example, its DNS is managed by Kinsta), the domain is verified at once and the wizard shows **Domain verified**.
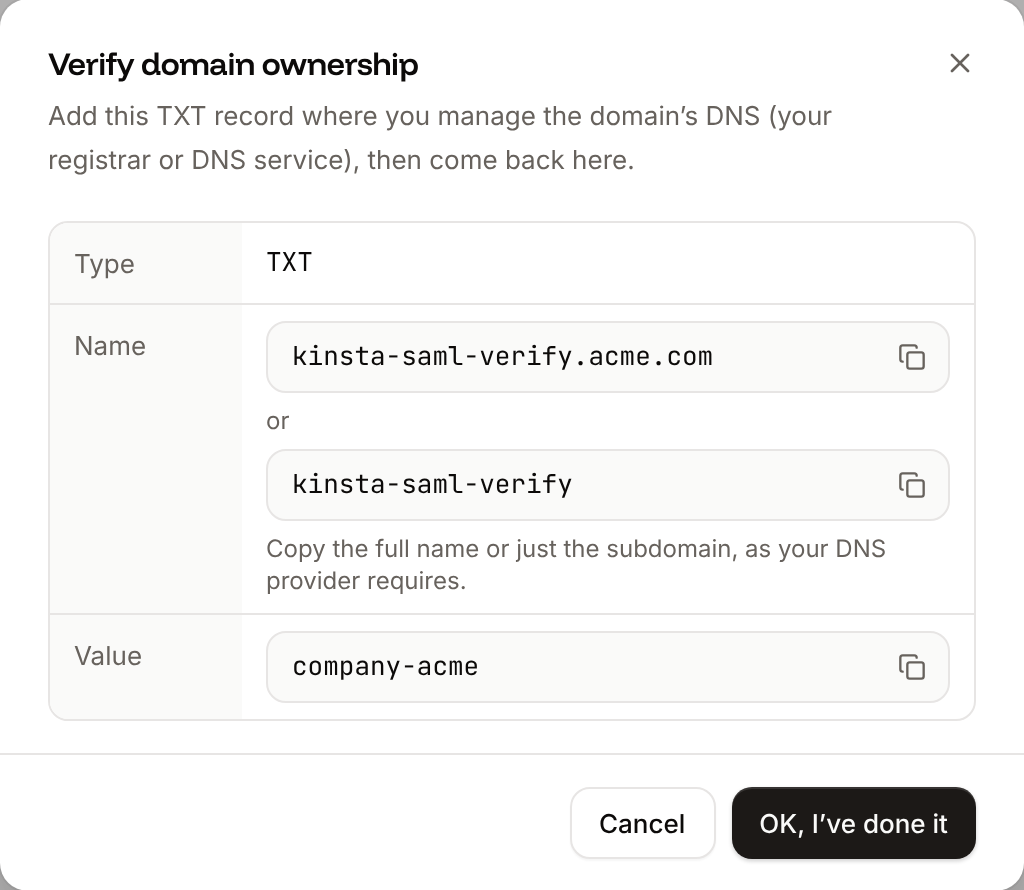
Otherwise, the **Verify domain ownership** dialog shows a TXT record. Add it where you manage the domain's DNS:
| Type | Name | Value |
| - | - | - |
| `TXT` | `kinsta-saml-verify.example.com` (or `kinsta-saml-verify`, if your DNS provider adds the domain for you) | Your company ID, shown in the dialog |
Click **OK, I’ve done it**. When Sevalla finds the record, the wizard shows **Domain verified**.
If Sevalla can't find the record yet, the dialog shows `We could not verify this domain.` DNS changes can take up to 24 hours to show. Wait, then click **Verify domain** to check again. You can also close the dialog and come back to the wizard later. If another company already verified the domain, Sevalla shows `This domain cannot be used.`
To use a different domain, click **Remove domain** and add the new one.
 ## Add the identity provider details
Under **Set up Sevalla SAML** on the same step, paste the values from the SAML app you created in your IdP:
| Field | What to paste |
| - | - |
| **SSO URL** | The IdP's single sign-on URL, where Sevalla sends sign-in requests. Must be a valid URL. |
| **Entity ID** | The IdP's entity ID, also called its issuer. |
| **Public certificate** | The IdP's signing certificate (X.509), the entire text including the `-----BEGIN CERTIFICATE-----` and `-----END CERTIFICATE-----` lines. |
**Continue** turns on once the domain is verified and all three fields are filled. Click it to go to **Test and finish**.
## Add the identity provider details
Under **Set up Sevalla SAML** on the same step, paste the values from the SAML app you created in your IdP:
| Field | What to paste |
| - | - |
| **SSO URL** | The IdP's single sign-on URL, where Sevalla sends sign-in requests. Must be a valid URL. |
| **Entity ID** | The IdP's entity ID, also called its issuer. |
| **Public certificate** | The IdP's signing certificate (X.509), the entire text including the `-----BEGIN CERTIFICATE-----` and `-----END CERTIFICATE-----` lines. |
**Continue** turns on once the domain is verified and all three fields are filled. Click it to go to **Test and finish**.
 ## Test and set SSO live
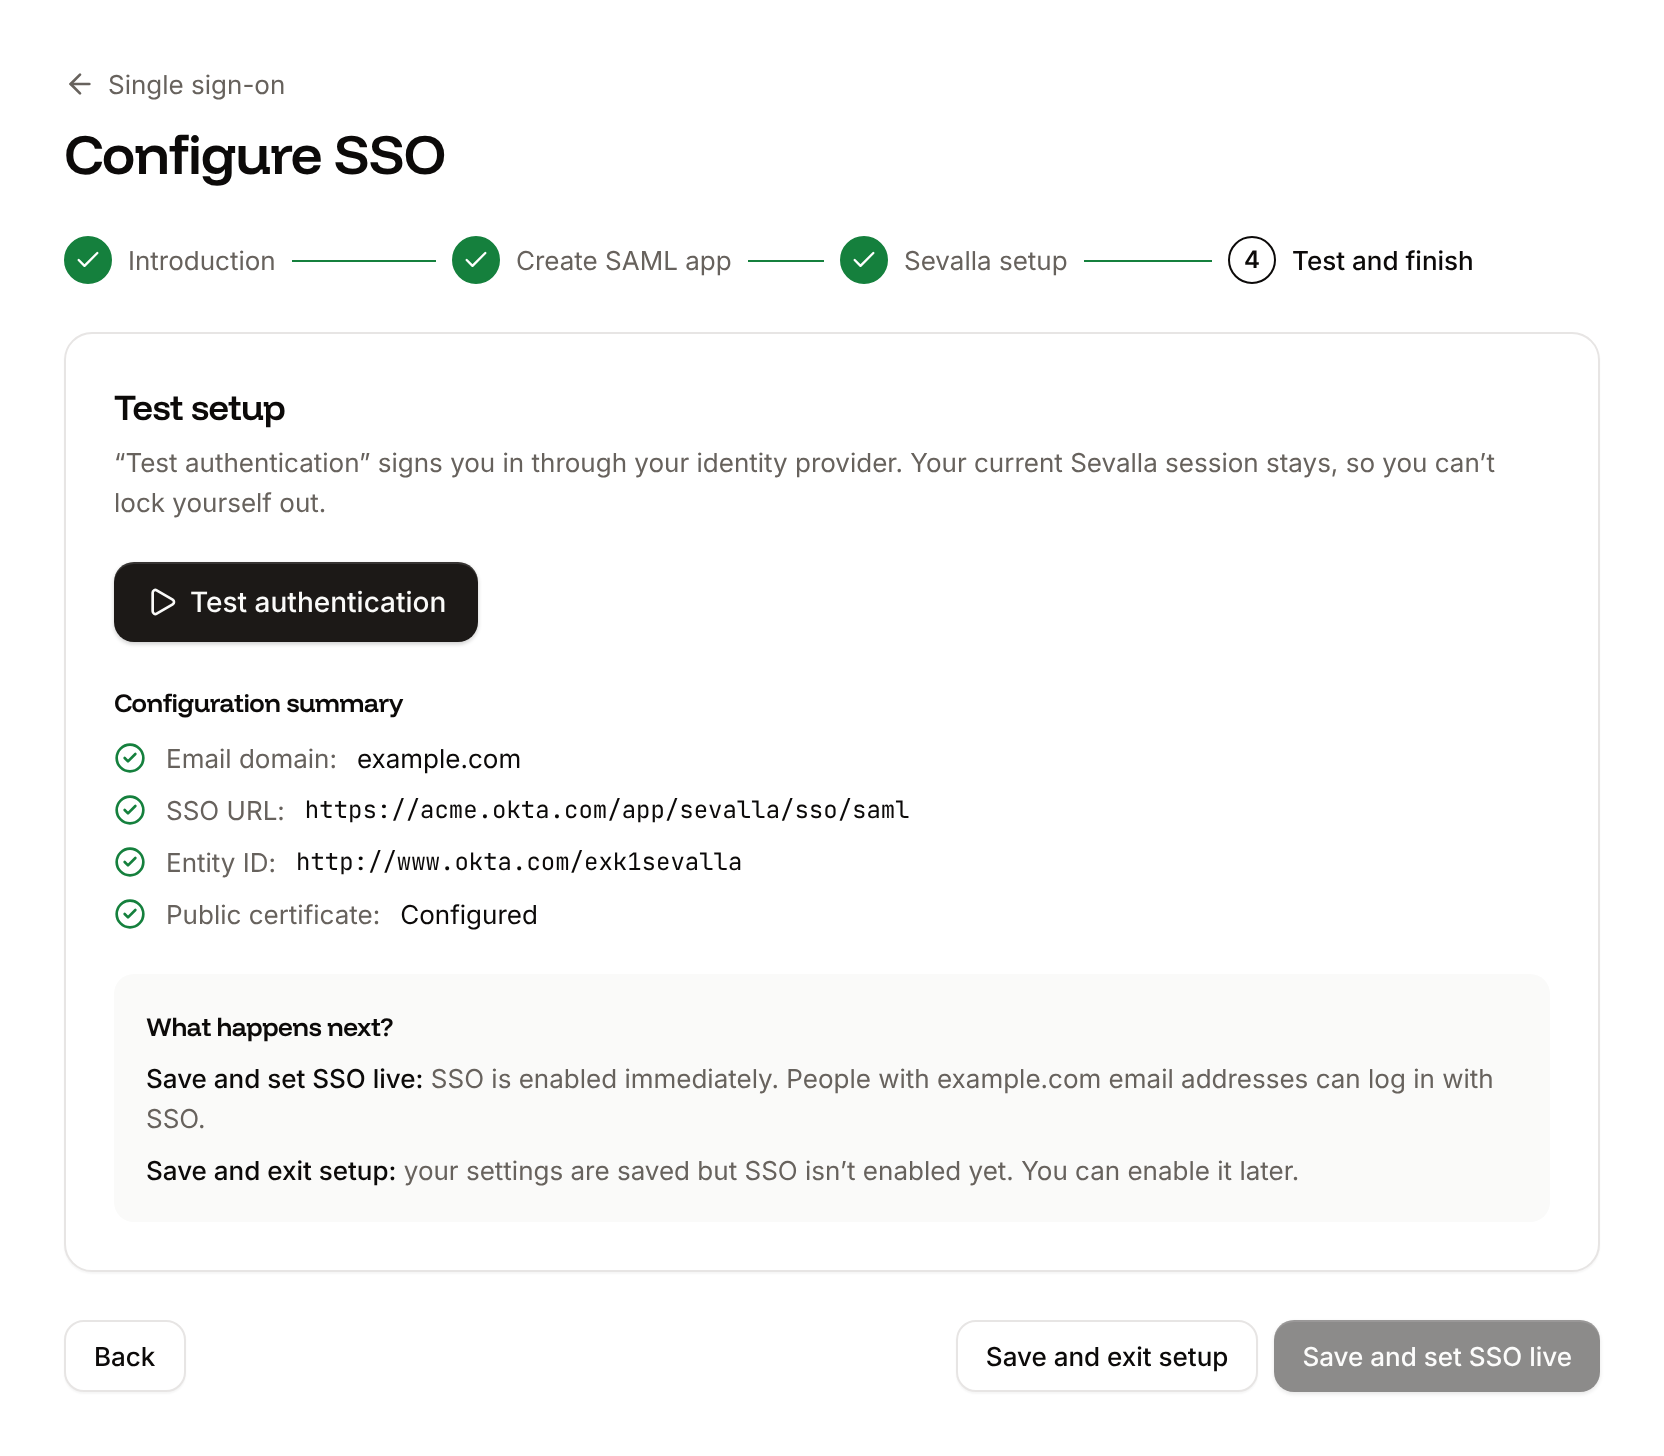
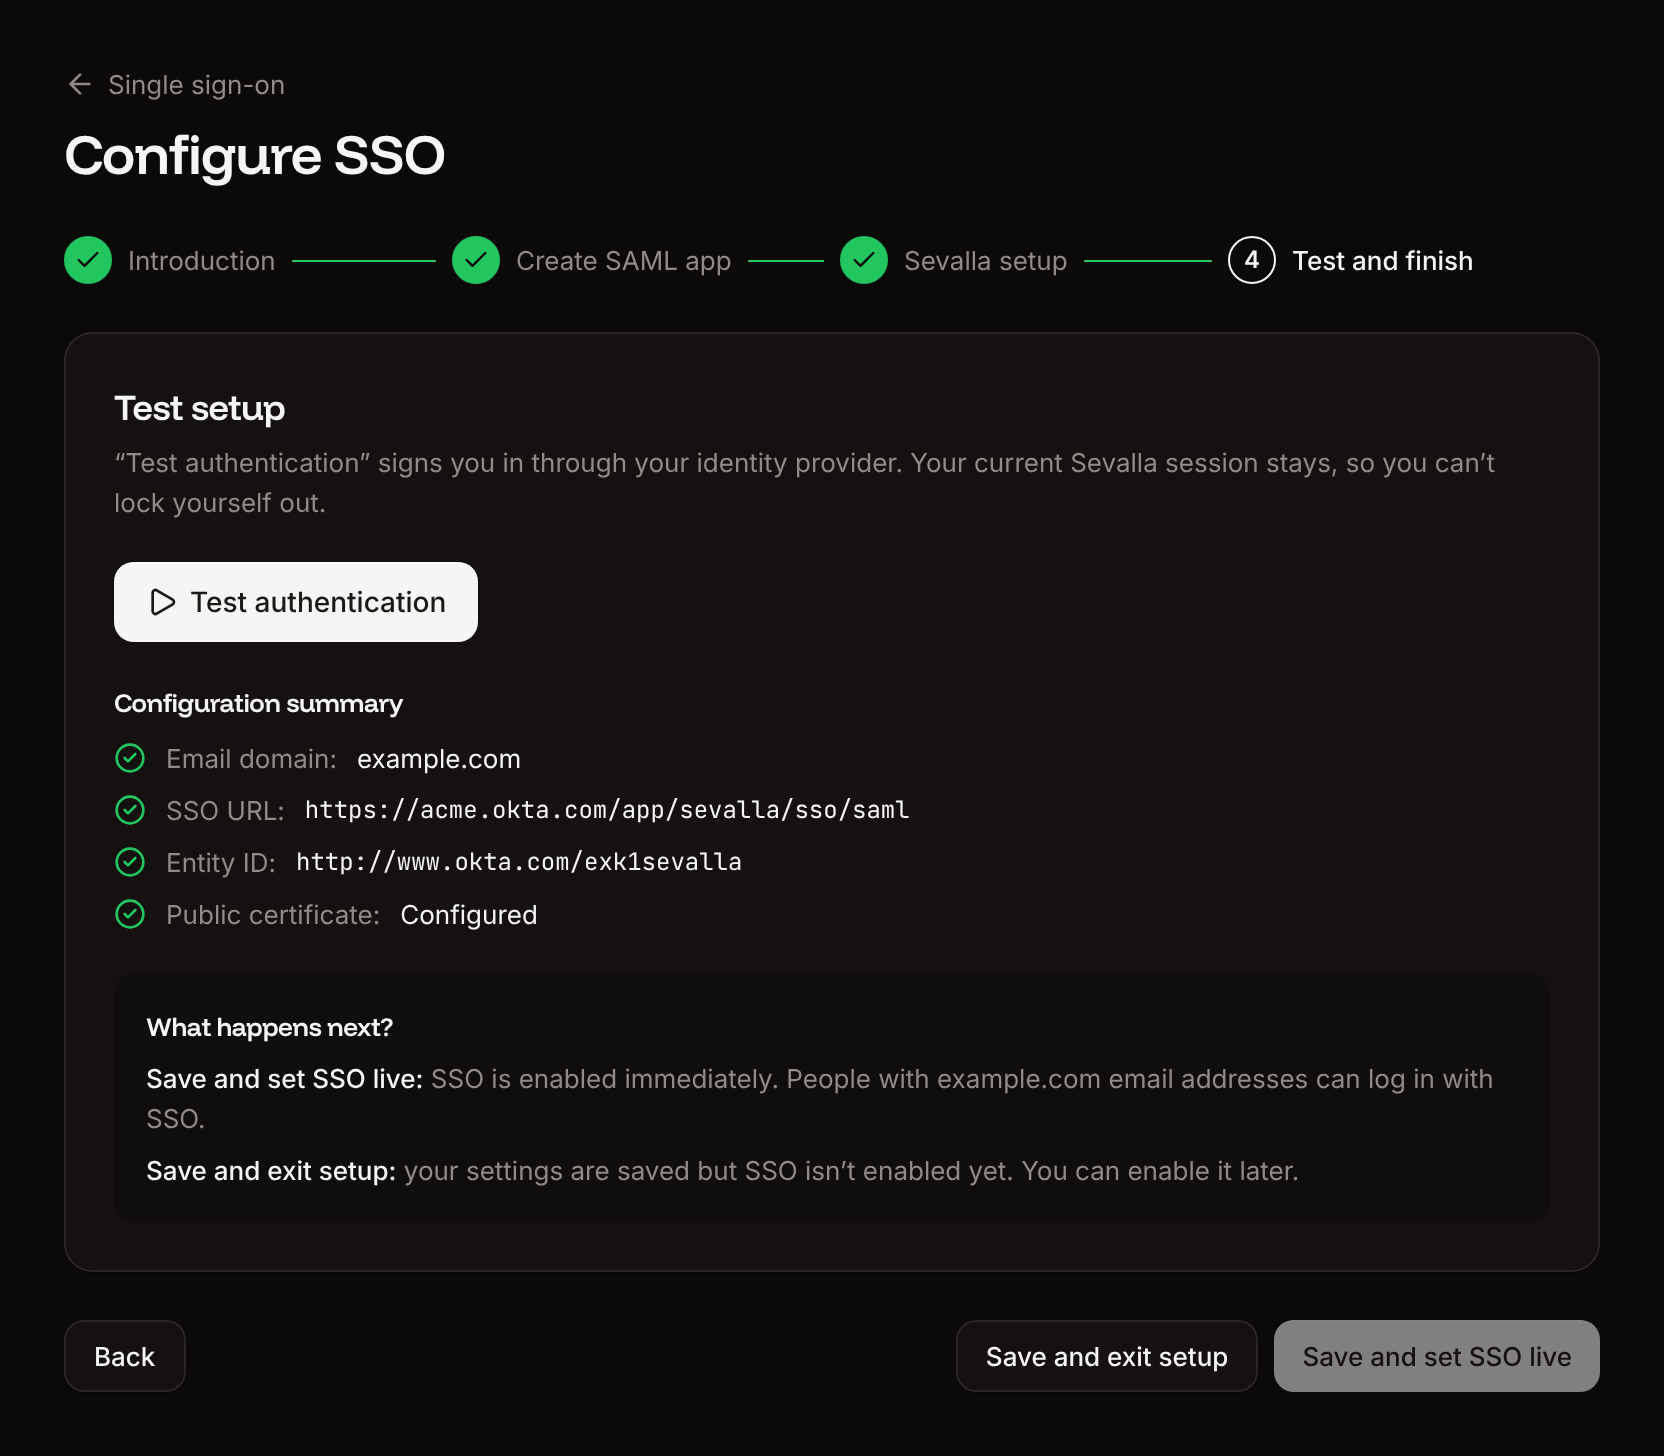
Sevalla only sets SSO live after a successful test. The test signs you in through your IdP; your current Sevalla session stays, so you can't lock yourself out.
On **Test and finish**, check the **Configuration summary**, then click **Test authentication**. Sign in to your IdP when it asks.
Sevalla brings you back to the wizard. `Authentication test was successful.` means it worked. `Authentication test failed.` comes with the reason; see [Troubleshoot SSO sign-in](#troubleshoot-sso-sign-in), fix the setting, and test again.
Click **Save and set SSO live**. To finish later instead, click **Save and exit setup**: your settings are saved, and SSO stays off until you set it live.
The **Single sign-on** card now shows **SSO is enabled** with your domain. People with an email address on the domain can sign in with **Sign in with SSO**, and can still sign in with their password unless you [make SSO mandatory](#make-sso-mandatory).
If you change the SSO URL, entity ID or certificate after a successful test, the wizard asks you to test again before you can set SSO live.
## Test and set SSO live
Sevalla only sets SSO live after a successful test. The test signs you in through your IdP; your current Sevalla session stays, so you can't lock yourself out.
On **Test and finish**, check the **Configuration summary**, then click **Test authentication**. Sign in to your IdP when it asks.
Sevalla brings you back to the wizard. `Authentication test was successful.` means it worked. `Authentication test failed.` comes with the reason; see [Troubleshoot SSO sign-in](#troubleshoot-sso-sign-in), fix the setting, and test again.
Click **Save and set SSO live**. To finish later instead, click **Save and exit setup**: your settings are saved, and SSO stays off until you set it live.
The **Single sign-on** card now shows **SSO is enabled** with your domain. People with an email address on the domain can sign in with **Sign in with SSO**, and can still sign in with their password unless you [make SSO mandatory](#make-sso-mandatory).
If you change the SSO URL, entity ID or certificate after a successful test, the wizard asks you to test again before you can set SSO live.
 ## Update the SSO configuration
To renew the IdP certificate or change any other value, click **Change** on the **Single sign-on** card. The wizard opens with the current values. Make your changes, run **Test authentication**, then click **Save and set changes live**. Until you do, the live configuration keeps working.
## Make SSO mandatory
Mandatory single sign-on requires everyone in the company to authenticate through your IdP, except the people on the [exceptions list](#add-or-remove-exceptions).
On the **Mandatory single sign-on** card, click **Enable**.
If SSO is already live and some people in the company don't use an email address on your SSO domain and aren't exceptions, the dialog shows **People will get locked out** with how many. Change their email address to one on the domain, add them as exceptions, or remove them from the company.
Leave the option to add the company owner to exceptions selected (it's labeled with the owner's name and selected by default), so the owner can still sign in with a password if your IdP has a problem.
Click **Enable mandatory SSO**. The card shows **Enabled: SSO only**.
With mandatory SSO, people can still sign in to their Sevalla account with a password, and their other companies work as before. When they open this company, Sevalla shows **Authentication required**; clicking **Continue** sends them through the IdP and back. A person who can't authenticate through the IdP can't access the company.
Mandatory SSO only applies while SSO is enabled. You can turn it on before SSO goes live, and it applies from the moment you set SSO live. To turn it off, click **Disable** on the card, then **Disable mandatory SSO**.
## Add or remove exceptions
Exceptions are people who can sign in with their password even when SSO is mandatory, for example contractors without an email address on your domain.
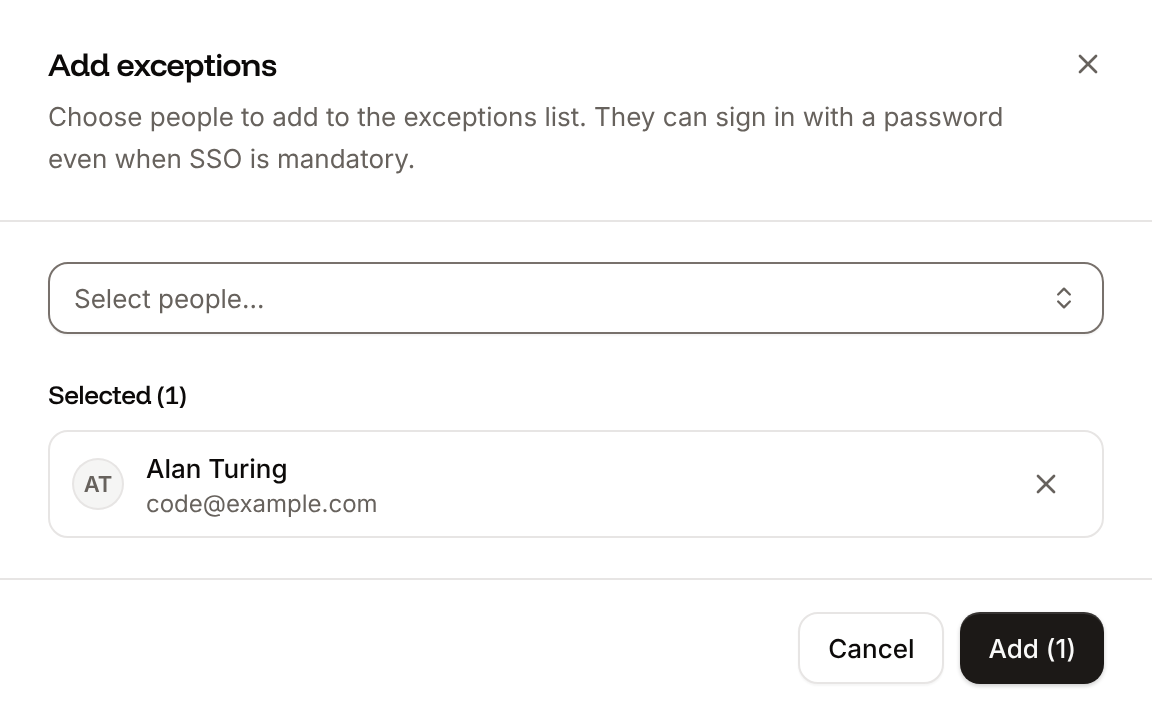
* **Add exceptions**: on the **Exceptions** card, click **Add exception**. In **Select people…**, pick one or more people from the company, then click **Add**.
* **Remove an exception**: click the trash icon next to the person, then click **Remove exception**. From then on, they can only access the company through your IdP.
Keep at least one person on the list, such as the company owner. When you remove the last exception, the dialog warns you: if your IdP fails and nobody is an exception, nobody can access the company.
## Update the SSO configuration
To renew the IdP certificate or change any other value, click **Change** on the **Single sign-on** card. The wizard opens with the current values. Make your changes, run **Test authentication**, then click **Save and set changes live**. Until you do, the live configuration keeps working.
## Make SSO mandatory
Mandatory single sign-on requires everyone in the company to authenticate through your IdP, except the people on the [exceptions list](#add-or-remove-exceptions).
On the **Mandatory single sign-on** card, click **Enable**.
If SSO is already live and some people in the company don't use an email address on your SSO domain and aren't exceptions, the dialog shows **People will get locked out** with how many. Change their email address to one on the domain, add them as exceptions, or remove them from the company.
Leave the option to add the company owner to exceptions selected (it's labeled with the owner's name and selected by default), so the owner can still sign in with a password if your IdP has a problem.
Click **Enable mandatory SSO**. The card shows **Enabled: SSO only**.
With mandatory SSO, people can still sign in to their Sevalla account with a password, and their other companies work as before. When they open this company, Sevalla shows **Authentication required**; clicking **Continue** sends them through the IdP and back. A person who can't authenticate through the IdP can't access the company.
Mandatory SSO only applies while SSO is enabled. You can turn it on before SSO goes live, and it applies from the moment you set SSO live. To turn it off, click **Disable** on the card, then **Disable mandatory SSO**.
## Add or remove exceptions
Exceptions are people who can sign in with their password even when SSO is mandatory, for example contractors without an email address on your domain.
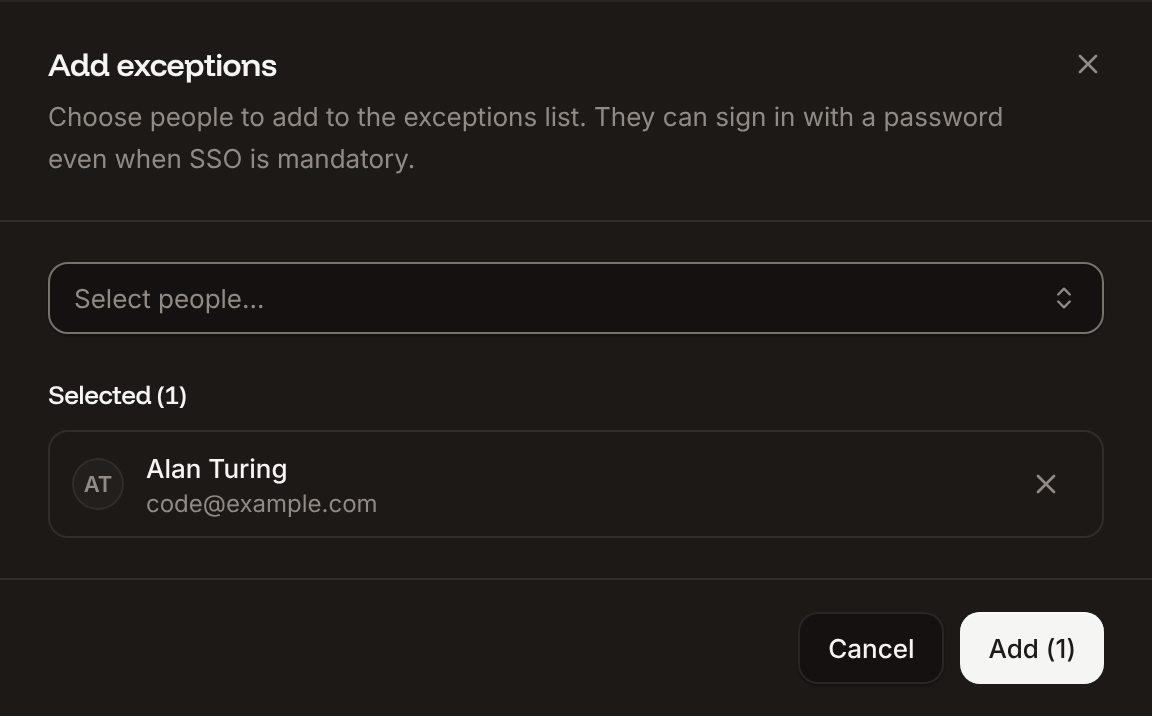
* **Add exceptions**: on the **Exceptions** card, click **Add exception**. In **Select people…**, pick one or more people from the company, then click **Add**.
* **Remove an exception**: click the trash icon next to the person, then click **Remove exception**. From then on, they can only access the company through your IdP.
Keep at least one person on the list, such as the company owner. When you remove the last exception, the dialog warns you: if your IdP fails and nobody is an exception, nobody can access the company.
 ## Turn on just-in-time provisioning
Just-in-time (JIT) provisioning lets anyone your IdP allows join the company the first time they sign in with SSO, without an invitation. Their email address must be on your SSO domain. They join with the default role.
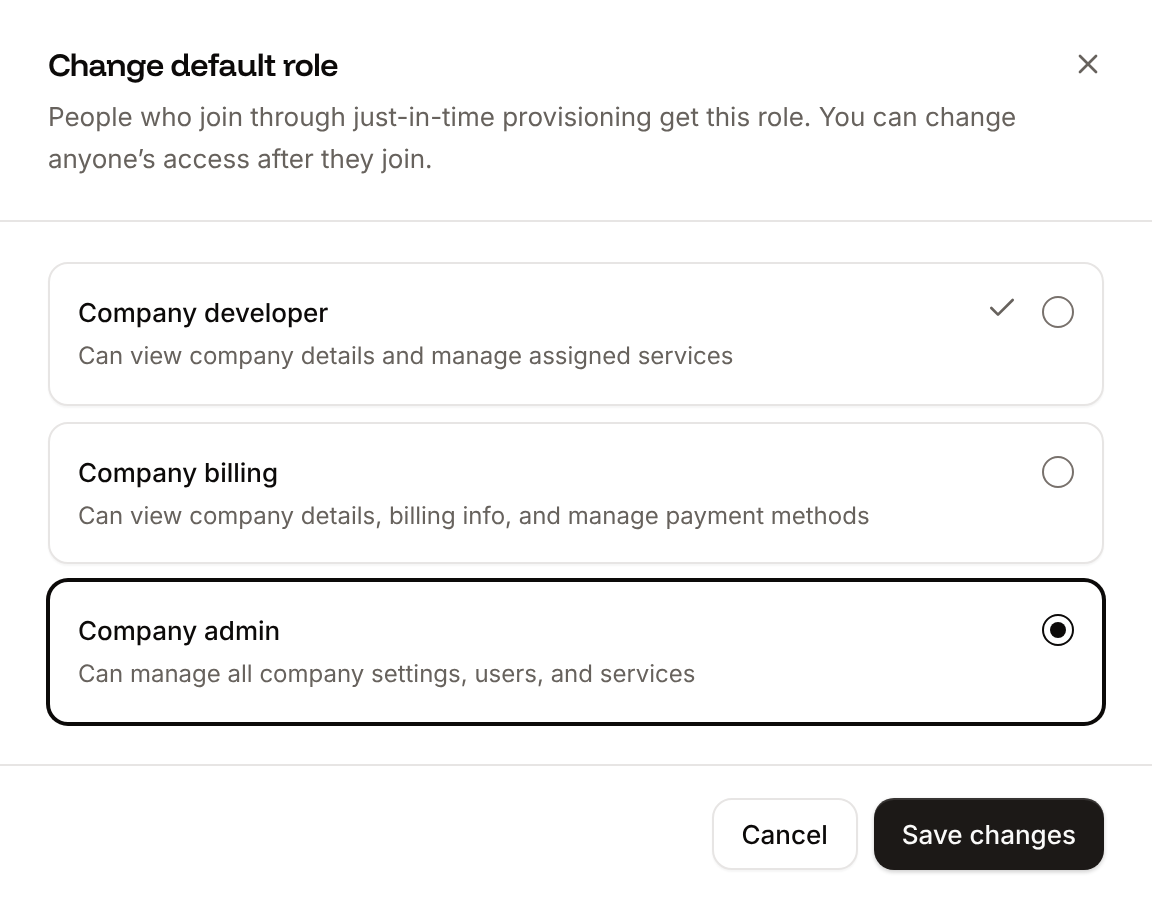
On the **Just-in-time provisioning** card, click **Change default role**. Pick **Company developer** (the default), **Company billing** or **Company admin**, then click **Save changes**. See [Users and roles](/company/users-and-roles#roles) for what each role can do.
On the same card, click **Enable**, then click **Enable JIT**. The card shows **Enabled** and the default role.
When JIT is on and SSO is enabled:
* **New people** click **Sign in with SSO** and enter their work email. Sevalla asks them to agree to the Terms of Service and Privacy Policy, then sends them to the IdP. Sevalla creates their account with the name the IdP sends.
* **People who already have a Sevalla account** with an email address on the domain join the company with the default role when they sign in with SSO.
You can change anyone's access after they join on the [User management](/company/users-and-roles#update-user-access) page. To turn JIT off, click **Disable** on the card, then **Disable JIT**. Nobody is removed; new people need an invitation again.
## Turn on just-in-time provisioning
Just-in-time (JIT) provisioning lets anyone your IdP allows join the company the first time they sign in with SSO, without an invitation. Their email address must be on your SSO domain. They join with the default role.
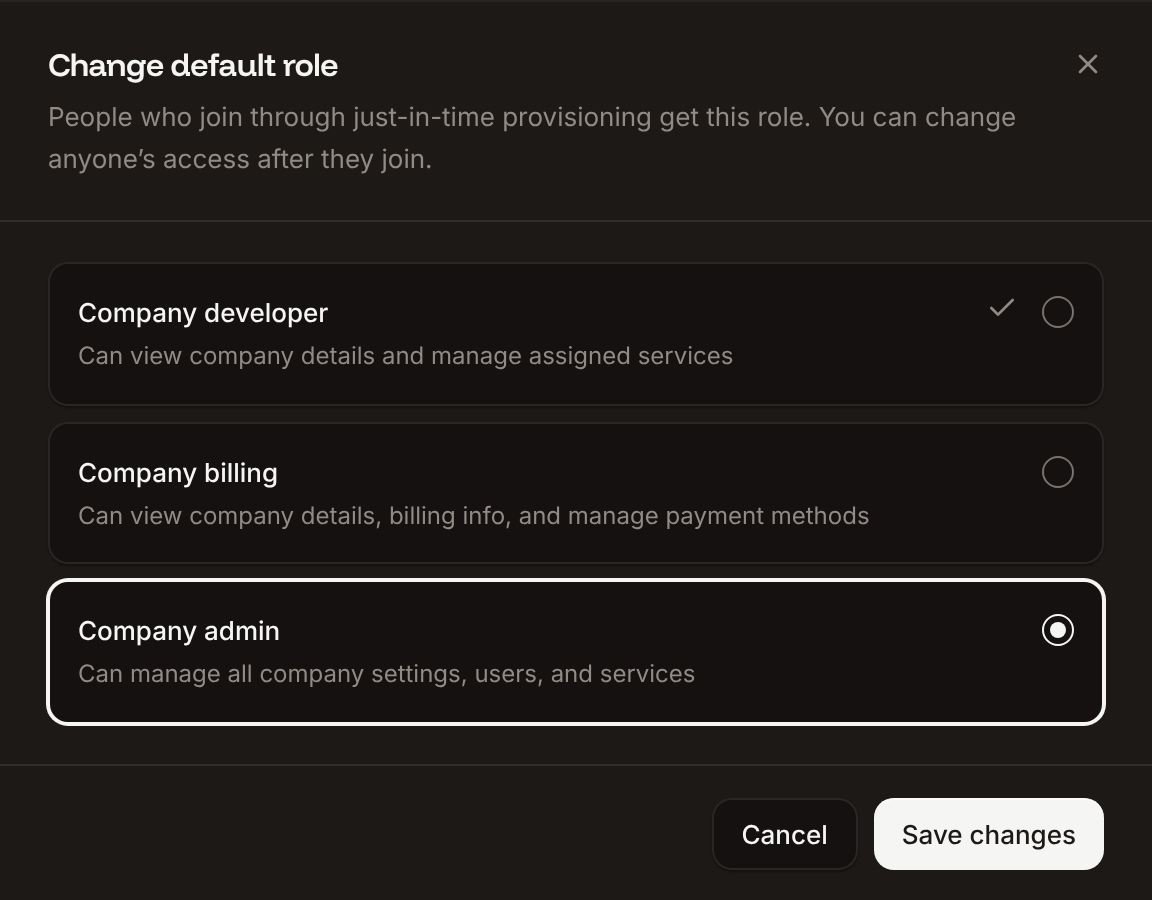
On the **Just-in-time provisioning** card, click **Change default role**. Pick **Company developer** (the default), **Company billing** or **Company admin**, then click **Save changes**. See [Users and roles](/company/users-and-roles#roles) for what each role can do.
On the same card, click **Enable**, then click **Enable JIT**. The card shows **Enabled** and the default role.
When JIT is on and SSO is enabled:
* **New people** click **Sign in with SSO** and enter their work email. Sevalla asks them to agree to the Terms of Service and Privacy Policy, then sends them to the IdP. Sevalla creates their account with the name the IdP sends.
* **People who already have a Sevalla account** with an email address on the domain join the company with the default role when they sign in with SSO.
You can change anyone's access after they join on the [User management](/company/users-and-roles#update-user-access) page. To turn JIT off, click **Disable** on the card, then **Disable JIT**. Nobody is removed; new people need an invitation again.
 ## Remove access
To take someone's access away completely, remove them in both places:
* **In Sevalla**: [remove them from the company](/company/users-and-roles#remove-a-user-from-the-company). If JIT is on and your IdP still allows them, they can sign in with SSO and join again.
* **In your IdP**: unassign them from the Sevalla app. If SSO isn't mandatory, or they're an exception, they can still sign in with their Sevalla password.
## Disable SSO
On the **Single sign-on** card, click **Disable**.
If some people have never set a Sevalla password (for example, they joined through JIT), the dialog says how many. Select **Send password reset email to users without a password** to email them a link to create one.
Click **Disable SSO**.
From then on, everyone signs in with their email address, password and [two-factor code](/account/sign-in#two-factor-authentication). Mandatory SSO no longer applies, and an unfinished configuration change is discarded. Sevalla keeps the domain and the IdP details, so you can set SSO live again later. People without a password can also create one with **Forgot your password?** on the sign-in page.
## Troubleshoot SSO sign-in
| What you see | Cause | Fix |
| - | - | - |
| `SAML configuration not found for email domain.` after entering your work email | SSO isn't live for that email domain, or the domain isn't verified. | Sign in with your password, or ask an owner or admin to set SSO live. |
| `Can't find user with this email` | There's no Sevalla account for that email and JIT is off. | Ask an owner or admin to [invite you](/company/users-and-roles#invite-users), or to turn on JIT. |
| `No user was found. Just-in-time provisioning may be turned off.` | You have a Sevalla account but no access to the company, and JIT is off. | Ask an owner or admin to invite you, or to turn on JIT. |
| `email_mismatch`, or a message that the SAML response email doesn't match | The IdP signed in a different account than the email you entered, often because you're already signed in to the IdP as someone else. | Sign out of your IdP, or use a private browser window, and try again. |
| `domain_mismatch`, or `Your email domain doesn’t match the domain set up for SSO.` | The email address the IdP sent isn't on the SSO domain. | In your IdP, map `email` (and the Name ID) to the person's address on your domain. |
| `validation_failed` during the test, or `Single sign-on didn’t work. Try again.` | Sevalla couldn't validate the IdP's response. | Check that the certificate in Sevalla is the IdP's current signing certificate, the **Entity ID** in Sevalla matches the IdP's issuer, the IdP uses Sevalla's **SSO/ACS URL** and **Entity ID**, and the IdP signs the response or the assertion. Start sign-in from Sevalla, not from the IdP's dashboard. |
## FAQ
Signing in with a Git provider uses your personal Git account, which you connect yourself on the [My account](/account/overview#connect-git-sign-in) page. SAML SSO uses your company's identity provider: the company decides who can sign in, can make SSO mandatory, and can add people automatically with JIT.
Mandatory SSO applies to one company, not to your Sevalla account. Your password still signs you in to your account and to your other companies. The company with mandatory SSO asks you to authenticate through its IdP before it opens, unless you're on its exceptions list.
No. Each company has one SSO domain. People with addresses on other domains can be added as [exceptions](#add-or-remove-exceptions) and sign in with a password.
This documentation is built and hosted on [Mintlify](https://mintlify.com), a developer documentation platform.
## Remove access
To take someone's access away completely, remove them in both places:
* **In Sevalla**: [remove them from the company](/company/users-and-roles#remove-a-user-from-the-company). If JIT is on and your IdP still allows them, they can sign in with SSO and join again.
* **In your IdP**: unassign them from the Sevalla app. If SSO isn't mandatory, or they're an exception, they can still sign in with their Sevalla password.
## Disable SSO
On the **Single sign-on** card, click **Disable**.
If some people have never set a Sevalla password (for example, they joined through JIT), the dialog says how many. Select **Send password reset email to users without a password** to email them a link to create one.
Click **Disable SSO**.
From then on, everyone signs in with their email address, password and [two-factor code](/account/sign-in#two-factor-authentication). Mandatory SSO no longer applies, and an unfinished configuration change is discarded. Sevalla keeps the domain and the IdP details, so you can set SSO live again later. People without a password can also create one with **Forgot your password?** on the sign-in page.
## Troubleshoot SSO sign-in
| What you see | Cause | Fix |
| - | - | - |
| `SAML configuration not found for email domain.` after entering your work email | SSO isn't live for that email domain, or the domain isn't verified. | Sign in with your password, or ask an owner or admin to set SSO live. |
| `Can't find user with this email` | There's no Sevalla account for that email and JIT is off. | Ask an owner or admin to [invite you](/company/users-and-roles#invite-users), or to turn on JIT. |
| `No user was found. Just-in-time provisioning may be turned off.` | You have a Sevalla account but no access to the company, and JIT is off. | Ask an owner or admin to invite you, or to turn on JIT. |
| `email_mismatch`, or a message that the SAML response email doesn't match | The IdP signed in a different account than the email you entered, often because you're already signed in to the IdP as someone else. | Sign out of your IdP, or use a private browser window, and try again. |
| `domain_mismatch`, or `Your email domain doesn’t match the domain set up for SSO.` | The email address the IdP sent isn't on the SSO domain. | In your IdP, map `email` (and the Name ID) to the person's address on your domain. |
| `validation_failed` during the test, or `Single sign-on didn’t work. Try again.` | Sevalla couldn't validate the IdP's response. | Check that the certificate in Sevalla is the IdP's current signing certificate, the **Entity ID** in Sevalla matches the IdP's issuer, the IdP uses Sevalla's **SSO/ACS URL** and **Entity ID**, and the IdP signs the response or the assertion. Start sign-in from Sevalla, not from the IdP's dashboard. |
## FAQ
Signing in with a Git provider uses your personal Git account, which you connect yourself on the [My account](/account/overview#connect-git-sign-in) page. SAML SSO uses your company's identity provider: the company decides who can sign in, can make SSO mandatory, and can add people automatically with JIT.
Mandatory SSO applies to one company, not to your Sevalla account. Your password still signs you in to your account and to your other companies. The company with mandatory SSO asks you to authenticate through its IdP before it opens, unless you're on its exceptions list.
No. Each company has one SSO domain. People with addresses on other domains can be added as [exceptions](#add-or-remove-exceptions) and sign in with a password.
This documentation is built and hosted on [Mintlify](https://mintlify.com), a developer documentation platform.