> ## Documentation Index
> Fetch the complete documentation index at: https://docs.sevalla.com/llms.txt
> Use this file to discover all available pages before exploring further.
> ## Agent Instructions
> These are the docs for Sevalla, a platform for deploying applications, databases, static sites, object storage and load balancers. The dashboard is at https://app.sevalla.com.
> Bold text in steps is an exact dashboard label.
> To act on a Sevalla account, prefer the Sevalla MCP server (https://mcp.sevalla.com/mcp, see https://docs.sevalla.com/ai-agents/overview.md), then the Sevalla CLI (https://docs.sevalla.com/developer-tools/cli.md), then the REST API (https://api-docs.sevalla.com, OpenAPI spec at https://api.sevalla.com/v3/openapi.json).
> Every page index is at https://docs.sevalla.com/llms.txt.
# Migrate from Heroku
> Move a Heroku app to Sevalla: how dynos, the Procfile, add-ons, config vars, release phase, review apps and Scheduler map to Sevalla, then copy the data and move the domains.
A Heroku app moves to Sevalla as an application with one process per Procfile entry, Sevalla databases in place of its add-ons, and environment variables in place of its config vars. You recreate the setup while the Heroku app keeps running, copy the data during a short maintenance window, then point the domains at Sevalla.
## How Heroku maps to Sevalla
| Heroku | Sevalla | Notes |
| - | - | - |
| App | [Application](/applications/overview) | Built from a Git repository or a [Docker image](/applications/docker-images) |
| Dyno | Instance of a [process](/applications/processes) | Each process runs one or more instances |
| `web` process type | Web process | Created with the application. Listens on `PORT`, `8080` by default |
| `worker` and other long-running process types | Background worker | One process per Procfile entry |
| Release phase (`release`) | [Job](/applications/processes#jobs) with the start policy **Before deployment** | Runs after the build, before the rollout. If it fails, the deployment fails and the previous version keeps running |
| Heroku Scheduler, clock processes | [Cron job](/applications/processes#cron-jobs) | Any cron schedule, in UTC unless you set a time zone |
| One-off dyno (`heroku run`) | [Web terminal](/applications/web-terminal) | A shell in a running instance of the web process or a background worker |
| Dyno types (Eco, Basic, Standard, Performance) | [Process sizes](/applications/scaling#instance-sizes) | H1, S1 to S5, C1 to C4 and M1 to M5, set per process |
| `heroku ps:scale`, dyno autoscaling | [Instances and horizontal autoscaling](/applications/scaling) | Set per web process and background worker |
| Eco dynos sleeping | [Hibernation](/applications/scaling#hibernation) | |
| Config vars | [Environment variables](/applications/environment-variables) | Available during runtime, build time or both |
| Buildpacks and stacks | [Build strategies](/applications/builds/overview) | Nixpacks (default), Buildpacks with `heroku/builder:24` or `heroku/builder:22`, Railpack or Dockerfile |
| GitHub integration, automatic deploys | [Automatic deployments](/applications/deployments#deploy-automatically-on-push) | From GitHub, GitLab or Bitbucket |
| Pipelines and promotion | [Pipelines](/pipelines/overview) | Stages of applications, promoted from one to the next |
| Review apps | [Preview apps](/pipelines/preview-apps) | Created for pull requests in a pipeline |
| Heroku Postgres | [PostgreSQL database](/databases/overview) | |
| Heroku Key-Value Store (Redis) | Redis or Valkey database | |
| Add-on attachment (`DATABASE_URL`, `REDIS_URL`) | [Internal connection](/databases/connect#connect-an-application) | Adds the connection details as environment variables |
| Bucketeer and other S3 add-ons | [Object storage](/object-storage/overview) | S3-compatible buckets |
| Custom domains, Automated Certificate Management | [Custom domains](/domains/overview) | Sevalla issues and renews the SSL certificates |
| `heroku maintenance:on` | [Maintenance mode](/applications/maintenance-mode) | |
| `heroku logs --tail` | [Logs](/applications/logs) | |
| Application metrics | [Analytics](/applications/analytics) | |
| Deploy hooks (notifications) | [Webhooks](/developer-tools/webhooks) | Subscribe to the `APP_DEPLOY` event |
| Teams and collaborators | [Users and roles](/company/users-and-roles) | |
| Platform API and CLI | [Sevalla API](/developer-tools/api) and [CLI](/developer-tools/cli) | |
## Before you begin
* The Heroku CLI, signed in to the account that owns the app.
* The app's code in a repository on GitHub, GitLab or Bitbucket. Sevalla doesn't deploy from Heroku's Git remote. See [Git providers](/git/overview).
* A Sevalla company with a payment method.
* The PostgreSQL client tools, at the same major version as Heroku Postgres or newer, if the app uses Heroku Postgres. See [Import and export PostgreSQL](/databases/import-export/postgresql#before-you-begin).
* A maintenance window: the Heroku app is in maintenance mode while you copy the data.
## Take stock of the Heroku app
Collect what you'll recreate, with your app's name in place of `storefront`:
```bash theme={null}
heroku apps:info --app storefront
heroku addons --app storefront
heroku domains --app storefront
heroku pg:info --app storefront
heroku config --shell --app storefront > heroku.env
```
* `apps:info` shows the region and the stack. Heroku's `us` region runs in northern Virginia and `eu` in Ireland; the closest Sevalla locations are **Ashburn, USA** and **London, UK**. See [Locations](/platform/locations).
* `addons` lists what becomes a database, a bucket or a third-party service. Services that connect through config vars, such as email or error tracking, keep working when you copy their variables.
* `pg:info` shows the PostgreSQL version (`PG Version`). Create the Sevalla database with the same version or a newer one.
* `heroku.env` holds every config var as `KEY=value`. It contains secrets: don't commit it.
* Keep your `Procfile` at hand: each line becomes a process.
## Create the databases
In the sidebar, click **Databases**, then click **Create database**. Under **Database**, choose **PostgreSQL** and a version at least as new as Heroku's. Enter `orders-db` as the **Display name**, choose the **Data center** the application will use and a **Size** with room for the data, then click **Create database**.
If the app uses Heroku Key-Value Store, create a second database the same way: choose **Redis**, enter `storefront-redis` as the **Display name**, and choose the same **Data center**. See [Create a database](/databases/create).
## Create the application
In the sidebar, click **Applications**, then click **Create** > **Application**. Under **Source**, click **Private repository**, then choose the **Git provider**, the **Repository** and the **Branch**. Under **Location**, choose the same **Data center** as the databases, choose a **Size**, and click **Create application**. The application opens on its **Overview** tab with the status **Not deployed yet**: creating an application doesn't deploy it. See [Create an application](/applications/create).
Sevalla builds with Nixpacks by default, which detects most languages without configuration. To build the way Heroku does, click the **Settings** tab, then click **Update build strategy** under **Build strategy**. Choose **Buildpacks**, set the **Pack builder** to `heroku/builder:24`, and click **Update build strategy**. See [Buildpacks](/applications/builds/buildpacks).
A web process on **H1** can't have custom domains. If you'll move a domain, choose a larger size, such as **S1**.
## Connect the databases
Click the **Networking** tab. Under **Connected services**, click **Add internal connection**. Choose `orders-db` as the **Service** and turn on **Add environment variables to the application**. Change the key `DB_URL` to `DATABASE_URL`, the name your code already reads, and click **Add internal connection**.
Add an internal connection to `storefront-redis` the same way. Its URL is already called `REDIS_URL`.
The PostgreSQL URL starts with `postgres://`, like Heroku's. The Redis URL starts with `redis://`, where Heroku Key-Value Store's starts with `rediss://` (TLS): if your code passes TLS options for it, such as `ssl_cert_reqs=None` with redis-py, remove them. See [Connect an application](/databases/connect#connect-an-application).
## Add the config vars
In `heroku.env`, delete `DATABASE_URL`, `REDIS_URL` and the other variables that Heroku add-ons set, such as `HEROKU_POSTGRESQL_*` or `REDIS_TLS_URL`: the internal connections replace them. Update any value that contains the Heroku domain, such as allowed hosts, to the application's `sevalla.app` domain under its name in the page header.
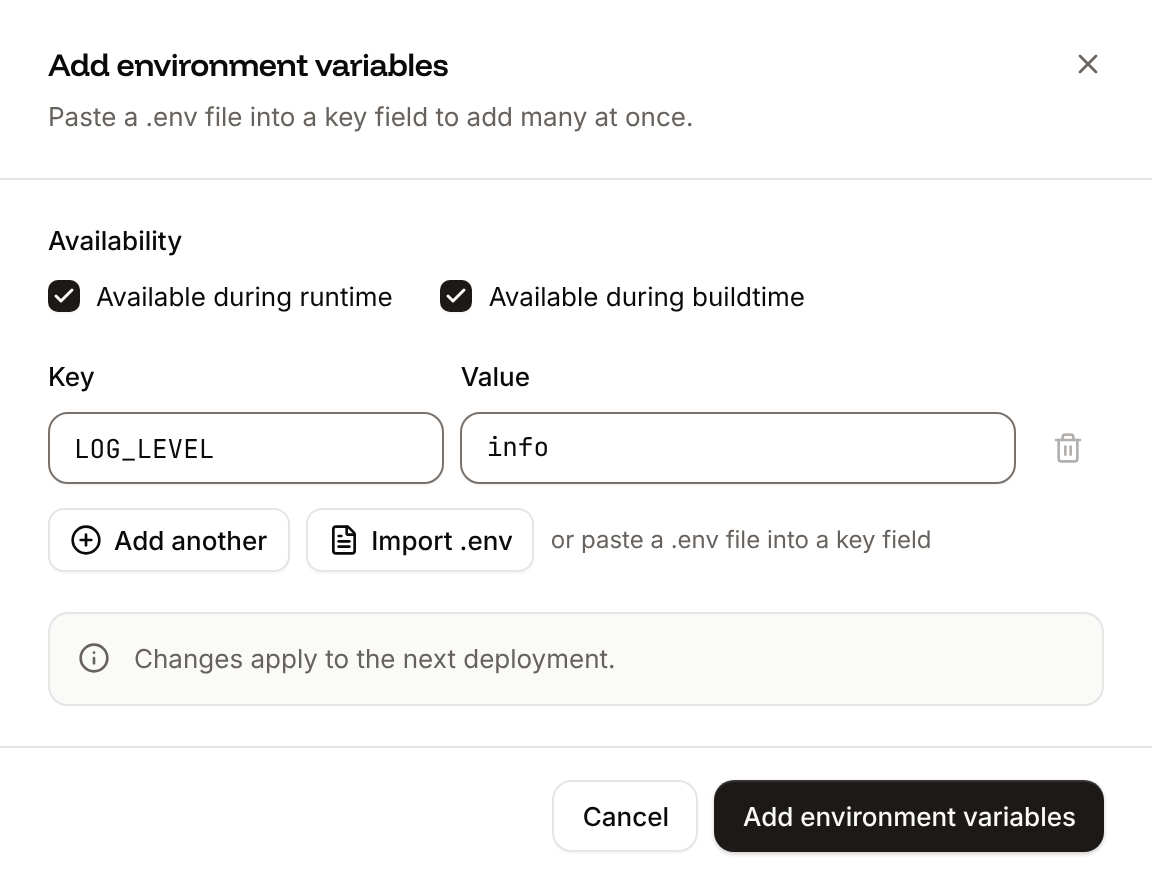
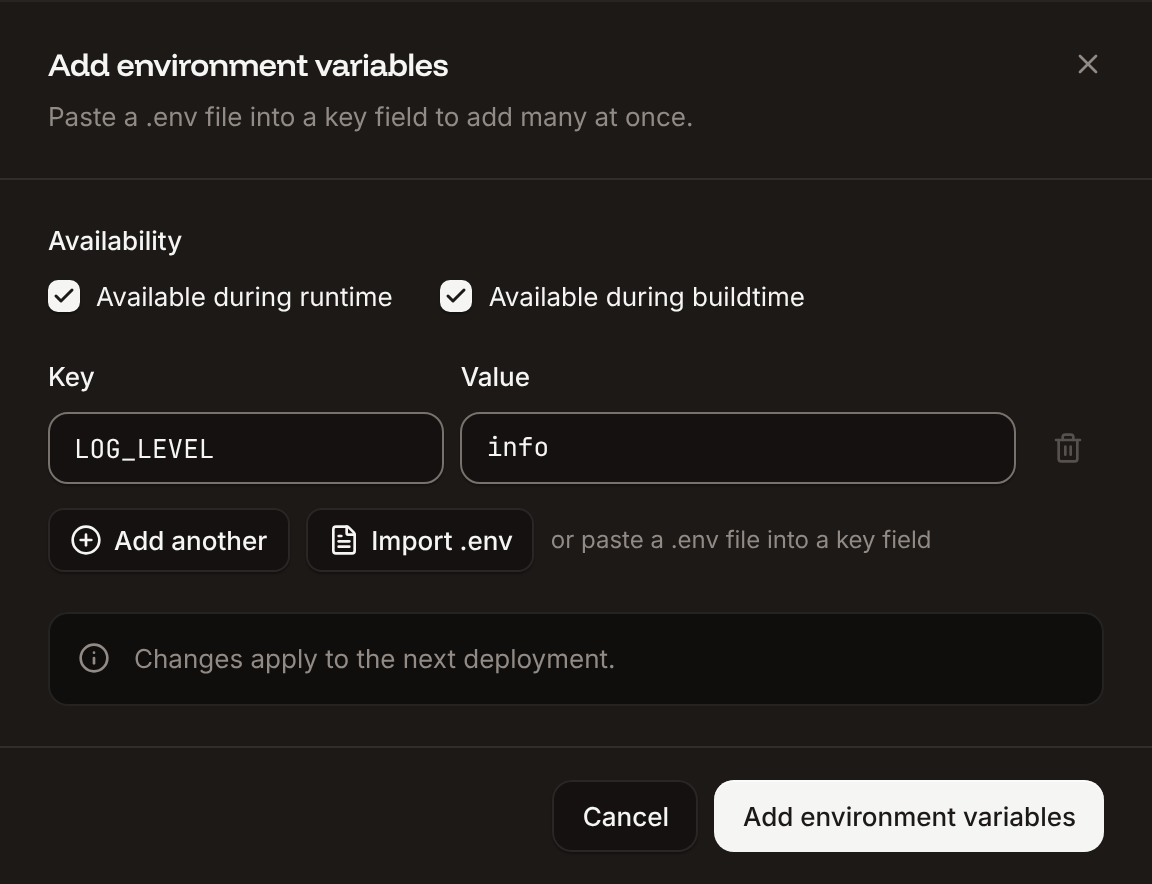
Click the **Environment variables** tab, then click **Add environment variables**. Click **Import .env** and choose `heroku.env`, or paste its contents into a key field. Keep **Available during runtime** and **Available during buildtime** selected, and click **Add environment variables**.
 Don't add `PORT`: Sevalla sets it to the web process's port. See [Environment variables](/applications/environment-variables).
## Recreate the Procfile processes
| Procfile entry | Sevalla process | What to set |
| - | - | - |
| `web: gunicorn storefront.wsgi` | The existing **Web** process | Nothing: Nixpacks and Buildpacks start the `web` command from the Procfile. To override it, set the process's **Custom start command**. |
| `worker: celery -A storefront worker` | A **Background worker** for each entry | The entry's command as the **Custom start command** |
| `release: python manage.py migrate` | A **Job** with the **Start policy** **Before deployment** | The entry's command as the **Custom start command** |
| A Heroku Scheduler job or a `clock` entry | A **Cron job** | The command as the **Custom start command**, and its **Schedule**, for example `*/10 * * * *` for every 10 minutes |
On the **Processes** tab, click **Create process**. Choose **Background worker**, **Cron job** or **Job**, enter a **Name** and the **Custom start command**, set the **Start policy** (jobs) or the **Schedule** (cron jobs), choose a **Resource**, and click **Create process**. Repeat for each entry.
Delete the `release` line from the `Procfile` and push the change. Nixpacks runs a `release` entry as a step of the build, not before each deployment; the job runs it at the right time instead.
Commands that use `$PORT` keep working: Sevalla sets `PORT` like Heroku does. See [Processes](/applications/processes).
## Copy the PostgreSQL data
Turn on maintenance mode, which answers visitors with Heroku's maintenance page, and stop the workers:
```bash theme={null}
heroku maintenance:on --app storefront
heroku ps:scale worker=0 --app storefront
```
```bash theme={null}
heroku pg:backups:capture --app storefront
heroku pg:backups:download --app storefront
```
The backup downloads as `latest.dump`, a custom-format archive.
In the sidebar, click **Databases**, then click `orders-db`. Click the **Networking** tab, click **Enable** under **External connection**, then click **Enable** in the dialog. Copy the **External hostname**, **External port** and password. See [Enable the external connection](/databases/connect#enable-the-external-connection).
Restore `latest.dump` with `pg_restore`, as in [Import a database](/databases/import-export/postgresql#import-a-database).
To rehearse, run these steps once without maintenance mode, deploy, and test on the `sevalla.app` domain. For the real cutover, empty the database first, for example with `pg_restore`'s `--clean --if-exists` options, so the restore doesn't collide with the rehearsal's tables.
## Copy the Redis data
Skip this when Redis holds only caches or jobs you can lose: the application refills it. Heroku Key-Value Store doesn't document an export, so copy the keys with `DUMP` and `RESTORE`:
Enable the external connection of the Sevalla Redis database, as for PostgreSQL, and copy its **External connection URL**.
Save this script, then run it with both URLs:
```python copy_redis.py theme={null}
import os
import redis
# Heroku Key-Value Store uses TLS with a self-signed certificate.
source = redis.from_url(os.environ["HEROKU_REDIS_URL"], ssl_cert_reqs=None)
target = redis.from_url(os.environ["SEVALLA_REDIS_URL"])
copied = 0
for key in source.scan_iter(count=1000):
data = source.dump(key)
if data is None: # the key expired during the copy
continue
ttl = source.pttl(key)
target.restore(key, max(ttl, 0), data, replace=True)
copied += 1
print(f"Copied {copied} keys")
```
```bash theme={null}
pip install redis
HEROKU_REDIS_URL="$(heroku config:get REDIS_URL --app storefront)" \
SEVALLA_REDIS_URL="redis://:@:/0" \
python copy_redis.py
```
The script copies database `0`, the one in both URLs, and keeps each key's expiry. If `RESTORE` fails with `DUMP payload version or checksum are wrong`, the Sevalla database runs an older version than Heroku's: create it with a newer version. See [Import and export Redis](/databases/import-export/redis).
## Deploy and verify
On the application's **Overview** tab, click **Deploy now** under **Recent deployments**, check the **Branch**, and click **Deploy**.
On the **Deployments** tab, wait for the status **Deployed**. The build log shows each job's result, such as `Migrate has been successful`.
Click the domain under the application's name and test the critical paths: sign-in, a write to the database, a background task. On the **Processes** tab, the web process and the background workers show **Running**.
To deploy every push to the branch automatically, click the **Settings** tab, then click **Update auto-deploy** in the **Auto-deploy** section. Turn on **Auto-deploy** and click **Update auto-deploy**. See [Deployments](/applications/deployments#deploy-automatically-on-push).
## Move the custom domains
On the application's **Domains** tab, click **Add custom domain**, enter the domain in **Domain name**, for example `shop.example.com`, and click **Add custom domain**.
Add the ownership and certificate records that Sevalla shows at your DNS provider. Heroku keeps serving the domain meanwhile. When the domain's status changes to **Pointing**, its certificate is ready. See [Verify the domain](/domains/overview#verify-the-domain).
Replace the record that points at Heroku (a `CNAME` to a `herokudns.com` target) with the pointing record that Sevalla shows. The status changes to **Active** when Sevalla sees it. See [Point the domain](/domains/overview#point-the-domain).
Add the custom domains to any setting that lists allowed hosts, such as Django's `ALLOWED_HOSTS`, then deploy.
## Shut down the Heroku app
When the domains are **Active** and traffic reaches Sevalla:
1. Disable the external connections you opened: on each database's **Networking** tab, click **Disable** under **External connection**, then click **Disable** in the dialog.
2. Keep `latest.dump` until you no longer need it.
3. Stop the Heroku app with `heroku ps:scale web=0 --app storefront`, and delete it with `heroku apps:destroy --app storefront` once you're sure. Deleting a Heroku app deletes its add-ons and their data.
To repeat the setup for staging and review apps, put the applications in a [pipeline](/pipelines/overview) and turn on [preview apps](/pipelines/preview-apps).
This documentation is built and hosted on [Mintlify](https://mintlify.com), a developer documentation platform.
Don't add `PORT`: Sevalla sets it to the web process's port. See [Environment variables](/applications/environment-variables).
## Recreate the Procfile processes
| Procfile entry | Sevalla process | What to set |
| - | - | - |
| `web: gunicorn storefront.wsgi` | The existing **Web** process | Nothing: Nixpacks and Buildpacks start the `web` command from the Procfile. To override it, set the process's **Custom start command**. |
| `worker: celery -A storefront worker` | A **Background worker** for each entry | The entry's command as the **Custom start command** |
| `release: python manage.py migrate` | A **Job** with the **Start policy** **Before deployment** | The entry's command as the **Custom start command** |
| A Heroku Scheduler job or a `clock` entry | A **Cron job** | The command as the **Custom start command**, and its **Schedule**, for example `*/10 * * * *` for every 10 minutes |
On the **Processes** tab, click **Create process**. Choose **Background worker**, **Cron job** or **Job**, enter a **Name** and the **Custom start command**, set the **Start policy** (jobs) or the **Schedule** (cron jobs), choose a **Resource**, and click **Create process**. Repeat for each entry.
Delete the `release` line from the `Procfile` and push the change. Nixpacks runs a `release` entry as a step of the build, not before each deployment; the job runs it at the right time instead.
Commands that use `$PORT` keep working: Sevalla sets `PORT` like Heroku does. See [Processes](/applications/processes).
## Copy the PostgreSQL data
Turn on maintenance mode, which answers visitors with Heroku's maintenance page, and stop the workers:
```bash theme={null}
heroku maintenance:on --app storefront
heroku ps:scale worker=0 --app storefront
```
```bash theme={null}
heroku pg:backups:capture --app storefront
heroku pg:backups:download --app storefront
```
The backup downloads as `latest.dump`, a custom-format archive.
In the sidebar, click **Databases**, then click `orders-db`. Click the **Networking** tab, click **Enable** under **External connection**, then click **Enable** in the dialog. Copy the **External hostname**, **External port** and password. See [Enable the external connection](/databases/connect#enable-the-external-connection).
Restore `latest.dump` with `pg_restore`, as in [Import a database](/databases/import-export/postgresql#import-a-database).
To rehearse, run these steps once without maintenance mode, deploy, and test on the `sevalla.app` domain. For the real cutover, empty the database first, for example with `pg_restore`'s `--clean --if-exists` options, so the restore doesn't collide with the rehearsal's tables.
## Copy the Redis data
Skip this when Redis holds only caches or jobs you can lose: the application refills it. Heroku Key-Value Store doesn't document an export, so copy the keys with `DUMP` and `RESTORE`:
Enable the external connection of the Sevalla Redis database, as for PostgreSQL, and copy its **External connection URL**.
Save this script, then run it with both URLs:
```python copy_redis.py theme={null}
import os
import redis
# Heroku Key-Value Store uses TLS with a self-signed certificate.
source = redis.from_url(os.environ["HEROKU_REDIS_URL"], ssl_cert_reqs=None)
target = redis.from_url(os.environ["SEVALLA_REDIS_URL"])
copied = 0
for key in source.scan_iter(count=1000):
data = source.dump(key)
if data is None: # the key expired during the copy
continue
ttl = source.pttl(key)
target.restore(key, max(ttl, 0), data, replace=True)
copied += 1
print(f"Copied {copied} keys")
```
```bash theme={null}
pip install redis
HEROKU_REDIS_URL="$(heroku config:get REDIS_URL --app storefront)" \
SEVALLA_REDIS_URL="redis://:@:/0" \
python copy_redis.py
```
The script copies database `0`, the one in both URLs, and keeps each key's expiry. If `RESTORE` fails with `DUMP payload version or checksum are wrong`, the Sevalla database runs an older version than Heroku's: create it with a newer version. See [Import and export Redis](/databases/import-export/redis).
## Deploy and verify
On the application's **Overview** tab, click **Deploy now** under **Recent deployments**, check the **Branch**, and click **Deploy**.
On the **Deployments** tab, wait for the status **Deployed**. The build log shows each job's result, such as `Migrate has been successful`.
Click the domain under the application's name and test the critical paths: sign-in, a write to the database, a background task. On the **Processes** tab, the web process and the background workers show **Running**.
To deploy every push to the branch automatically, click the **Settings** tab, then click **Update auto-deploy** in the **Auto-deploy** section. Turn on **Auto-deploy** and click **Update auto-deploy**. See [Deployments](/applications/deployments#deploy-automatically-on-push).
## Move the custom domains
On the application's **Domains** tab, click **Add custom domain**, enter the domain in **Domain name**, for example `shop.example.com`, and click **Add custom domain**.
Add the ownership and certificate records that Sevalla shows at your DNS provider. Heroku keeps serving the domain meanwhile. When the domain's status changes to **Pointing**, its certificate is ready. See [Verify the domain](/domains/overview#verify-the-domain).
Replace the record that points at Heroku (a `CNAME` to a `herokudns.com` target) with the pointing record that Sevalla shows. The status changes to **Active** when Sevalla sees it. See [Point the domain](/domains/overview#point-the-domain).
Add the custom domains to any setting that lists allowed hosts, such as Django's `ALLOWED_HOSTS`, then deploy.
## Shut down the Heroku app
When the domains are **Active** and traffic reaches Sevalla:
1. Disable the external connections you opened: on each database's **Networking** tab, click **Disable** under **External connection**, then click **Disable** in the dialog.
2. Keep `latest.dump` until you no longer need it.
3. Stop the Heroku app with `heroku ps:scale web=0 --app storefront`, and delete it with `heroku apps:destroy --app storefront` once you're sure. Deleting a Heroku app deletes its add-ons and their data.
To repeat the setup for staging and review apps, put the applications in a [pipeline](/pipelines/overview) and turn on [preview apps](/pipelines/preview-apps).
This documentation is built and hosted on [Mintlify](https://mintlify.com), a developer documentation platform.