Deploy your application
If automatic deployment is enabled, the application deploys every time a commit is made to the branch in the Git repository. You can enable or disable automatic deployments for private Git repositories in the application’s Settings. To manually deploy your application, click Deploy now, select the branch you want to deploy, and click Deploy. If you want to restart your application without rebuilding it, select Skip building (restart latest) and click Deploy.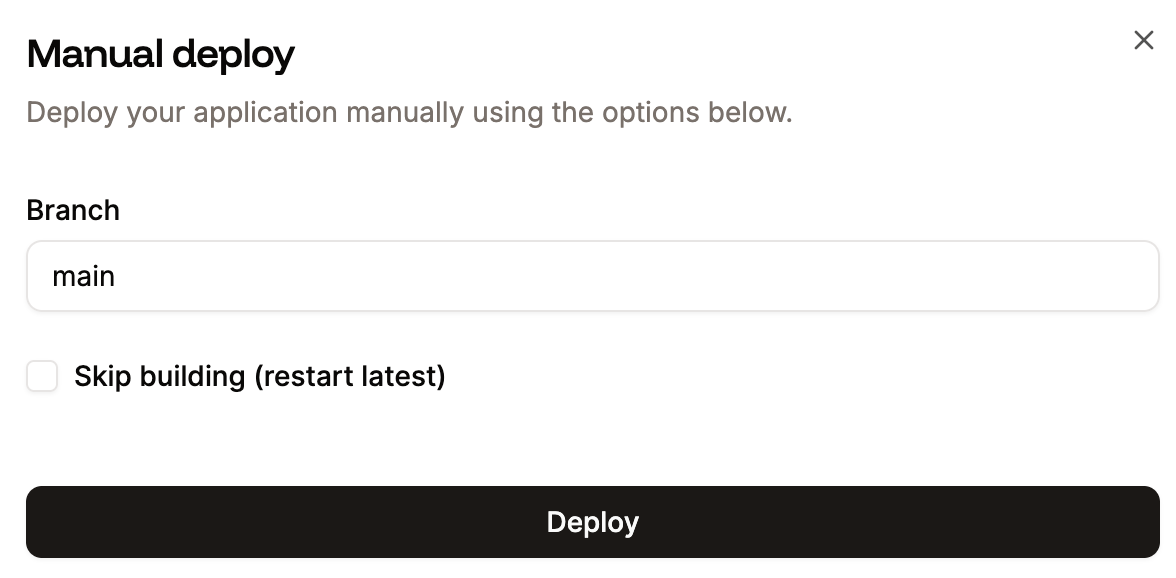
Manually deploy your application.
Zero downtime with health checks
If your application includes a health check and you have defined the health check path within the web process, there is zero downtime between deployments. When the application deploys or redeploys, or if the pod restarts, the old pods continue to run until the new pods are ready. You can enable a readiness probe to check if the process is ready to receive traffic; if this fails, the process won’t serve requests until it is healthy. You can also enable a liveliness probe to check if the process is still running correctly; if this fails, the process automatically restarts. Implementing health checks for production applications is strongly recommended to minimize downtime during deployments and ensure system reliability. Health checks continuously monitor the application’s status, ensuring it remains functional during updates and enabling workloads to be quickly rescheduled at any time, such as during maintenance or unexpected disruptions. This proactive approach helps maintain application stability and delivers a seamless user experience.Individual deployment details
If you click on any of the previous deployments, you’ll be brought to a dedicated page that shows the deployment log and details for that specific deployment. If the deployment fails, check the deployment log to determine where the process may have encountered an error.Deployment logs
When you deploy your application to Sevalla, the deployment log shows each step of the deployment and whether it is successful or not. For example, an application using Nixpacks shows the following steps in the deployment log:- Fetching source code from GitHub.
- Source code fetched successfully.
- Building docker image using Nixpacks.
- Docker image built successfully.
- Pushing Docker image to registry.
- Docker image pushed successfully.
- Starting rollout.
- App has been deployed successfully.
Deployment logs are stored for up to 30 days.
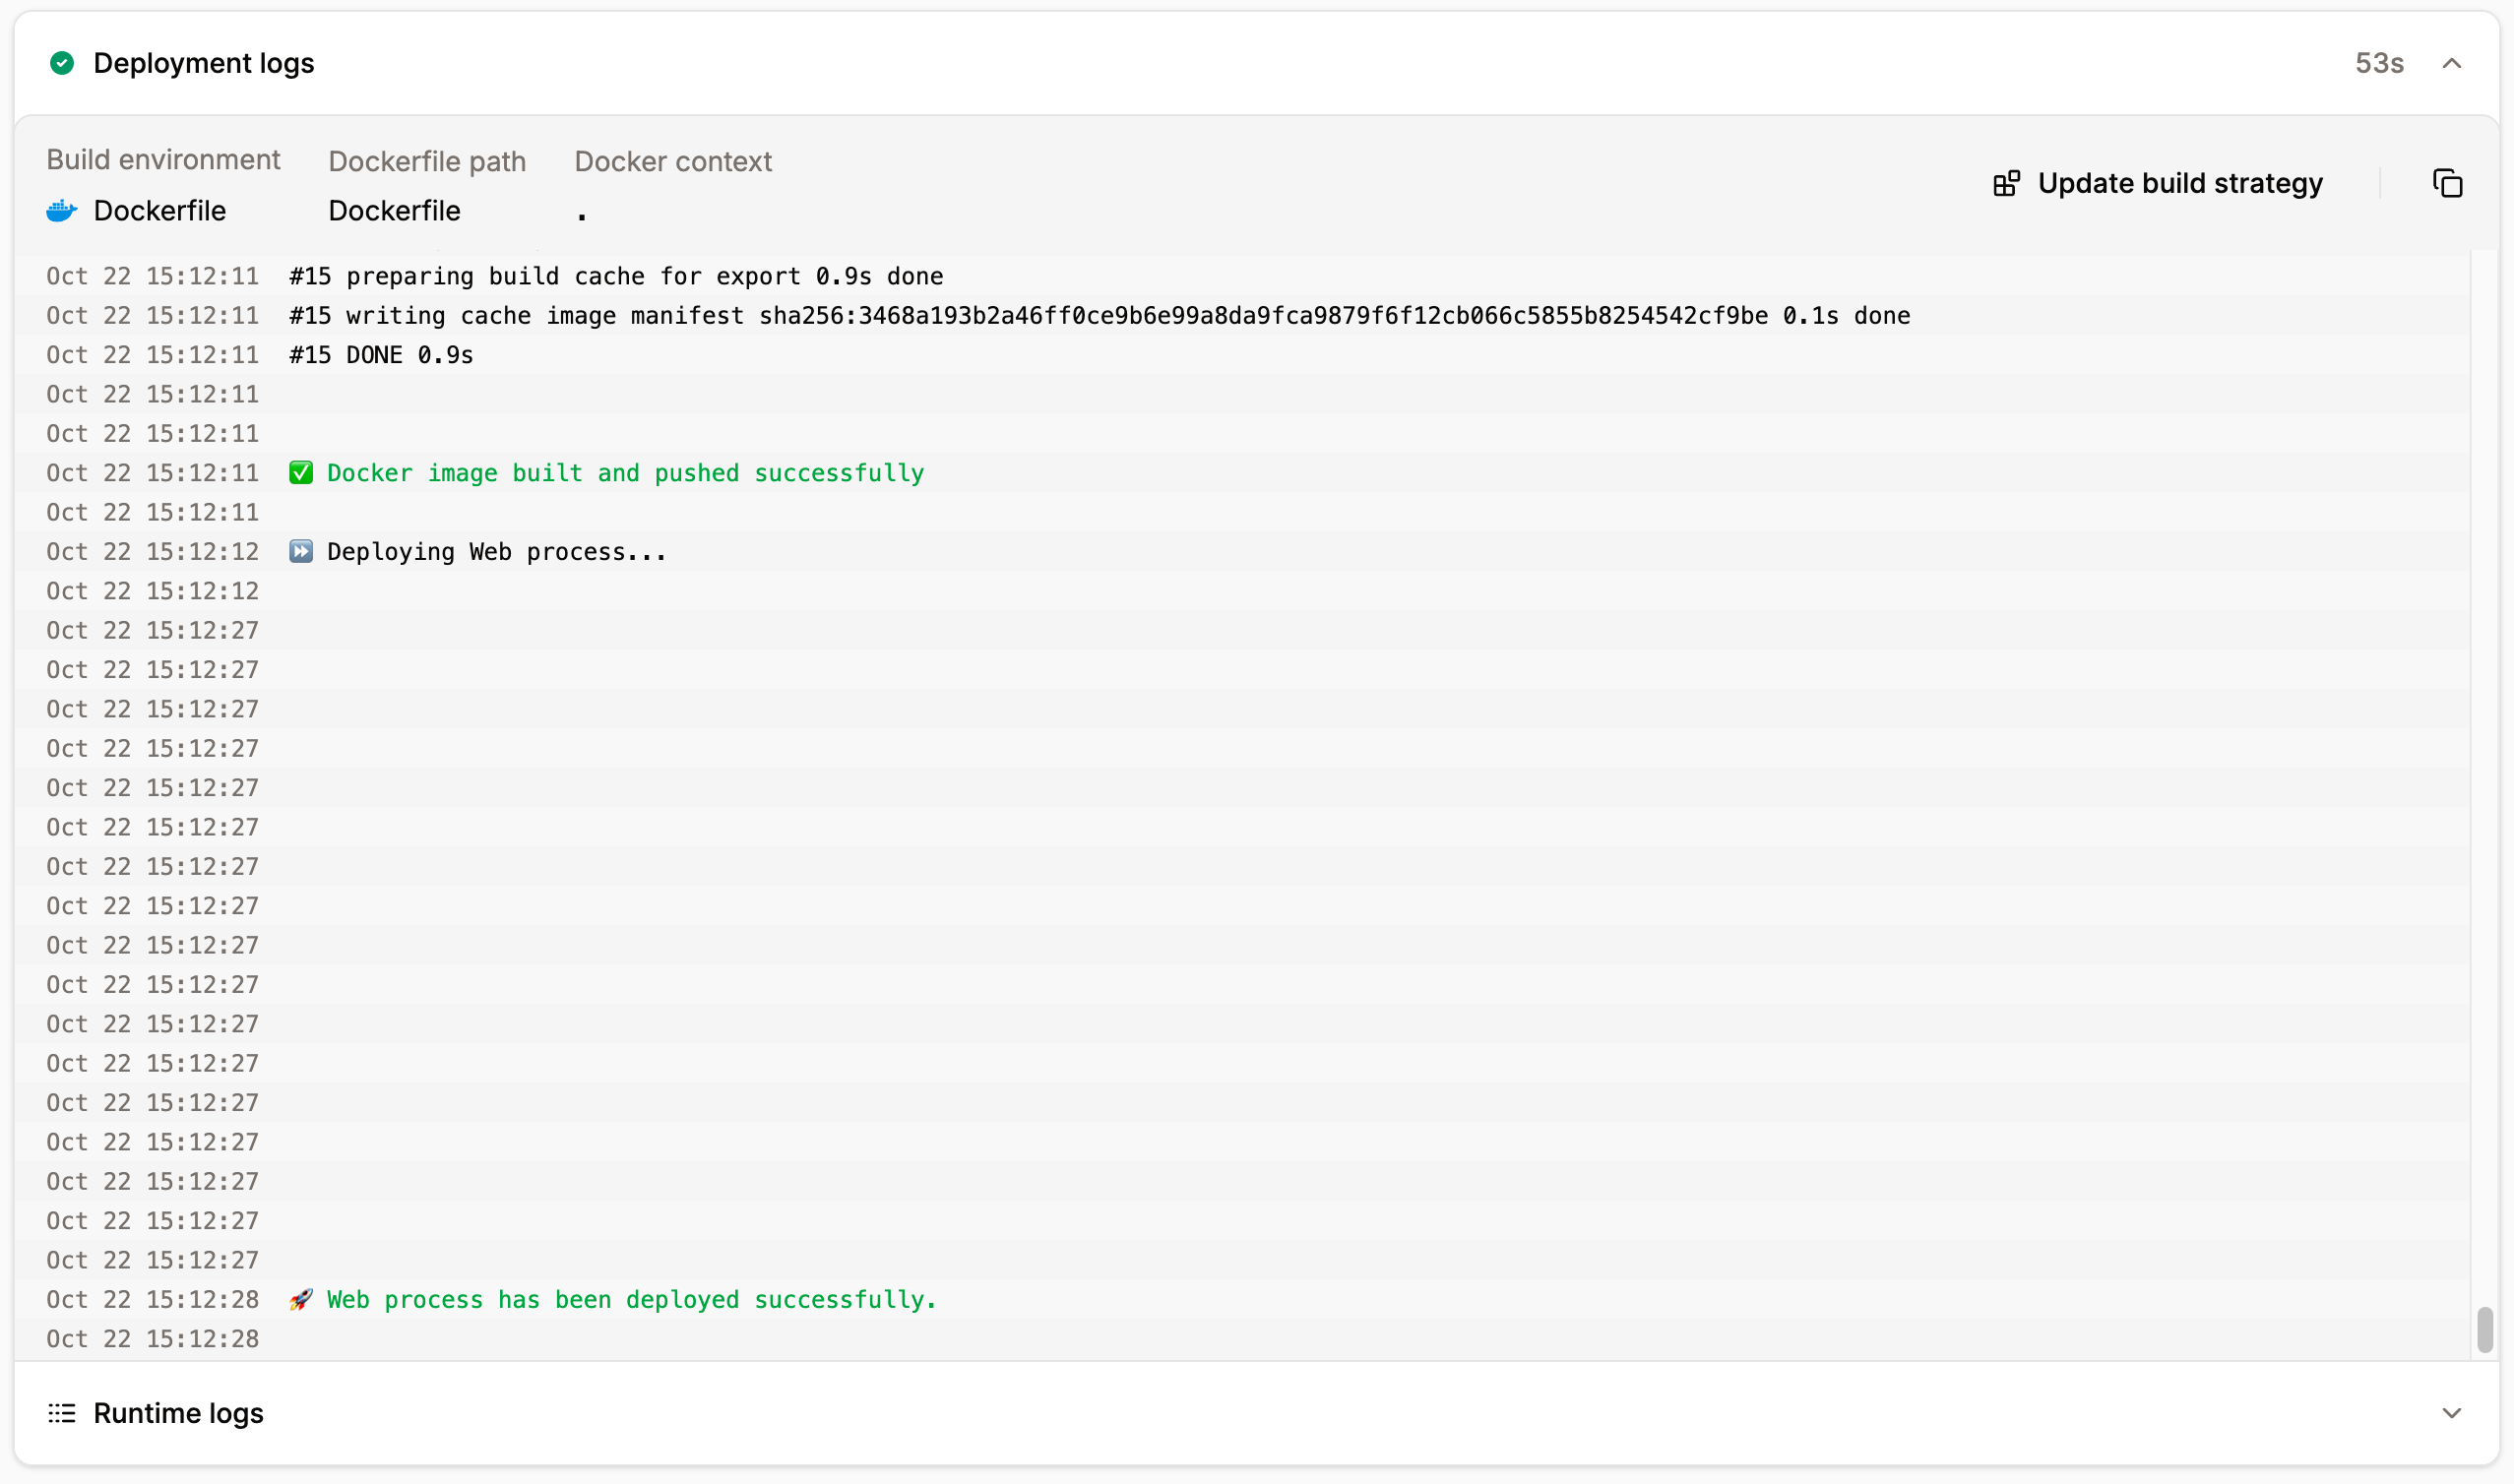
The application deployment log for an individual deployment.
Runtime logs
If the deployment is successful, the runtime logs are shown for the deployment. If the deployment is successful but the application fails to run, the runtime logs may show the underlying reason for this.Deployment details
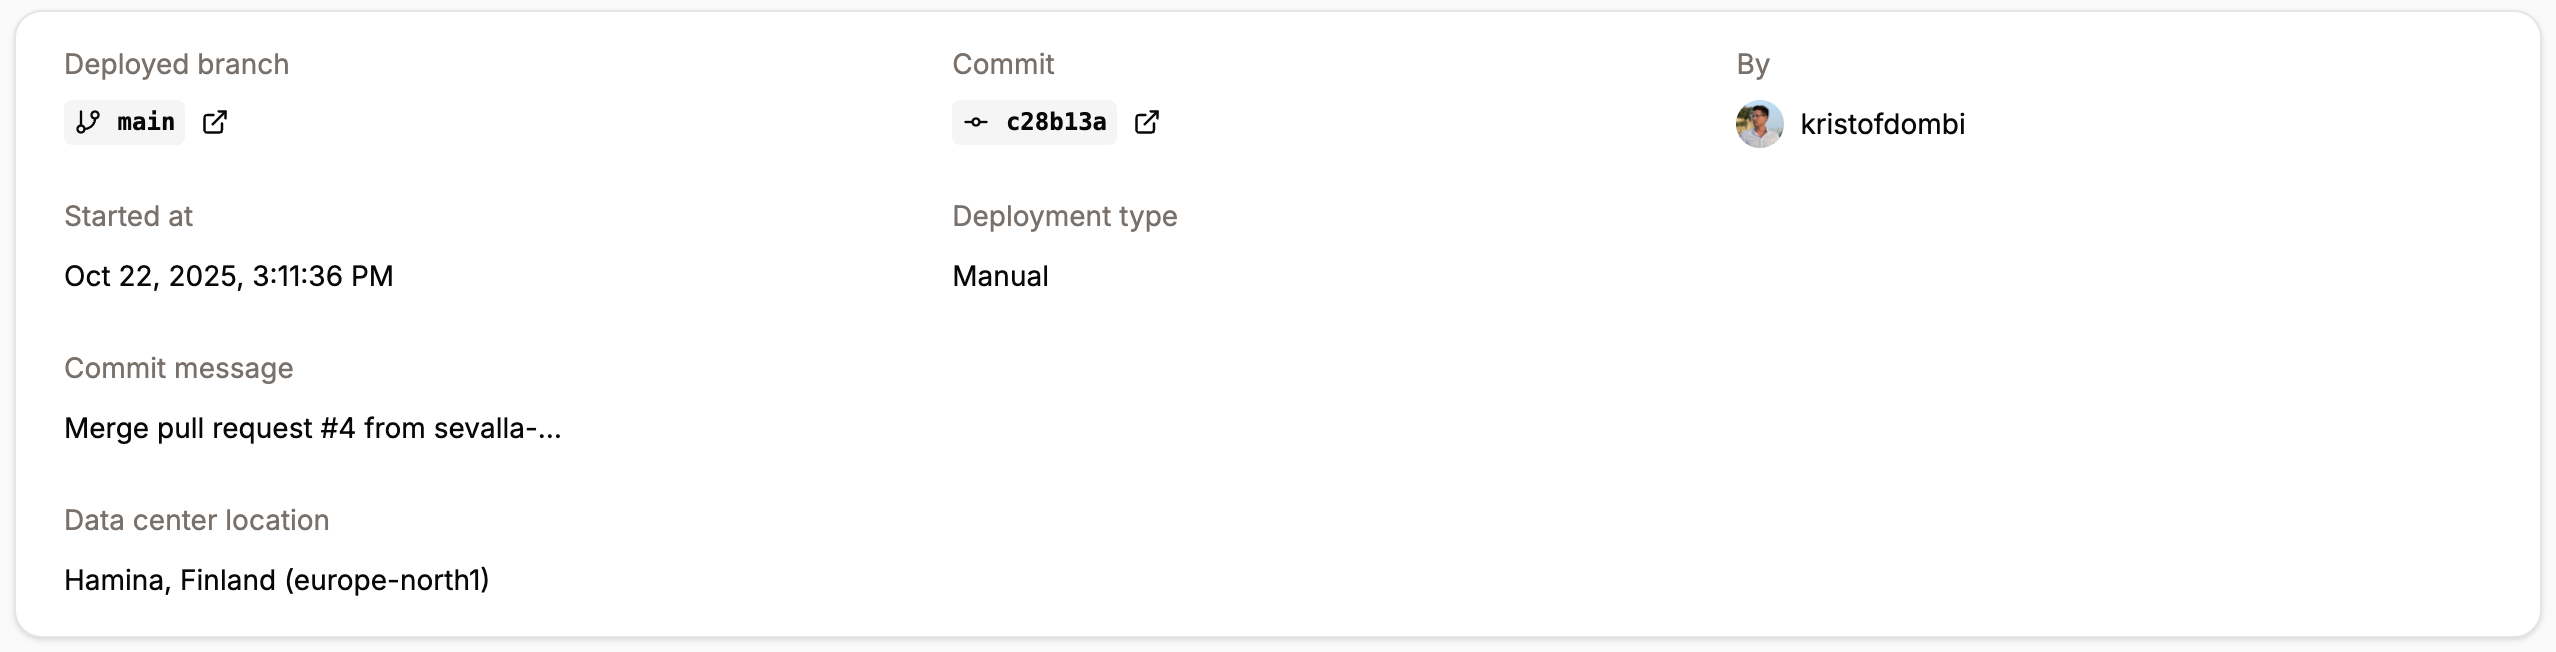
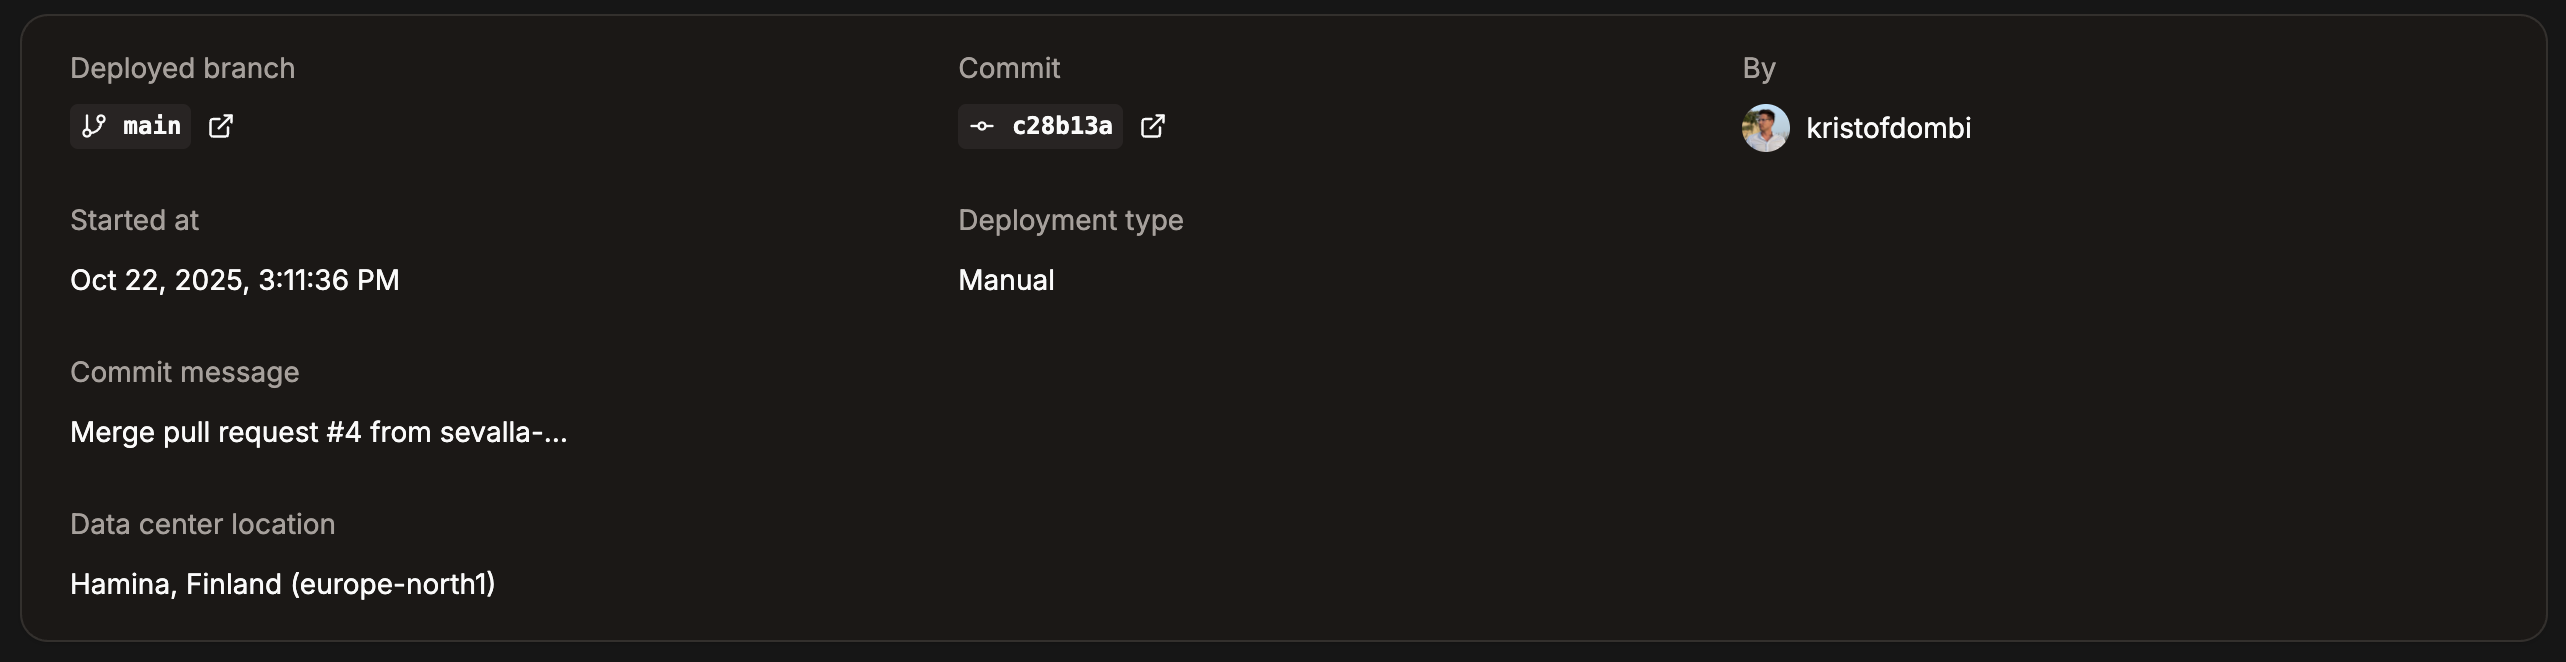
Individual deployment details.
- The name of the Git repository and branch.
- The Commit ID, with a link to the commit at the Git service provider.
- Who initiated the deployment.
- The deployment start date and time.
- The time it takes for the deployment to finish (Deploy time).
- The deployment type is either manual or automatic. Automatic deployments only occur if you have selected Automatic deployment on commit.
- The data center location.
- The commit message.
- The path to the Docker image.
- The deployment start date and time.
- The deployment type.
- The data center location.
Cancel a deployment
There may be times when you need to cancel a deployment of your application. You may want to change the code, or perhaps the deployment is taking longer than expected, and you want to investigate your application’s code. To cancel a deployment, click Cancel on the Deployment is in progress notification.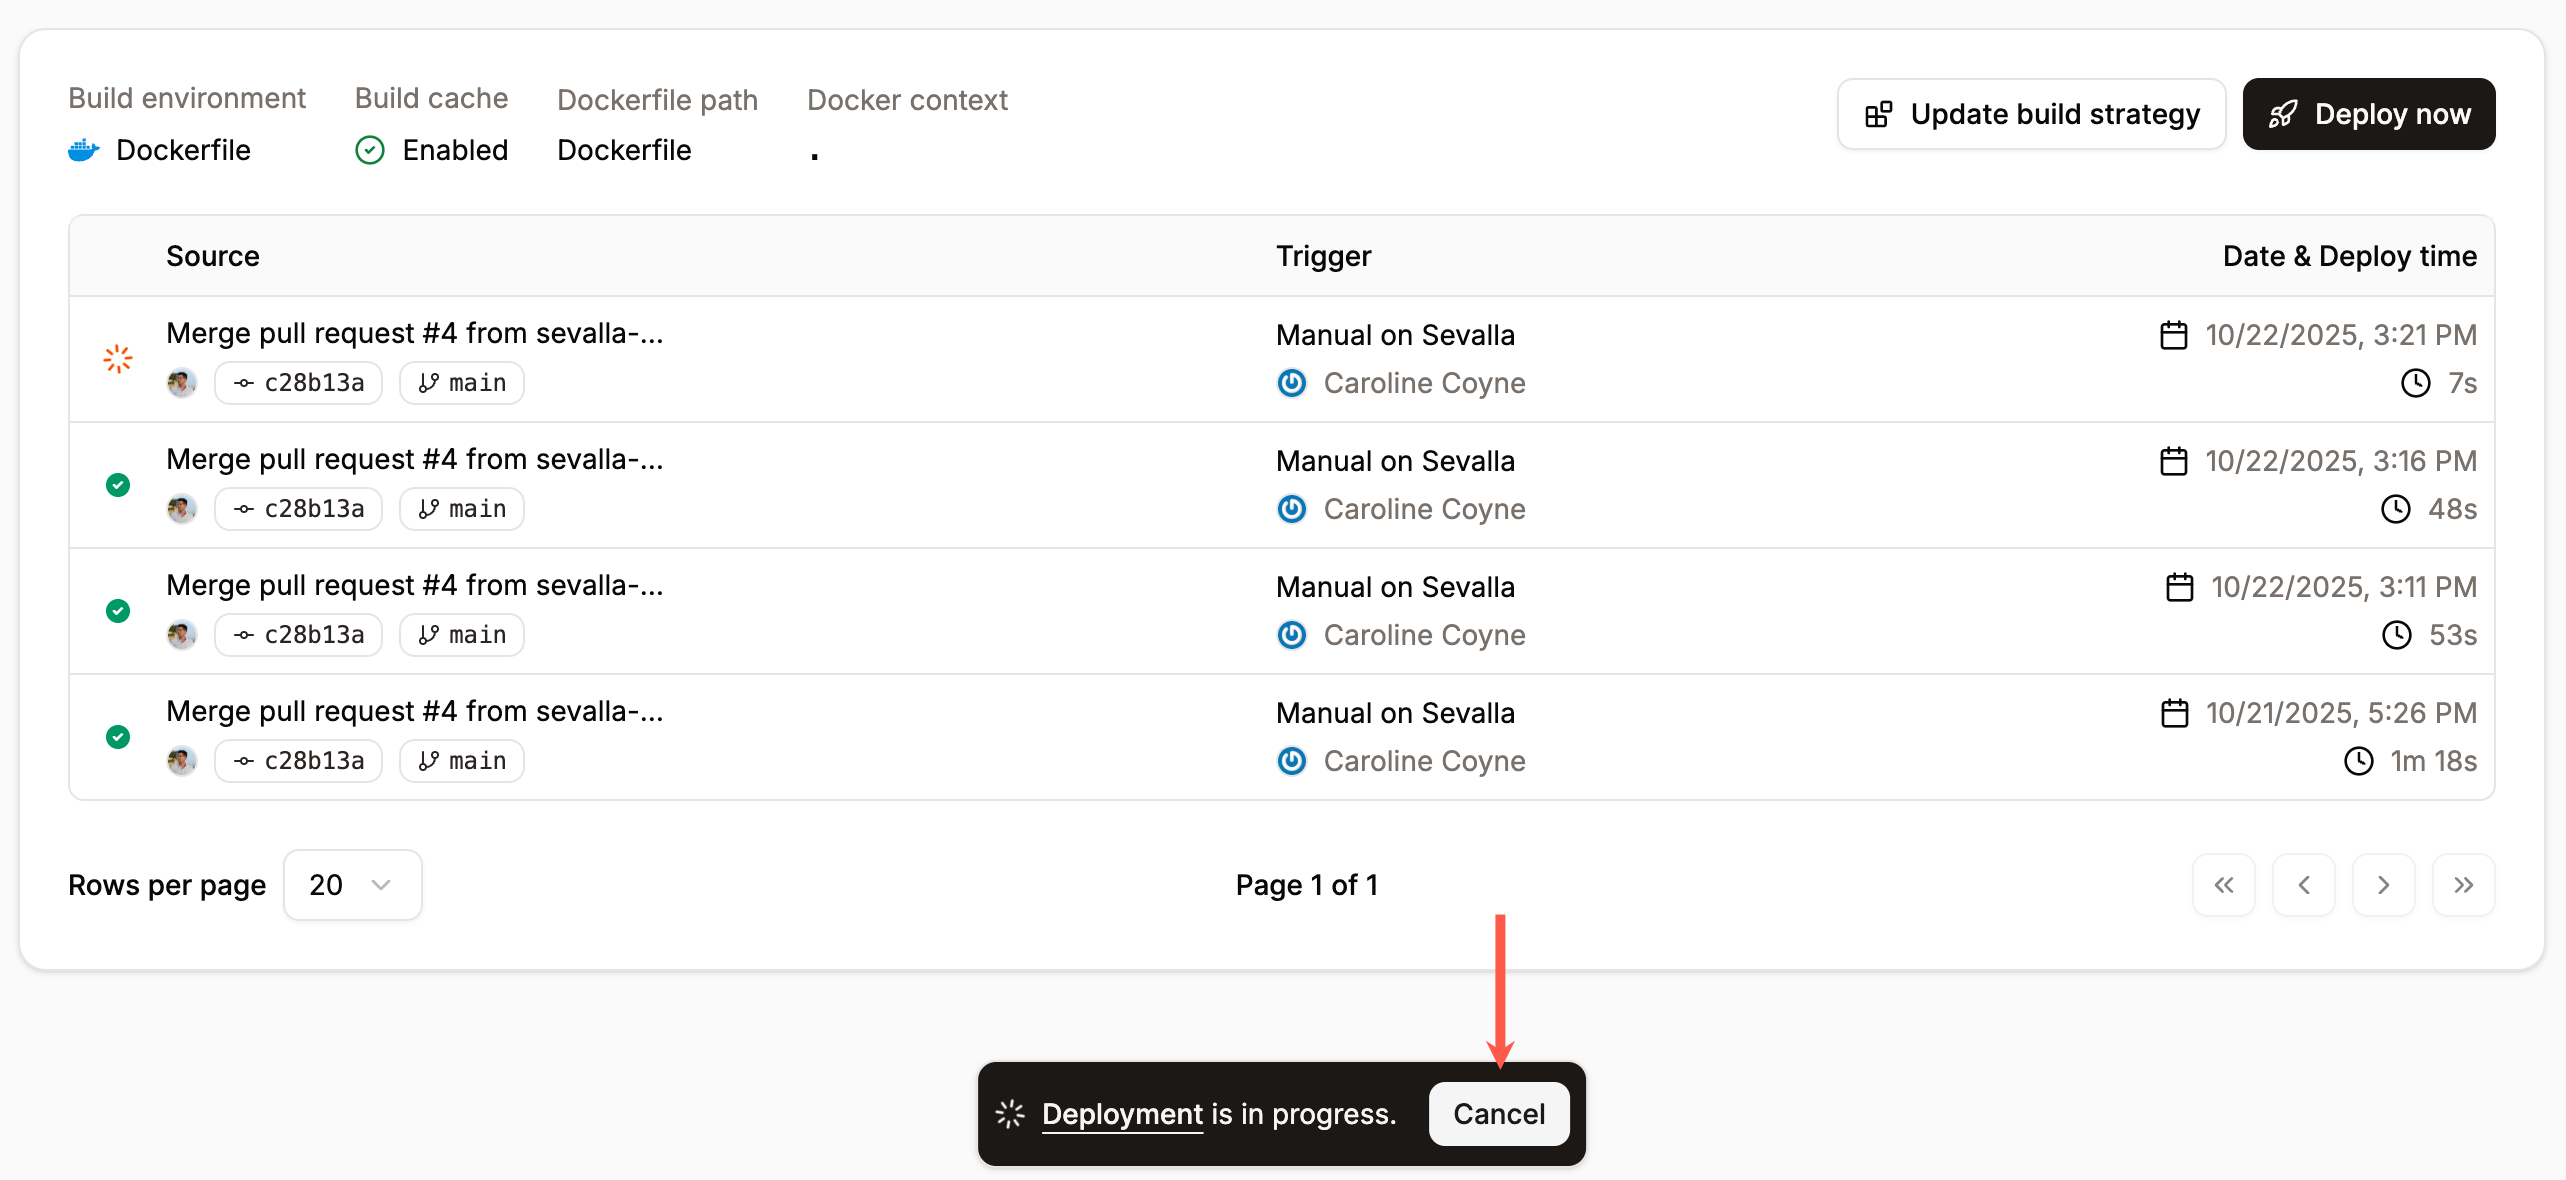
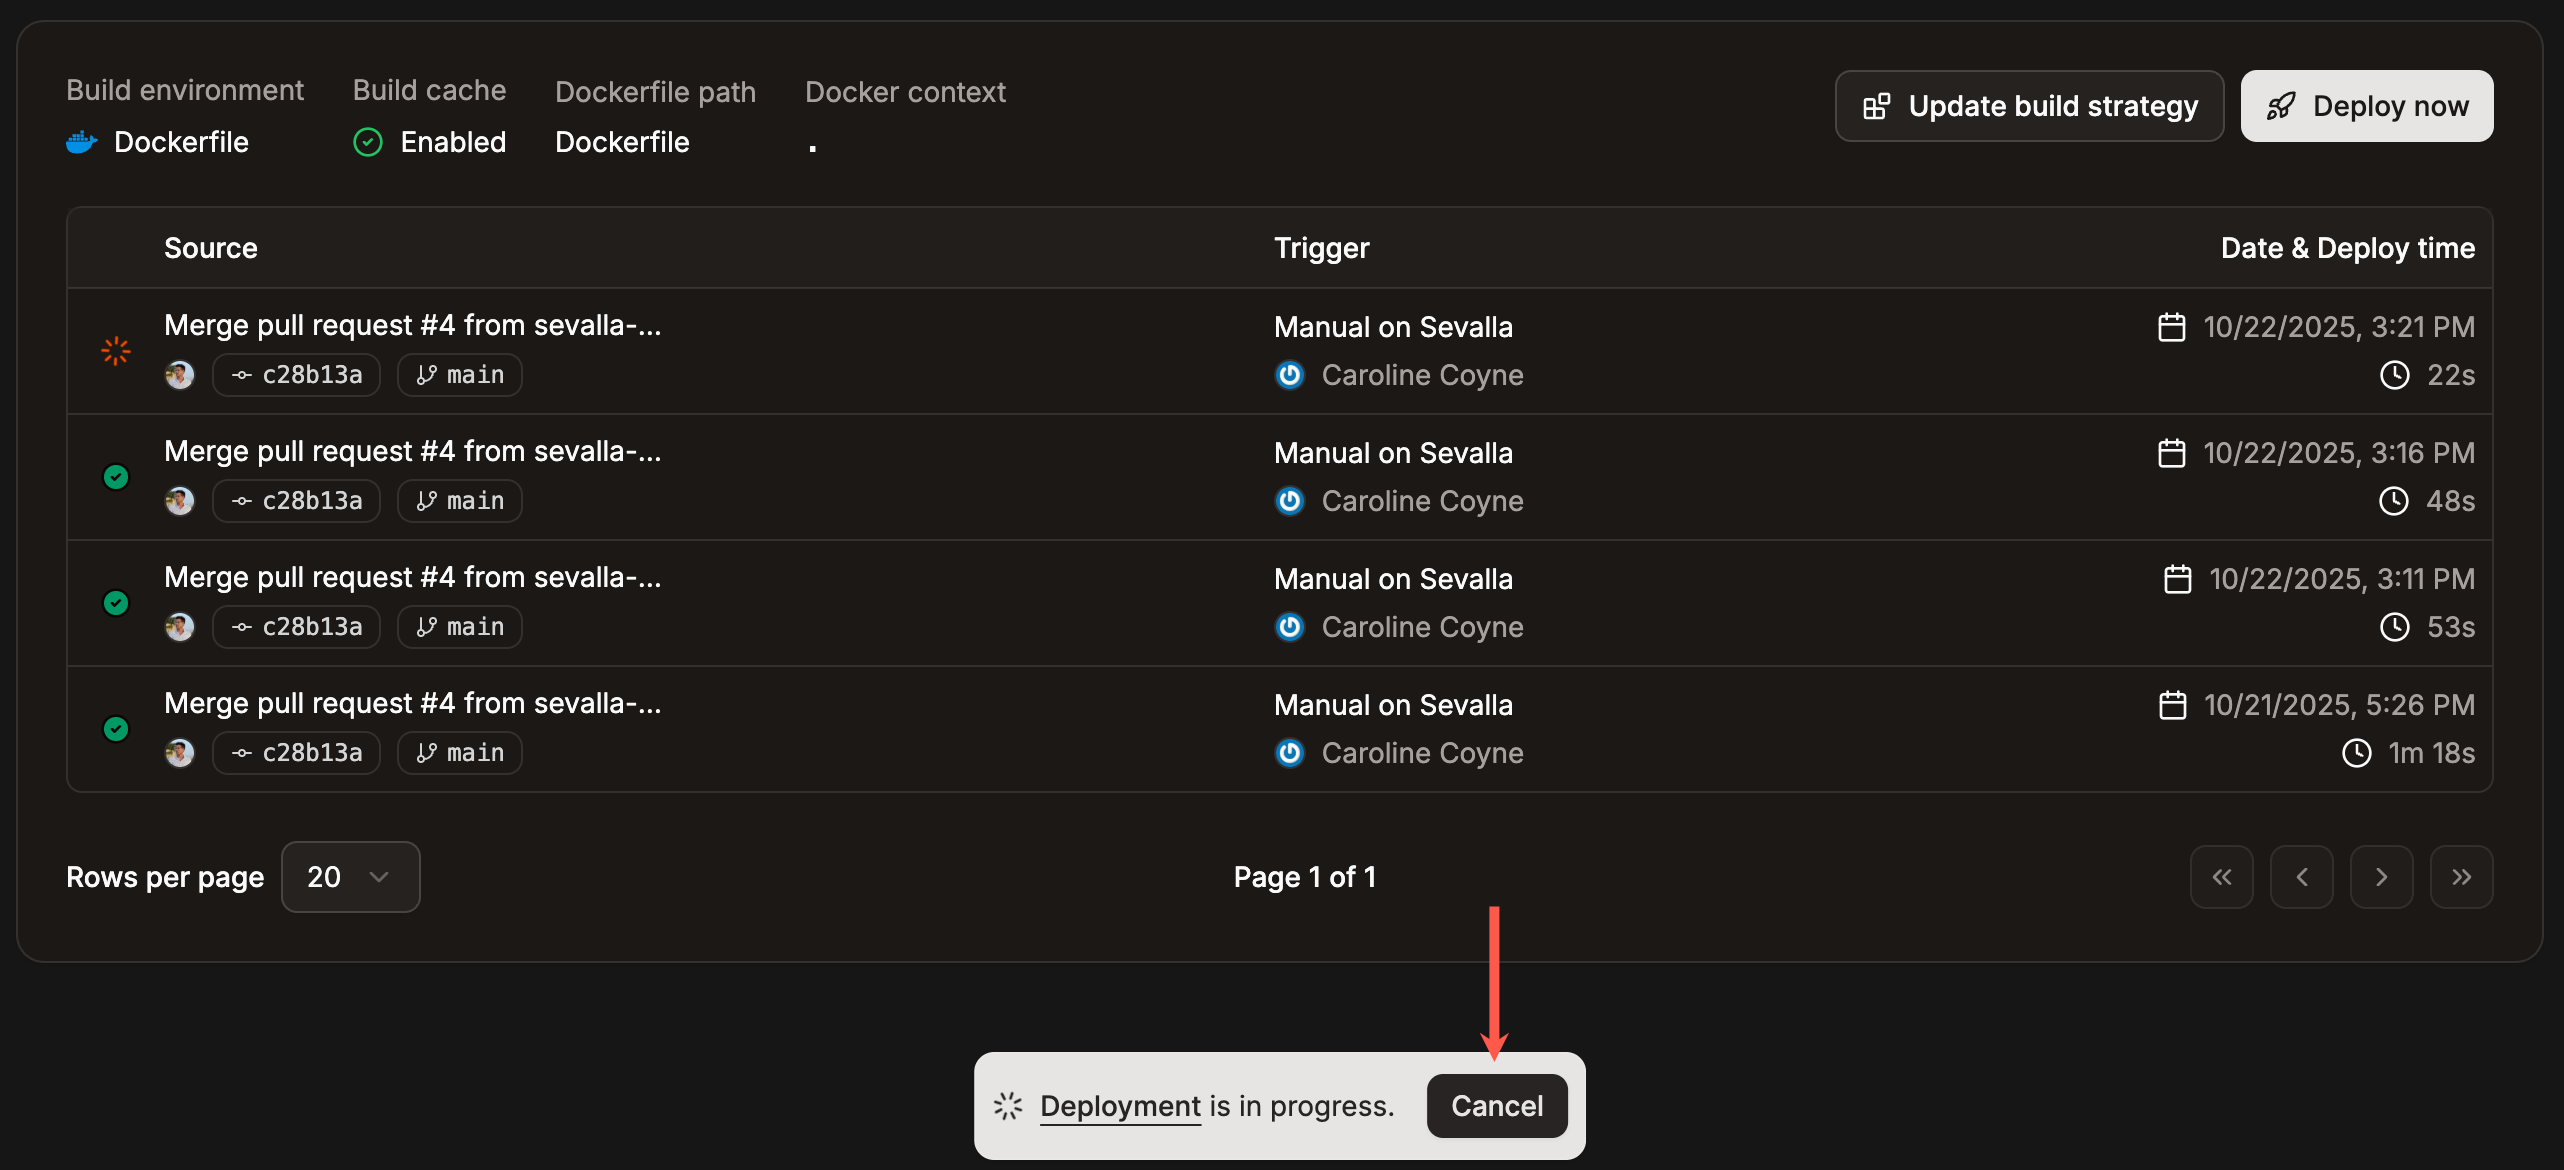
Cancel a deployment.
You may still incur costs for the build time when you cancel a deployment.
View the deployment changes
Within each individual deployment, you can view the Changeset, which displays the changes made to both the runtime and build.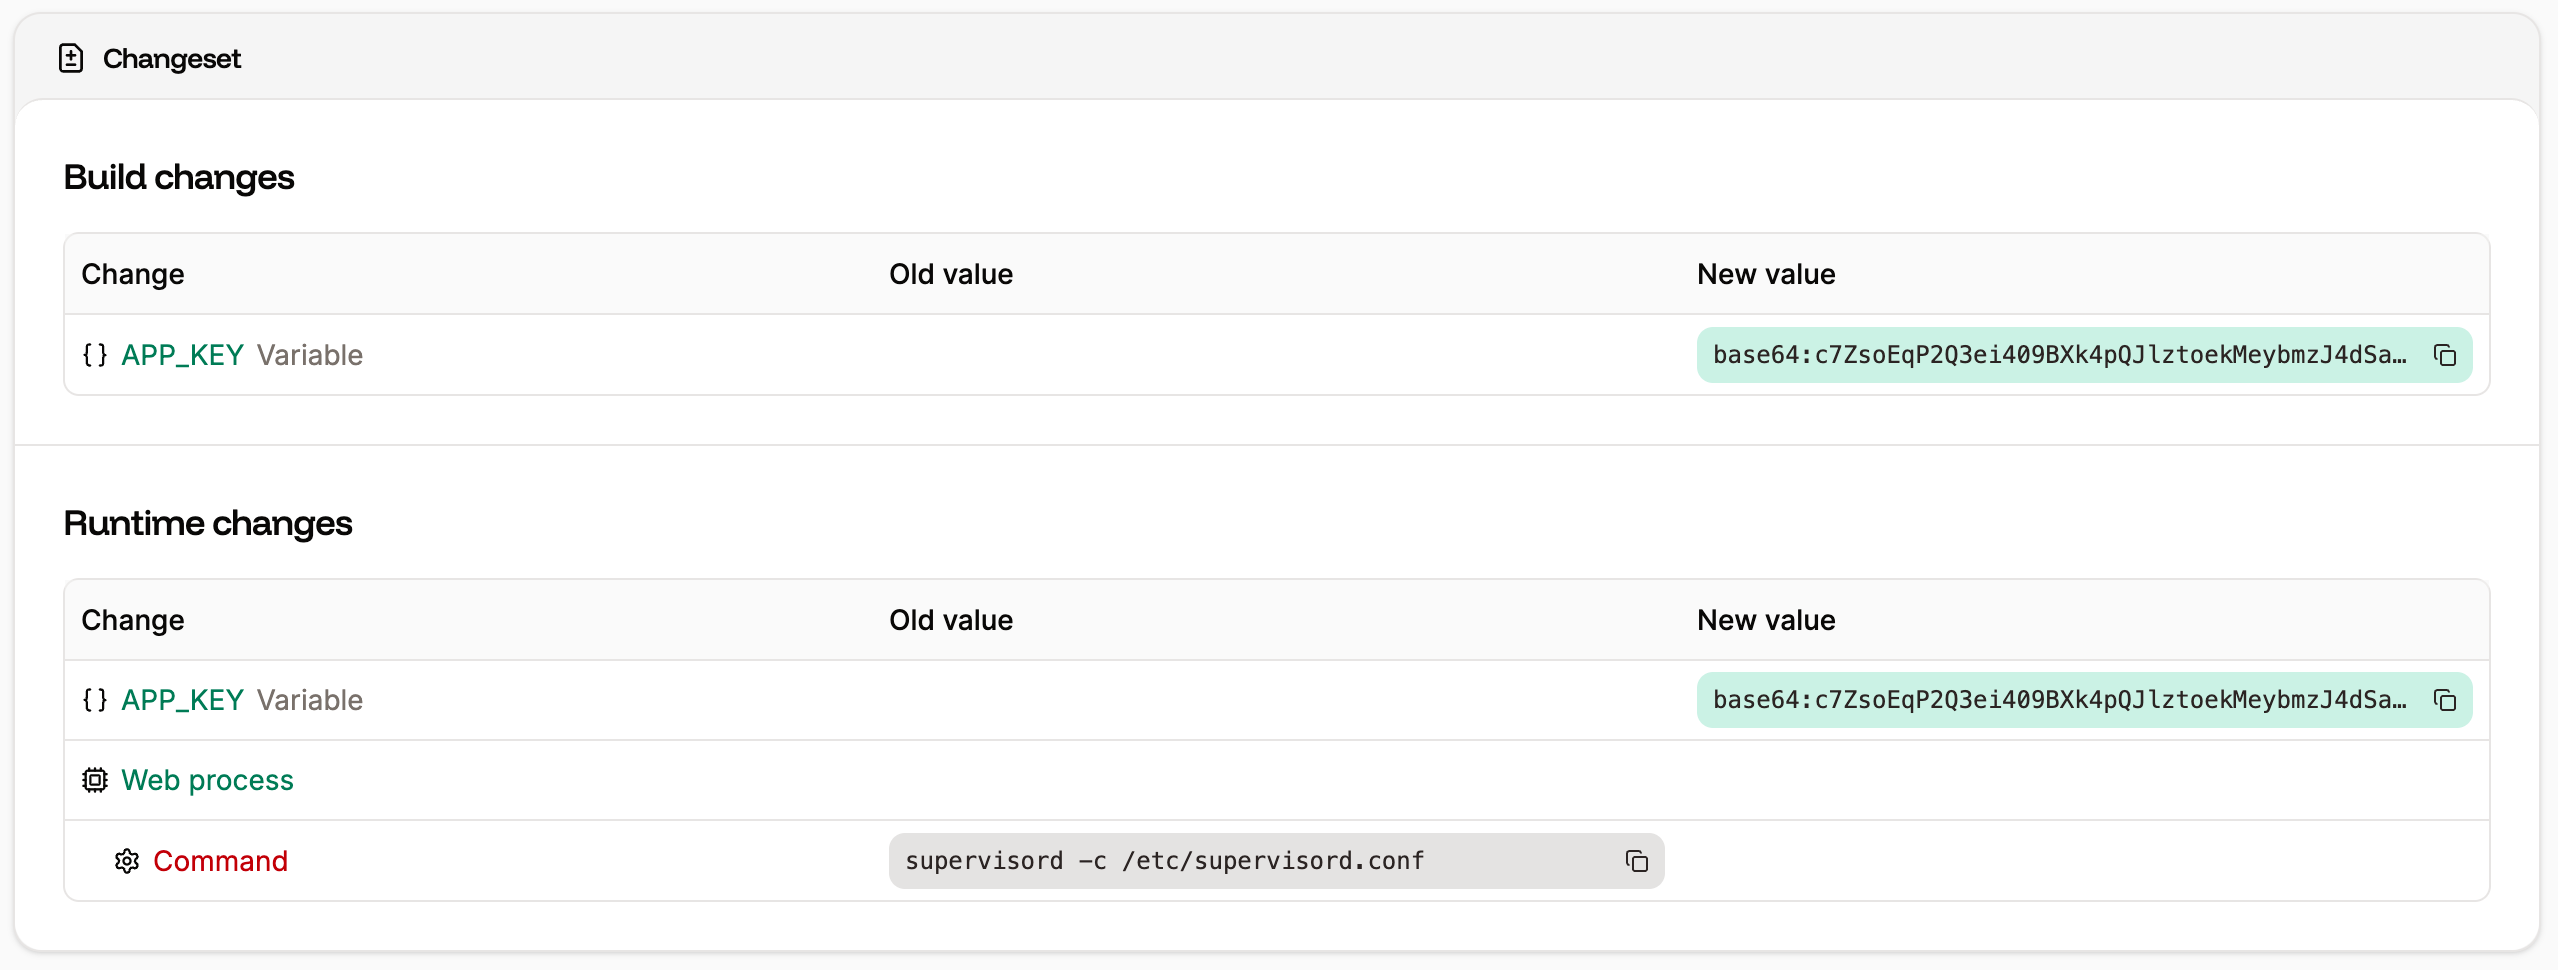
Changeset for an individual deployment.