General
General settings for your application.
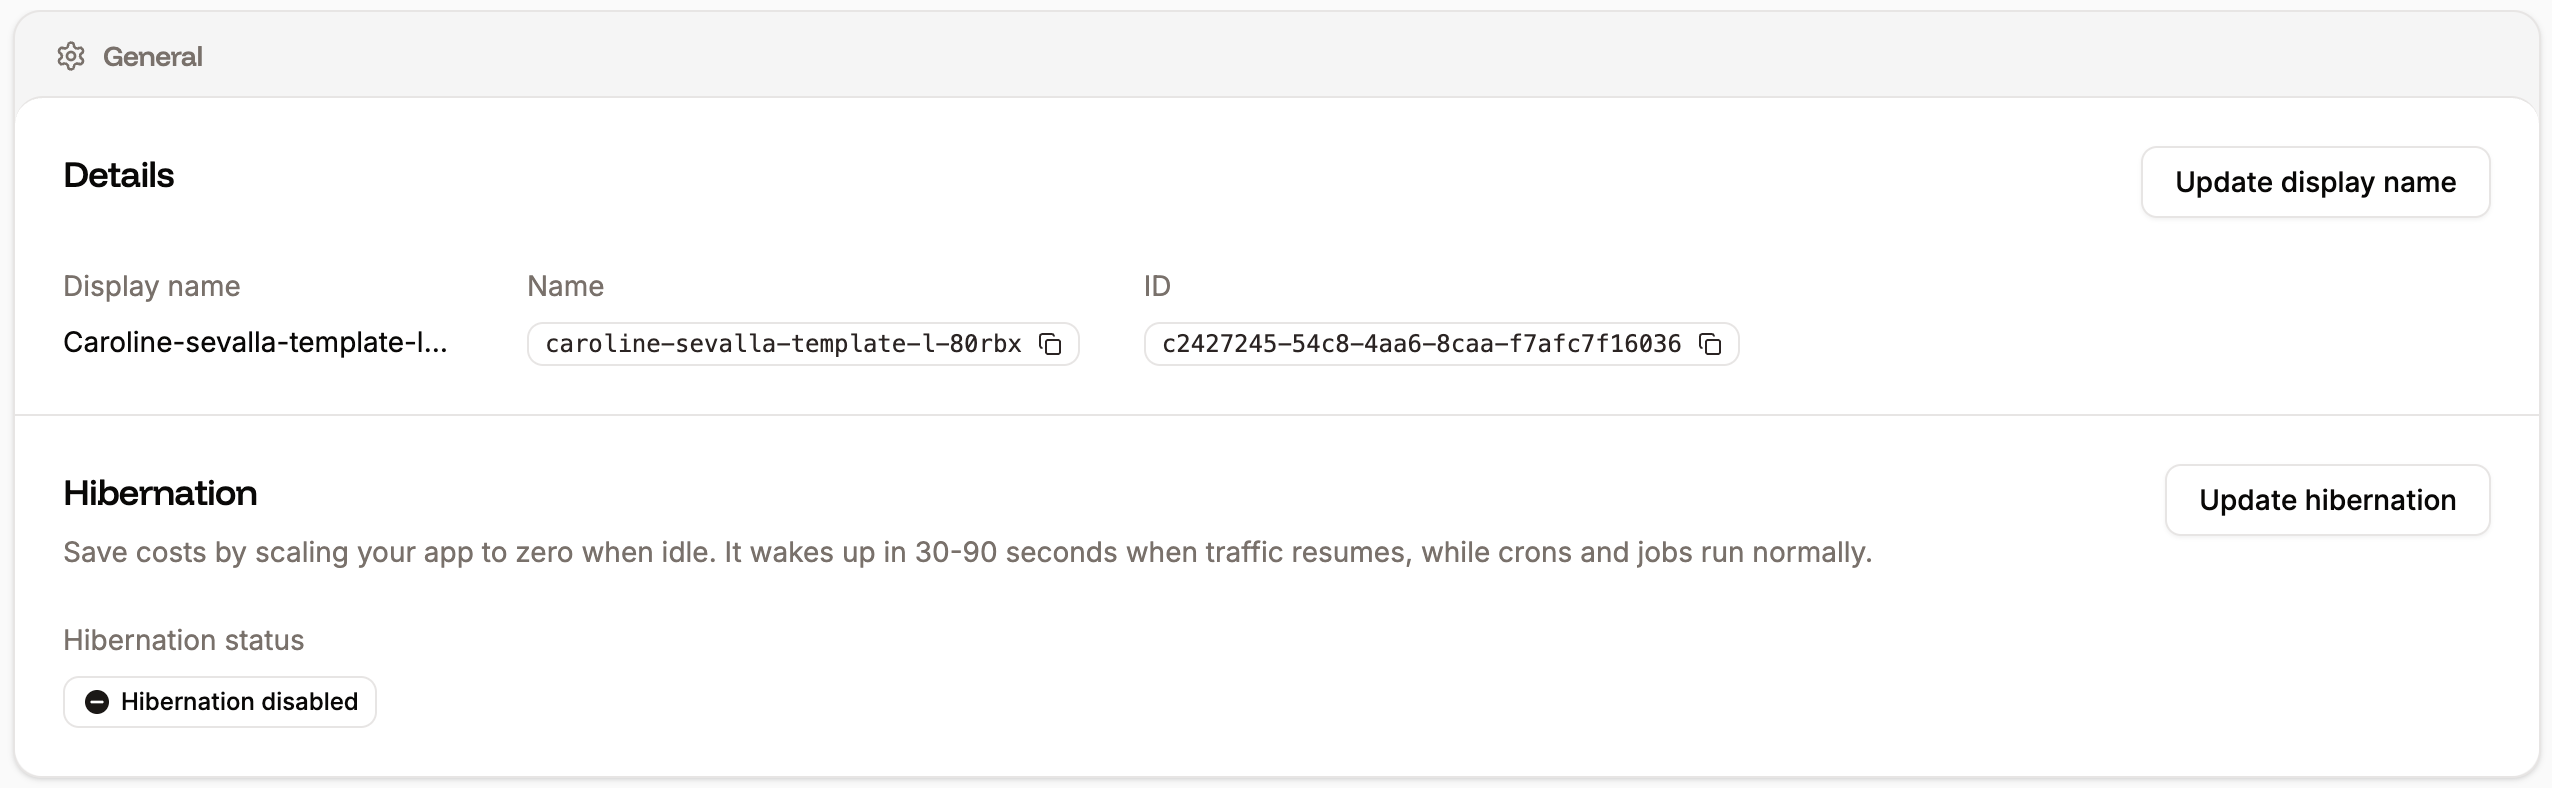
Details
This section shows the application display name, name, and ID. To change the display name, click Update display name, enter a new name, and click Update display name.Hibernation
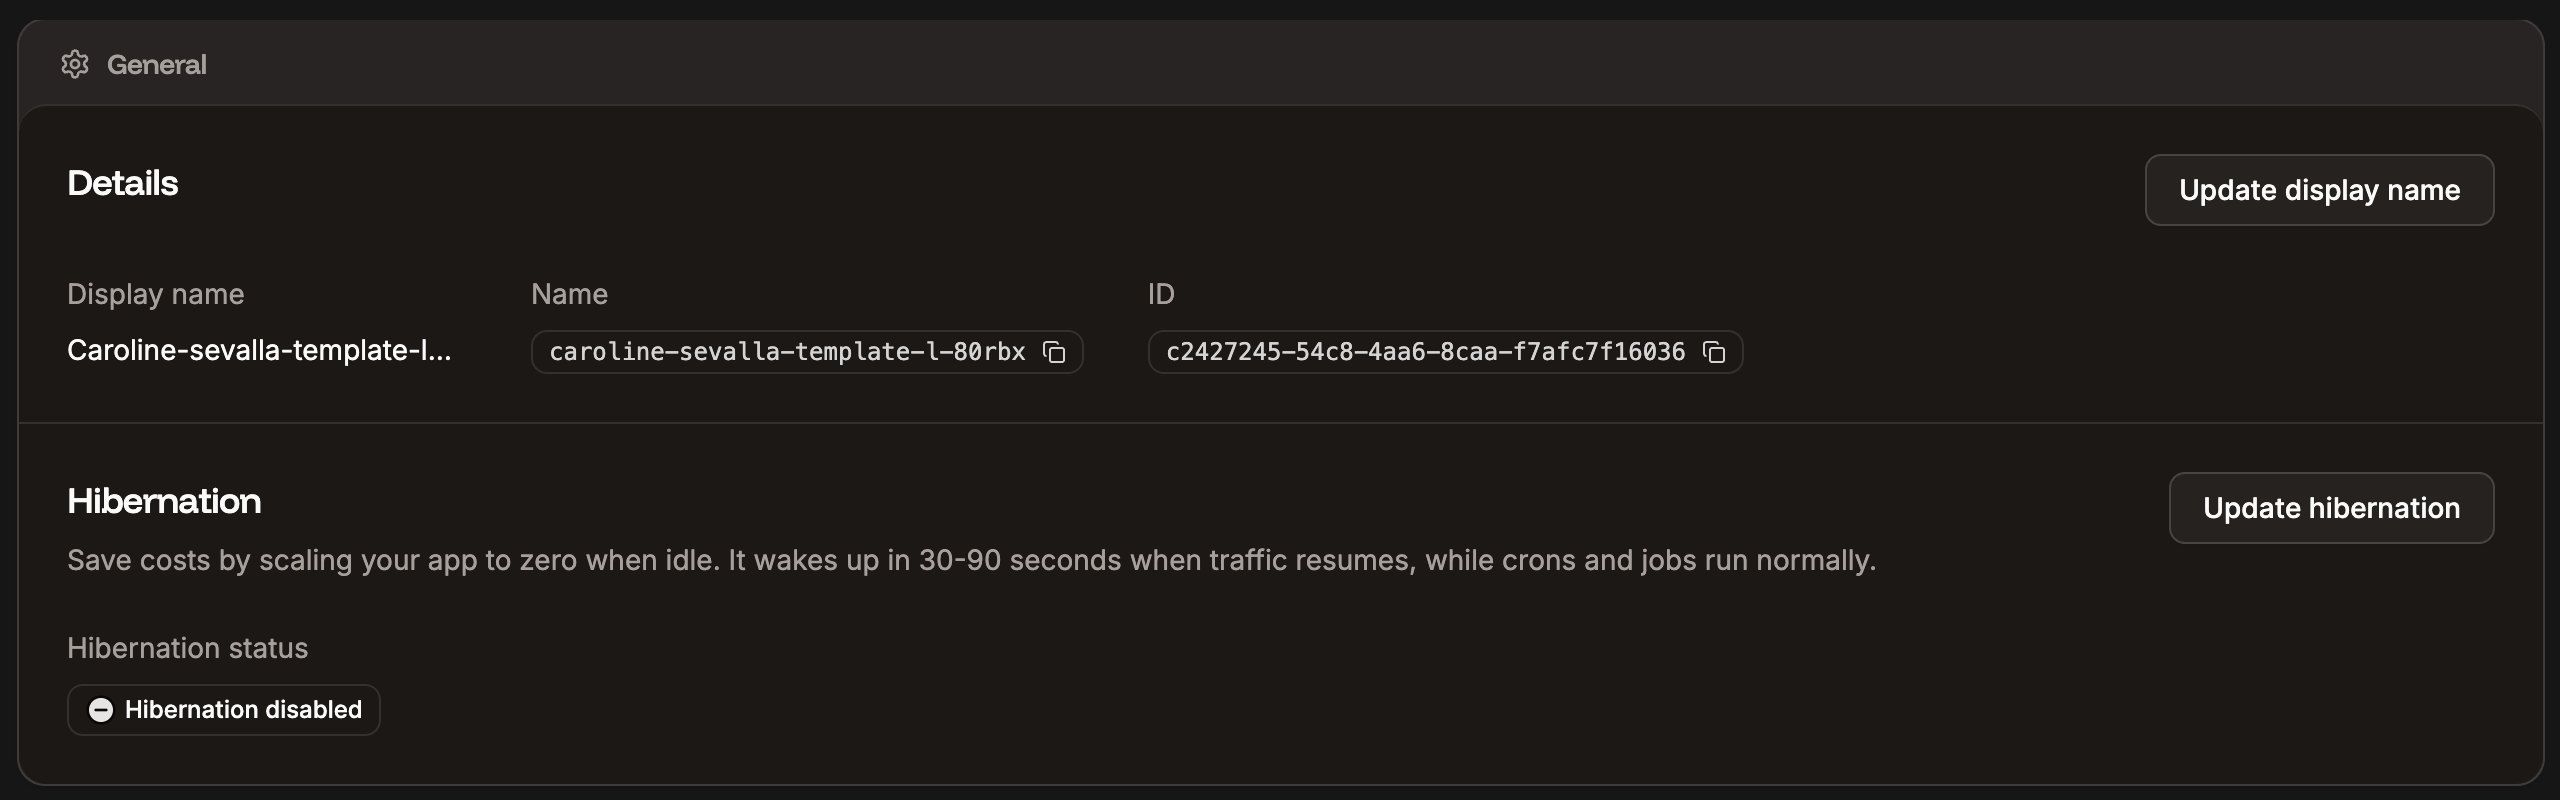
Hibernation automatically scales down your application if no HTTP requests are received within the specified timeframe. When traffic resumes, the application wakes up in 8-20 seconds, with the HTTP request remaining pending during that time. Cron jobs and other jobs continue to run normally, even while hibernation is active. To enable hibernation on your application, click Update hibernation. Select Hibernation, enter the number of idle minutes after which you want your application to enter hibernation, and click Update hibernation.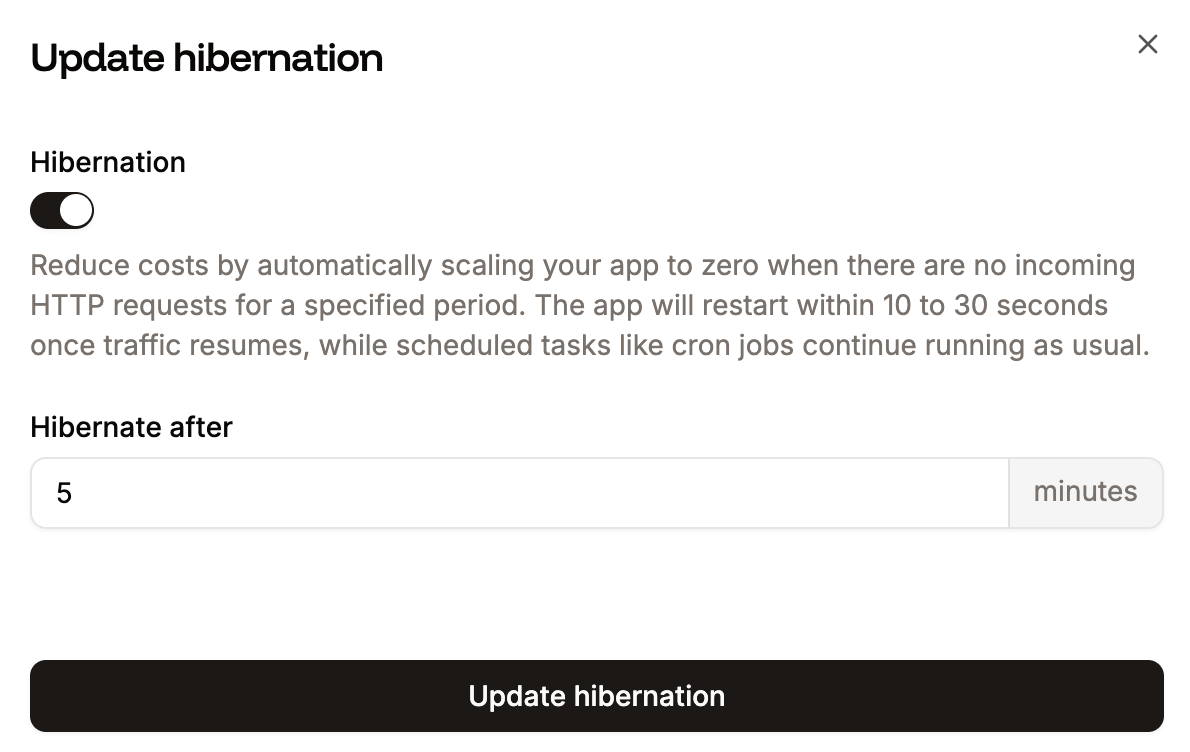
Hiberation settings for your application.
Deploy
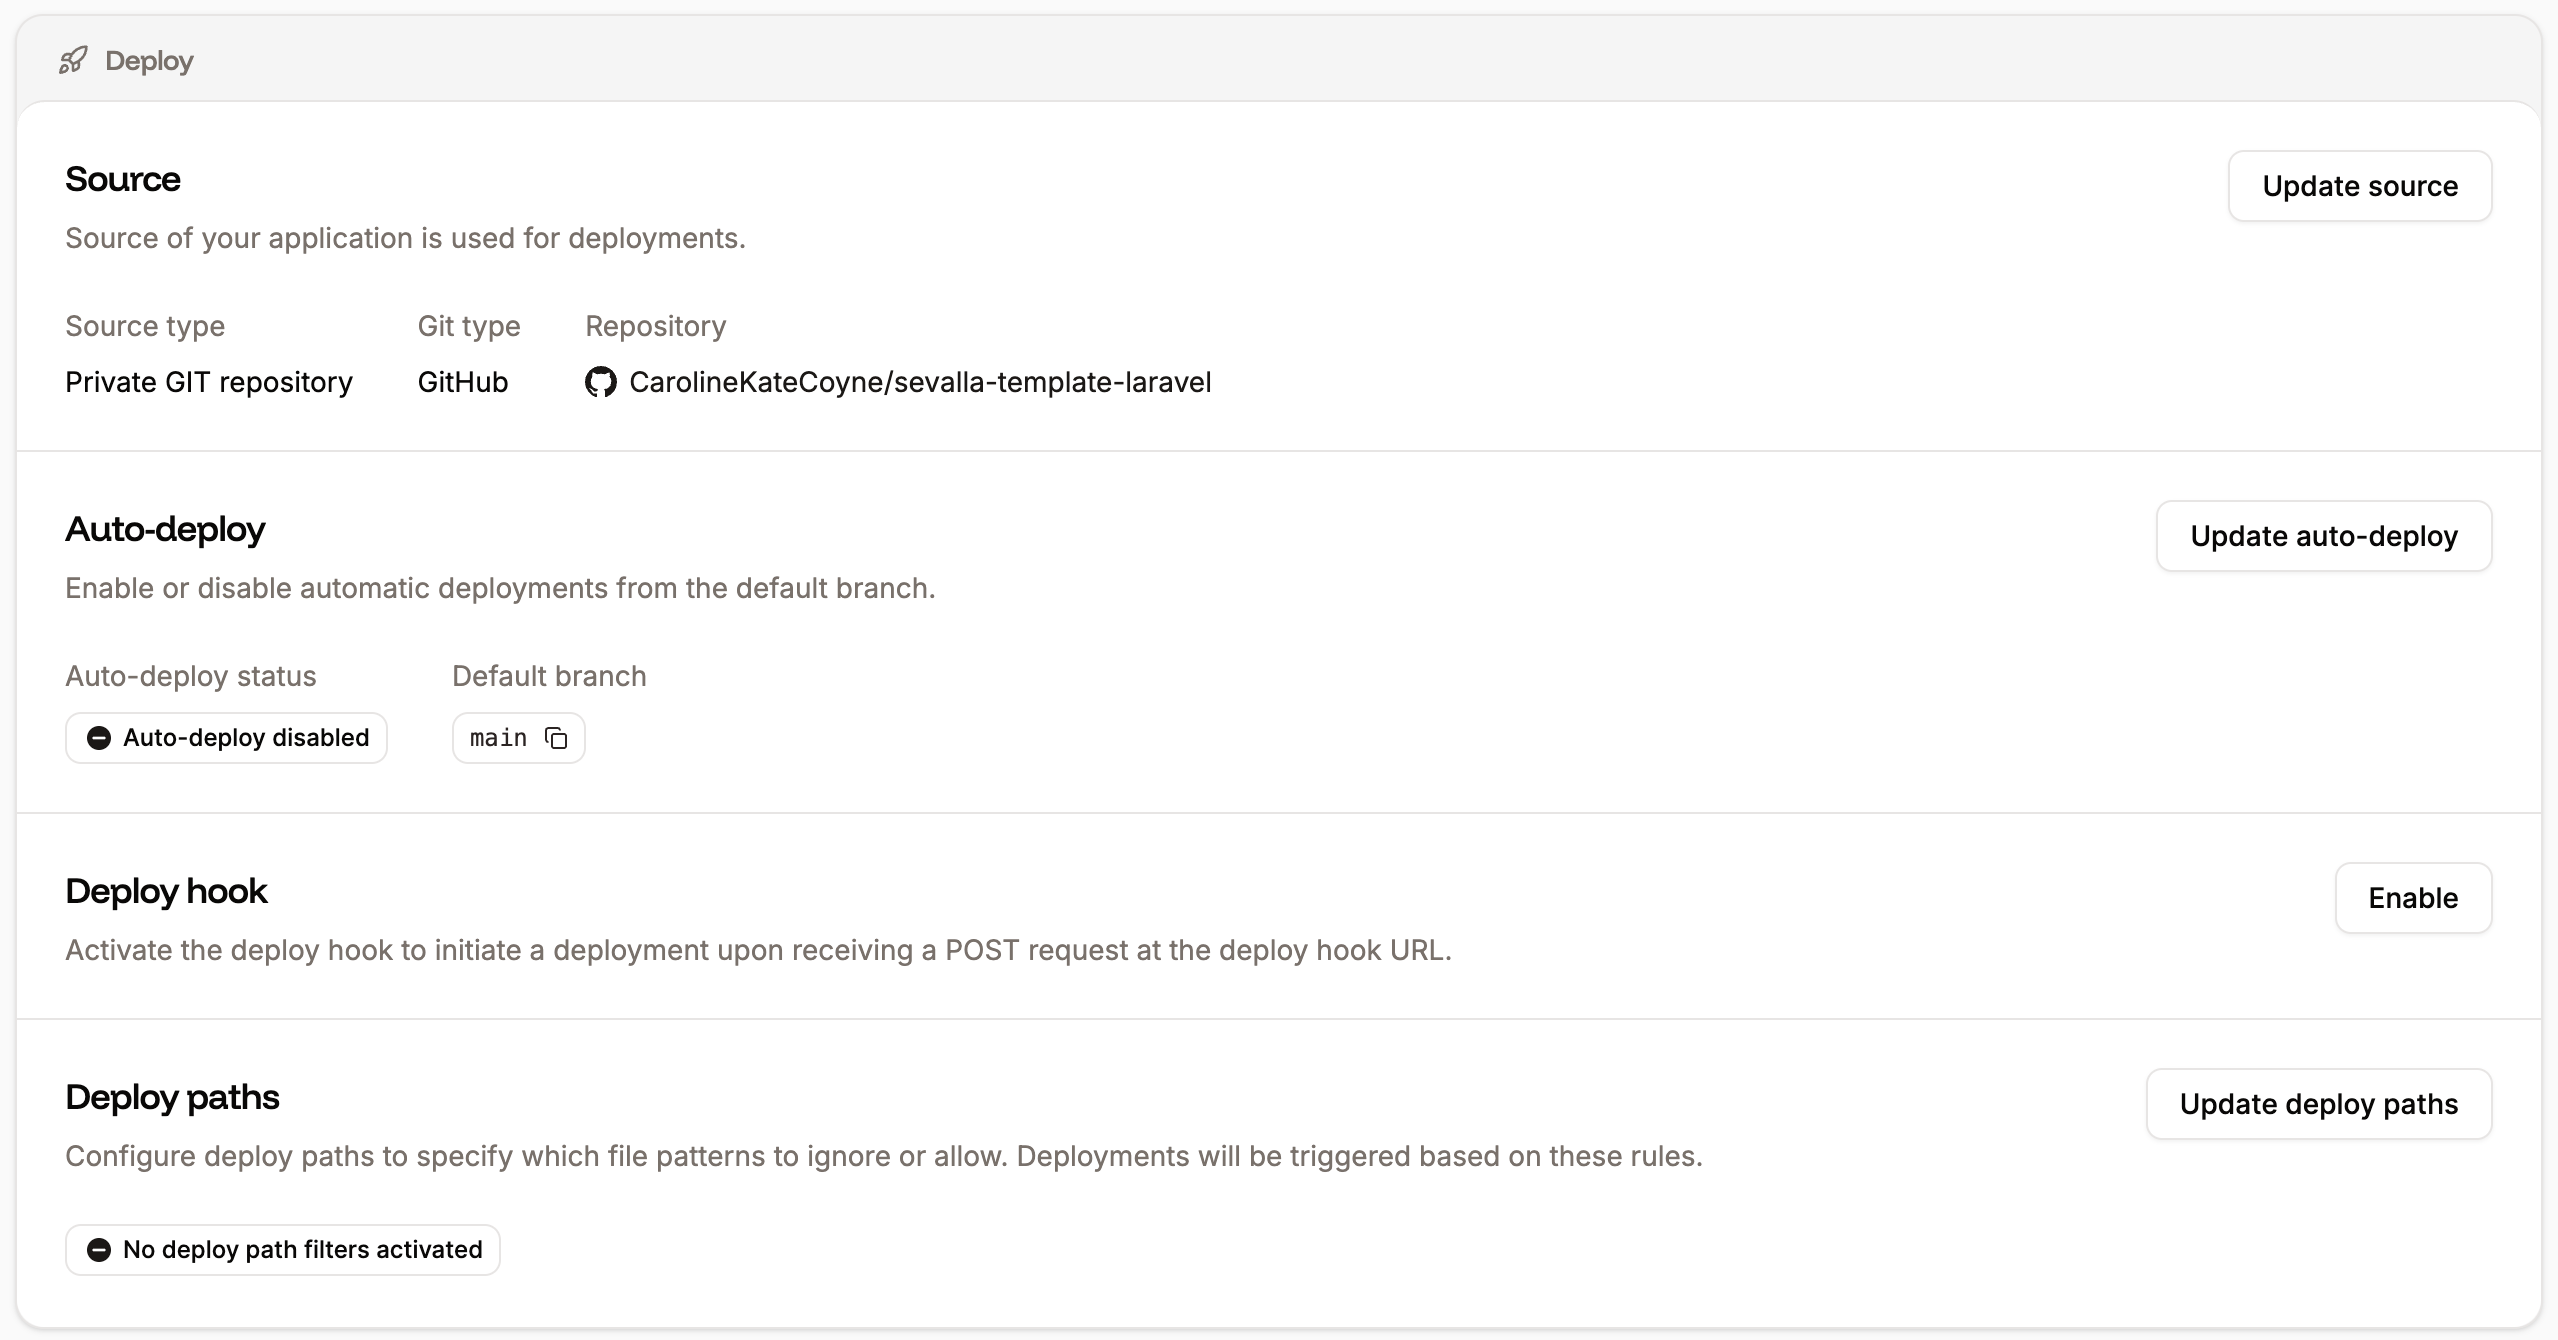
Deploy settings for your application.
Source
This shows the information about the application source. The information shown depends on whether you use a Git repository or a Docker image.Git repository
- Source type: Shows if the repository is private or public.
- Git type: Shows which Git provider the application is using.
- Repository: The Git repository.
Docker image
- Source type: This shows that the application is using a Docker image.
- Docker image: This is the path to your Docker image.
- Registry credential: This shows the name of the registry credentials set up within Integration > Registry credentials.
Auto-deploy
Use this option to automatically deploy each time a commit is made to the selected branch. To enable or disable automatic deployments or change the branch to automatically deploy from, click Update auto-deploy. Select the required options and click Update auto-deploy.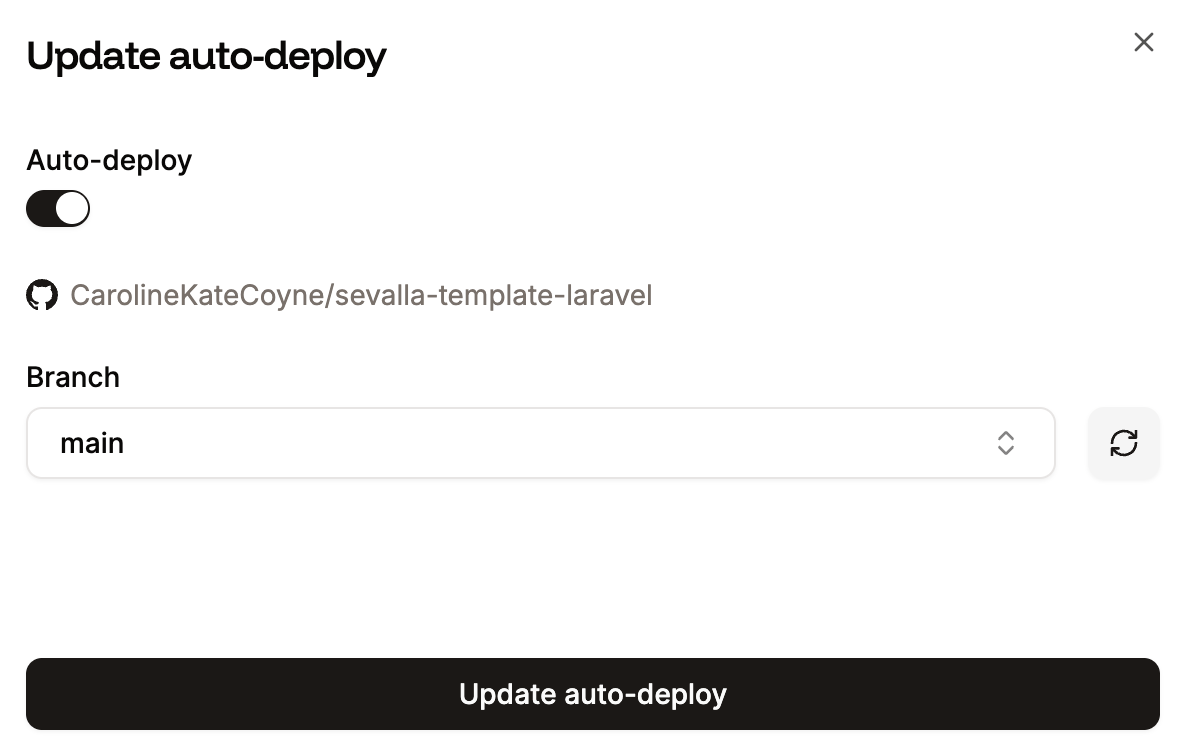
Auto-deploy settings for your application.
Deploy hook
Deploy hooks allow you to effortlessly trigger deployments by making a simple POST request to a unique URL, enabling seamless workflow integration. To set up a deploy hook, click Enable and then click Continue. This generates a unique URL that you can call with a POST request to trigger a deployment. If you want to automate deployments based on external events (e.g., pushing code to a repository), you can configure a webhook in your repository provider (GitHub, GitLab, Bitbucket, or Docker) to call the deploy hook URL.

Set up a deploy hook for your application.
Deploy paths
Deploy paths allow you to trigger deployments based on a specific set of rules. You can define which file changes should initiate a deployment and which should be ignored. For example, you can trigger deployments only when files in/src/backend/** are modified or skip deployments if changes are limited to **/*.md files. This can be especially useful for monorepos.
To configure deploy paths, click Update deploy paths.
To trigger a deployment when a file is changed within a specific path, select Allow paths. To skip a deployment when a file is changed in a specific path, select Ignore paths. Add the required path patterns and click Update deploy paths.
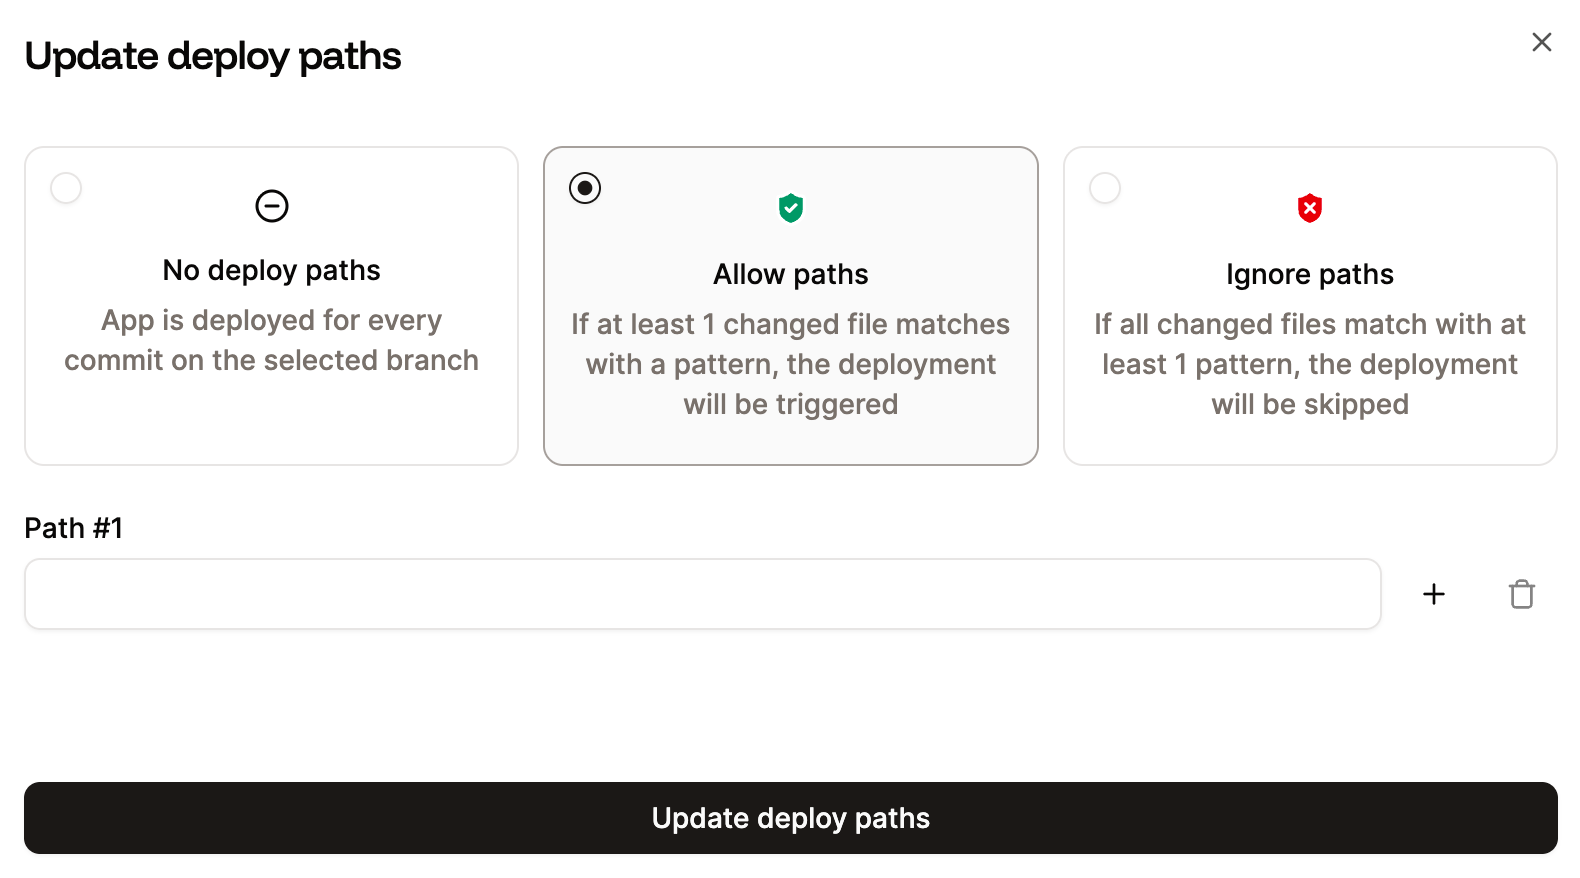
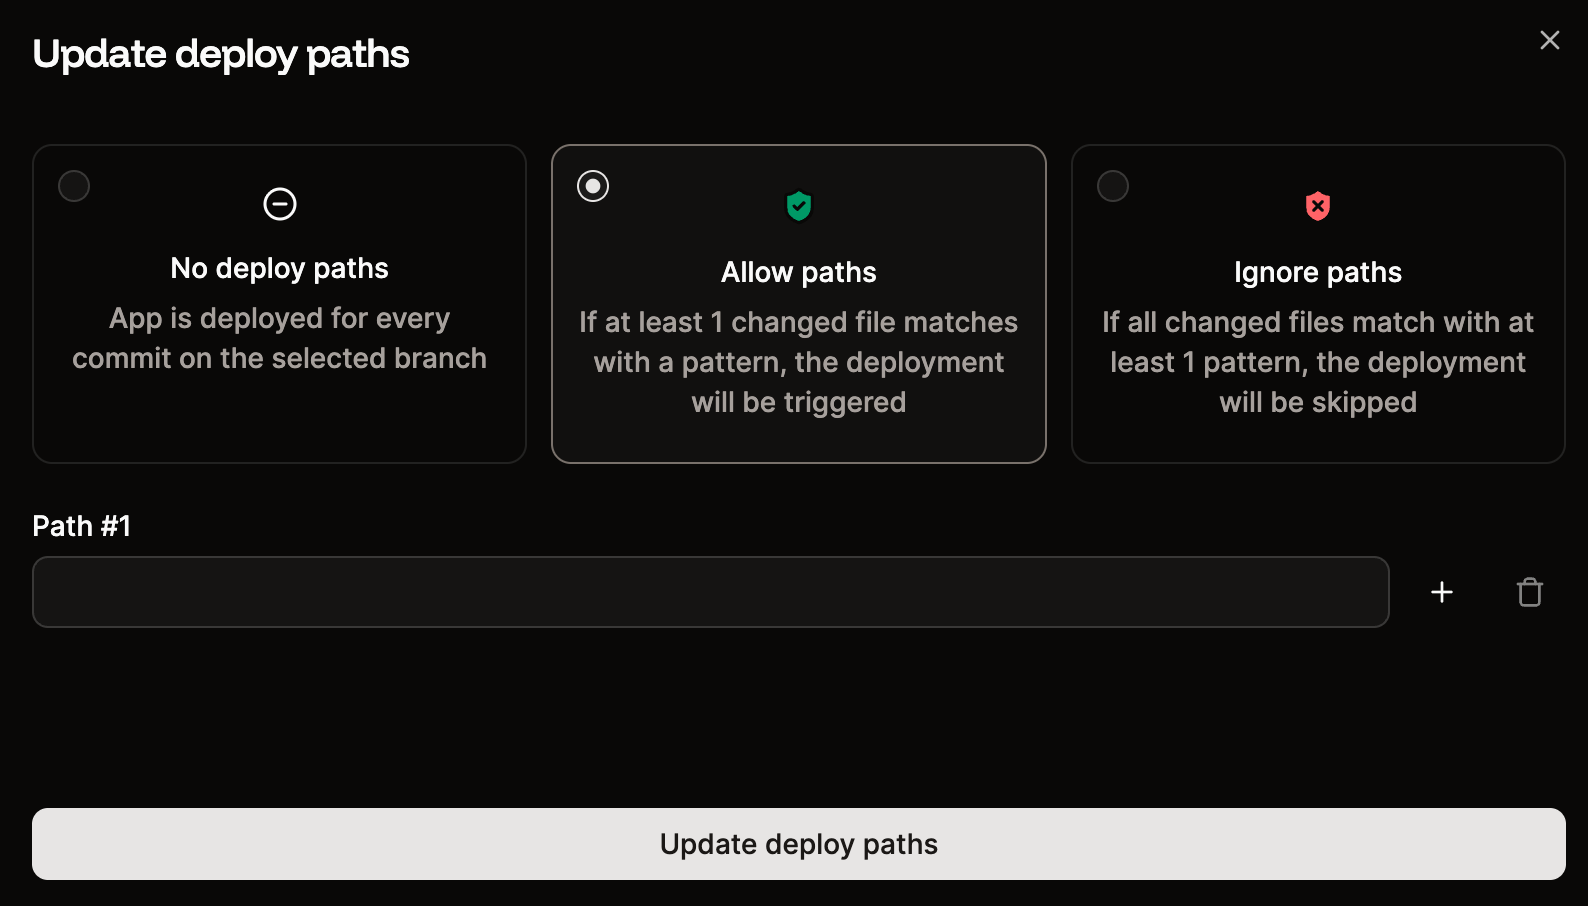
Add the required deploy paths to trigger or skip a deployment.
Git Large File Storage (LFS)
If your repository tracks files with Git LFS, Git LFS support ensures the actual file contents are fetched when the repository is cloned for a build. When disabled, LFS pointers are checked out as-is and the underlying objects are not downloaded. Git LFS is enabled by default. The current state is shown as a Git LFS enabled or Git LFS disabled badge. To change it, click Enable (or Disable if it is already on), then click Continue. The change takes effect on the next deployment.Git LFS is only available for applications deployed from a Git repository, not from a Docker image.
Build
Build settings for your application.
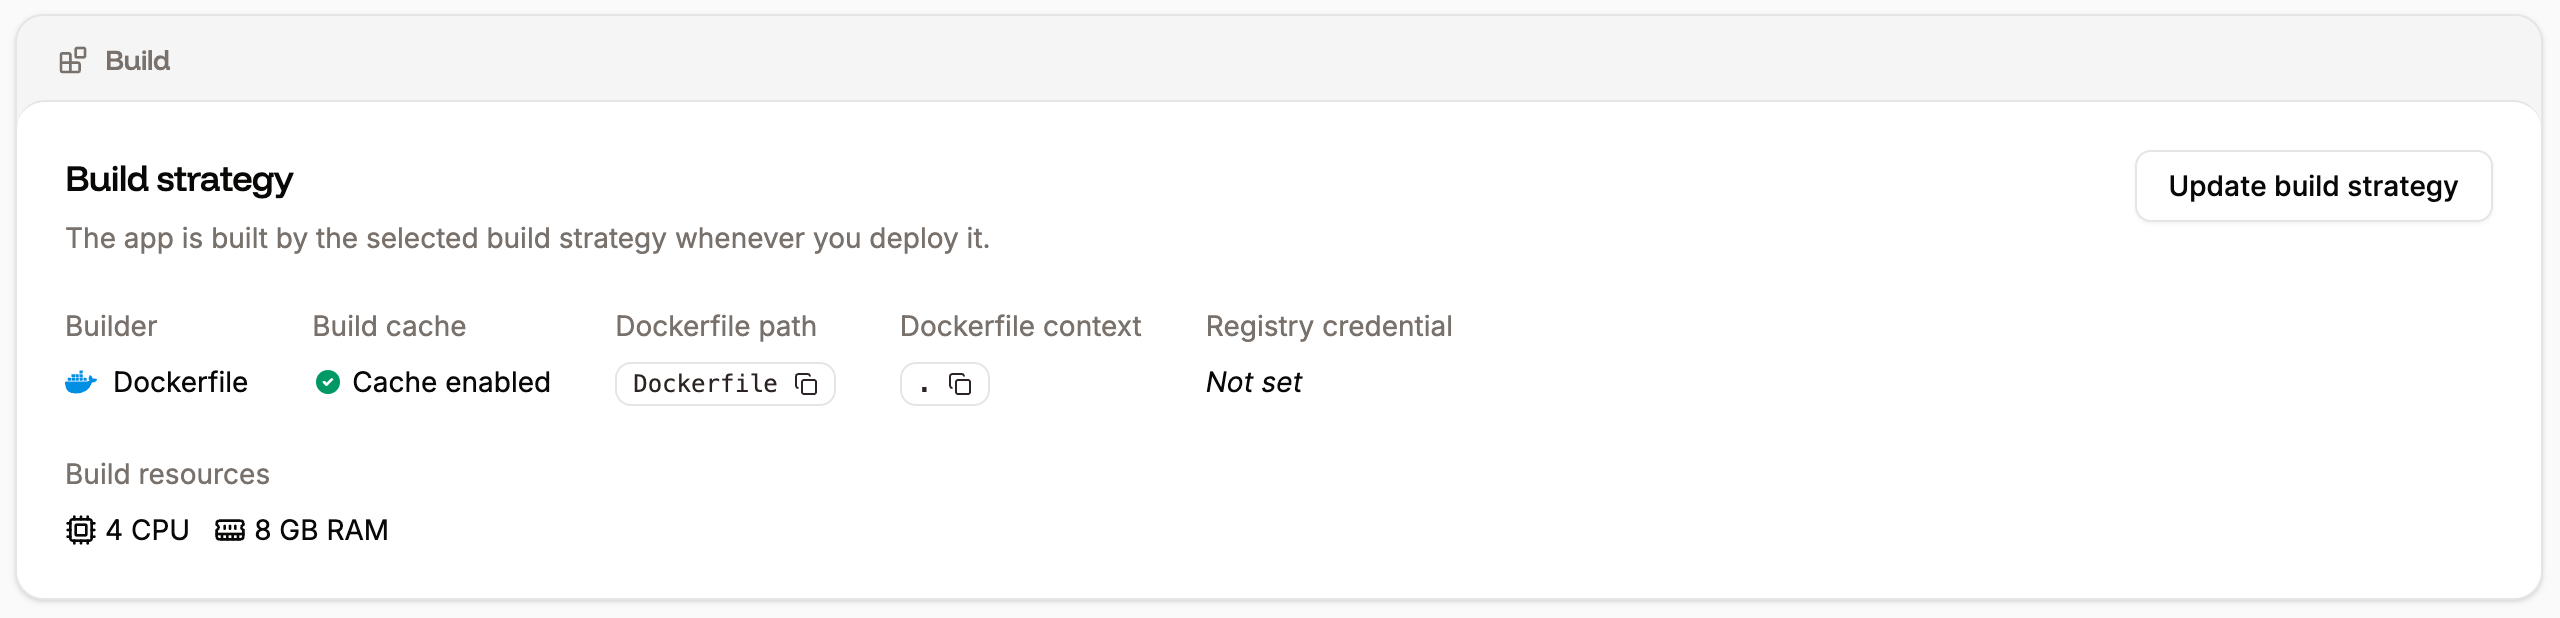
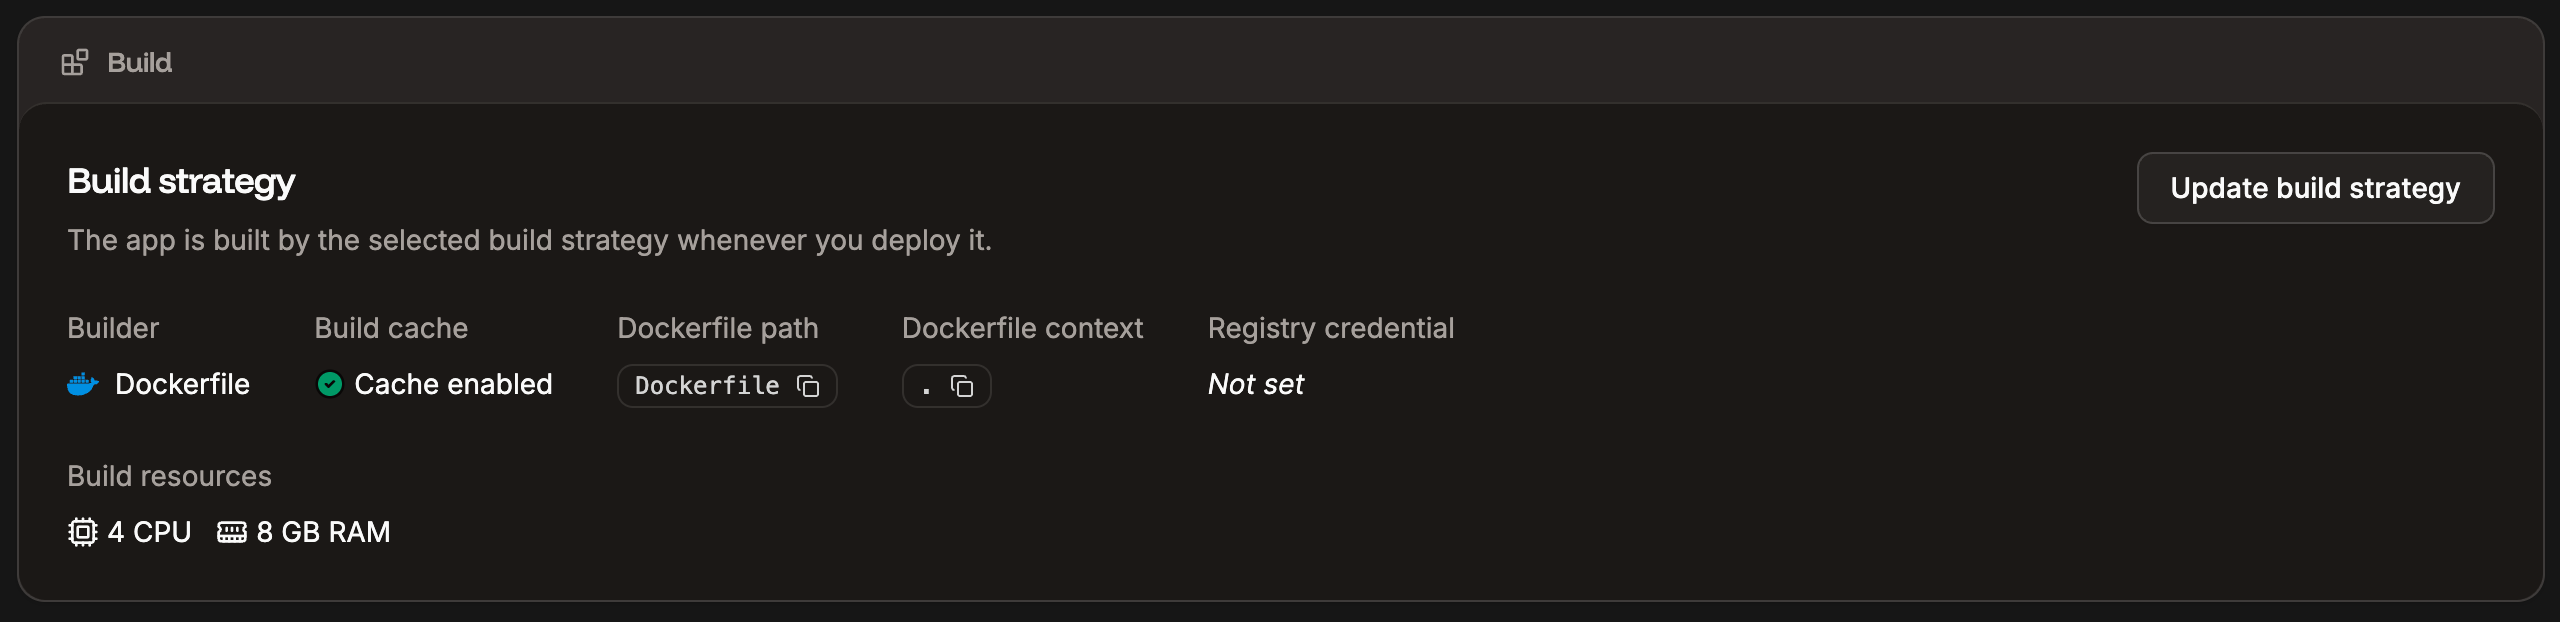
Build strategy
This shows information about your environment’s build strategy. To change any of these settings, click Update build strategy, and select from the following:Nixpacks
Use Nixpacks to create a container for your application based on your repository.- Cache enabled: When you build your application, Sevalla creates a deployable image from your code. By default, cache is enabled, which stores the latest successful deployment so that future builds can reuse unchanged components, significantly speeding up the process and reducing resource usage.
- Build path: This is the path in the repository to the files required to build the application. Most applications are built from the repository root, and the Build path defaults to this (.). If you have a different build path, specify it here. For example, if your application needs to be built from a subdirectory named app, enter app in the Build path field. This is also useful if you have a monorepo.
- Nixpacks version: Choose the Nixpacks version you want to use to build your application. Different versions can affect the build process, so it’s important to review the Nixpacks changelog for your application’s language. Ensuring compatibility is your responsibility, as changes between versions may impact how your application is built and runs.
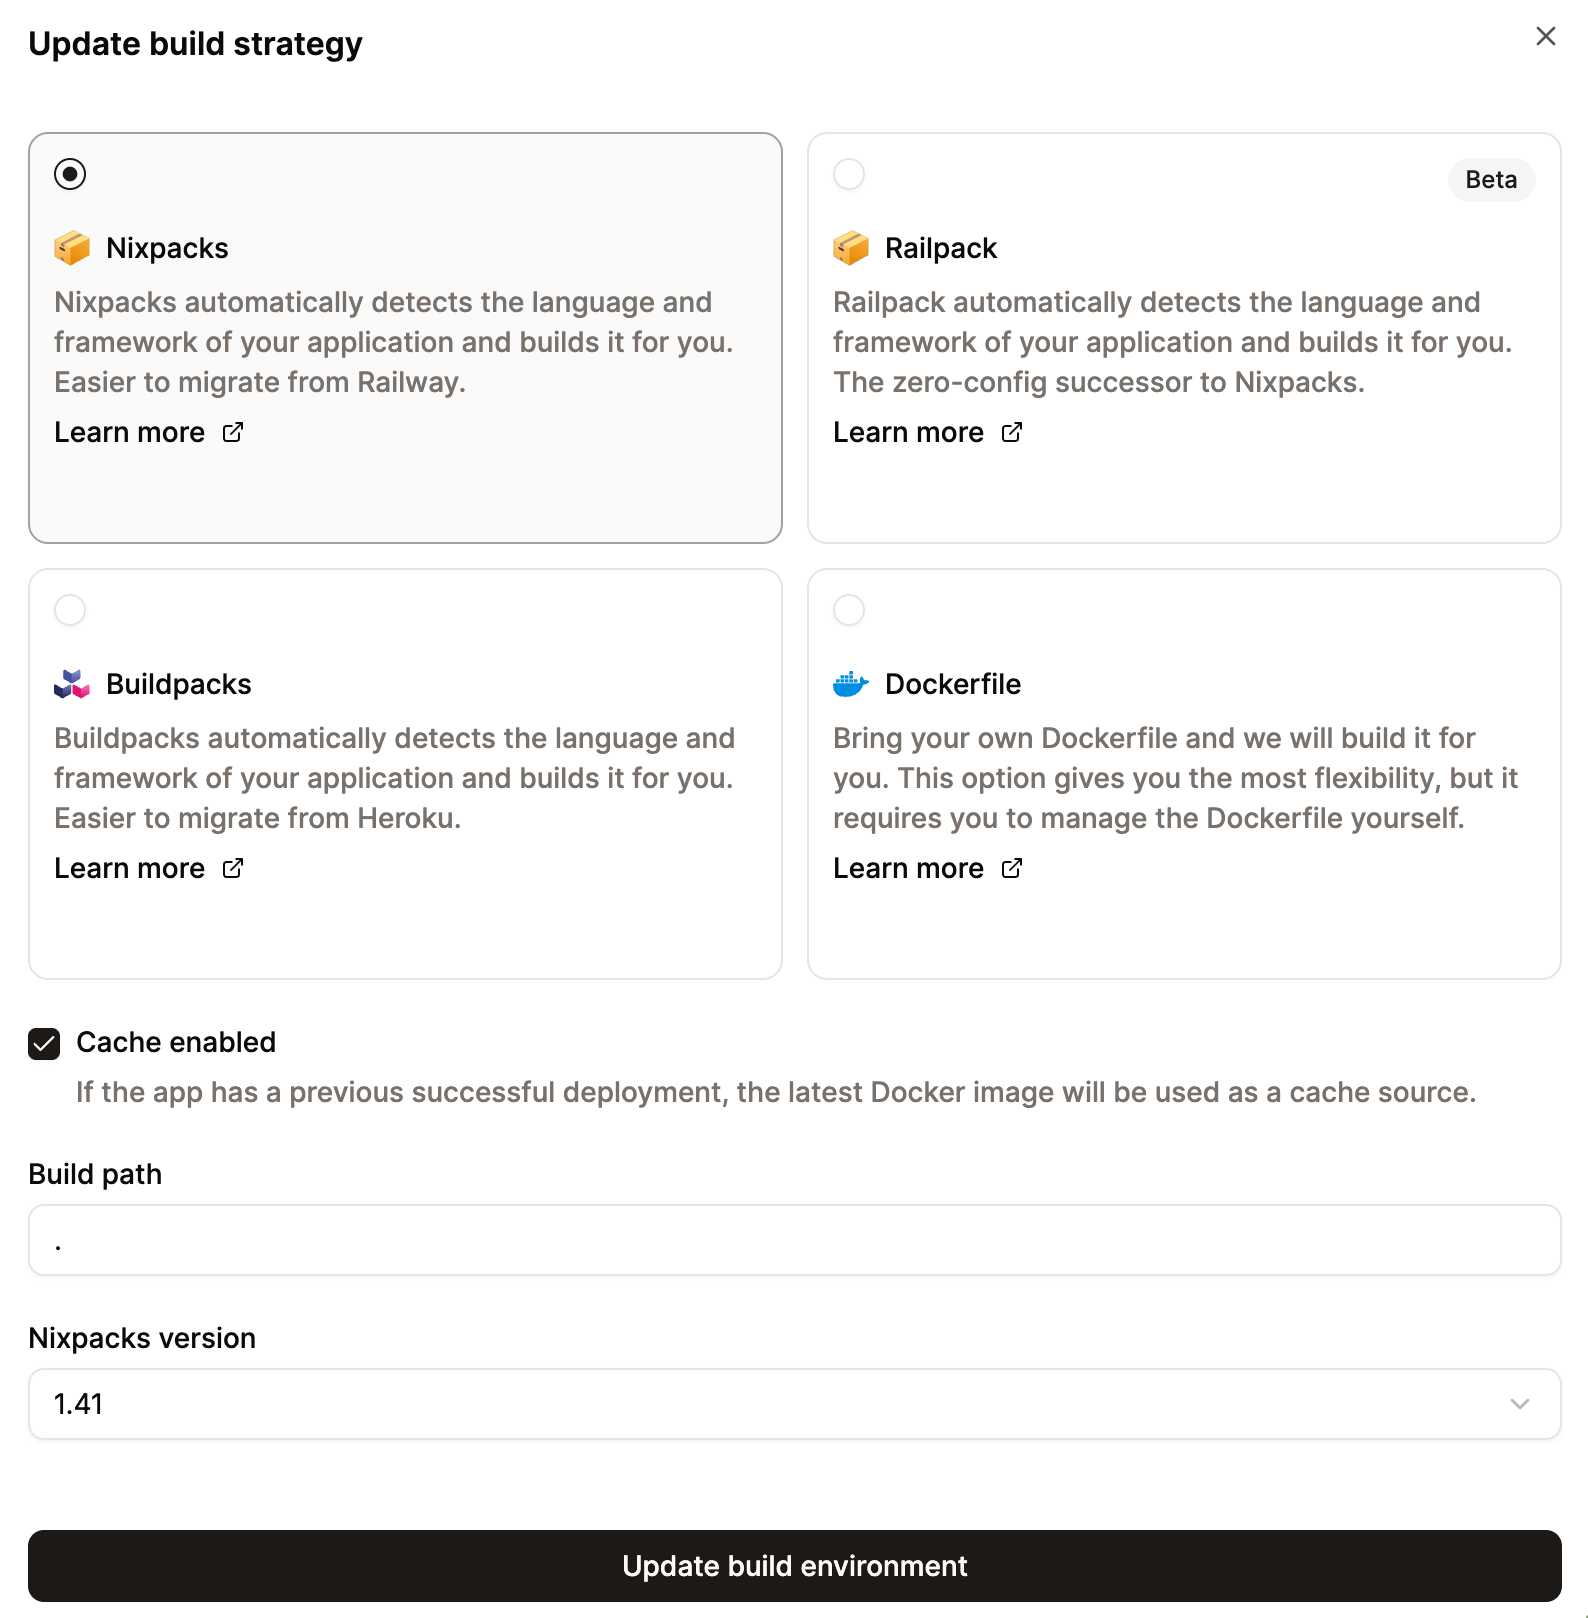
Select Nixpacks for your build environment
Railpack
Use Railpack, the successor to Nixpacks, to create a container for your application based on your repository. Railpack analyzes your repository and builds an optimized container image with zero configuration, powered by BuildKit.- Cache enabled: When you build your application, Sevalla creates a deployable image from your code. By default, cache is enabled, which stores the latest successful deployment so that future builds can reuse unchanged components, significantly speeding up the process and reducing resource usage.
- Build path: This is the path in the repository to the files required to build the application. Most applications are built from the repository root, and the Build path defaults to this (.). If you have a different build path, specify it here. For example, if your application needs to be built from a subdirectory named app, enter app in the Build path field. This is also useful if you have a monorepo.
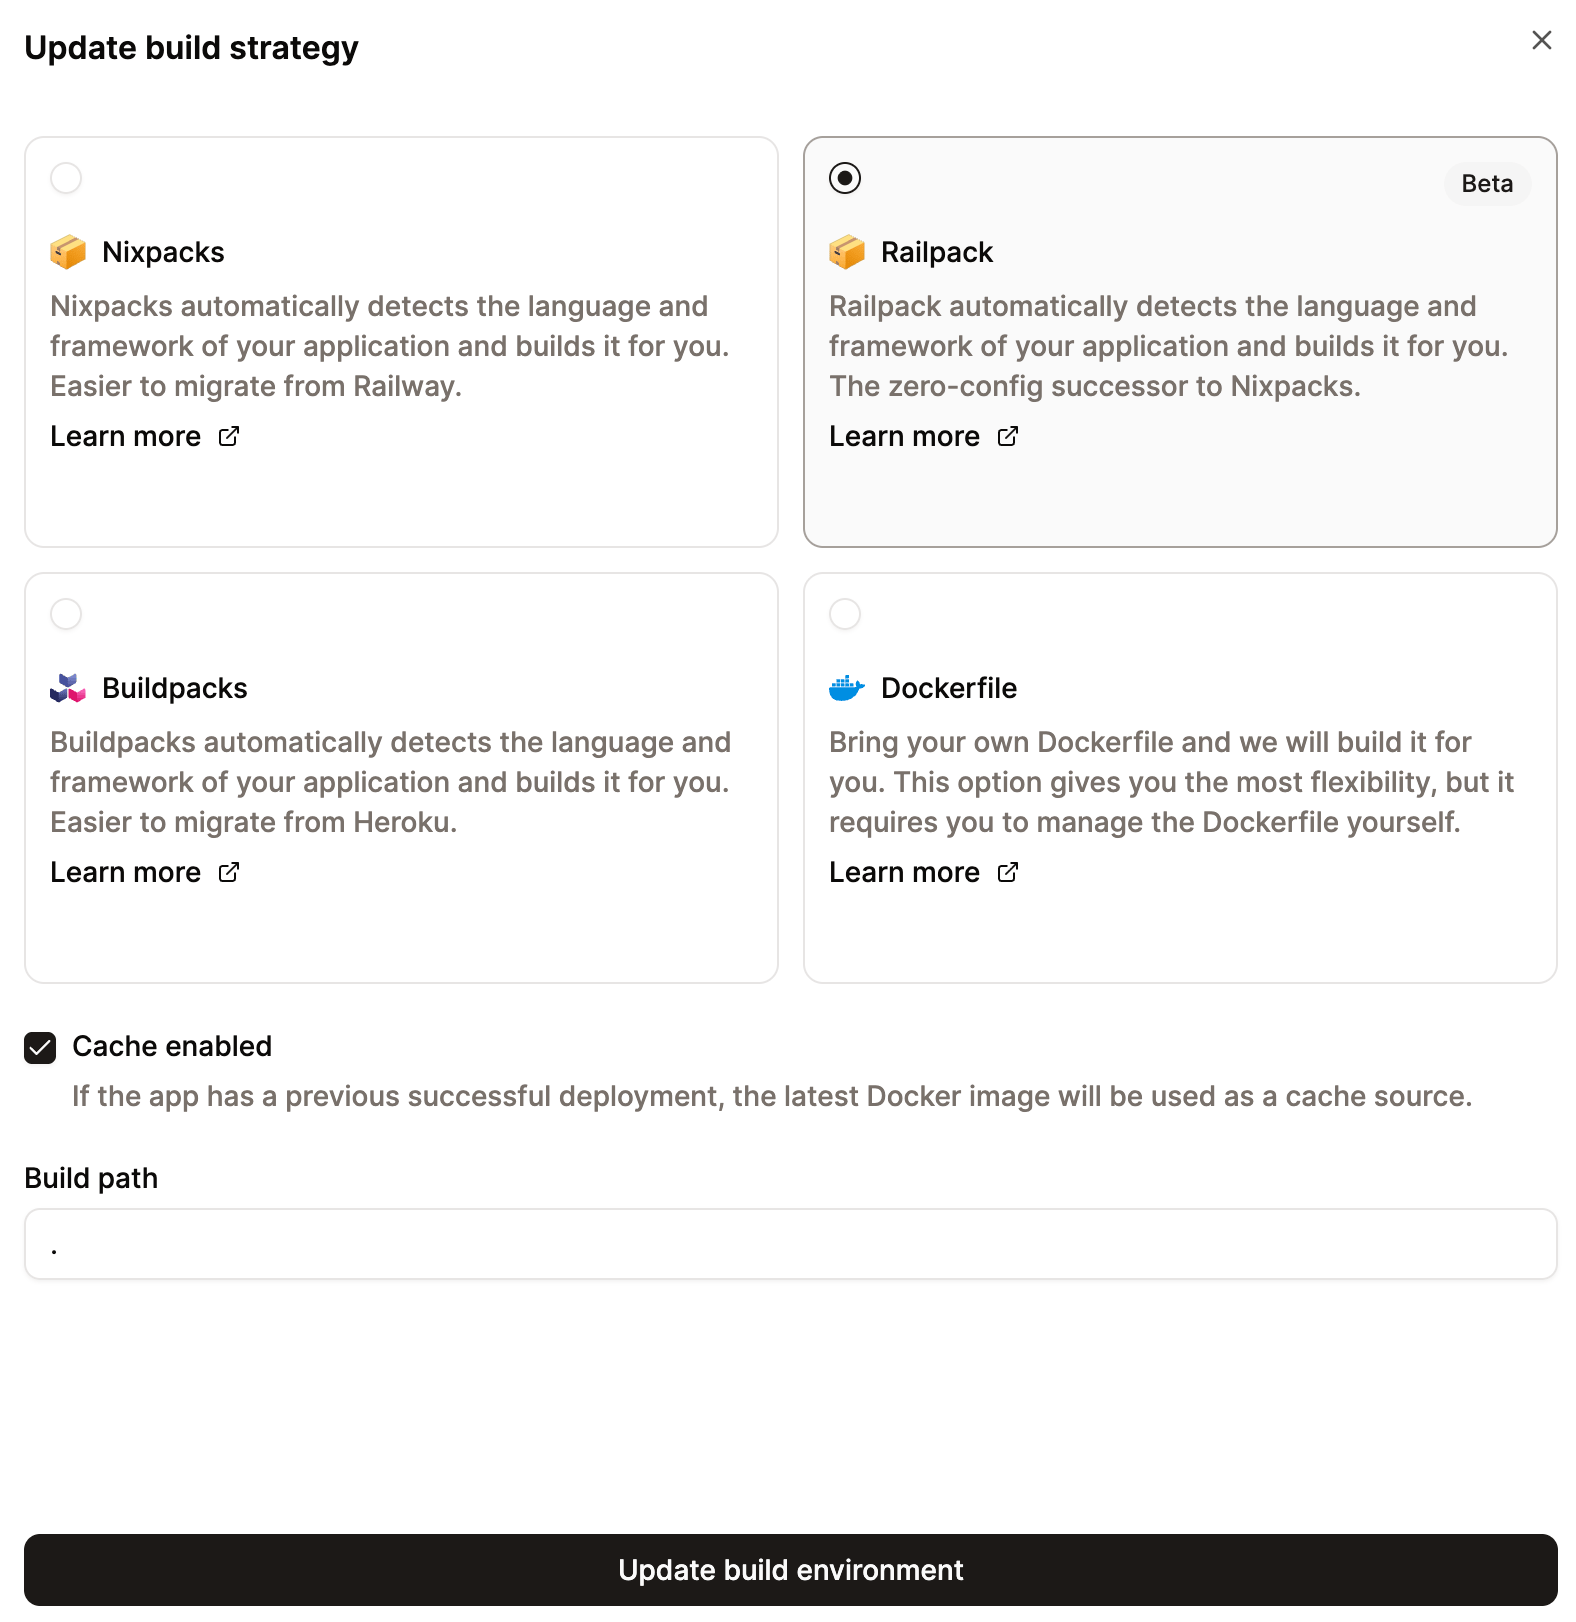

Select Railpack for your build environment
Buildpacks
Use Buildpacks to create a container for your application based on your repository.- Cache enabled: When you build your application, Sevalla creates a deployable image from your code. By default, cache is enabled, which stores the latest successful deployment so that future builds can reuse unchanged components, significantly speeding up the process and reducing resource usage.
- Build path: This is the path in the repository to the files required to build the application. Most applications are built from the repository root, and the Build path defaults to this (.). If you have a different build path, specify it here. For example, if your application needs to be built from a subdirectory named app, enter app in the Build path field. This is also useful if you have a monorepo.
- Pack builder: Choose which buildpack builder you want to use. For information about what each builder includes, refer to Heroku stacks.
- Add buildpack: Add the required buildpacks for your application. The buildpack that contains the primary language of your application must be the last one in the buildpacks list. For example, if you have a Node.js application and need to add another buildpack, make sure the Node.js buildpack is at the end of the list.
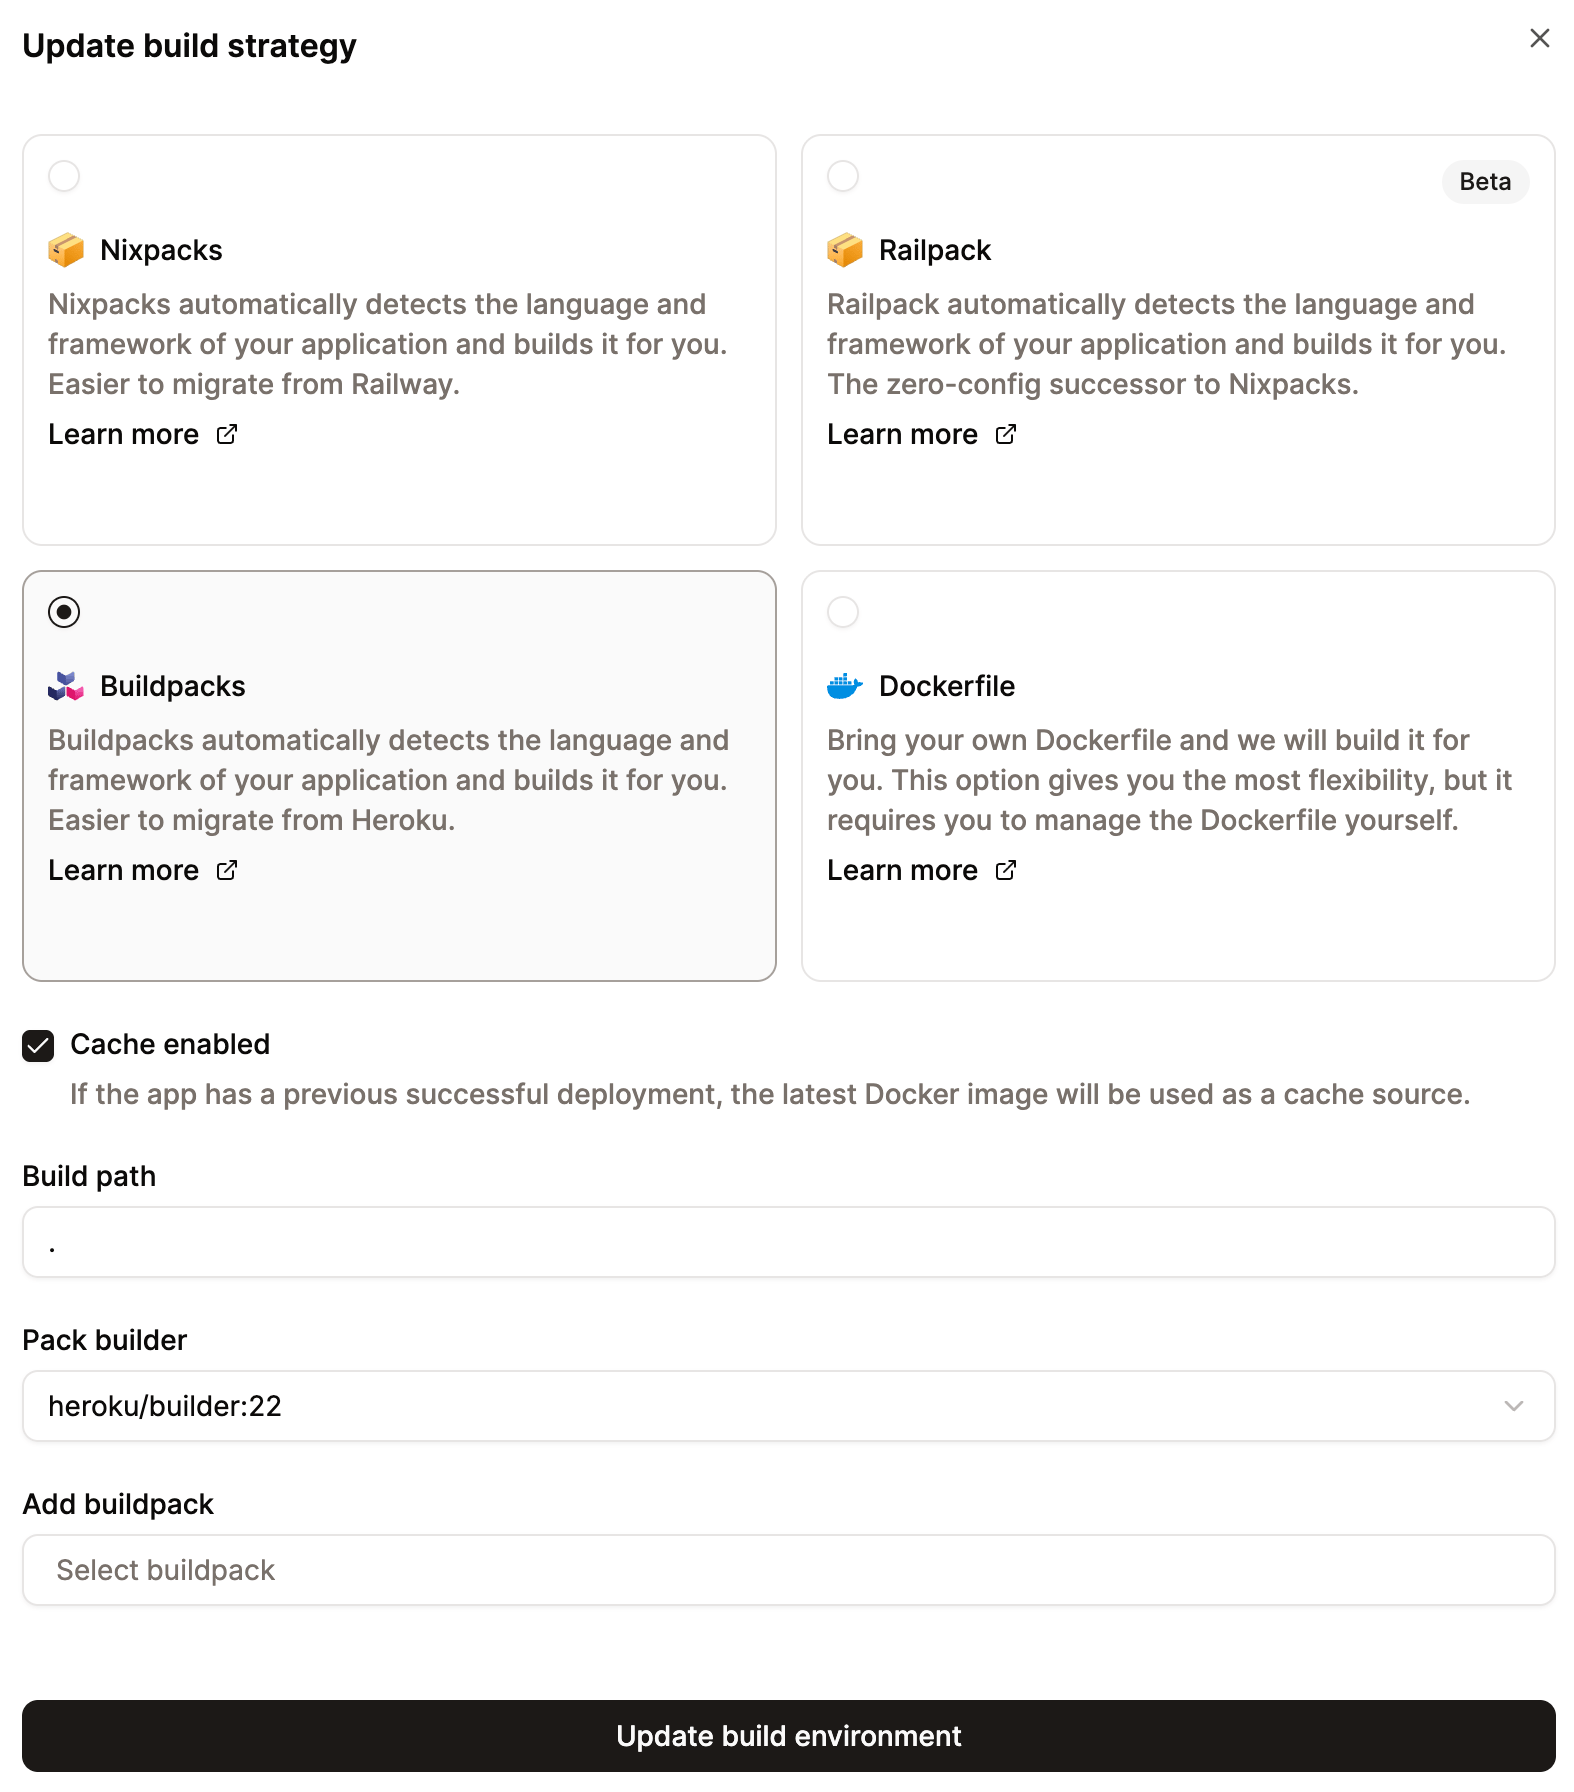
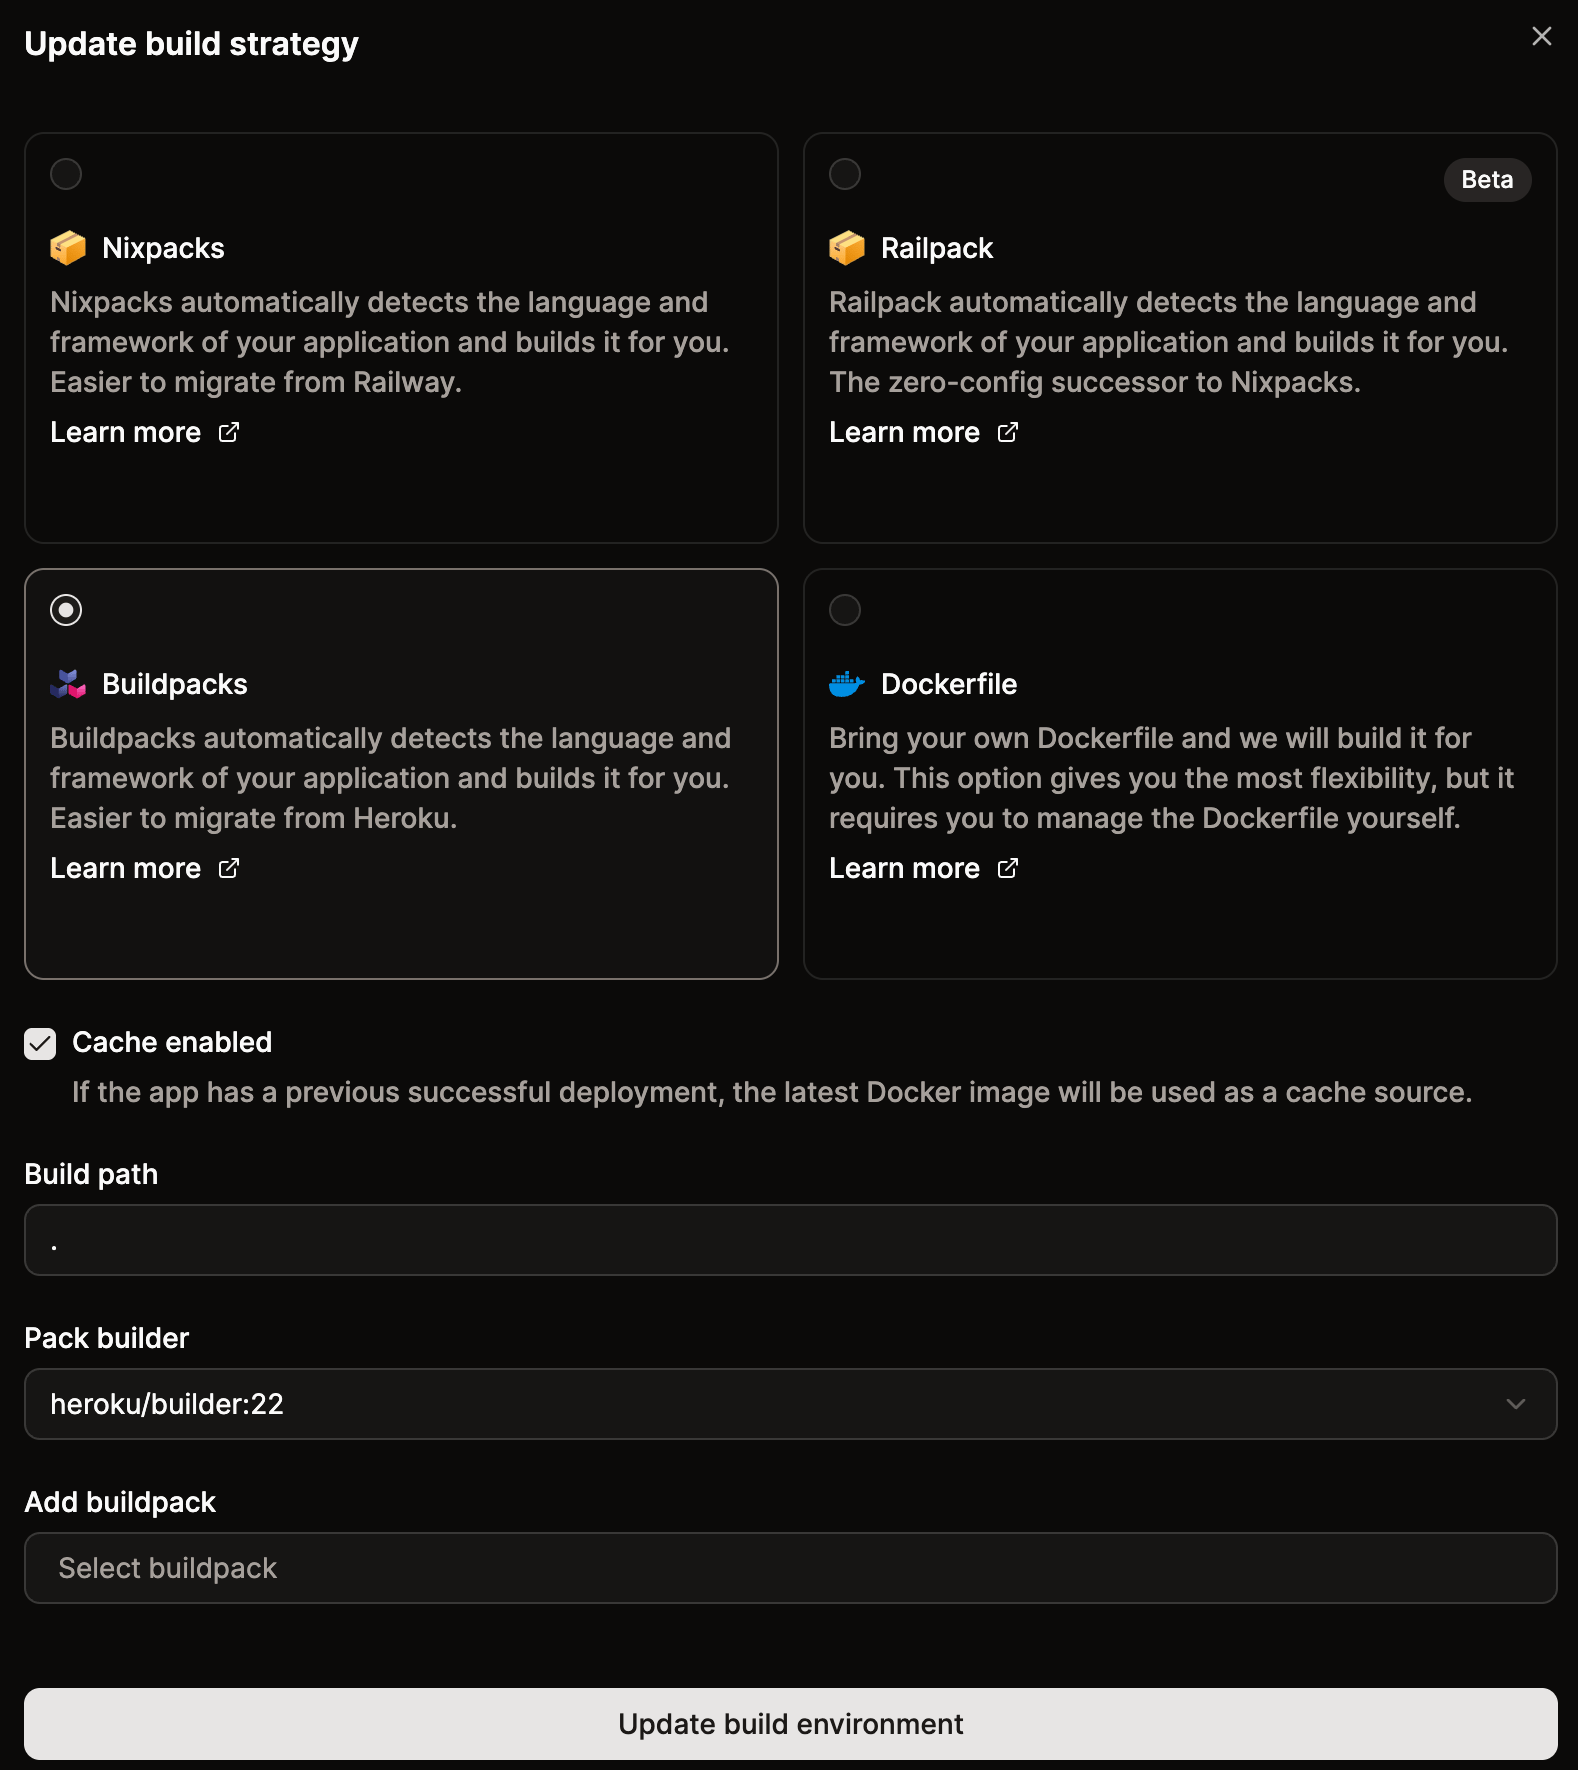
Select Buildpacks for your build environment.
Dockerfile
Use a Dockerfile (stored in your repository) to create a container for your application.- Cache enabled: When you build your application, Sevalla creates a deployable image from your code. By default, cache is enabled, which stores the latest successful Docker image so that future builds can reuse unchanged components, significantly speeding up the process and reducing resource usage.
- Dockerfile path: This is the path to your Dockerfile relative to the repository root. For example, if your Dockerfile is in the repository root, enter Dockerfile in that field. If your Dockerfile is in a subdirectory named app, enter the path to the Dockerfile: app/Dockerfile.
- Docker context: This is the path in the repository we need access to so we can build your application. Most applications are built from the repository root, and you can enter the repository root (.) in the Context field. For example, if your application needs to be built from a subdirectory named app, enter app in the Context field.
- Docker Registry Credential: This is only required for private Docker images. You must enter your registry credentials within Integration > Registry credentials. Once you’ve entered your credentials in the Company settings, you can choose which credentials you want to use.
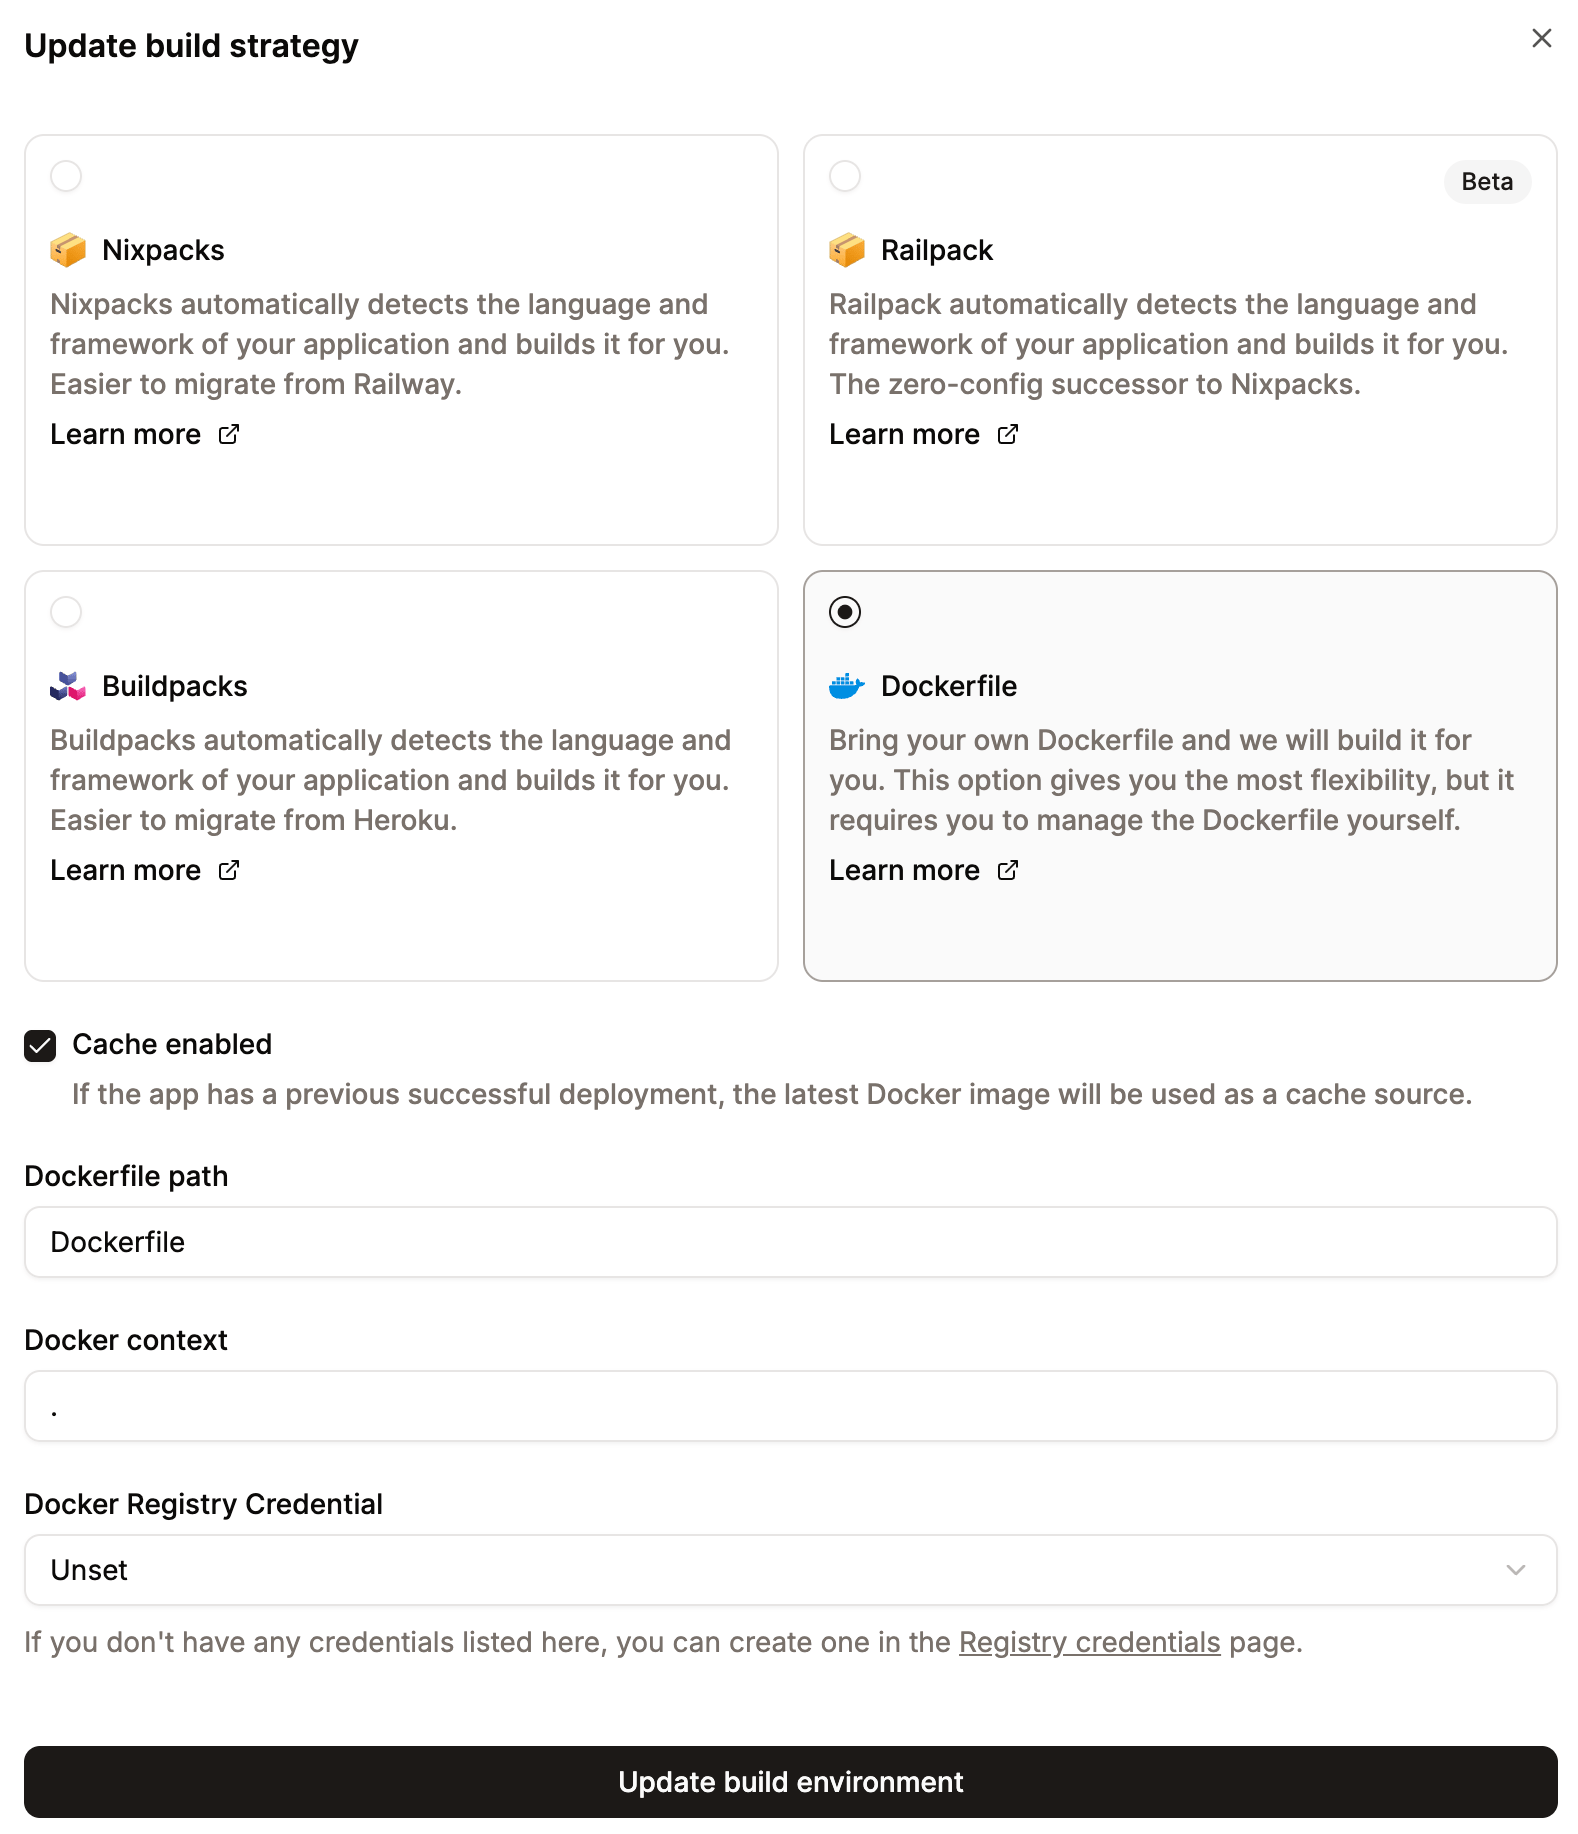

Select Dockerfile for your build environment.
Danger zone
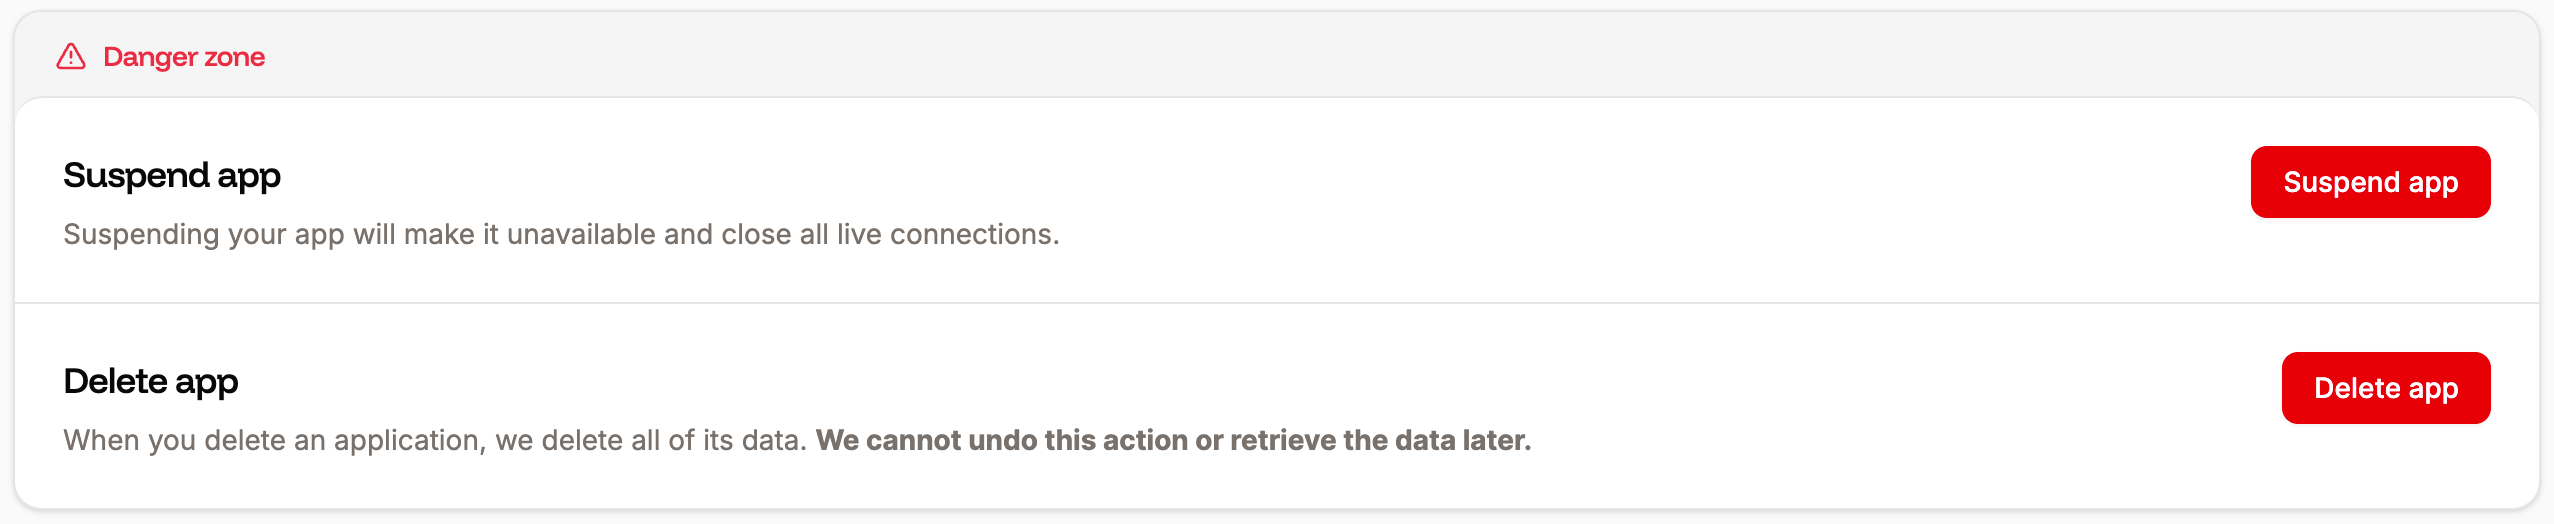

Danger zone settings for your application.
Only Company Owners and Company Administrators can suspend, resume, or delete an Application. For information about how to change a user’s access, refer to User Management.
Suspend or Activate app
There may be times when you need to stop an application without deleting it. This can be useful if you need to troubleshoot issues or test parts of the application without it running. Suspending the application doesn’t change or remove anything from it. Connections to the application remain in place but will not work while the application is suspended. You will not incur any costs for the application during the suspension. Click Suspend app and confirm the suspension by clicking Continue. When you’re ready to restart your application, click Activate app and confirm the restart by clicking Continue.Delete app
If you no longer need the application, click Delete app and click Continue to remove it completely. Deleting the application completely removes the following:- All files
- Settings
- Persistent storage disks
- Connections to other applications or databases.