Why migrate to Sevalla
Beyond Heroku’s shift to maintenance mode, Sevalla provides several advantages:- Lower costs - Competitive pricing with no surprise add-on fees. Databases, object storage, CDN, and DDoS protection are integrated into the platform rather than sold as third-party add-ons.
- Built-in CDN and edge caching - Powered by Cloudflare’s global network spanning 260+ cities in 100+ countries. Enabled with a single click, no add-on required.
- DDoS protection included - Enterprise-level Cloudflare DDoS protection on every application at no extra cost.
- Private networking - Internal connections between your applications and databases stay within the network, with no exposure to the public internet.
- Flexible build options - Choose between Nixpacks (20+ languages), Heroku Buildpacks, or your own Dockerfile.
- Preview environments - Automatically generated for pull requests through pipelines, making it easy to test changes before promoting to production.
- Persistent storage - Attach disks directly to your application pods, something Heroku doesn’t natively support.
- Modern analytics - Built-in compute and web analytics with request metrics, country-level breakdowns, response times, and zoomable charts.
Feature mapping
The tables below show how Heroku features and terminology map to their Sevalla equivalents.Compute
Deployment
Networking
Datastores
Storage and assets
Observability
Platform
Enterprise and security
Phase 1: Prepare to migrate
Before moving anything, take inventory of your Heroku setup so nothing gets missed.Create a Sevalla account
Sign up at sevalla.com if you haven’t already. You can explore the dashboard and create resources before committing to a migration.Catalog your Heroku resources
For each Heroku app, document the following:-
Procfile processes - List every process type and its command. Each one maps to a Sevalla process:
webbecomes your web processworkerbecomes a background workerreleasebecomes a job process with a “Before deployment” start policy
-
Config vars - Export all environment variables. You can import these into Sevalla via the dashboard or by uploading a
.envfile. - Add-ons - Identify your Heroku Postgres, Redis, and any third-party add-ons. Many third-party services (like SendGrid, Mailgun, or Sentry) continue working after migration since they connect via environment variables.
- Custom domains - Note all custom domains and their DNS configuration.
Phase 2: Recreate your app on Sevalla
Step 1: Create datastores first
Create your databases before deploying your application so the app can connect immediately on first deploy.You are not moving data yet. This step creates empty databases for your application to connect to. Data migration happens in Phase 3.
- In the Sevalla dashboard, go to Databases > Create database.
- Select the database type and version (PostgreSQL, MySQL, MariaDB, Redis, or Valkey).
- Configure the database name, user, and password.
- Select a data center location - this must match the location you choose for your application to enable internal connections.
- Choose a resource size and click Create database.

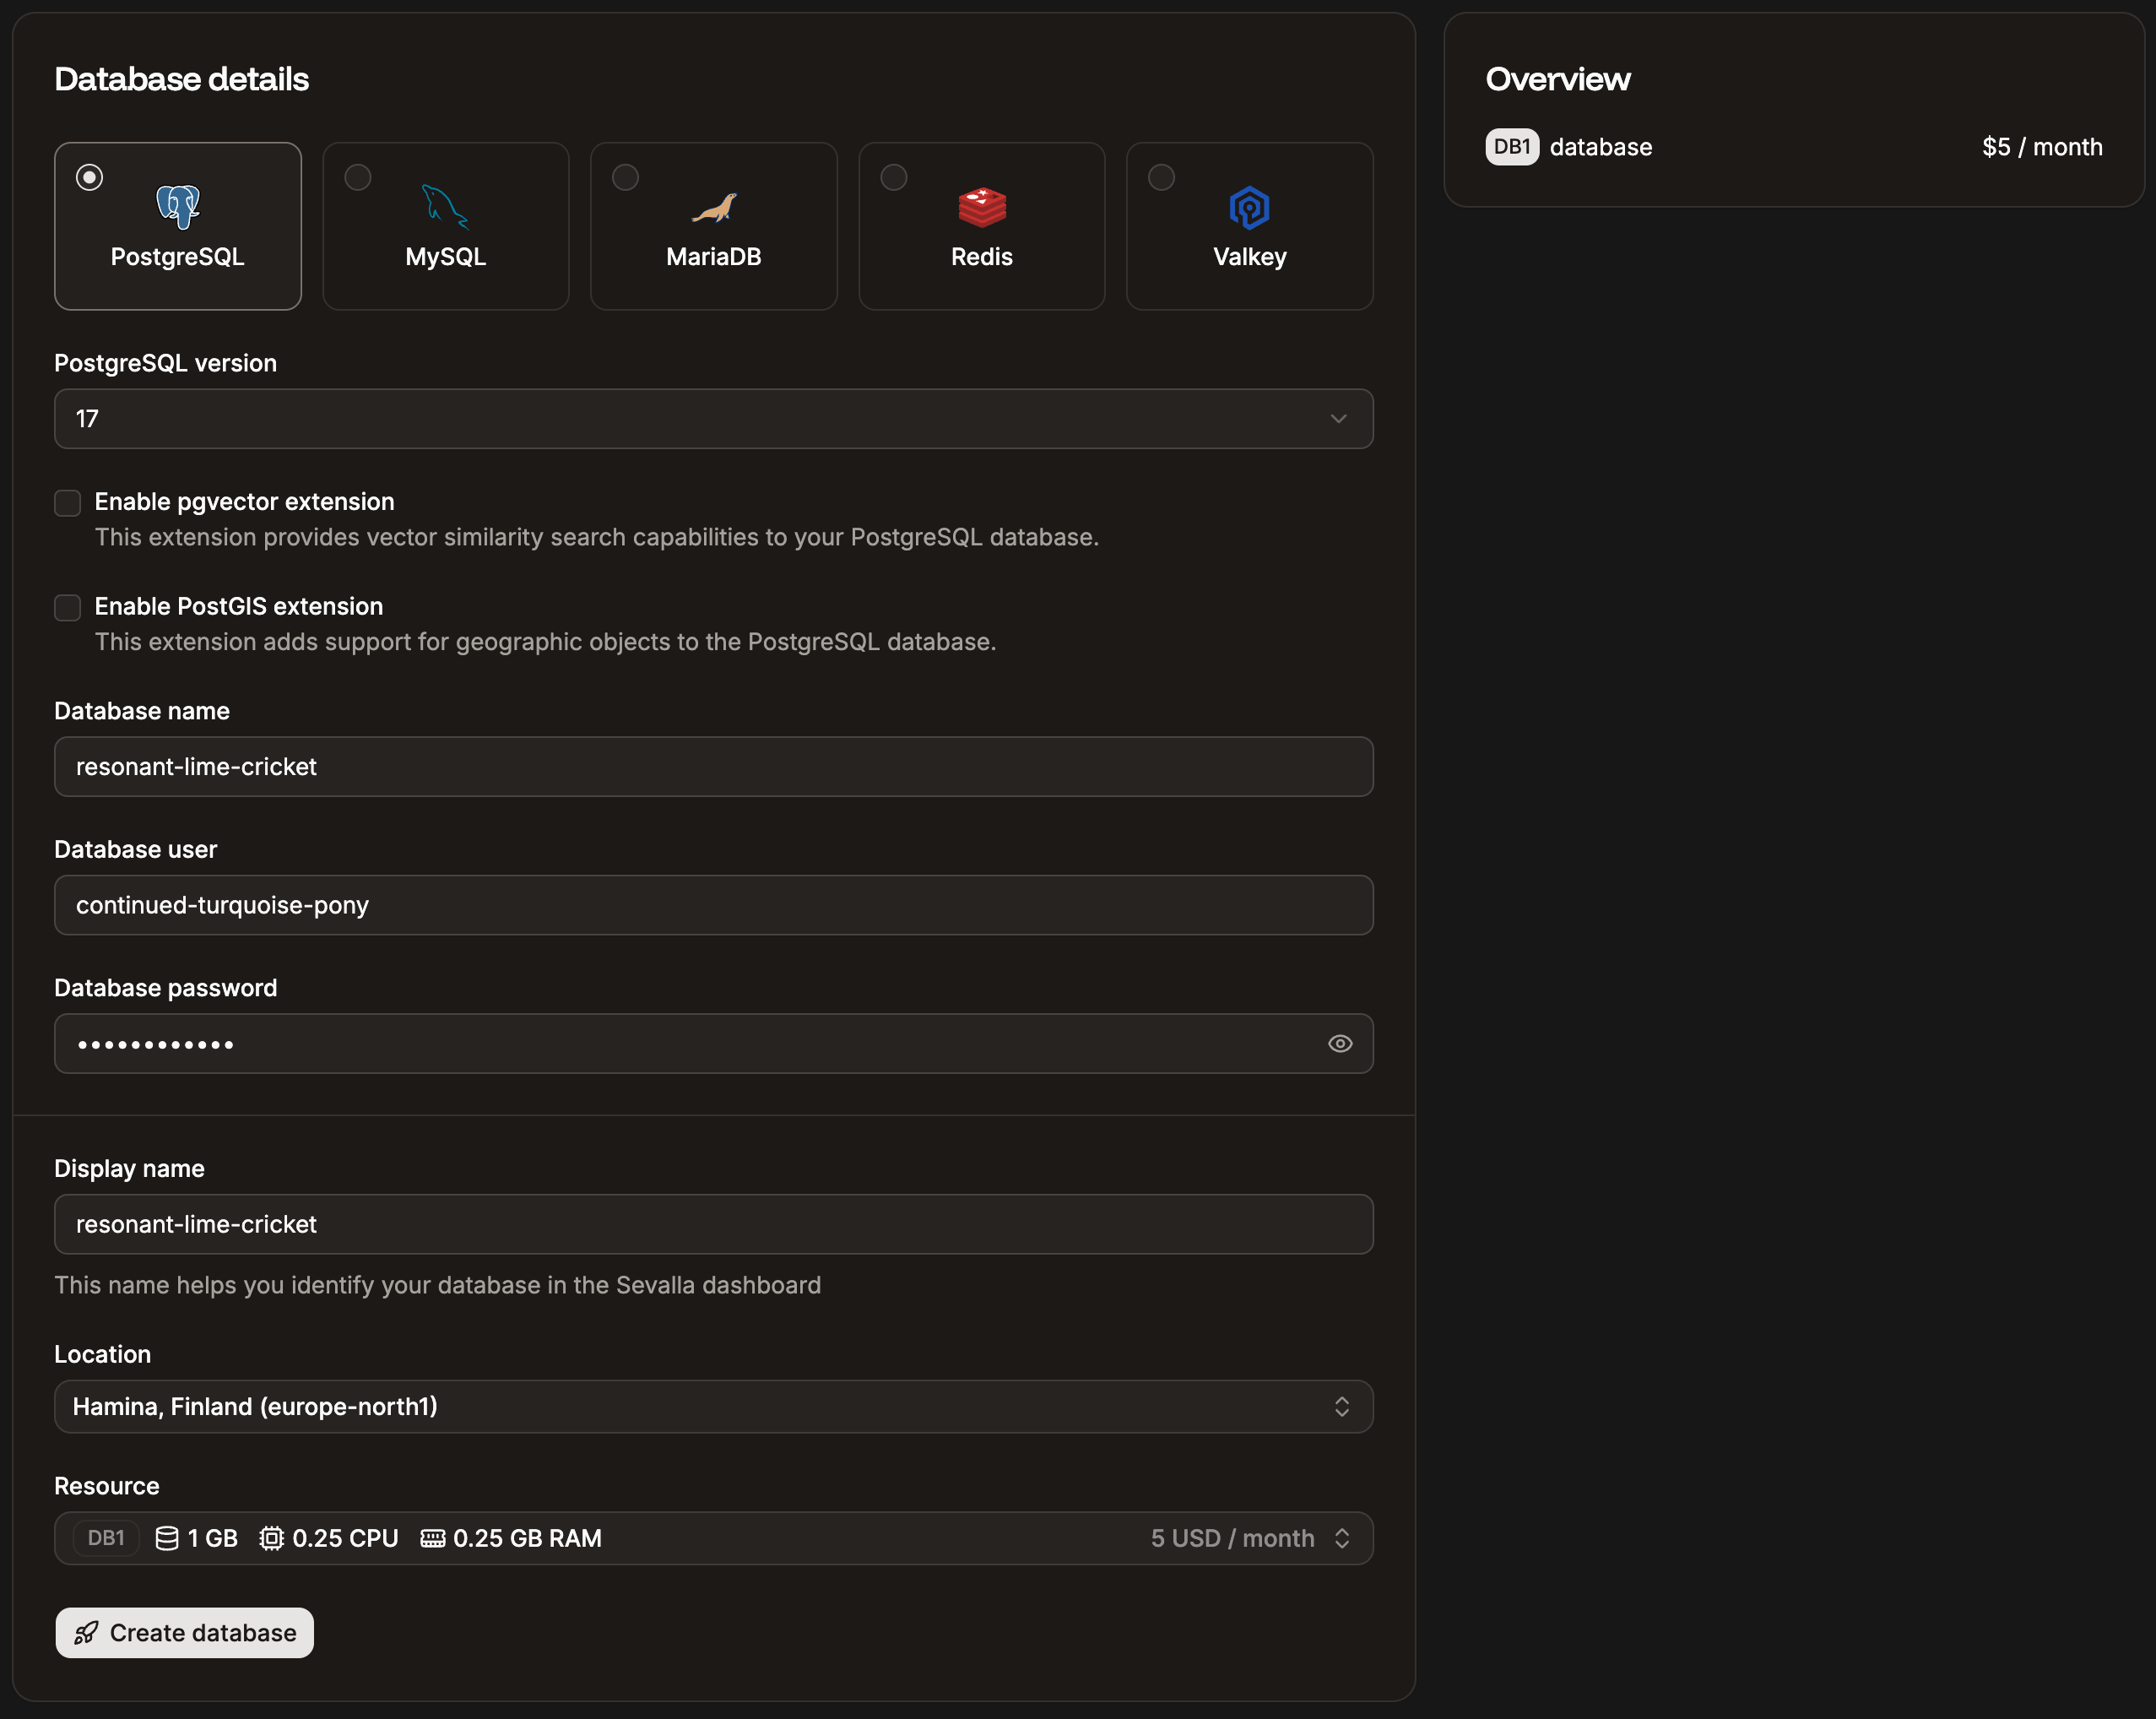
Create a database in Sevalla.
Step 2: Create your application
- In the dashboard, go to Applications > Create > Application.
- Connect your Git provider (GitHub, GitLab, or Bitbucket) and select your repository, or deploy from a Docker image.
- Choose the same data center location as your databases.
- Select a process size.
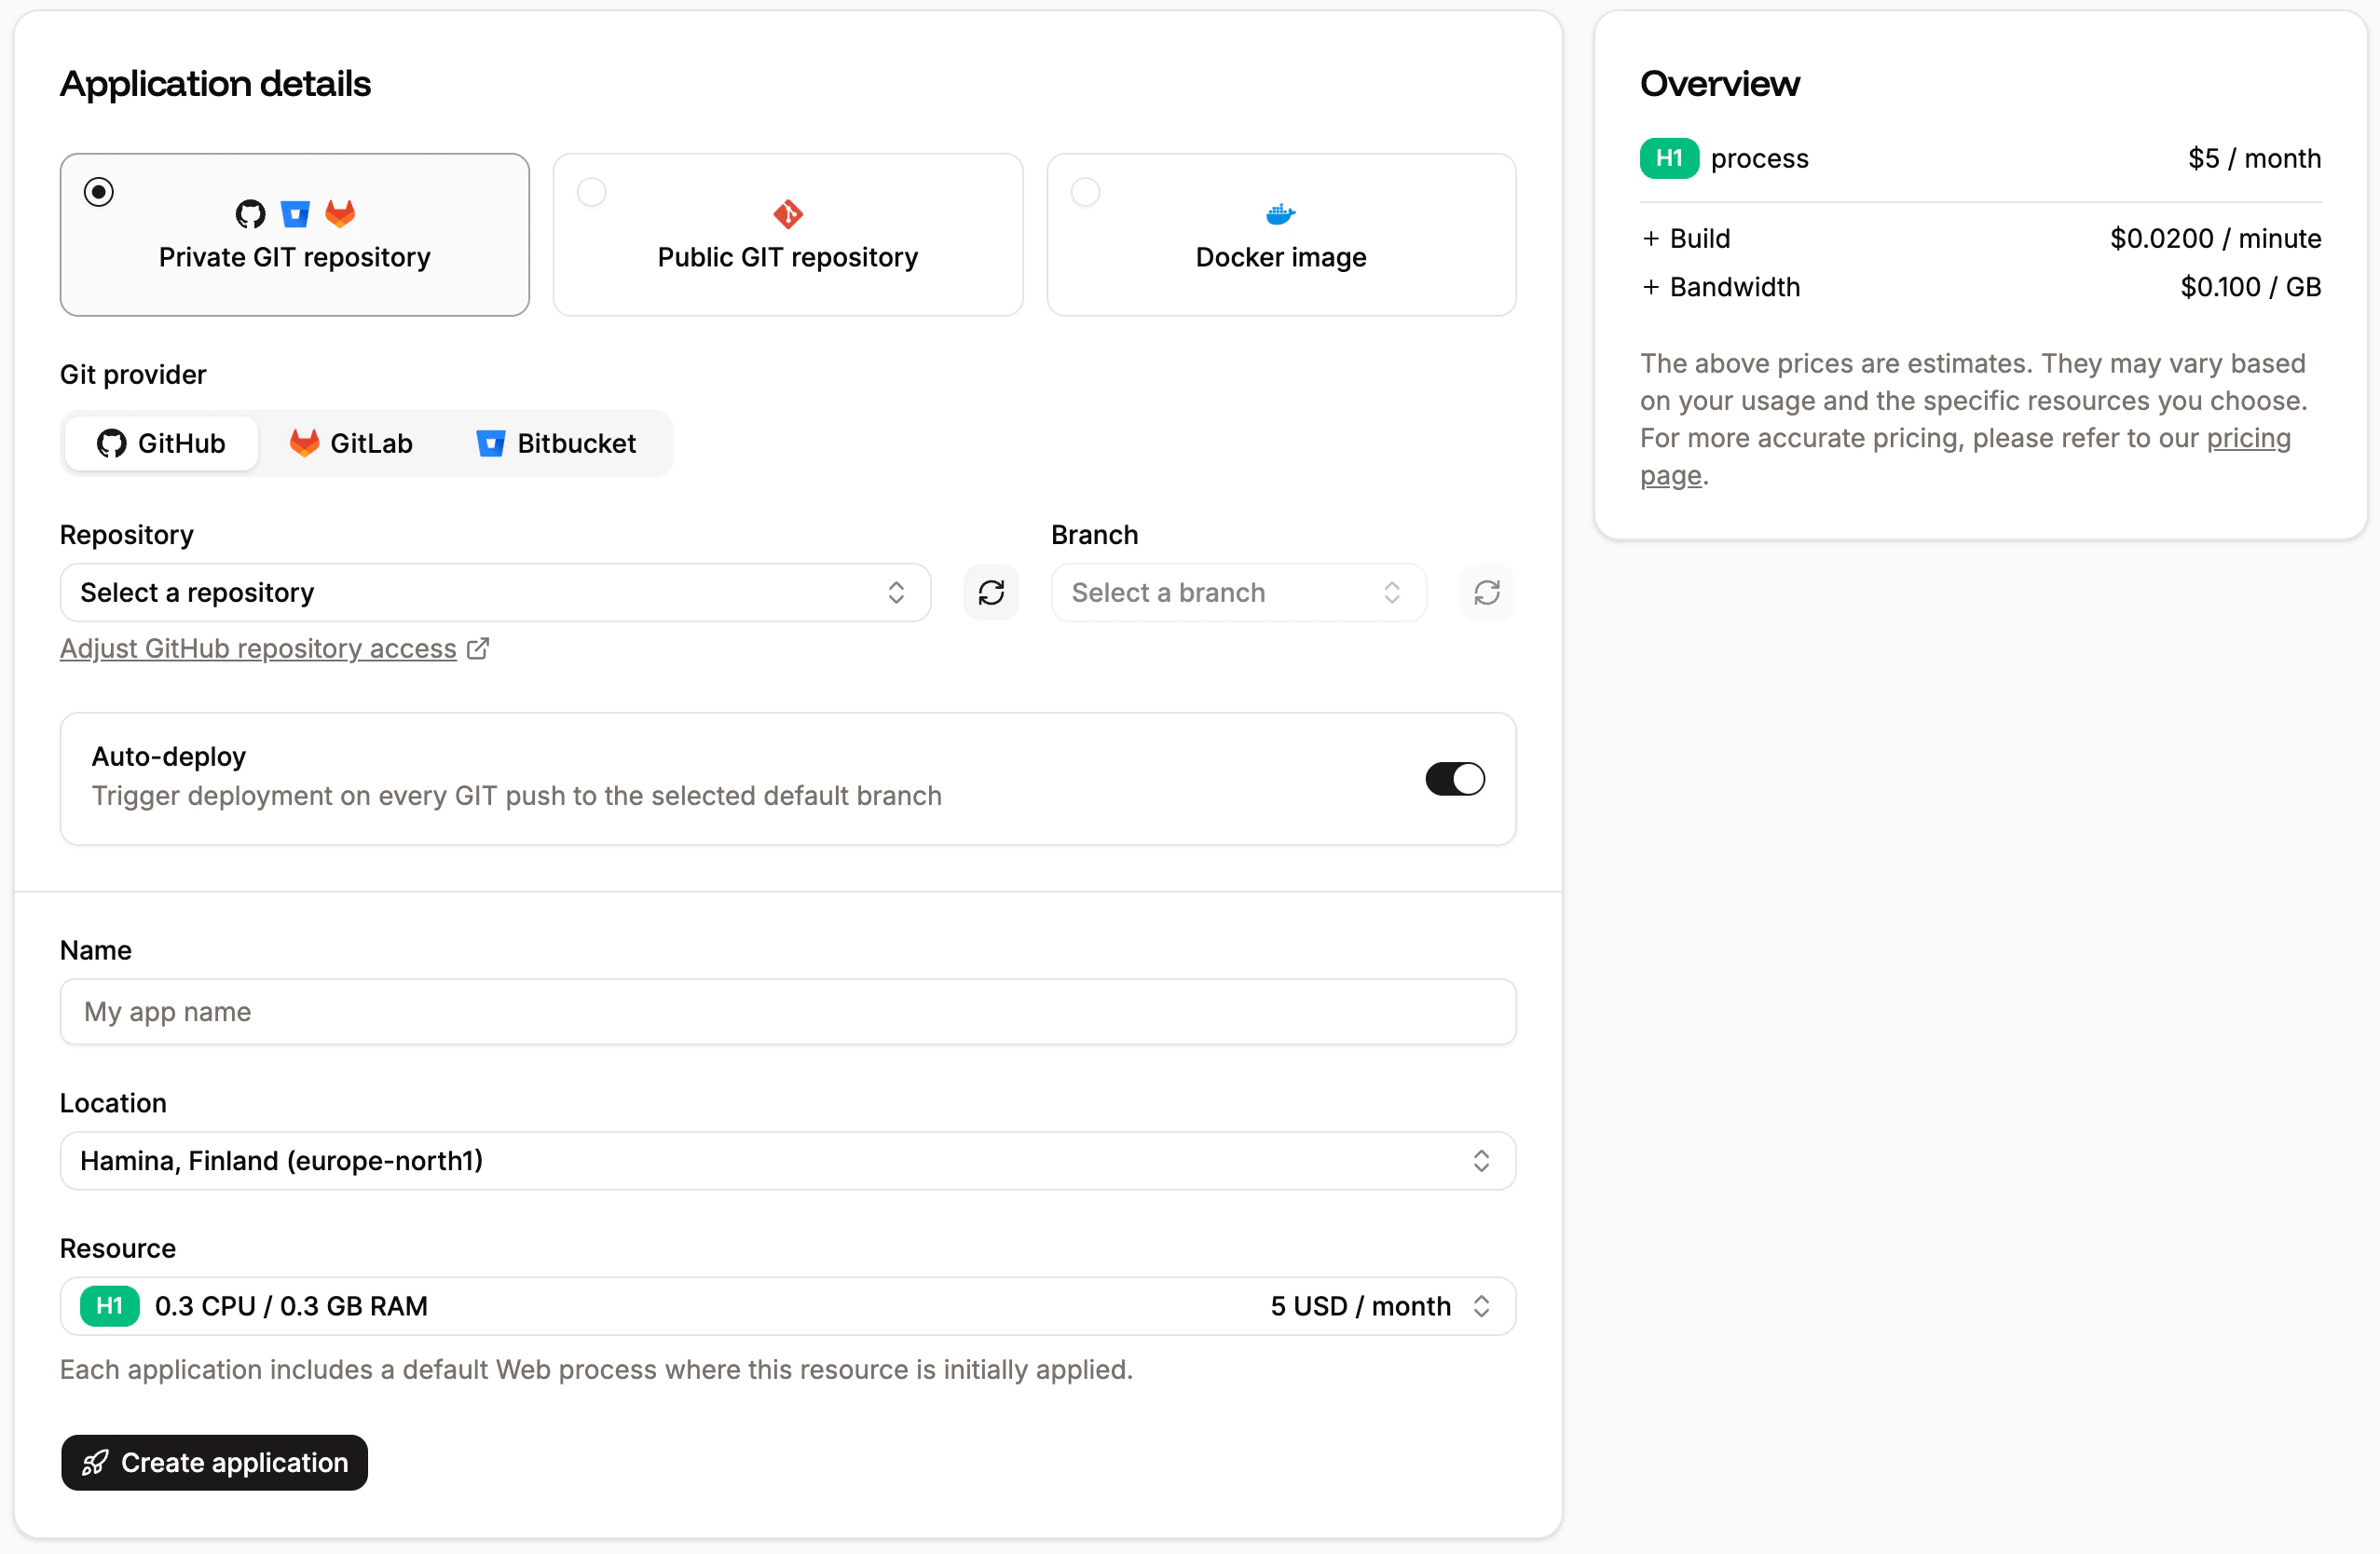
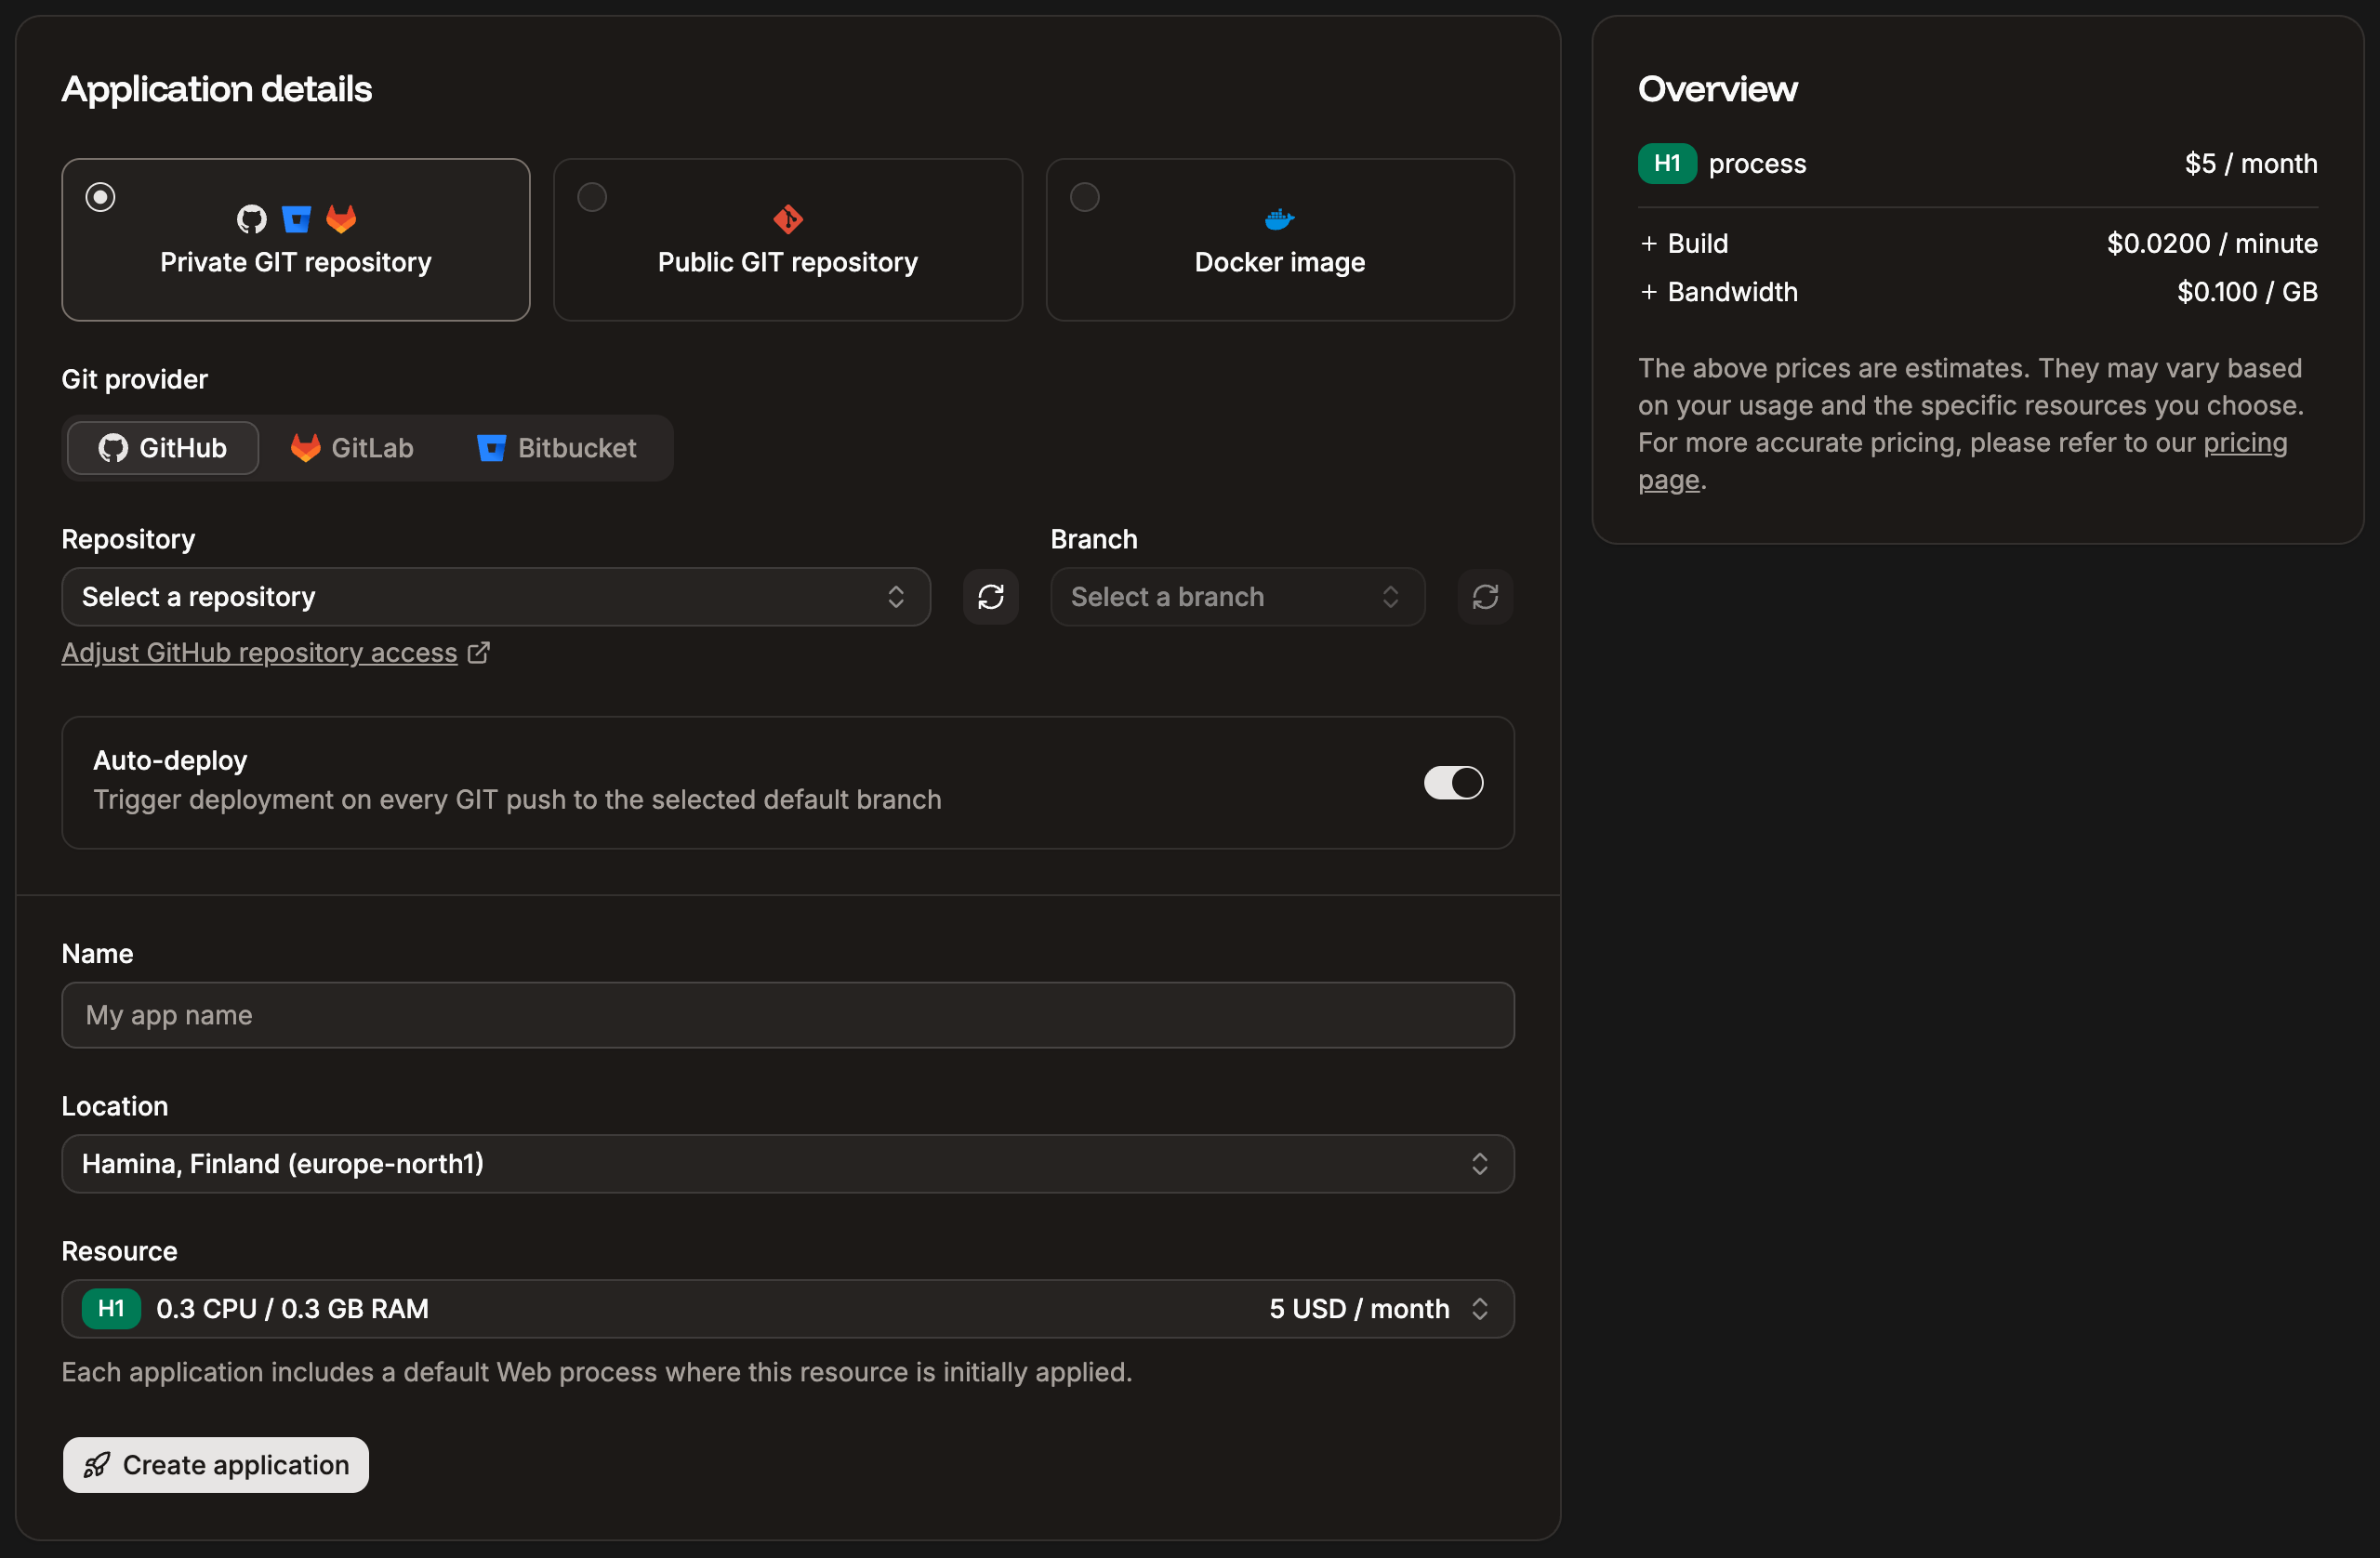
Add an application from a private Git repository.
Don’t deploy yet. Configure your environment variables and processes first.
Step 3: Configure environment variables
- Go to your application’s Environment variables tab.
- Add your Heroku config vars - you can paste key=value pairs in bulk or import a
.envfile. - Set each variable’s availability to Runtime, Build, or both.
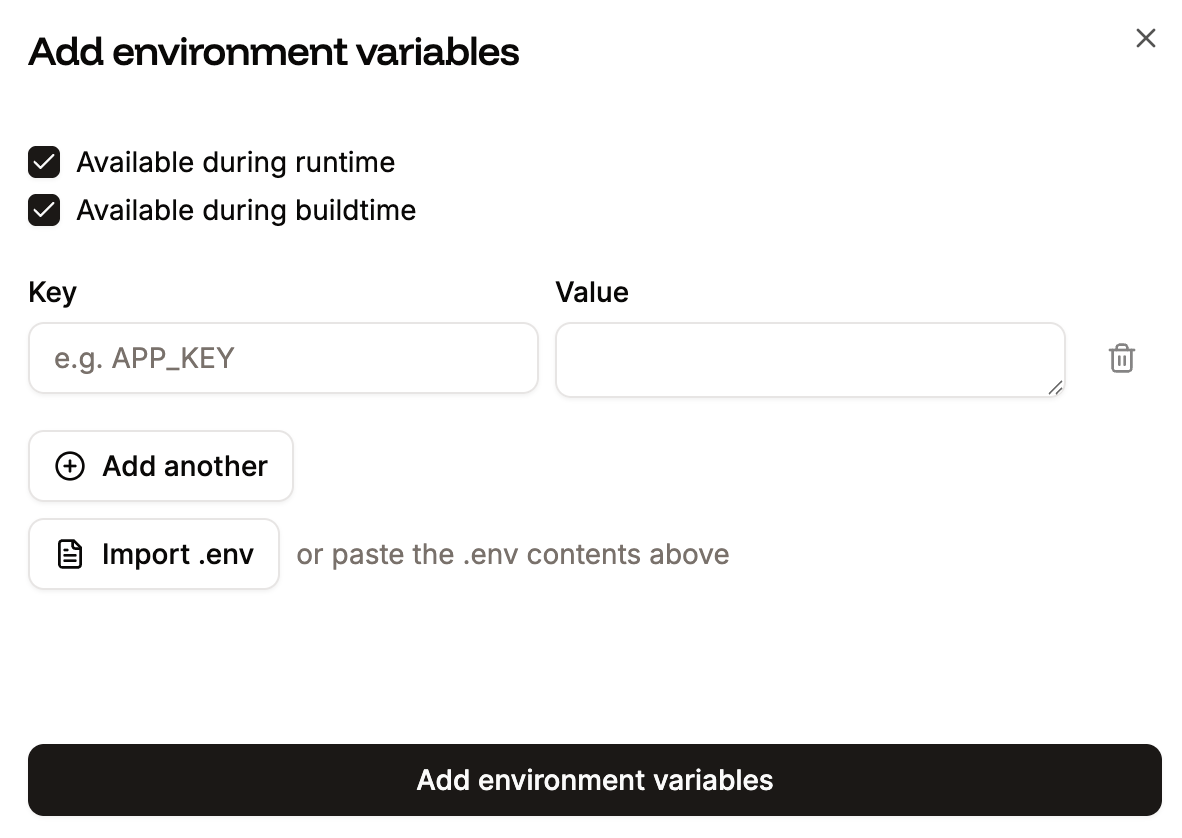

Add environment variables to your application.
Step 4: Set up internal connections
Connect your application to the databases you created in Step 1:- Go to your application’s Networking tab.
- Under Connected services, click Add internal connection.
- Select the database and select Add environment variables to the application to auto-populate connection details (e.g.
DATABASE_HOST,DATABASE_PORT,DATABASE_USER,DATABASE_PASSWORD,DATABASE_NAME). - Click Add connection.
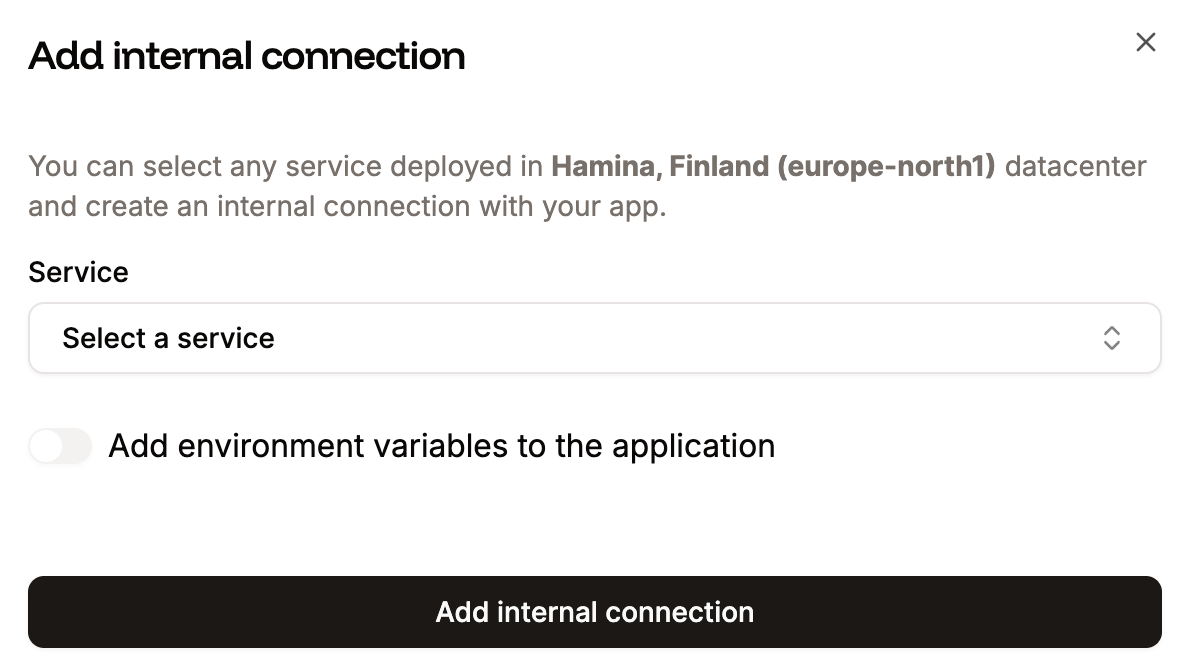
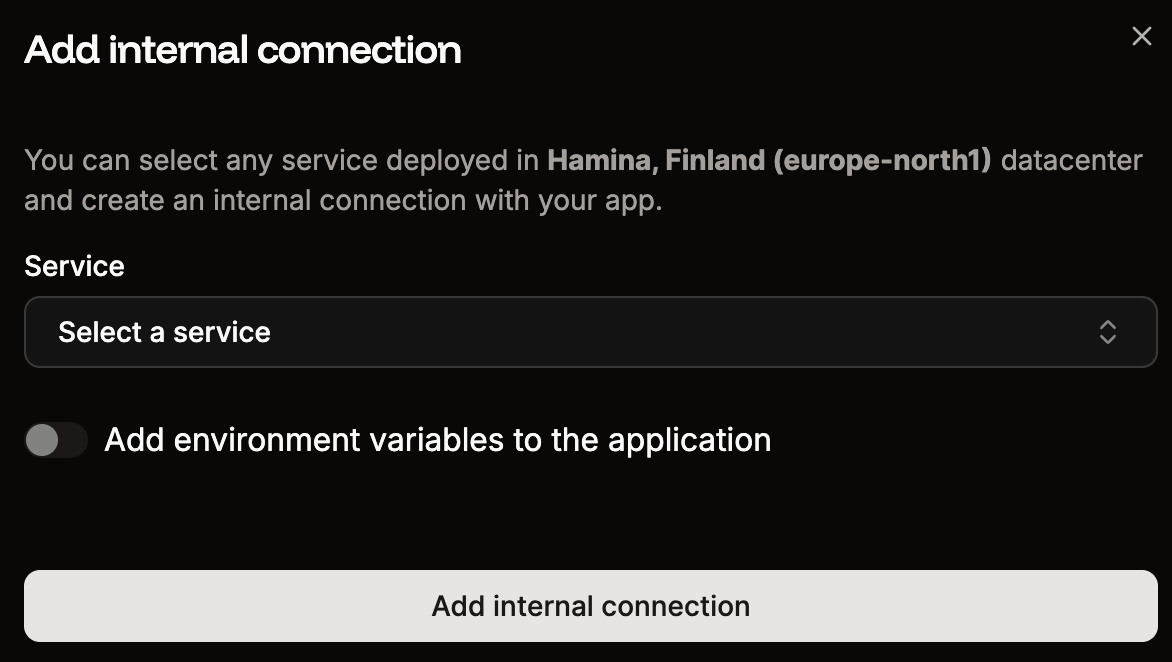
Add an internal connection to your database.
Step 5: Set up processes
If your Heroku app uses multiple Procfile processes, add the equivalent processes in Sevalla:- Go to your application’s Processes tab.
- Update the web process start command if needed.
- Click Create new process to add background workers, cron jobs, or jobs as needed.

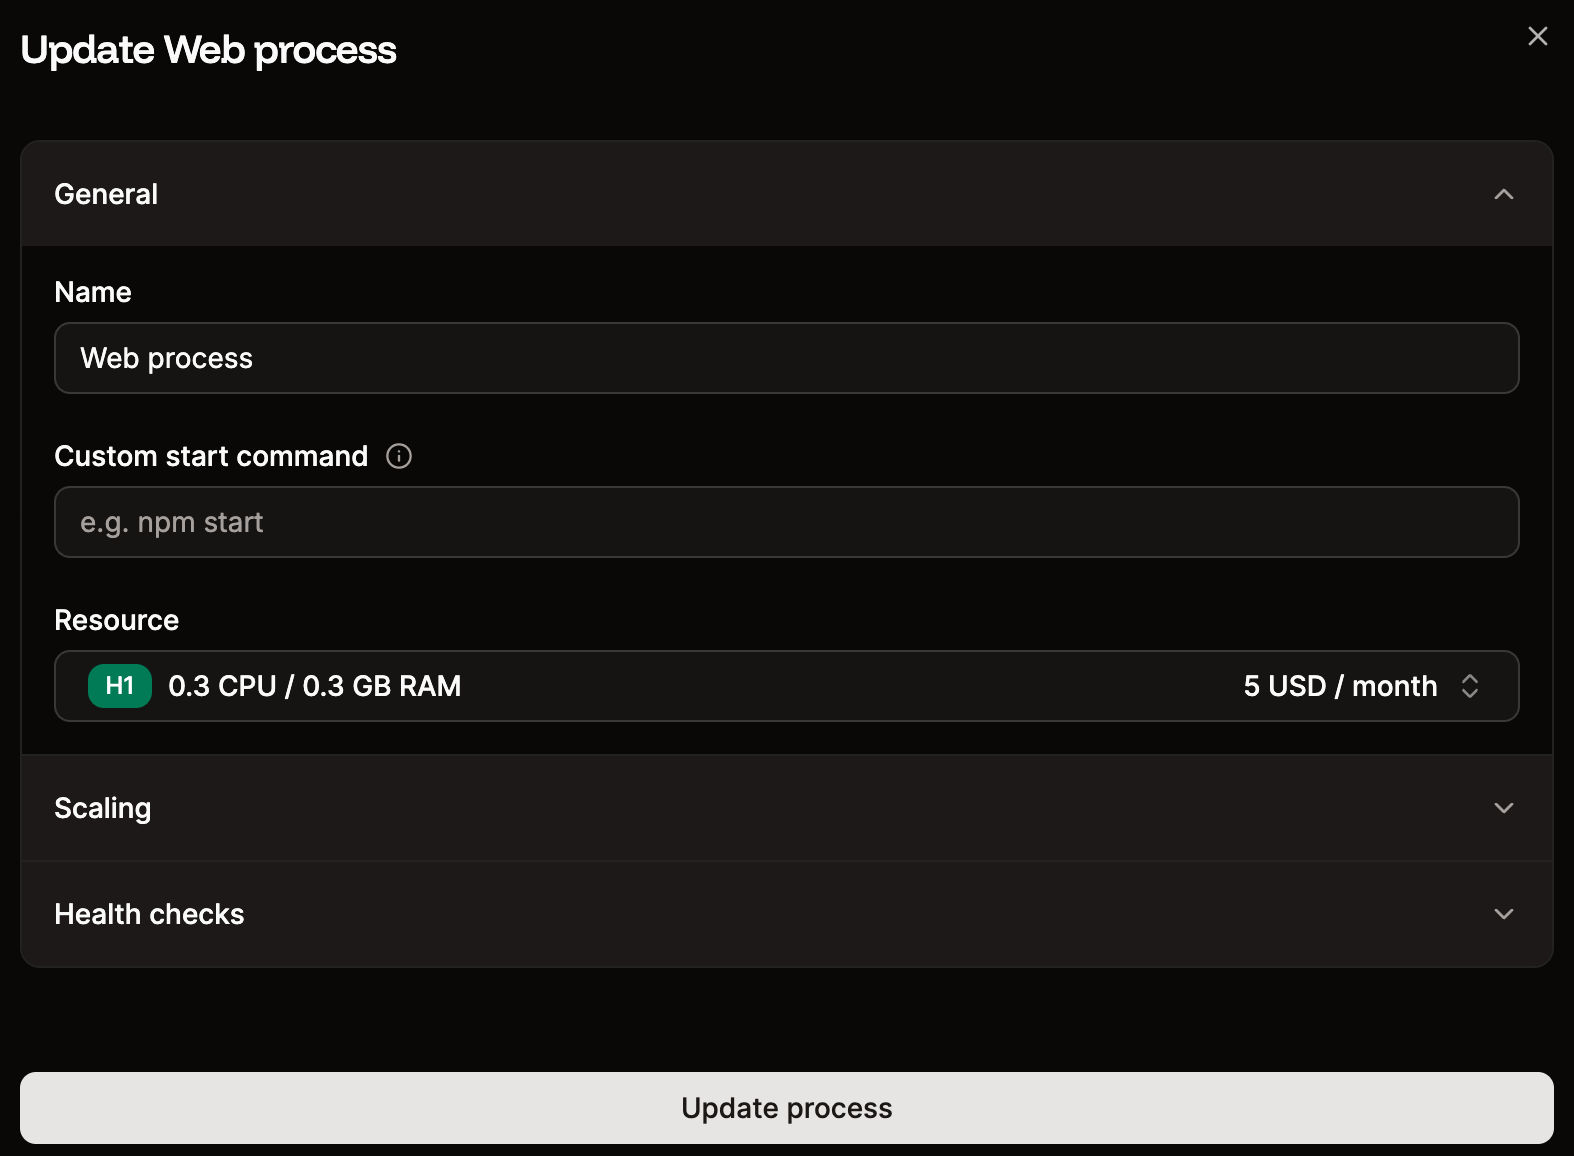
Update the web process start command and configuration.
Step 6: Configure build settings
Sevalla defaults to Nixpacks for builds. If you prefer to keep using Heroku Buildpacks:- Go to Settings > Build strategy > Update build strategy.
- Select Buildpacks and choose the appropriate Heroku Pack builder.
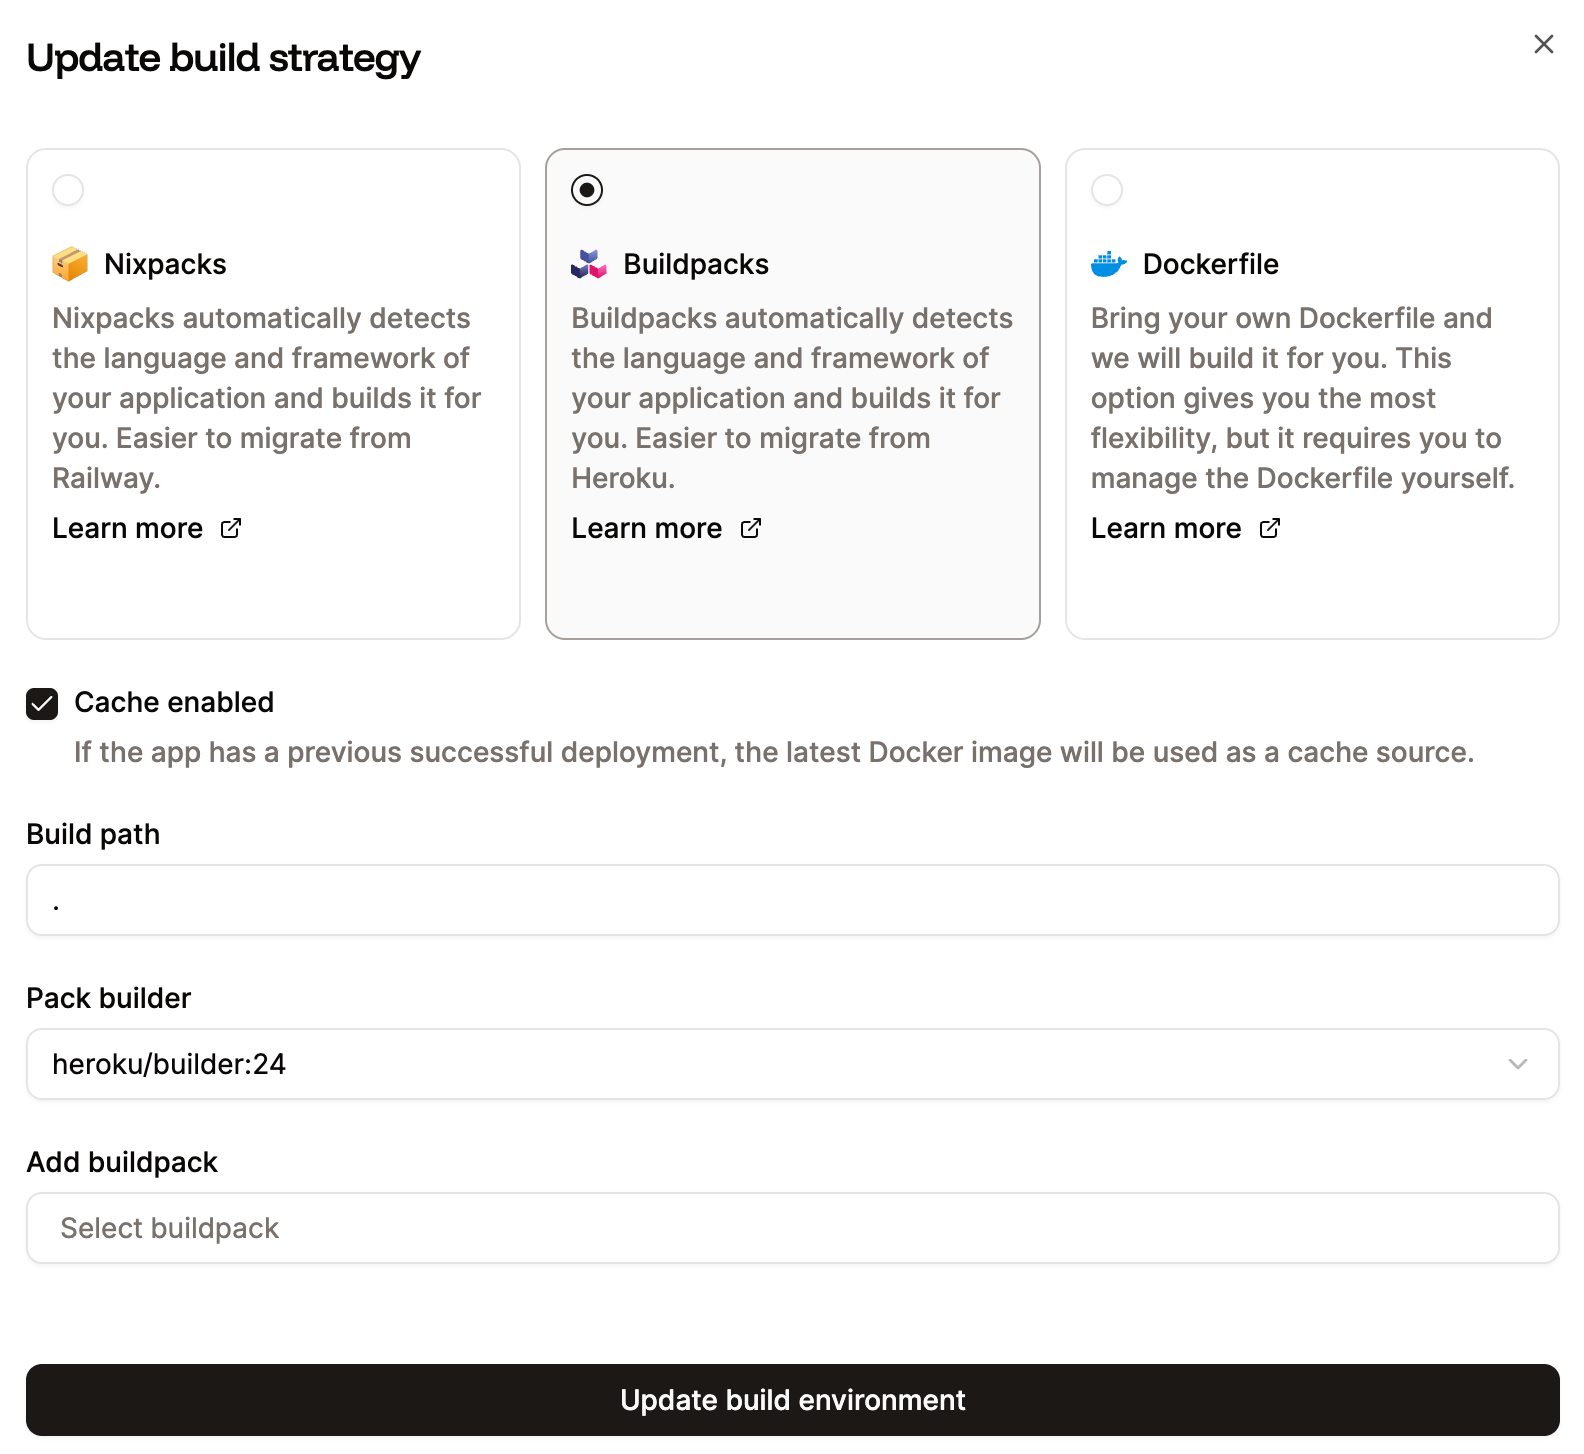
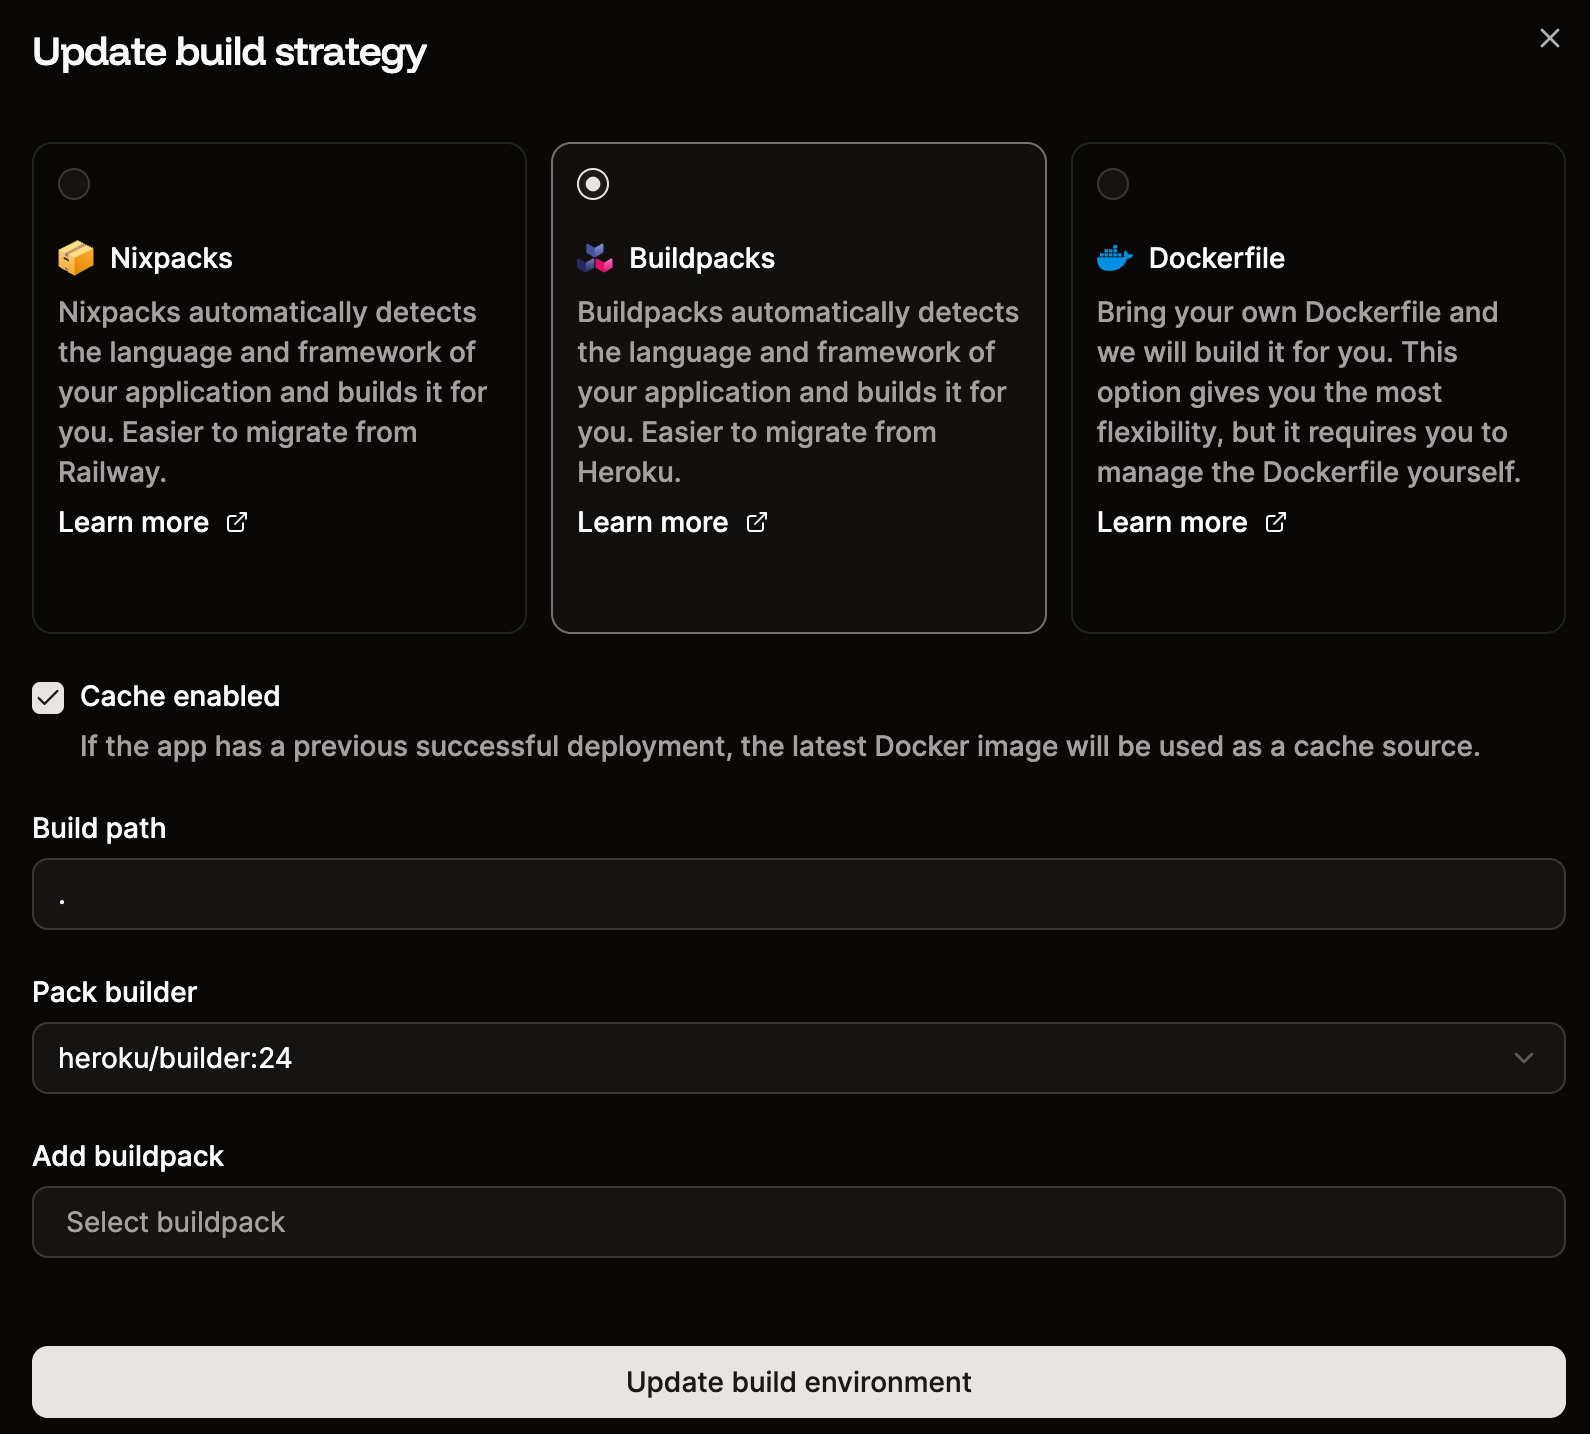
Update build strategy to use Heroku Buildpacks.
Phase 3: Migrate data and go live
Step 1: Enable maintenance mode on Heroku
Prevent new writes to your Heroku database during migration:Step 2: Export your Heroku database
PostgreSQL:latest.dump file locally.
Redis:
Export your Redis data using the method appropriate for your dataset size. For smaller datasets, you can use redis-cli with the --rdb flag or a tool like redis-dump.
Step 3: Import data into Sevalla
Get your Sevalla database’s external connection details from the database’s Networking tab (enable external connections temporarily if needed).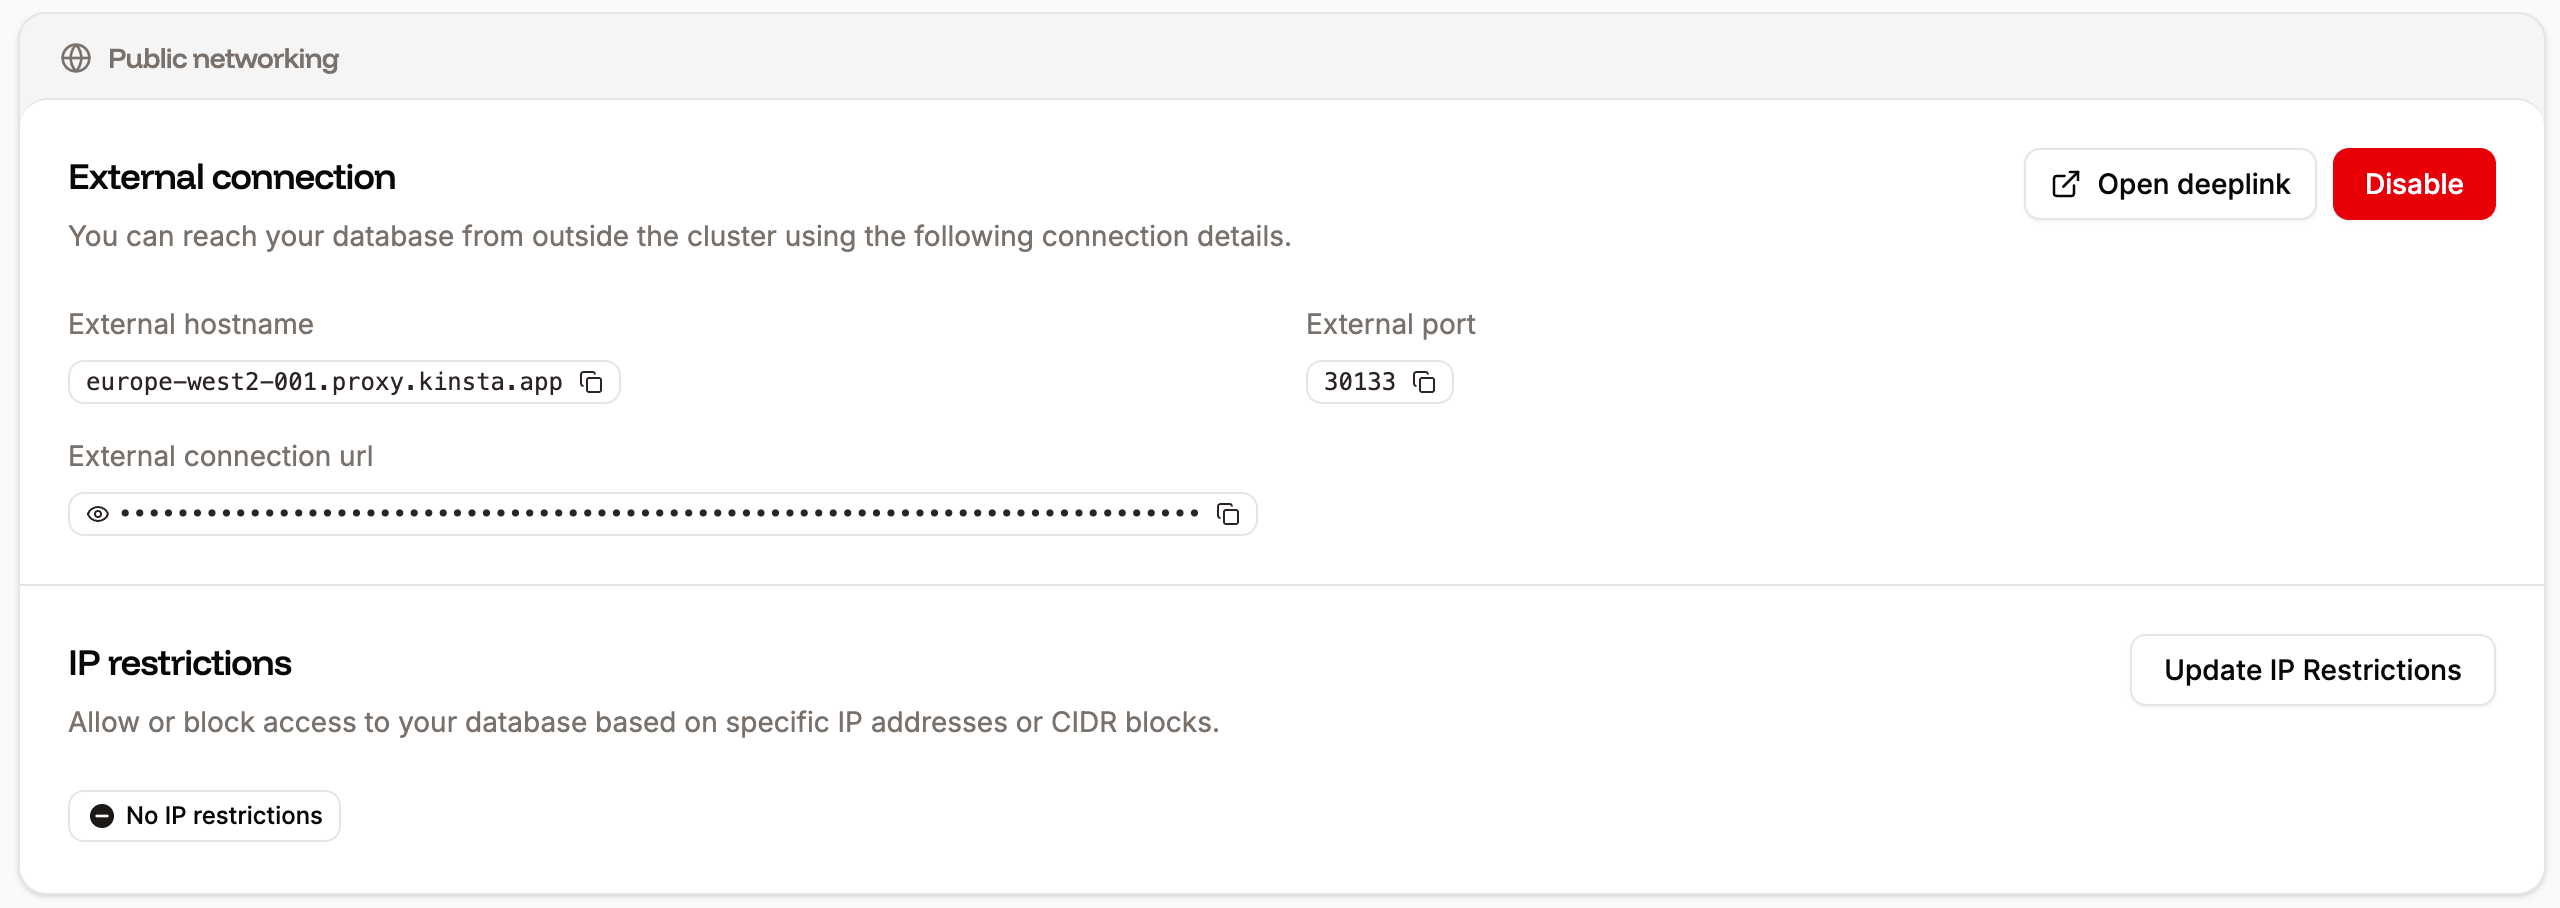
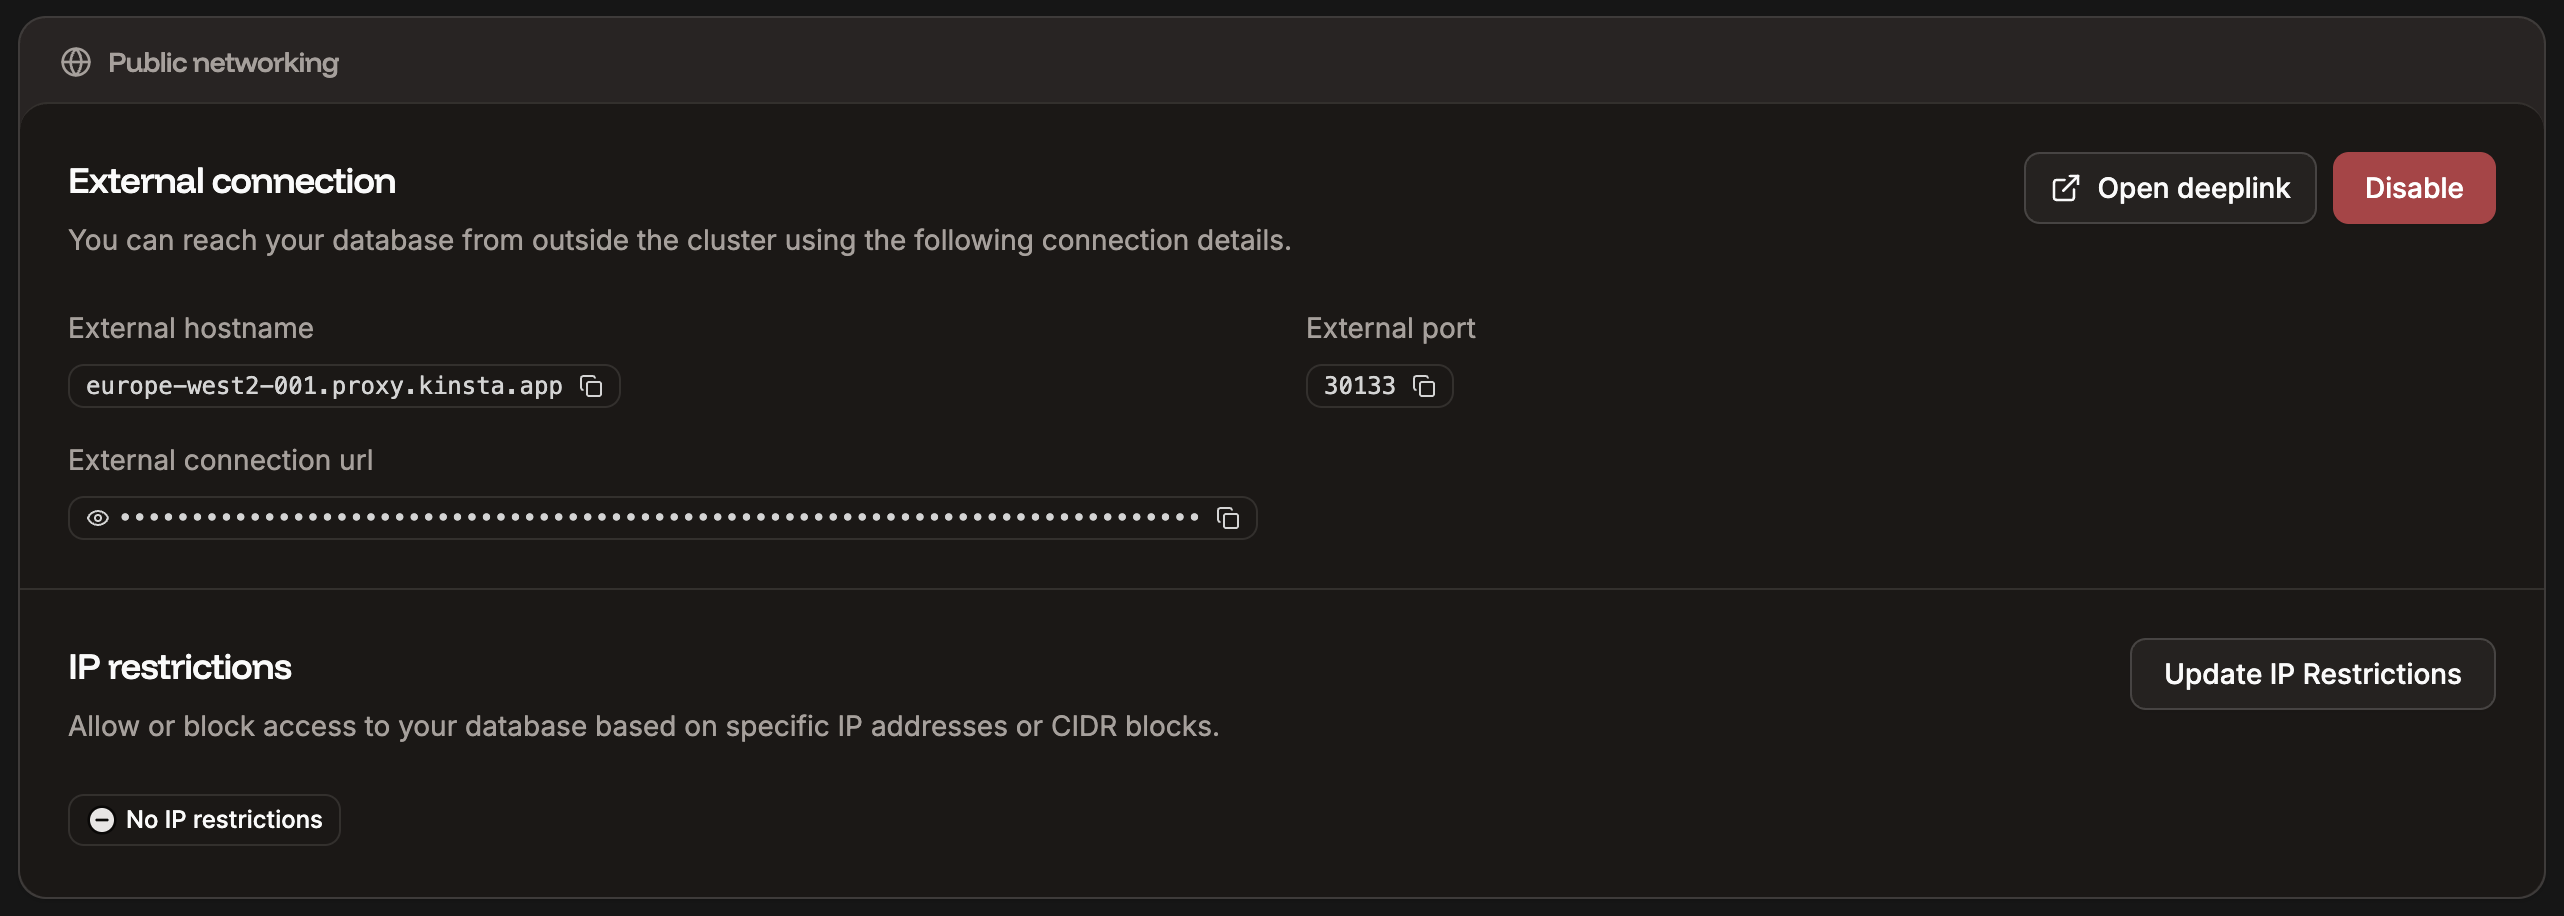
Database external connection details.
Alternative: Server-to-server migration without downloading
If downloading the database to a local machine is not an option (e.g. for security or compliance reasons, or the dataset is too large), you can spin up a lightweight Sevalla application that migrates data directly between the two databases. Data flows server-to-server and never touches a local machine.- Create a new Sevalla application with a Dockerfile that includes the database client tools you need (e.g.
postgres:17ormysql:9images already have them). - Add environment variables for both the Heroku source and the Sevalla target connection strings.
- Set the start command to pipe the export directly into the import:
- Deploy the application and monitor the logs to track progress.
- Once the migration completes, delete the migration application.
This approach keeps your data in transit between servers only, which is important for large databases and environments with strict data handling policies. Make sure both databases are accessible from the Sevalla application’s data center.
Step 4: Deploy your application
Go to your application’s Deployments page and click Deploy now. Monitor the deployment log to verify everything builds and starts correctly.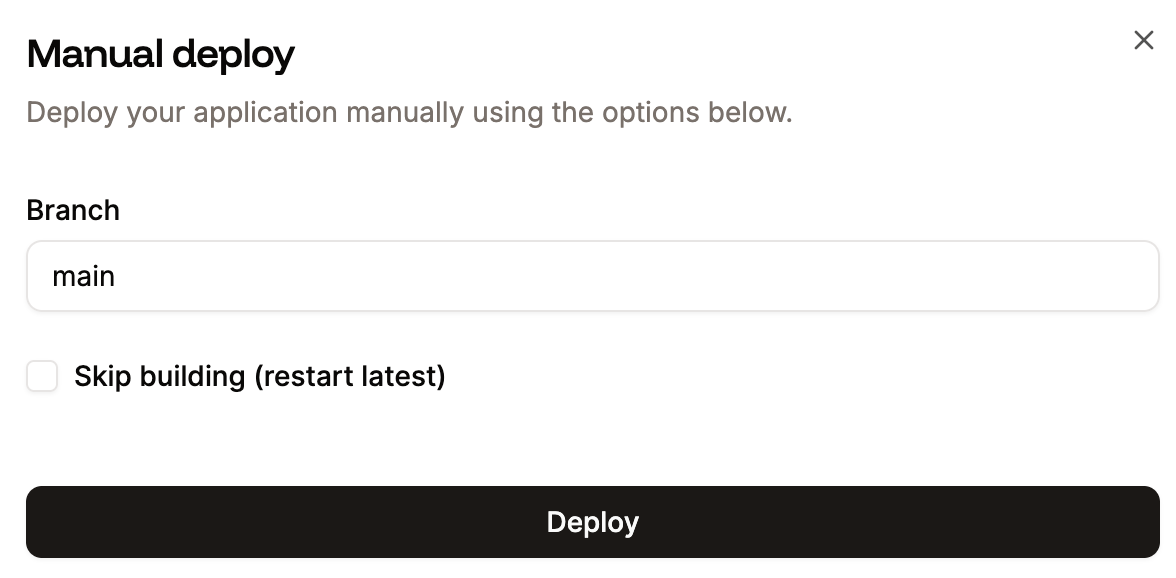
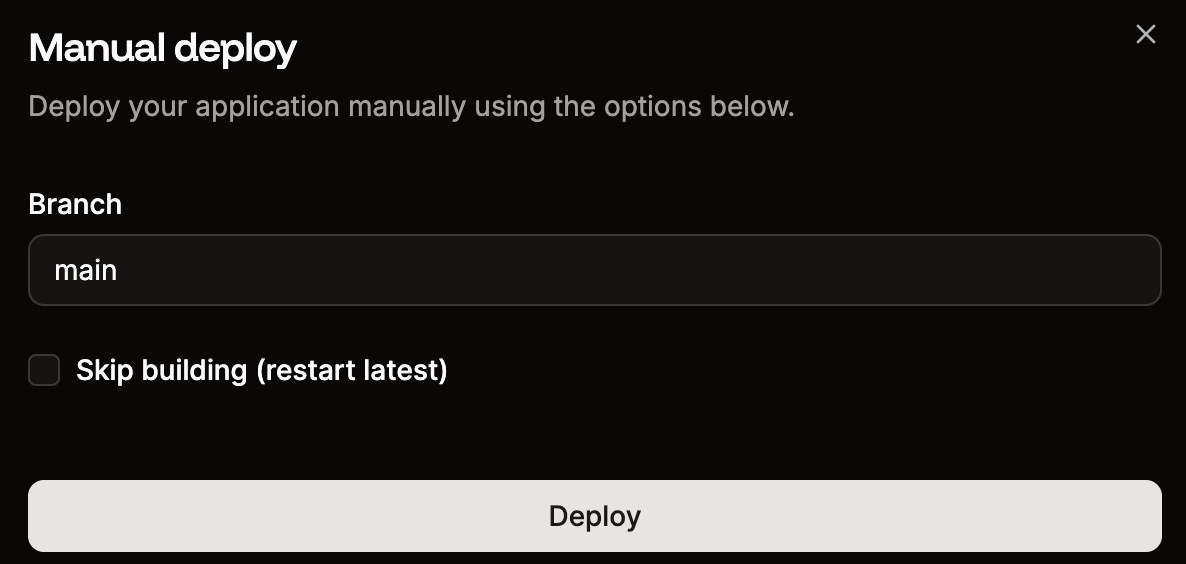
Manually deploy your application.
Step 5: Update DNS records
Once your application is running on Sevalla:- Go to your application’s Domains tab and add your custom domain.
- Add the TXT record for domain verification at your DNS provider.
- Add the CNAME record for SSL certificate provisioning.
- Update your A record to point to the IP address provided by Sevalla.
- Allow time for DNS propagation.
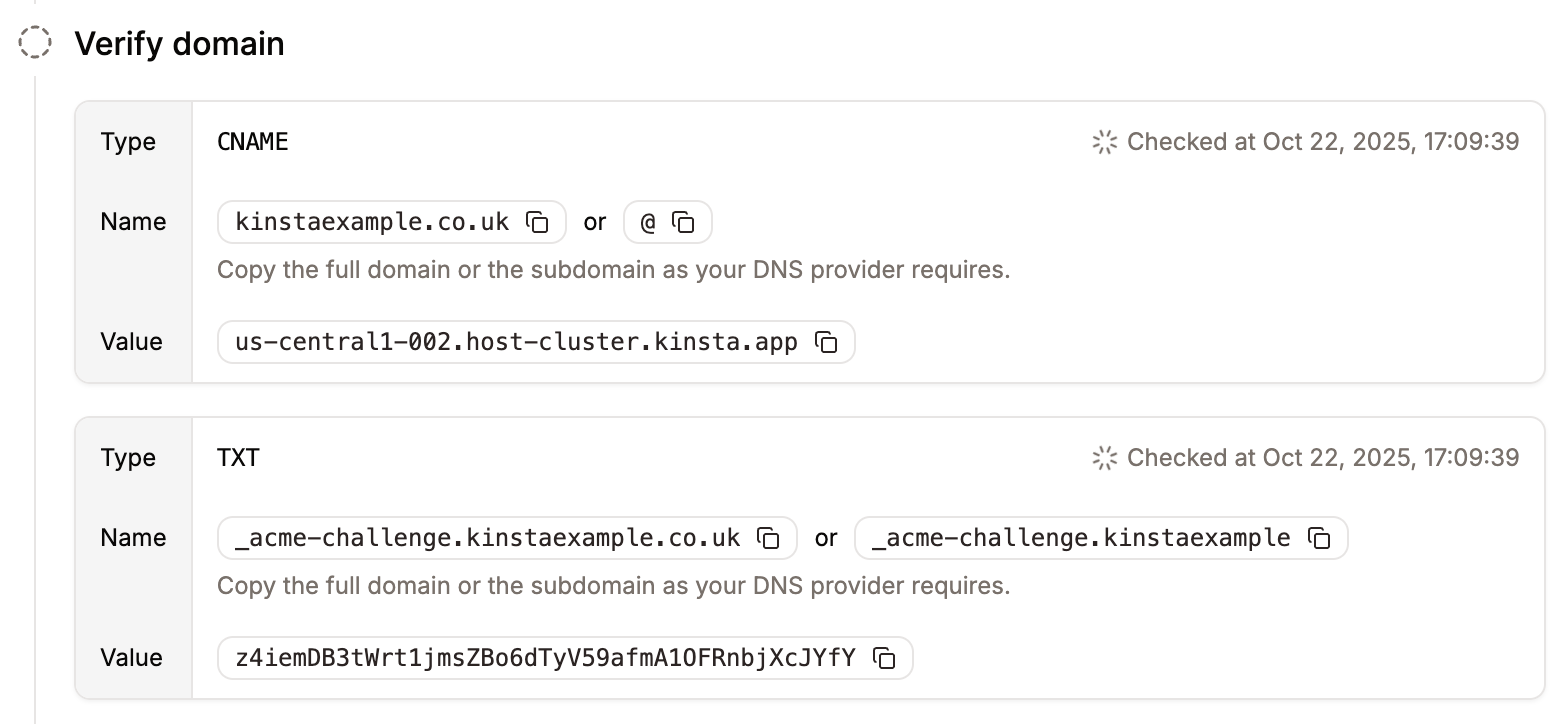
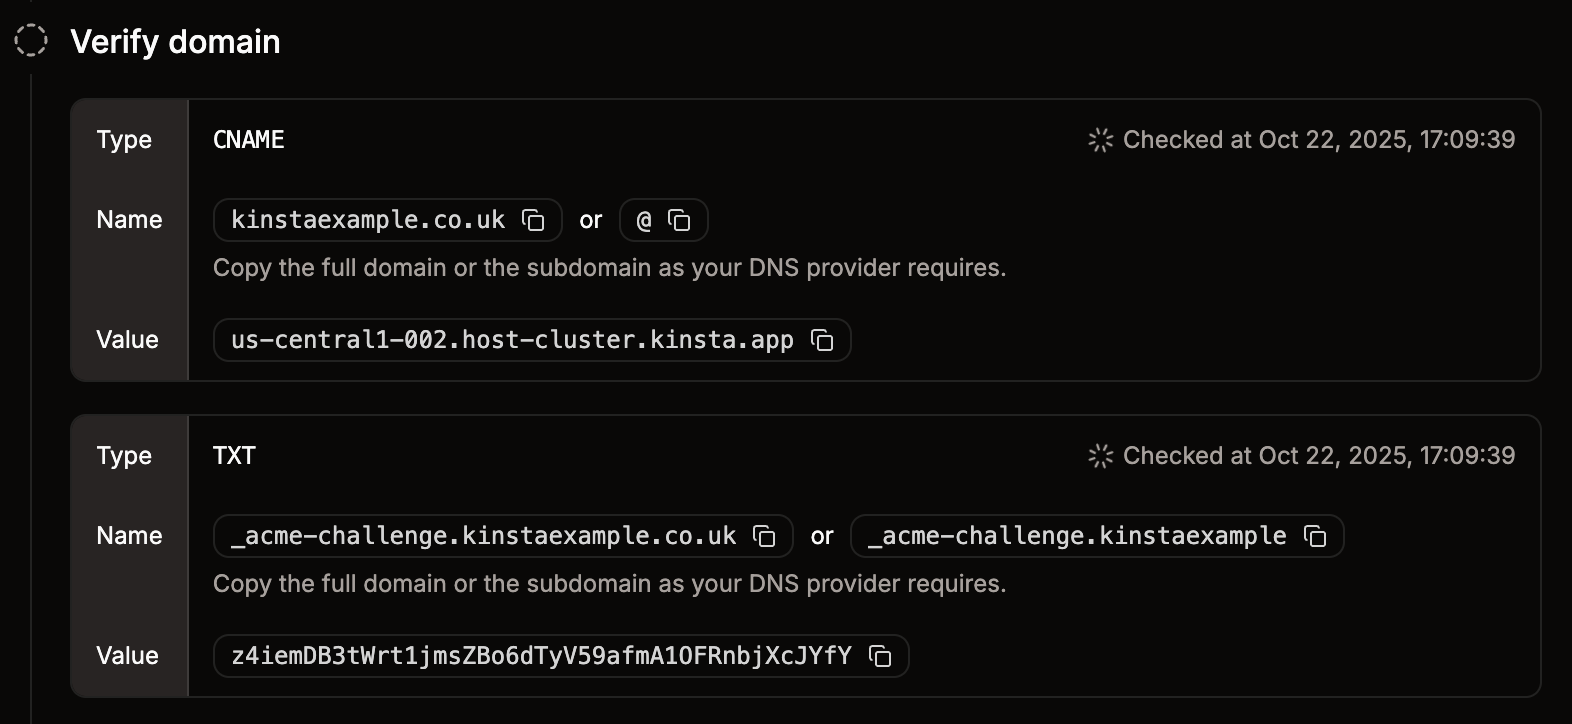
Verify your custom domain.
Step 6: Verify and disable Heroku
After confirming your application works correctly on Sevalla:- Test all critical functionality.
- Verify database data integrity.
- Check that background workers and cron jobs are running as expected.
- Disable external connections on your Sevalla database if you enabled them for import.
- Scale down or delete your Heroku resources.
What’s next
Now that your application is running on Sevalla, explore these features:- Pipelines - Set up dev/staging/production environments with preview apps.
- CDN and edge caching - Enable the built-in Cloudflare CDN for faster delivery.
- Analytics - Monitor performance with built-in compute and web analytics.
- Auto-scaling - Configure automatic horizontal scaling based on CPU usage.
- Webhooks - Get notified about deployment events and resource lifecycle changes.