Build process failed – No Buildpack groups passed detection
When deploying an application using Buildpacks, if there is an issue detecting your application’s buildpack during the build process, you may see the following error in the Deployment logs.Build process failed Unknown build fail typeOpen the Deployment logs and look for errors similar to the following:
===> DETECTING ERROR: No buildpack groups passed detection. ERROR: Please check that you are running against the correct path. ERROR: failed to detect: no buildpacks participating ERROR: failed to build: executing lifecycle: failed with status code: 20These errors occur when there isn’t enough information to correctly detect the type of application. This is usually caused by one of the following:
- The Git repository doesn’t contain all the files needed for the application.
- Something within the code or settings causes an incorrect buildpack to be selected.
- The build path is incorrect.
Git repository
Check your repository to ensure all the correct files have been pushed into the repository for your application.Buildpack
Sevalla uses Nixpacks by default to build your application and set up the container image. You can choose to use Railpack or Buildpacks within Settings > Build strategy > Update build strategy. If your application requires additional buildpacks, you can also add them here. When using buildpacks, you must also ensure the correct language version is in your application’s files. For more details, see our documentation on specifying a language version for Buildpacks.Build path
The build path is where the files to build your application are located in the repository. Usually, this is the repository root, and you do not have to set a build path when adding your application. If your application has a different build path, you can change it in Settings (Settings > Build strategy > Update build strategy). For example, if your application needs to be built from a subdirectory named app, enter that subdirectory path as /app in the Build path field.Failed build due to Buildpack version
When deploying an application using Buildpacks, you may receive an error regarding the Buildpack version, such as:Please switch to one of our newer ‘heroku/builder:*’ builder images, such as ‘heroku/builder:22’This may be due to an updated build configuration in Sevalla. To resolve this:
- In Sevalla, click Applications > app name > Processes > edit the Web process > for Laravel applications, enter the following start command:
heroku-php-apache2 /publicfor all other PHP applications, remove the Start command. - Click Update process.
- Click Deployments > Deploy now.
Failed rollout
When deploying an application, if there is an issue with deployment, you may see one of the following errors:Build process failed Unknown build fail typeIf the rollout process fails immediately, or if the build process fails, no pods are created, and runtime logs do not exist, an incorrect start command in the web process is most often the cause (or an incorrect
ENTRYPOINT in the Dockerfile if your application is built from a Dockerfile).
If the rollout process runs for a minute or two and then fails, this usually means the pods were created, but something went wrong, and the process stopped. In this case, you should check the deployment runtime logs to identify any error messages. The error messages can help you identify bugs in the application’s code so you can debug the issue.
If you cannot identify the issue, check the following, and if the issue persists, contact our Support team.
Git repository
Check your repository to ensure all the correct files have been pushed into the repository for your application.Language
When you add your application and choose to use Nixpacks or Buildpacks to create your application’s container image, we automatically determine and set up a container for your application. When using Nixpacks or Buildpacks, if you do not want the default or latest available version of the language to be used, you must set the language version in your application’s files. For more details, see our documentation on specifying a language version for Buildpacks or specifying a language version for Nixpacks. Additionally, if you deploy a PHP or Python application with Nixpacks and the rollout fails when the container image is built, this is most likely due to a missing language version in the application’s code, particularly if the deployment works with Buildpacks but not with Nixpacks. Check the following to make sure the language version is set:PHP
If there is a composer.json file in your repository, it must contain therequire key with the PHP version, like the following:
Python
To specify your Python version, include the following in your application’s runtime.txt file:Start command or ENTRYPOINT
The Start command for the web process starts your application. If this is incorrect, the application will not run. You can check the command in Processes > Web process. If your application uses a Dockerfile to set up your container image, you must specify theENTRYPOINT in the Dockerfile to run a container. For more information about how to specify your application’s ENTRYPOINT, see the Dockerfile reference.
Build path or Dockerfile context
You can choose Nixpacks, Railpack, Buildpacks, or a Dockerfile for your container image. You can update the Build path or Dockerfile context within Settings > Build strategy > Update build strategy- Build path: This only applies to Nixpacks, Railpack, and Buildpacks. This is the path in the repository to the files required to build the application. Most applications are built from the repository root, and the Build path defaults to this (.). If you have a different build path, specify it here. For example, if your application needs to be built from a subdirectory (e.g., app), enter that subdirectory path in the Build path field: app. This is also useful if you have a monorepo.
- Context: This only applies to Dockerfiles. This is the path in the repository we need access to so we can build your application. Most applications are built from the repository root, and you can enter the repository root (.) in the Context field. If your application needs to be built from a subdirectory (e.g., app), enter that subdirectory path in the Context field: app.
Environment variables
Environment variables feed your application information from outside of the running of that application. An incorrect environment variable may prevent your application from running. You can check your environment variables in Environment variables.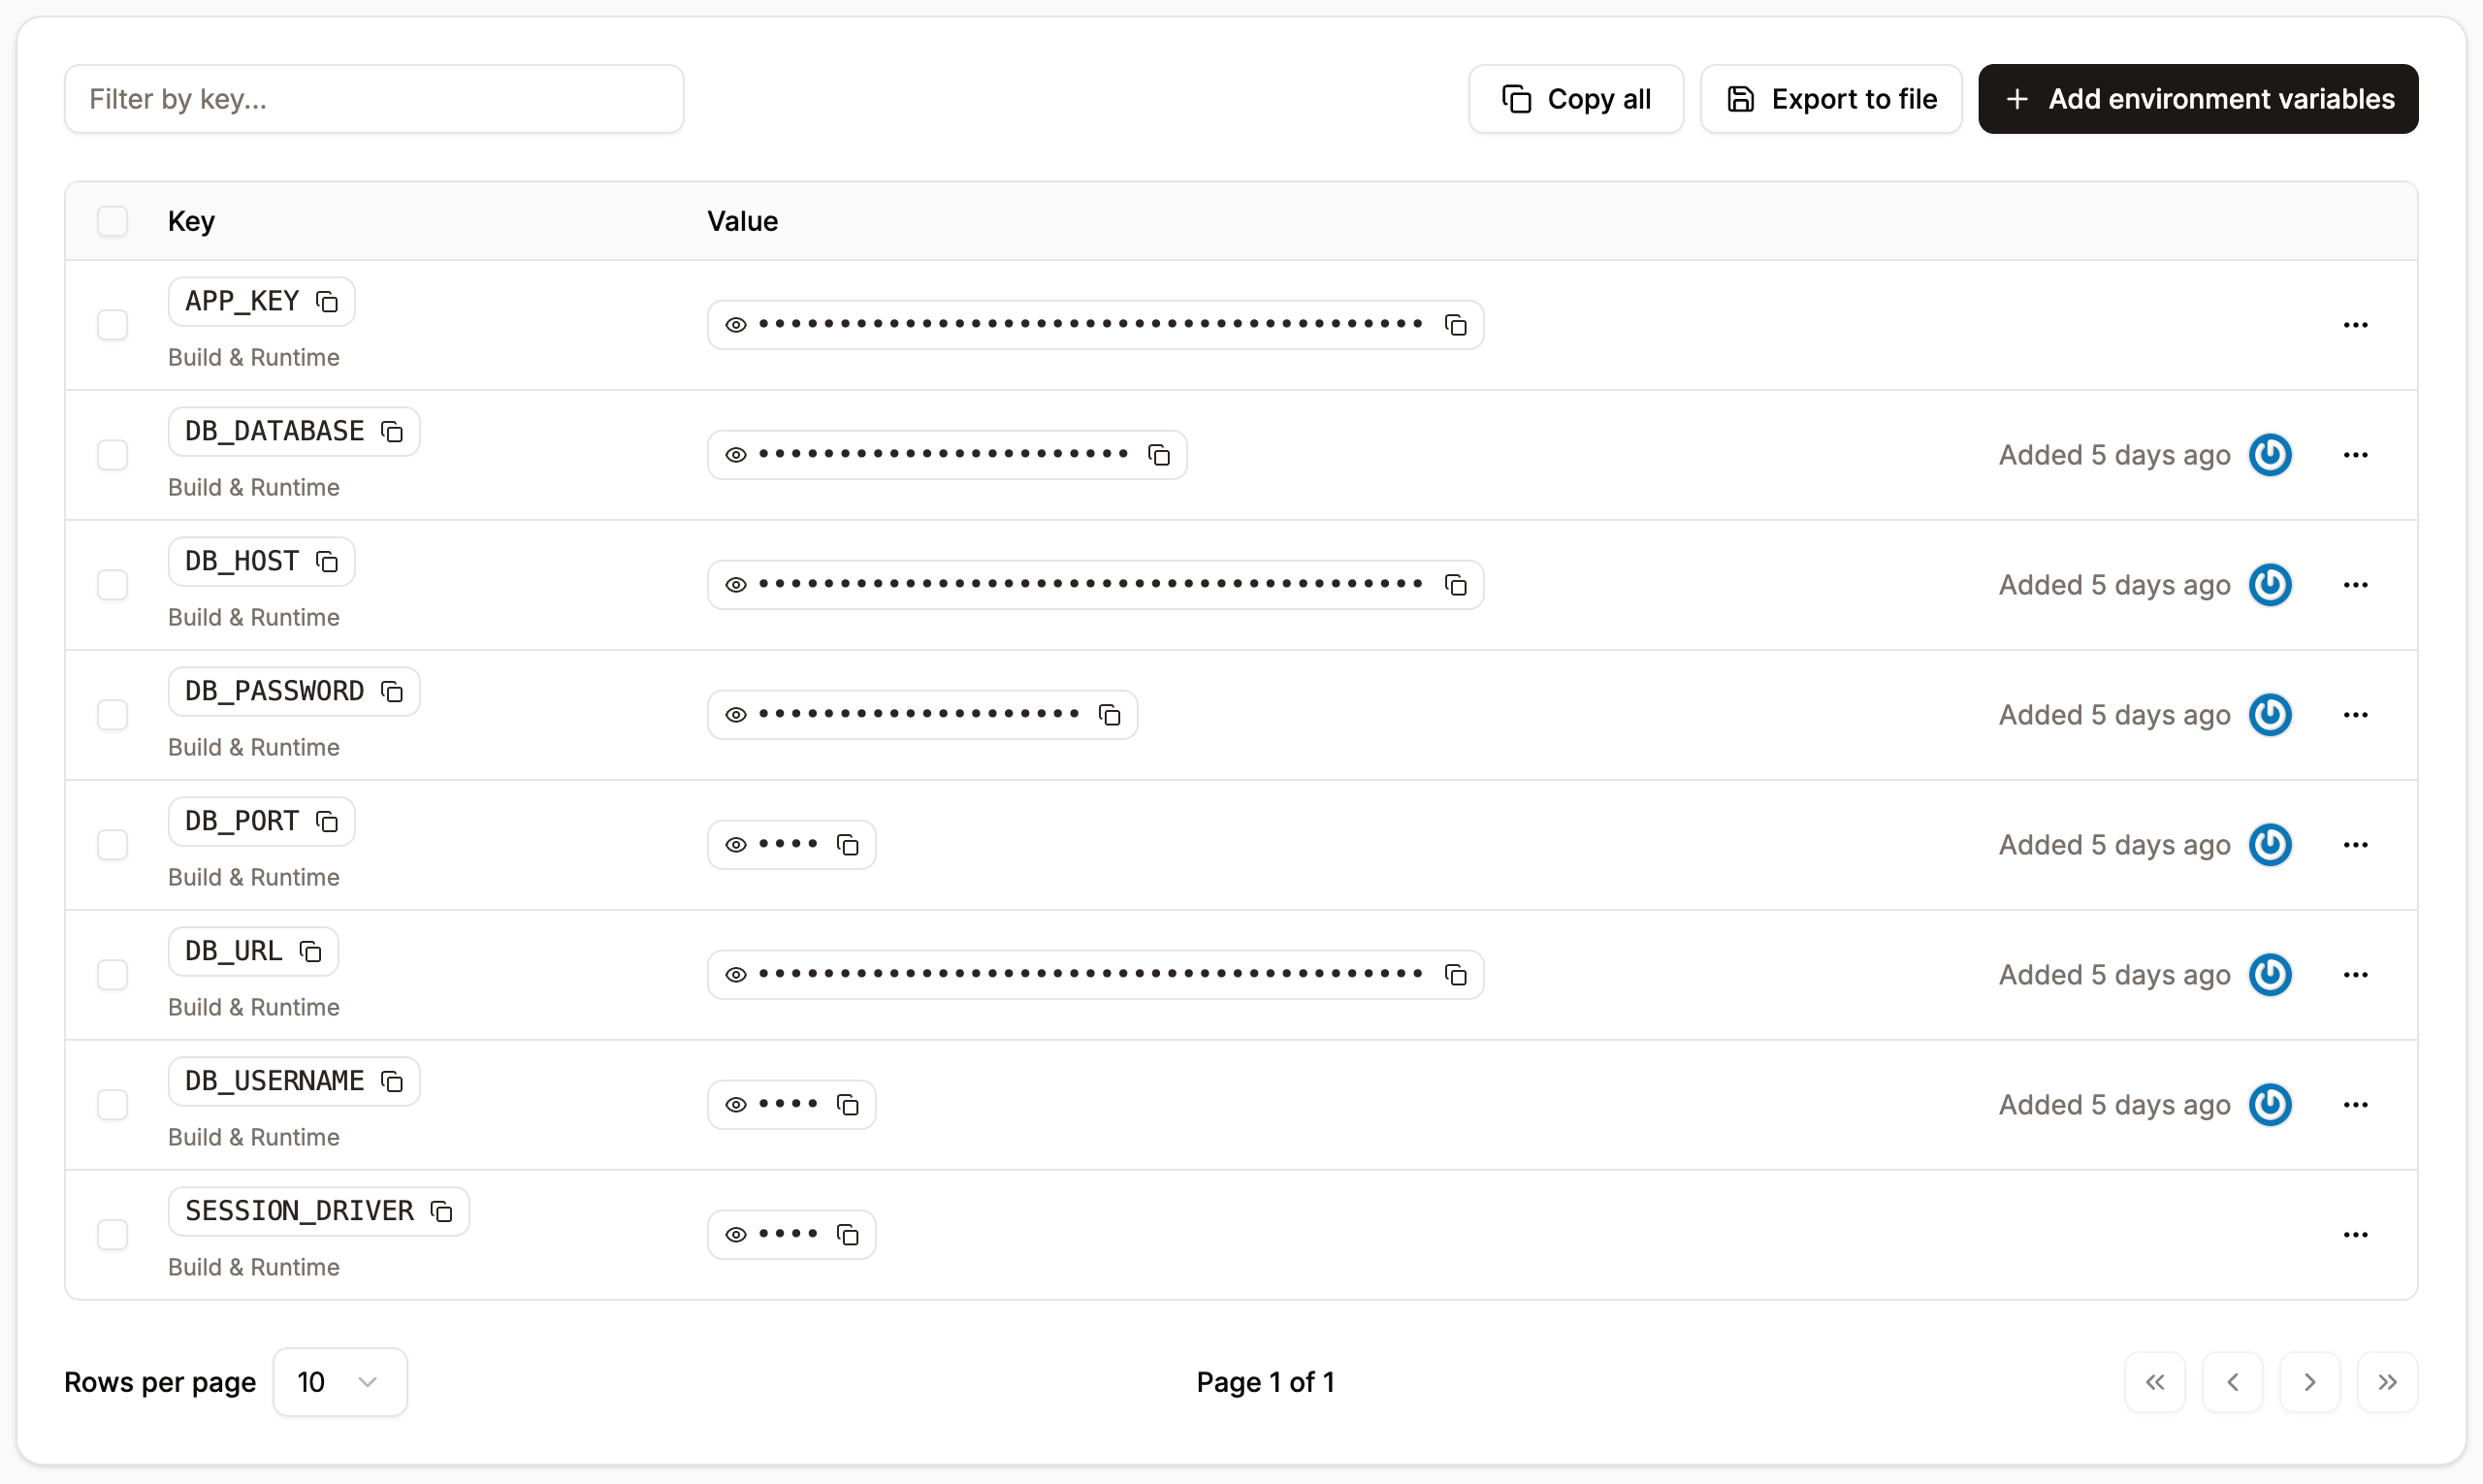

Environment variables for your application.
- Each key must be unique, and a key can only be added once.
- Parentheses can cause the build or rollout process to fail, depending on when they are available during deployment. They cannot be used in environment variables.
- Unescaped commas are interpreted as delimiters by the rollout process, so they cannot be used in environment variables. If you need to use a comma in your environment variable value, you must escape it with a backslash (
\). - Unescaped double quotes are either disregarded or will cause the rollout process to fail. If you need to use double quotes in your environment variable value, you must escape them with a backslash (
\).
Port
Only ports 80 and 443 are open for application hosting. You can change the port your application’s web process uses when you add the application or within Networking > Update port.Invalid package name
An invalid package name in package.json can cause an error. For example, do not use “js” or “node” in the name. For more details, see the specifics of npm’s package.json handling in the npm Docs.Deployment timing out
If the build succeeds but the deployment times out, it may be due to insufficient runtime resources on one of the application processes. To resolve this, increase the allocated resources by selecting a pod size with more CPU or RAM for the process. You can adjust this within Processes. On the process, click the kebab (three dots), select Update process, and change the Resource size.Error: failed to solve: process
When deploying a Laravel application, you may get the following error:ERROR: failed to solve: process “/bin/bash -ol pipefail -c npm run build” did not complete successfully: exit code: 126This error is caused when the
vendor and node_modules folders are present within the repository. These folders are generated during the build process and should, therefore, be removed from the repository to resolve this issue.