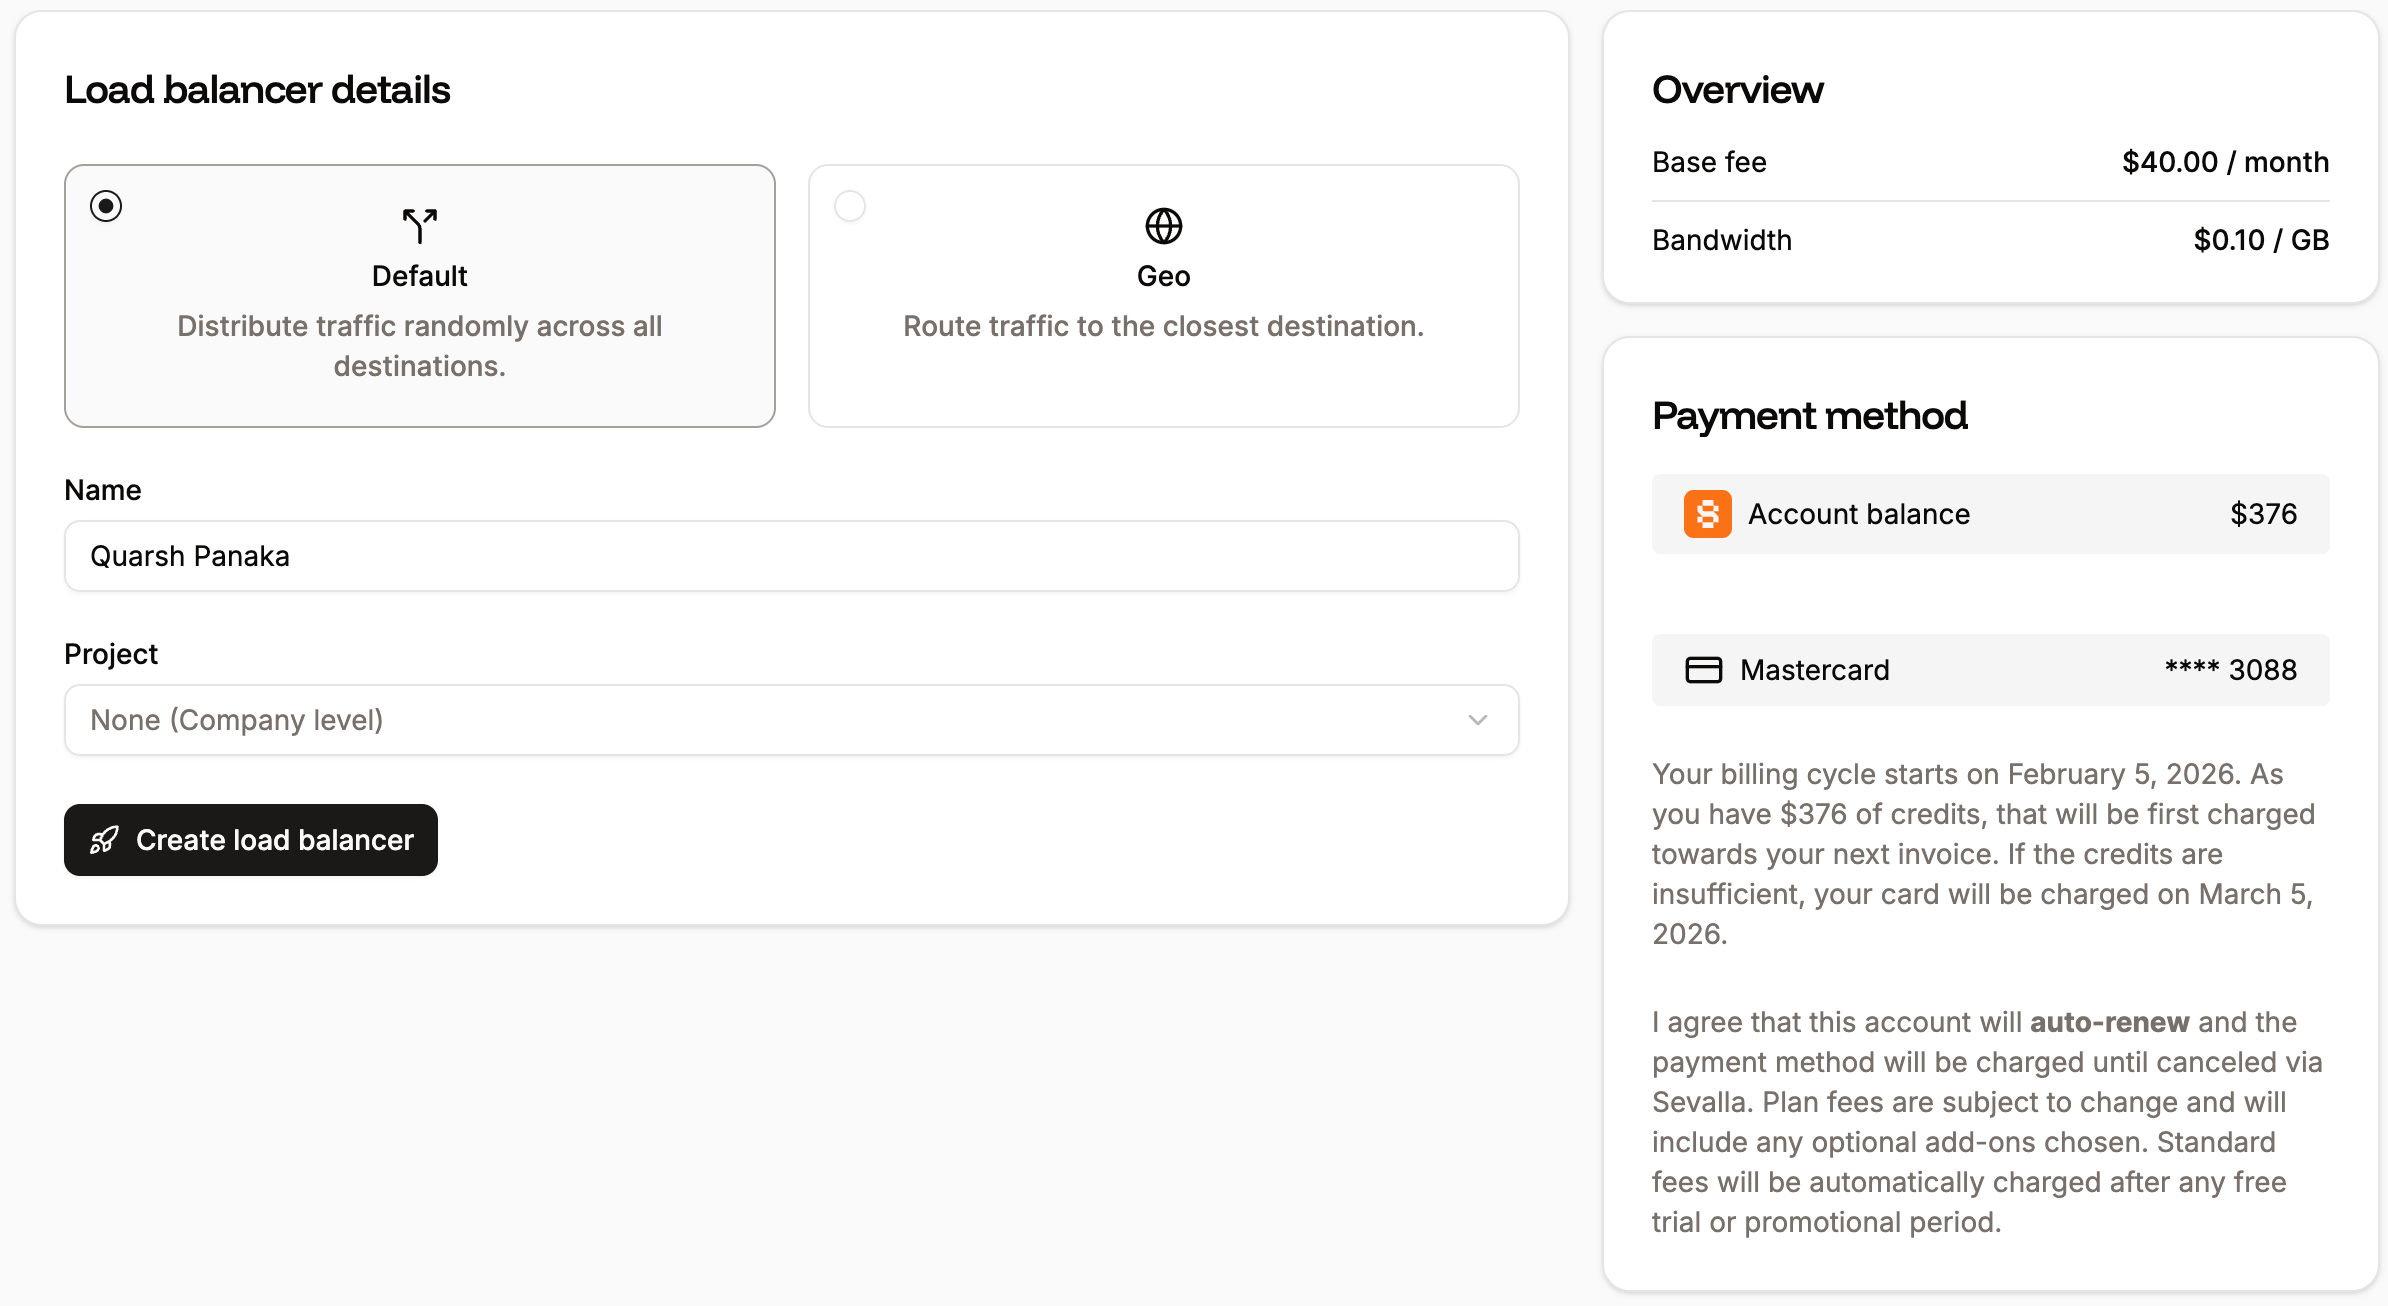
- Default (Weighted): Choose this option to control the proportion of traffic each destination receives. The traffic is distributed randomly across all destinations. This is ideal for canary deployments, A/B testing, and gradual migrations between services.
- Geo: Choose this option to automatically route users to the nearest destination based on their location. This reduces latency and improves performance for globally distributed applications.
- Name: Add a name for the load balancer.
- Project: This option is only shown if your company already has at least one project. Select the project you’d like to add the load balancer to, or leave it blank to keep the load balancer at the company level instead of assigning it to a specific project.

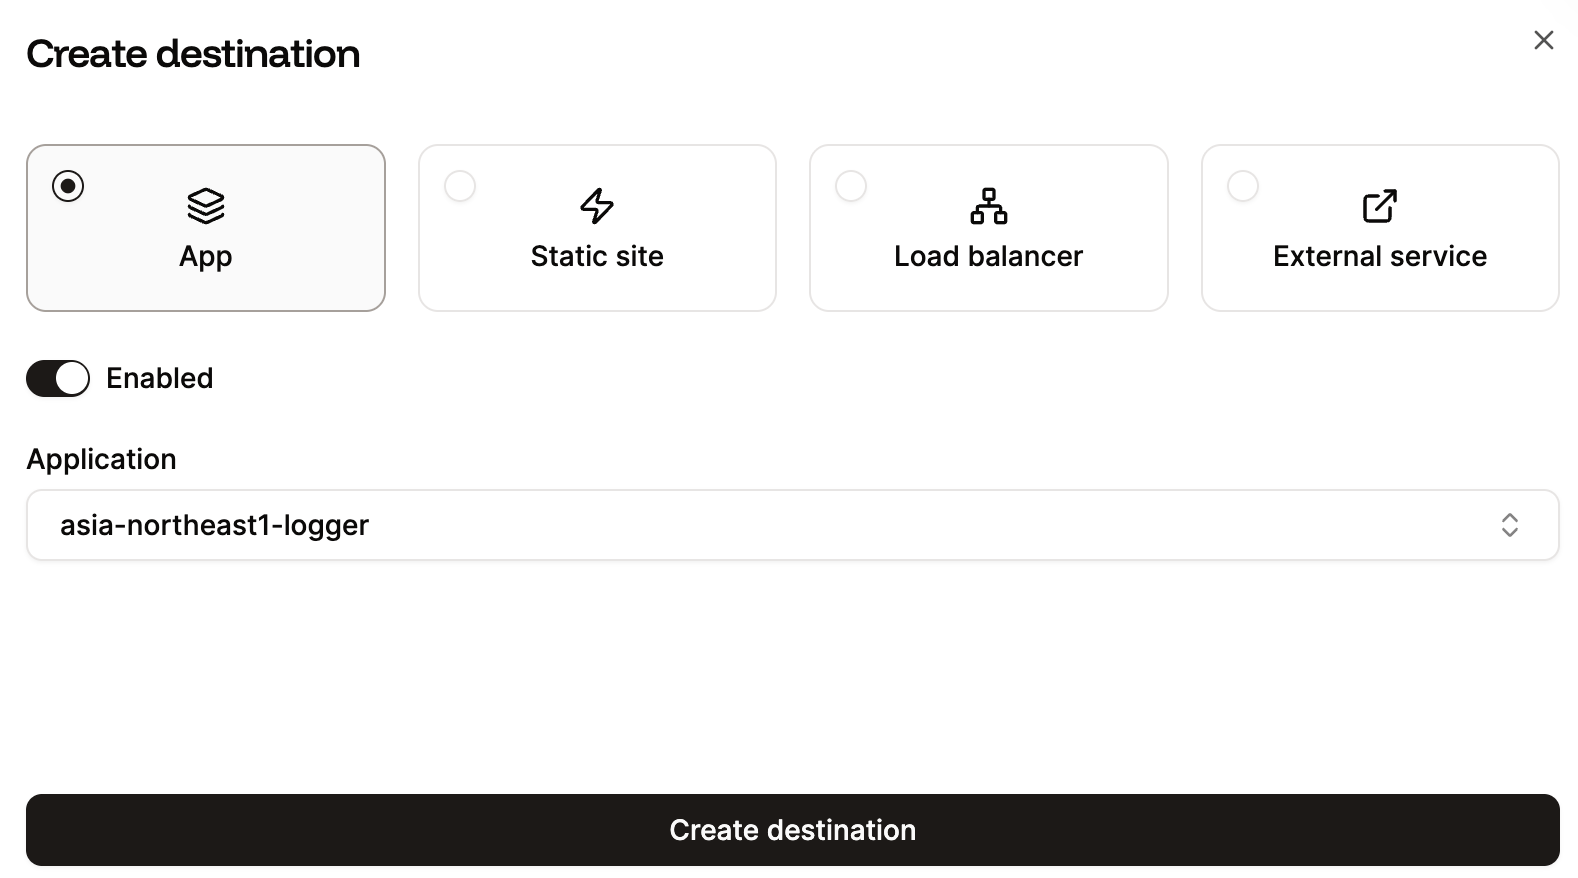
Add a destination
Once you’ve created a load balancer, you can add the destinations you want to route users to or distribute the traffic across. You can add up to 20 destinations per load balancer. To add a destination, click Add destination or the plus icon. You can then choose an application, a static site, another load balancer, or an external service. If you choose an external service, you need to provide the URL, plus the longitude and latitude. Once you’ve selected the destination, click Create destination.