

acme.shop.example.com, and a public schema holds what tenants share. On Sevalla, a wildcard custom domain sends every subdomain to the application, and a job migrates every schema before each deployment.
Before you begin
- A Django project deployed on Sevalla with a PostgreSQL database, as in Deploy Django. Use a database that holds no data you need yet: django-tenants expects to manage every schema from its first migration.
- A domain whose DNS you control, such as
shop.example.com. - The web process on a size larger than H1: custom domains aren’t available on H1. See Scaling.
Install django-tenants
Install the package and updaterequirements.txt:
Add the tenant models
Create an app for the tenants and their domains, and an app with the tenants’ own features:customers/models.py
Configure the project
Updatestorefront/settings.py:
storefront/settings.py
TenantMainMiddlewarecomes before Django’s own middleware: it picks the tenant, and so the schema, from the request’s host. If you added the health check middleware, keep it in front ofTenantMainMiddleware, because the probes’ host matches no tenant.django.contrib.authanddjango.contrib.sessionsare both shared here. Keep them together, inSHARED_APPSor inTENANT_APPS: a session points at a user, so both tables must be in the same schema.DB_URLcomes from the database’s internal connection. Without it locally, setDB_URLin.envto a local PostgreSQL database.
Add the views and URLs
shop/views.py
storefront/urls.py
storefront/urls_public.py
Prepare the application on Sevalla
1
Migrate every schema
On the application’s Processes tab, click ⋯ on the
Migrate job, then click Update process. Change the Custom start command to python manage.py migrate_schemas and click Update process. It migrates the public schema with the shared apps and every tenant’s schema with the tenant apps.2
Add the wildcard domain
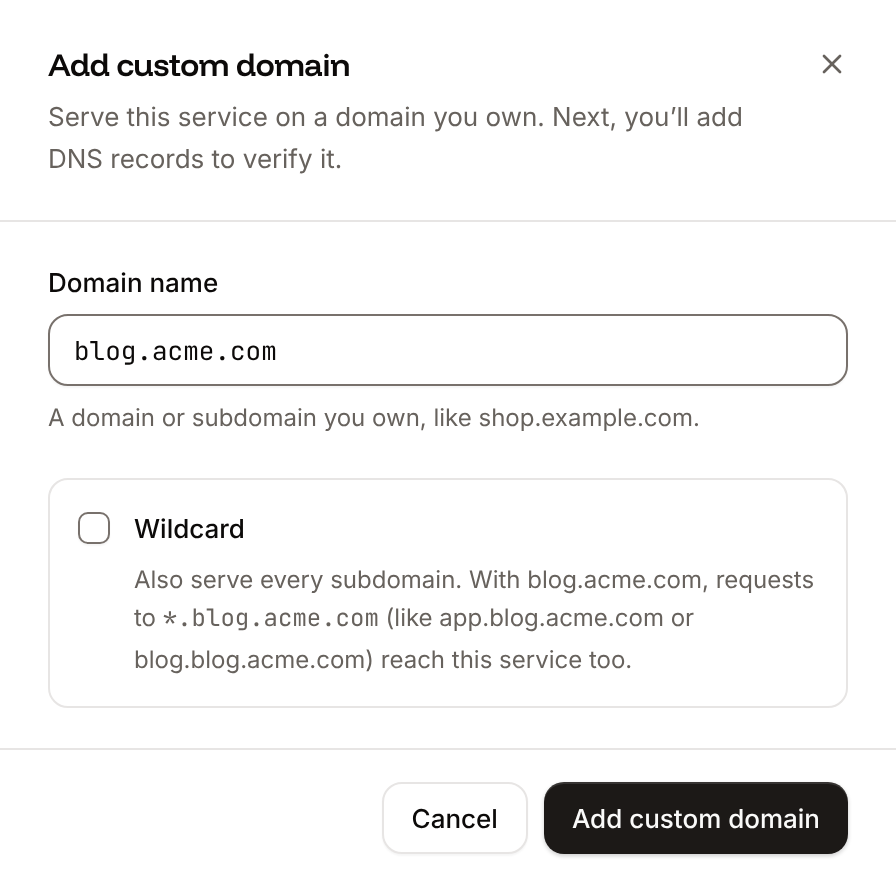
Click the Domains tab, then click Add custom domain. Enter
shop.example.com as the Domain name, select Wildcard so that every subdomain such as acme.shop.example.com reaches the application too, and click Add custom domain. Add the DNS records that Sevalla shows at your DNS provider, including the pointing record for *.shop.example.com, and wait until the domain’s status is Active. See Wildcard domains.3
Allow the subdomains
Click the Environment variables tab. Update
ALLOWED_HOSTS to storefront-x7k2m.sevalla.app,.shop.example.com (the leading dot matches the domain and every subdomain) and CSRF_TRUSTED_ORIGINS to https://storefront-x7k2m.sevalla.app,https://shop.example.com,https://*.shop.example.com, with your application’s sevalla.app domain.4
Deploy
Click Deploy in the undeployed changes bar at the bottom of the page.
Create the tenants
django-tenants serves a request only when its host belongs to a tenant, so create thepublic tenant for the main domain first. Click the Web terminal tab, choose the Web process, and open a Django shell:
acme creates the acme schema and runs the tenant apps’ migrations in it. Create every later tenant the same way, or from your own sign-up view.
The application’s sevalla.app domain matches no tenant, so it returns 404. To show the public site there too, set SHOW_PUBLIC_IF_NO_TENANT_FOUND = True in storefront/settings.py.
Verify
- Open
https://shop.example.com: the page readsShop platform. - Open
https://acme.shop.example.com: the page readsWelcome to Acme Inc.