

fastapi run serves it with Uvicorn in the web process, and a job runs its Alembic migrations before each deployment. Its data lives in a Sevalla PostgreSQL database that the application reaches over an internal connection.
Before you begin
- A Sevalla company with a payment method, and a GitHub, GitLab or Bitbucket account for the repository. See Git providers.
- Python 3.12 or later on your computer.
Create the project
Create a virtual environment and install FastAPI, SQLModel, Alembic and the PostgreSQL driver:
Keep local files out of the repository:
.gitignore
postgres://, which SQLAlchemy doesn’t accept, so the code switches the scheme to postgresql+psycopg://:
storefront/db.py
DB_URL is the variable Sevalla adds when you connect the database; without it, the project uses SQLite locally.
Add a model and the application:
storefront/models.py
storefront/main.py
Prepare the project for Sevalla
Set up migrations
Create the Alembic files:alembic/env.py, point Alembic at the same database URL and at the SQLModel tables. Replace the config and target_metadata lines:
alembic/env.py
alembic/script.py.mako
Pin the Python version
Nixpacks, the default build strategy, reads the Python version from.python-version. Nixpacks 1.41 supports Python versions up to 3.13, so pin 3.13:
.python-version
Set the start command
Createnixpacks.toml in the repository root:
nixpacks.toml
fastapi runstarts Uvicorn in production mode on0.0.0.0. Requests reach it through Sevalla’s ingress, so--forwarded-allow-ips '*'makes Uvicorn trust theX-Forwarded-ProtoandX-Forwarded-Forheaders, and FastAPI sees the original scheme and client address. See Request headers.- The web process listens on the port in the
PORTenvironment variable. Sevalla setsPORTto the web process’s port,8080by default. - To use more CPU, add
--workers 2(or more) when you choose a larger size. - Migrations don’t run here. A job runs them once per deployment.
List the dependencies
Nixpacks installsrequirements.txt with pip:
alembic folder and alembic.ini, and push it to your Git provider:
Deploy to Sevalla
1
Create the database
In the sidebar, click Databases, then click Create database. Under Database, choose PostgreSQL and the newest version. Enter
orders-db as the Display name, choose a Data center and a Size, then click Create database. See Create a database for every field.2
Create the application
In the sidebar, click Applications, then click Create > Application. Under Source, click Private repository, then choose the Git provider, the Repository and the Branch. Under Location, choose the same Data center as the database. Keep the Size at H1 or choose a larger one, then click Create application. The application opens on its Overview tab with the status Not deployed yet: creating an application doesn’t deploy it.
3
Connect the database
Click the Networking tab. Under Connected services, click Add internal connection. Choose
orders-db as the Service, turn on Add environment variables to the application, and click Add internal connection. Sevalla adds DB_URL and the other connection variables to the application. See Connect an application.4
Create the migration job
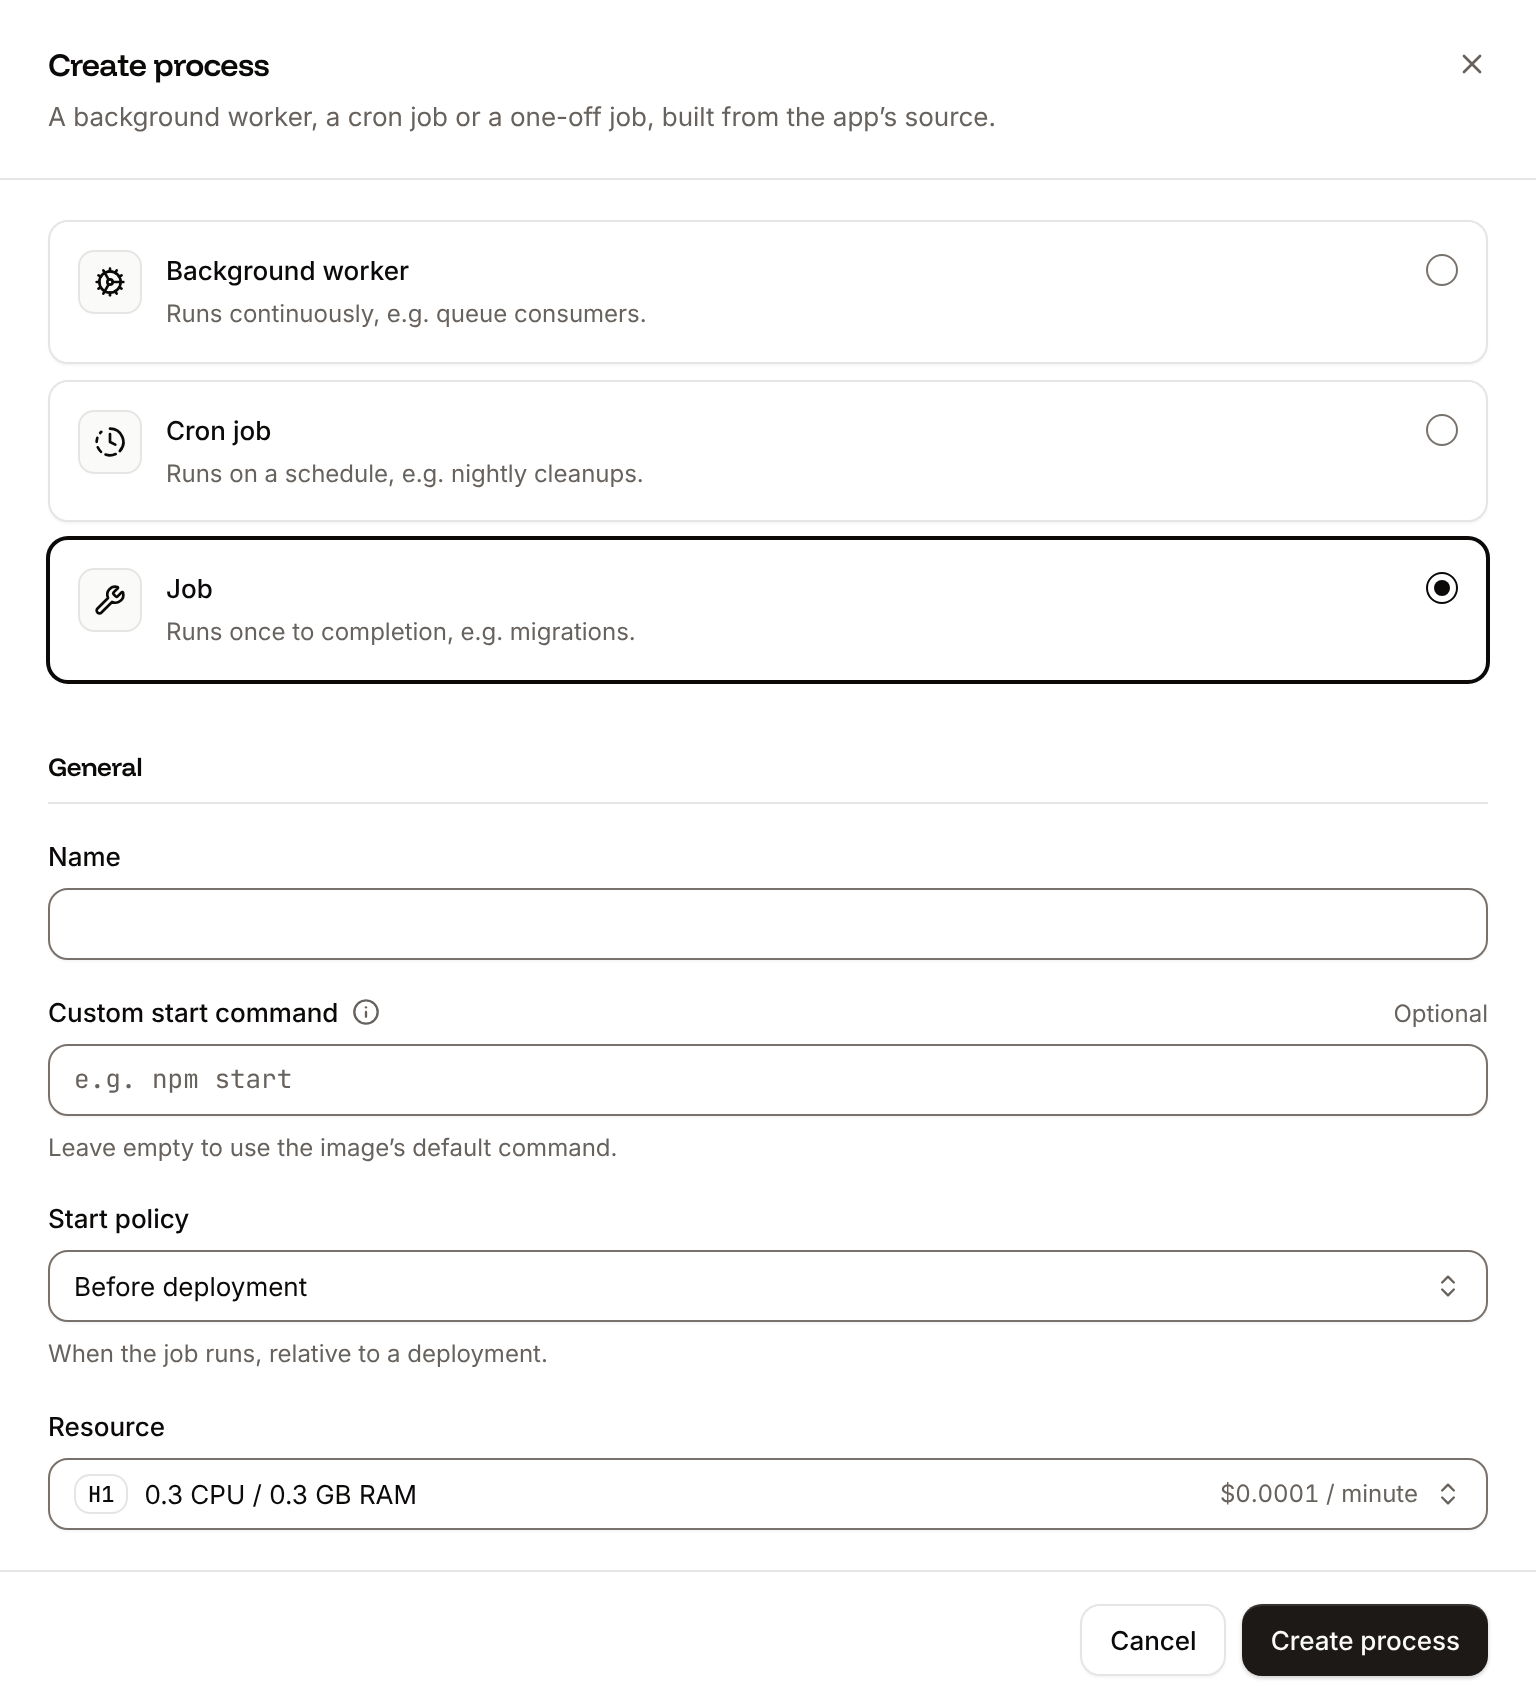
Click the Processes tab, then click Create process. Choose Job, enter
Migrate as the Name and alembic upgrade head as the Custom start command. Keep the Start policy at Before deployment and the Resource at H1, then click Create process.5
Deploy
Click the Overview tab, then click Deploy now under Recent deployments. Check the Branch and click Deploy.
6
Turn on auto-deploy
To deploy every push to the branch automatically, click the Settings tab, then click Update auto-deploy in the Auto-deploy section. Turn on Auto-deploy and click Update auto-deploy. See Deployments.
Verify the deployment
-
On the Deployments tab, wait for the deployment’s status to change to Deployed. The application’s status next to its name changes to Running. During the rollout, the deployment’s build log shows
Migrate has been successful. If the job fails, the deployment fails and nothing changes for visitors. -
Click the domain under the application’s name. The response is
{"items":0}, which shows that the application reads the PostgreSQL database. -
Add an item and read it back, with your application’s domain:
The second response is
{"items":1}. The interactive API docs are at/docs.
Deploy changes
With Auto-deploy on, every push to the branch starts a deployment; otherwise, click Deploy now for each change. Each deployment builds the image, runs theMigrate job, then replaces the web process’s instances. For a schema change, run alembic revision --autogenerate locally and commit the new migration with the code. See Deployments.
Add a custom domain
Add the domain on the application’s Domains tab. FastAPI doesn’t check the host, so no code change is needed. Custom domains need a web process larger than H1.Troubleshoot the deployment
For more causes, see Troubleshoot builds and deployments. To add file storage, caching or background tasks, see the FastAPI guides.