

sevalla.app address: you sign up, connect GitHub, create the application from a repository and deploy it. After you sign up, every step happens in the dashboard at app.sevalla.com.
To deploy from your editor instead, connect an AI agent to the Sevalla MCP server. To script it, use the Sevalla CLI.
Before you begin
- A GitHub repository with a web application. Sevalla detects the language and builds it with Nixpacks unless you choose another build strategy.
- The application listens for HTTP on the port in the
PORTenvironment variable. Sevalla setsPORTto the web process’s port,8080by default. - A credit or debit card. Sevalla verifies it with Stripe and charges only for what you use.
Sign up and complete setup
1
Create your account
Go to sevalla.com/signup and sign up with your email address or a Git account. Sevalla creates a company for you, named after you (for example “Ana’s Company”), and signs you in to the dashboard. You can rename the company later.
2
Add a payment method
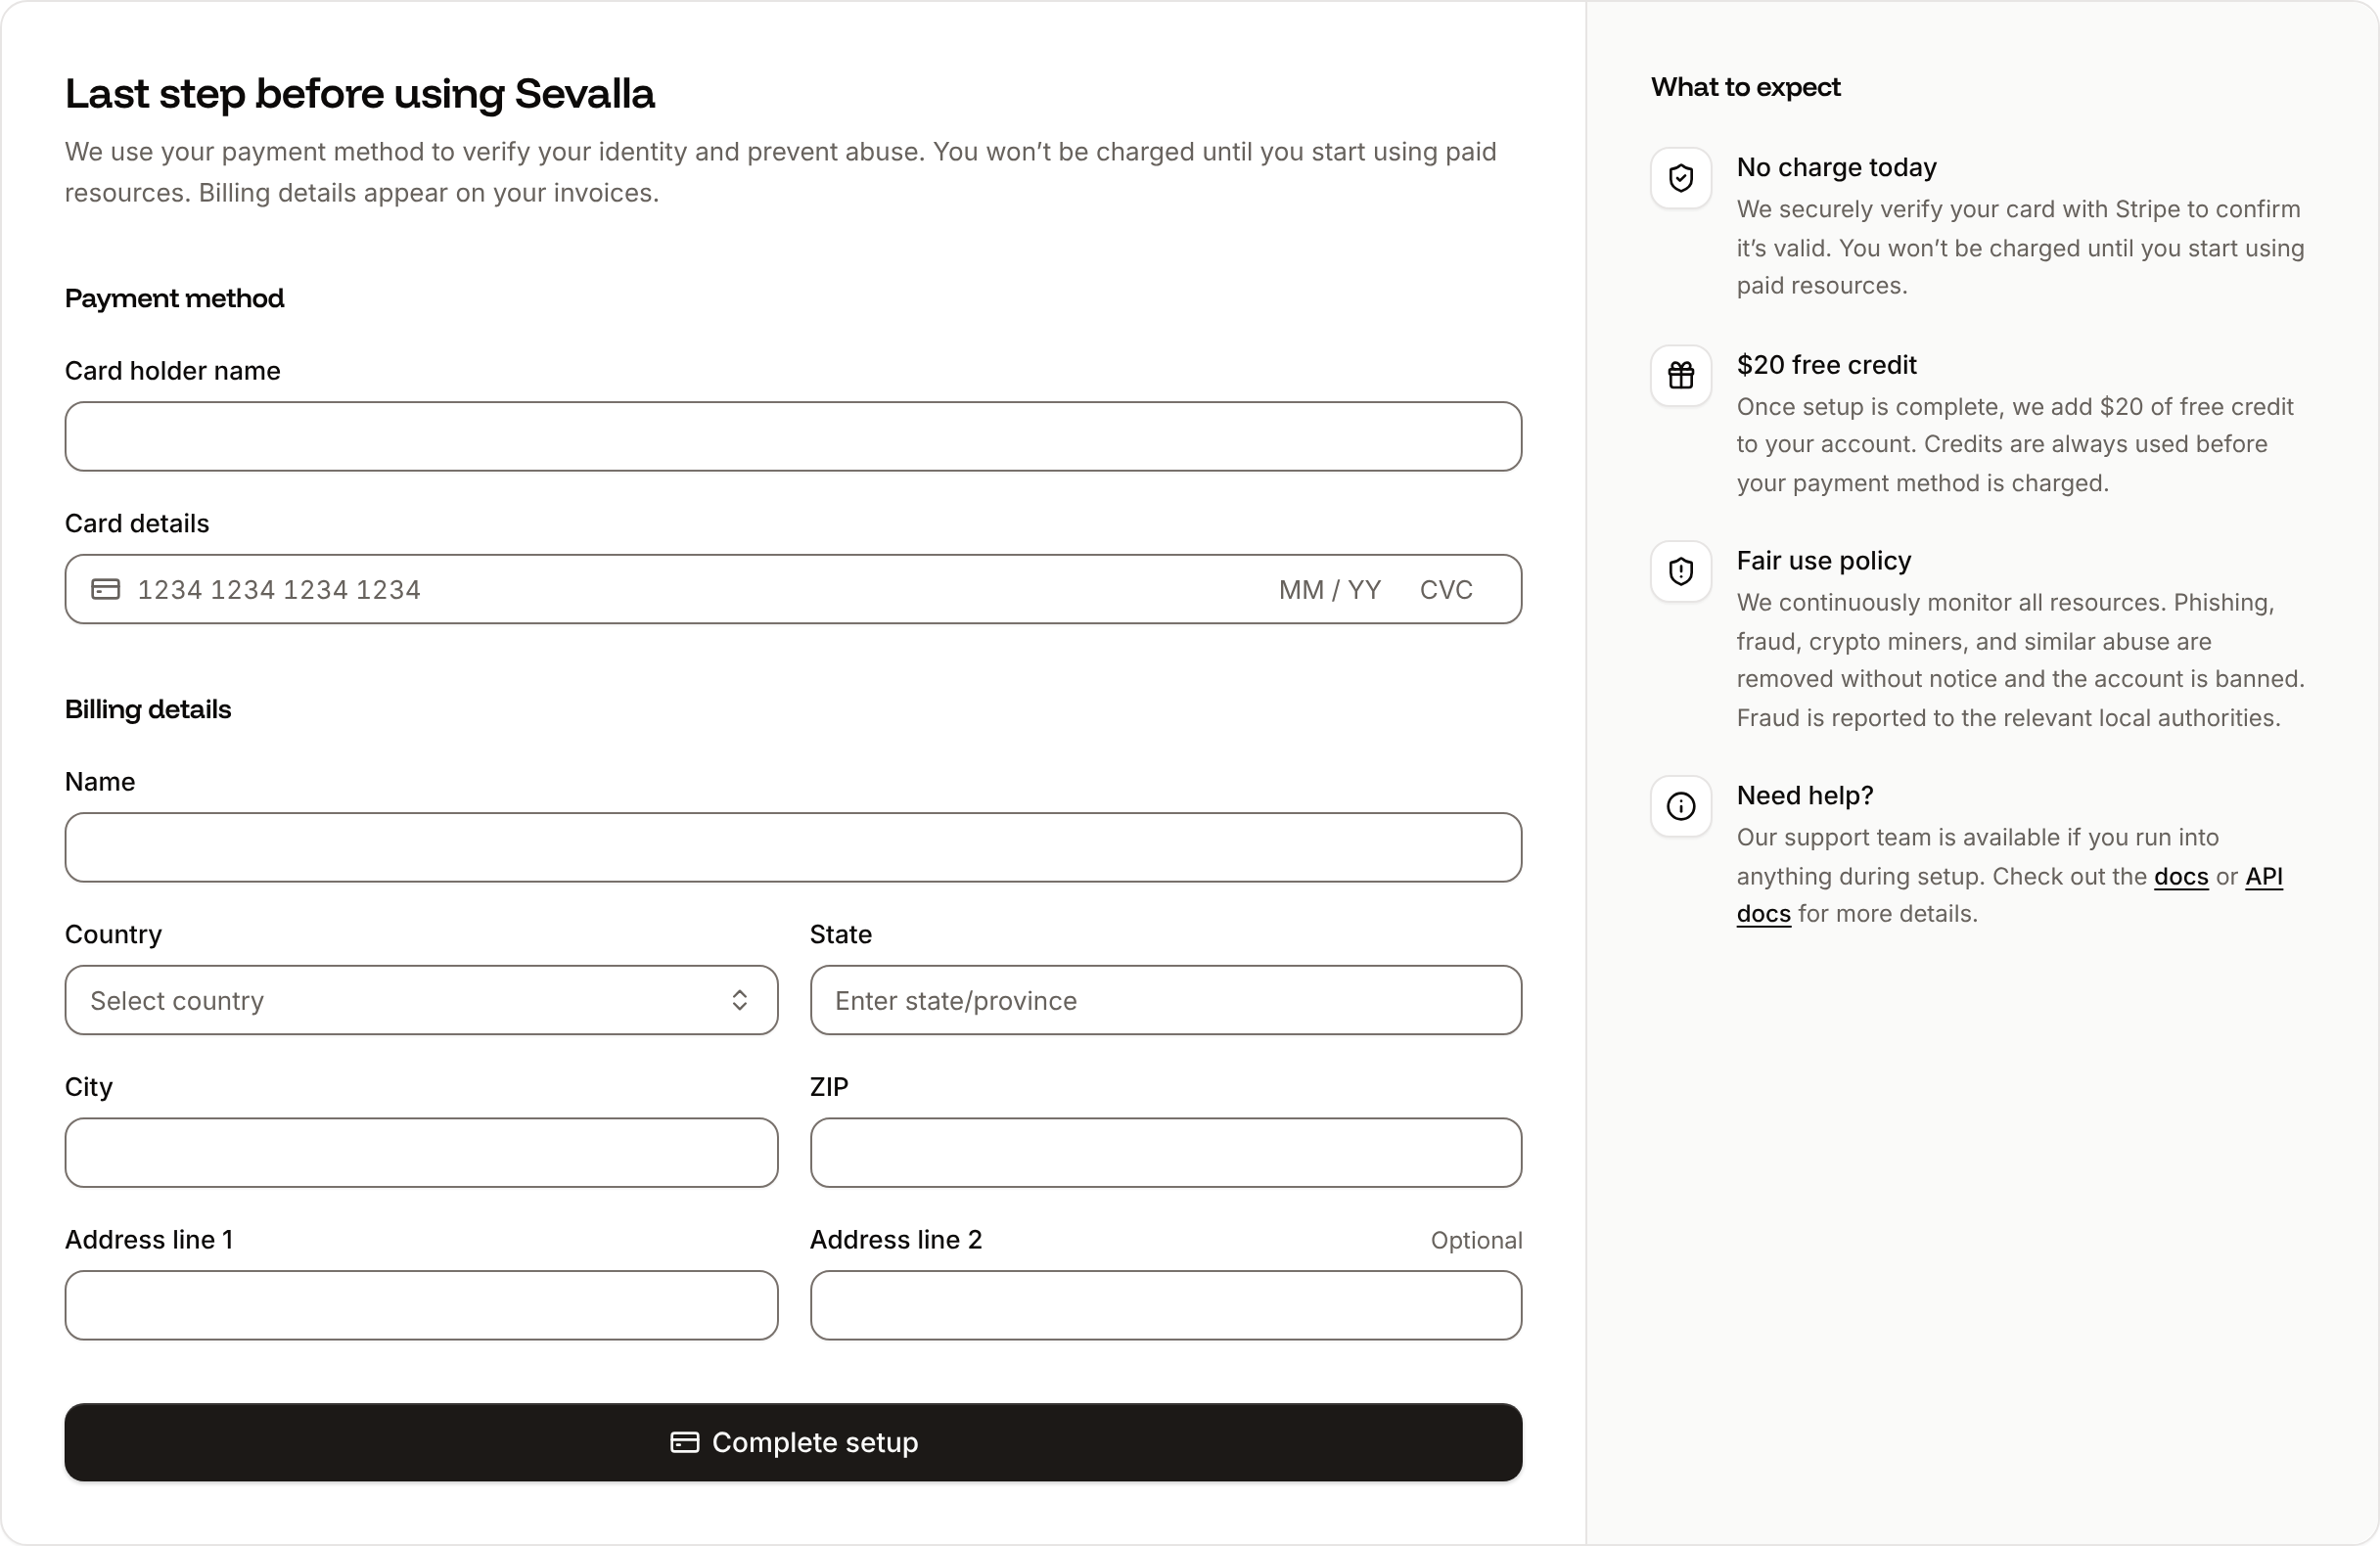
The dashboard opens on Last step before using Sevalla. Under Payment method, enter the Card holder name and the Card details.
3
Add billing details
Under Billing details, enter the Name, Country, State (Province in Canada, County in the UK), City, ZIP and Address line 1 that should appear on your invoices. Address line 2 is optional.
4
Finish
Click Complete setup. Your bank may ask you to confirm the card.
Setup complete. Welcome to Sevalla. and opens the Welcome to Sevalla guide. Close it to follow this quickstart; you can reopen it from Help > Get started guides. Your first company also gets $20 of free credit, which Sevalla uses before it charges your card. How billing works explains credits and invoices.
Create the application
1
Open the create form
In the sidebar, click Applications, then click Create an application. If you already have applications, click Create, then Application.
2
Connect GitHub
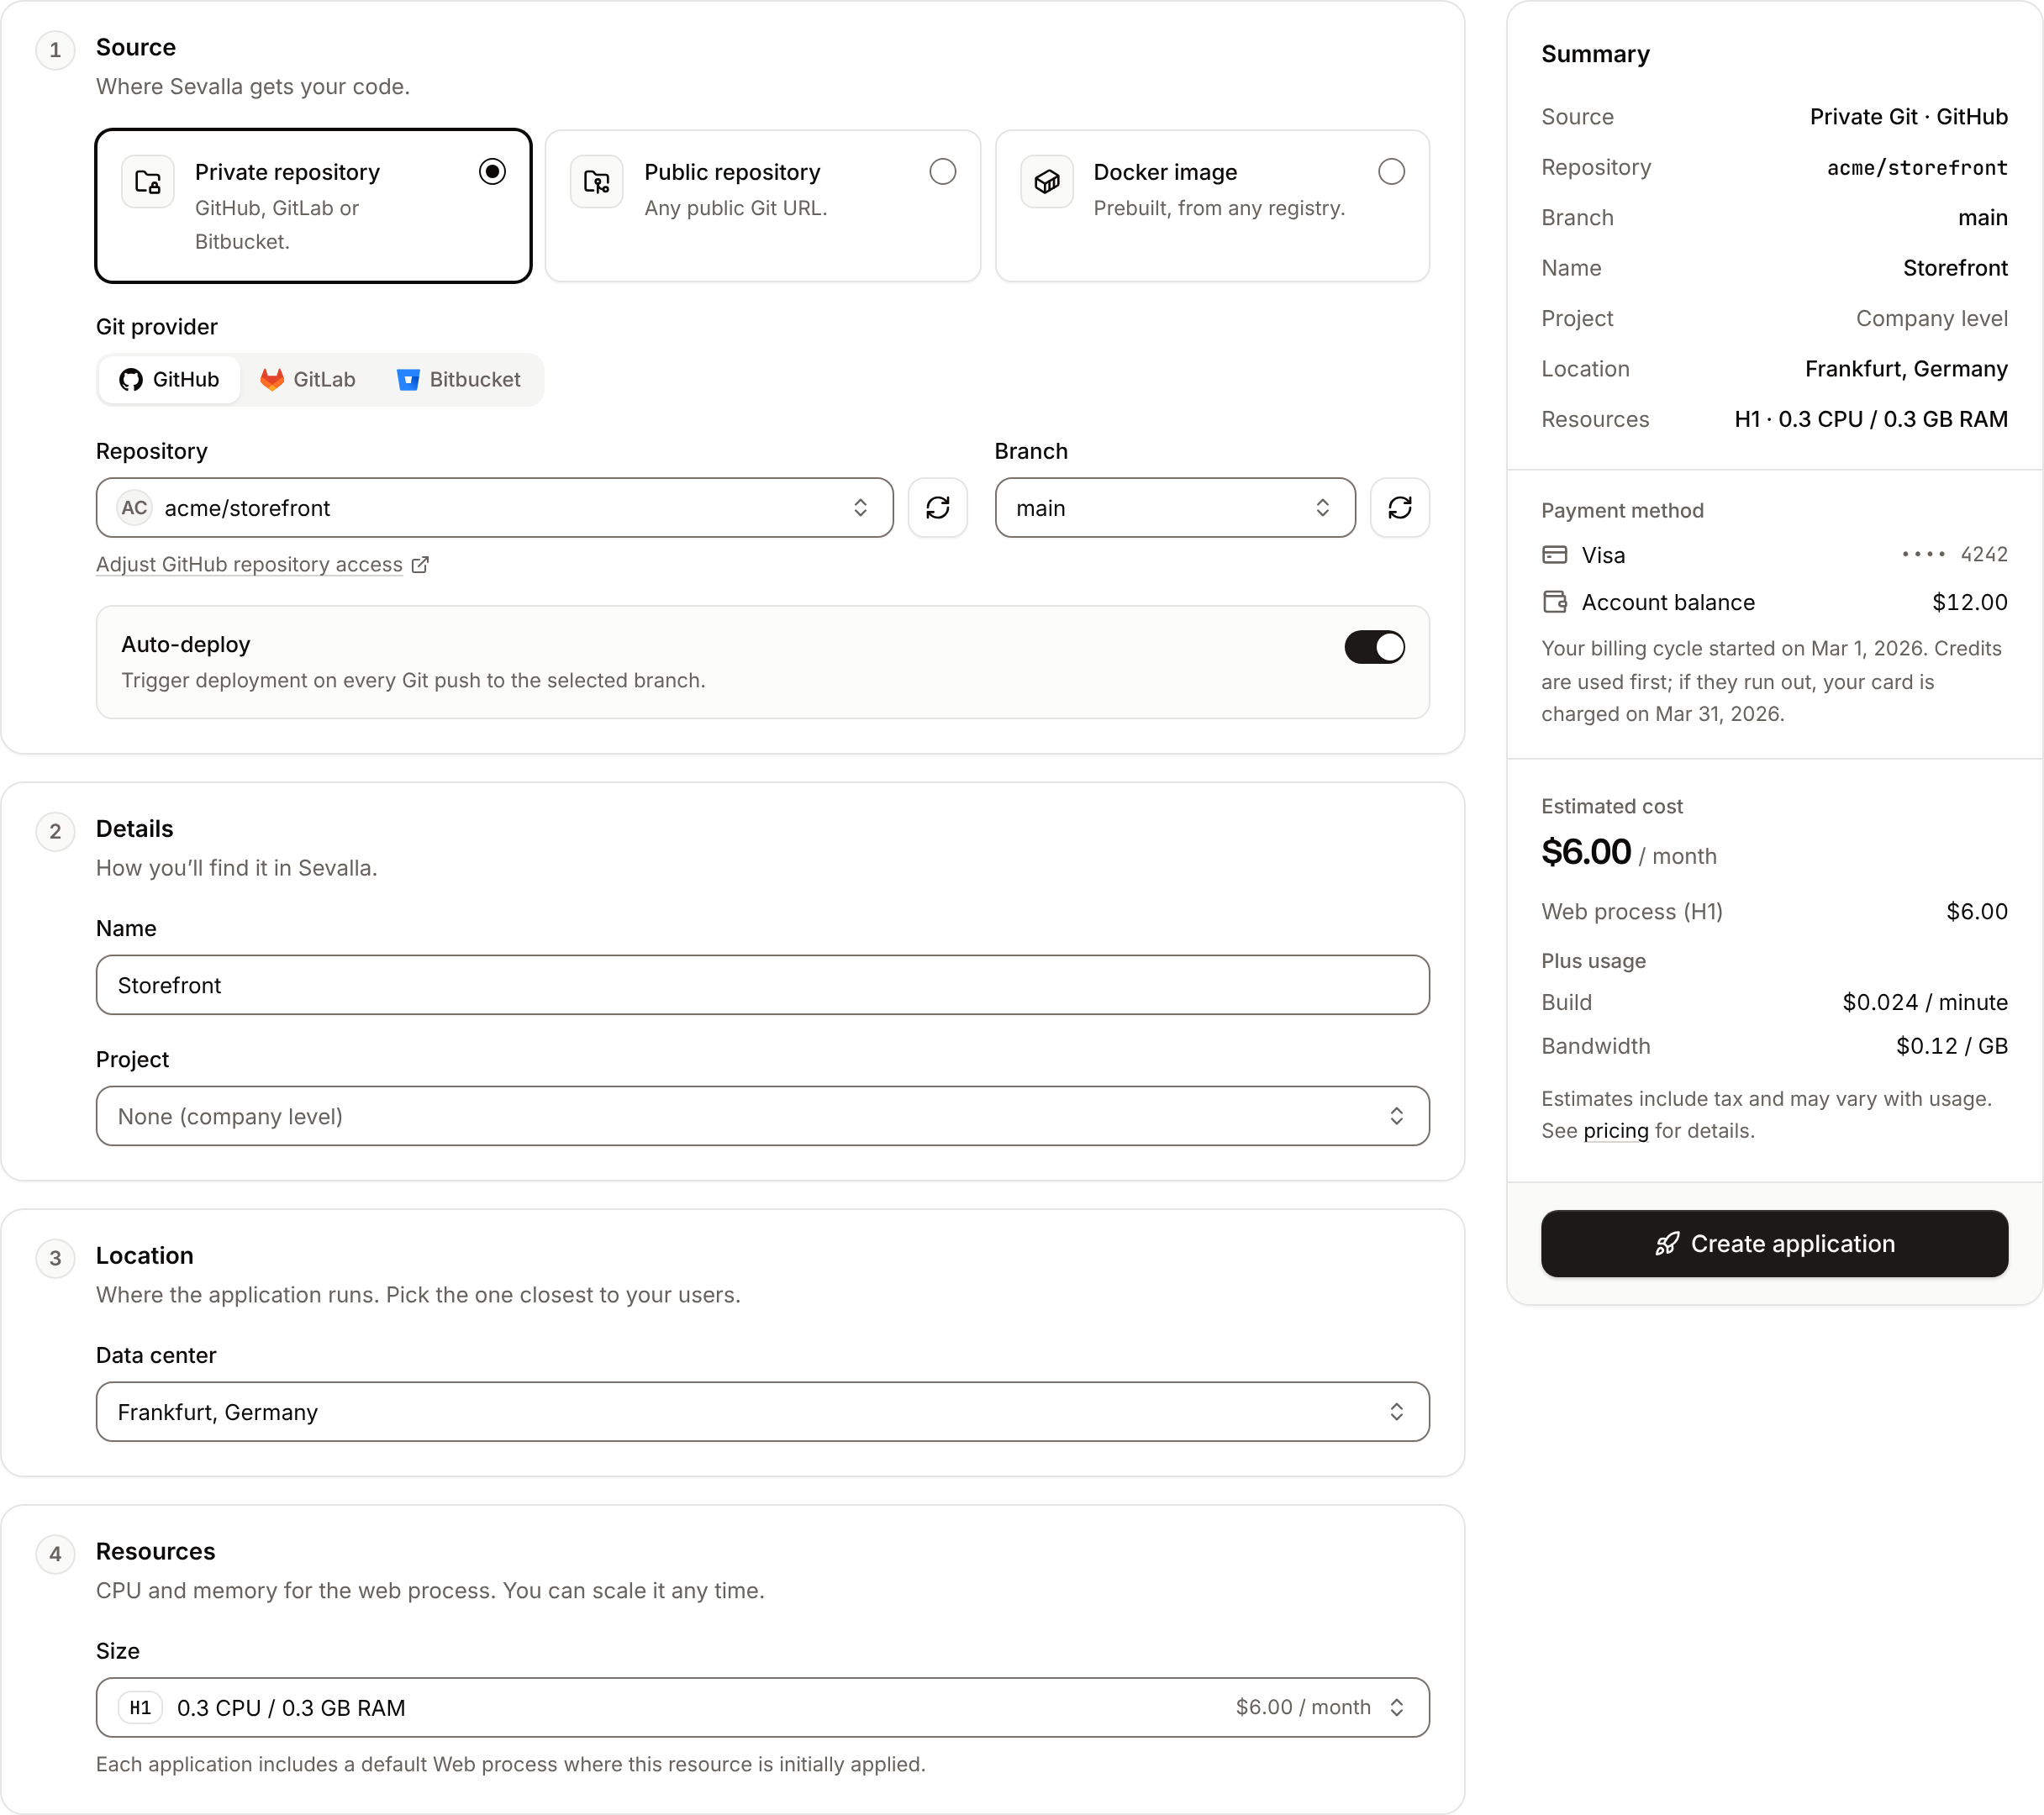
Under Source, keep Private repository and, under Git provider, GitHub. If GitHub isn’t connected yet, click Connect to GitHub and authorize Sevalla in the GitHub tab that opens. Back in the dashboard, the form picks up the connection on its own (click Check again if it doesn’t).
3
Pick the repository and branch
Choose the repository in Repository and the branch to deploy in Branch. If the repository isn’t listed, click Adjust GitHub repository access and give the Kinsta GitHub App access to it.
4
Name the application
Under Details, keep the repository’s name in Name or enter your own, for example
storefront.5
Choose the location
Under Location, Data center already shows a location on your continent, based on your browser’s time zone. Pick the one closest to your users. You can’t move an application to another location later, and its databases must be in the same location to use internal connections.
6
Choose the size
Under Resources, Size sets the CPU and memory of the web process. It starts at H1 (0.3 vCPU, 0.3 GB RAM), the smallest size. Keep it or pick a larger one; you can scale at any time.
7
Create it
Check the Summary, including the Estimated cost, then click Create application.
Deploy it
1
Start the deployment
On the application’s Overview tab, under Recent deployments, click Deploy now.
2
Confirm the branch
In Manual deploy, keep the branch you chose, then click Deploy.
3
Follow the build
Click the deployment in Recent deployments to open it. It moves through Queued, Build and Rollout, with the build log on the same page.
Open the application
The application’s address shows in its header, next to the repository and branch: its name followed by 5 random characters onsevalla.app, for example storefront-a1b2c.sevalla.app. Click it to open the application in a new tab.


Add a custom domain and a database
- Custom domain: on the application’s Domains tab, add a domain such as
shop.example.comand point your DNS at it. Custom domains aren’t available on the H1 size, so scale the web process first. See Custom domains. - Database: create a database, for example
orders-db, in the same location as the application, then connect them with an internal connection from the database’s Networking tab. In the same step you can add the connection details, such asDB_HOSTandDB_PORT, to the application as environment variables. See Connect an application.