

sevalla.app domain. Creating it doesn’t deploy it: you start the first deployment from the application’s page. This page covers Git sources; for a prebuilt image, see Deploy a Docker image.
Before you begin
- Add a valid payment method to the company on the Billing page. Without one, Sevalla rejects the application with
No valid payment method found. Add one at https://app.sevalla.com/billing/payment-methods to continue. - For a private repository, have an account on GitHub, GitLab or Bitbucket with access to it. You connect it during the steps; see Git providers.
- You need permission to create applications in the company, or in the project you’ll put the application in.
Create the application
1
Open the create form
In the sidebar, click Applications, then click Create > Application. If the company has no applications yet, click Create an application.
2
Choose the source
Under Source, click Private repository for a repository on your GitHub, GitLab or Bitbucket account, or Public repository for any public Git URL.
3
Pick the repository and branch
For a private repository, click the Git provider (GitHub, GitLab or Bitbucket). If it isn’t connected yet, click Connect to GitHub (or GitLab, Bitbucket), finish in the new tab, and the form picks up the connection. Choose the Repository and the Branch.For a public repository, enter the Repository URL, for example
https://github.com/acme/storefront, and the Branch, for example main.4
Name the application
Under Details, check the Name. It starts as the repository’s name. If your company has projects, choose a Project or None (company level).
5
Choose the location
Under Location, choose the Data center closest to your users and to the databases the application will use.
6
Choose the size
Under Resources, choose the Size of the web process.
7
Create it
Check the Summary and the estimated cost, then click Create application.
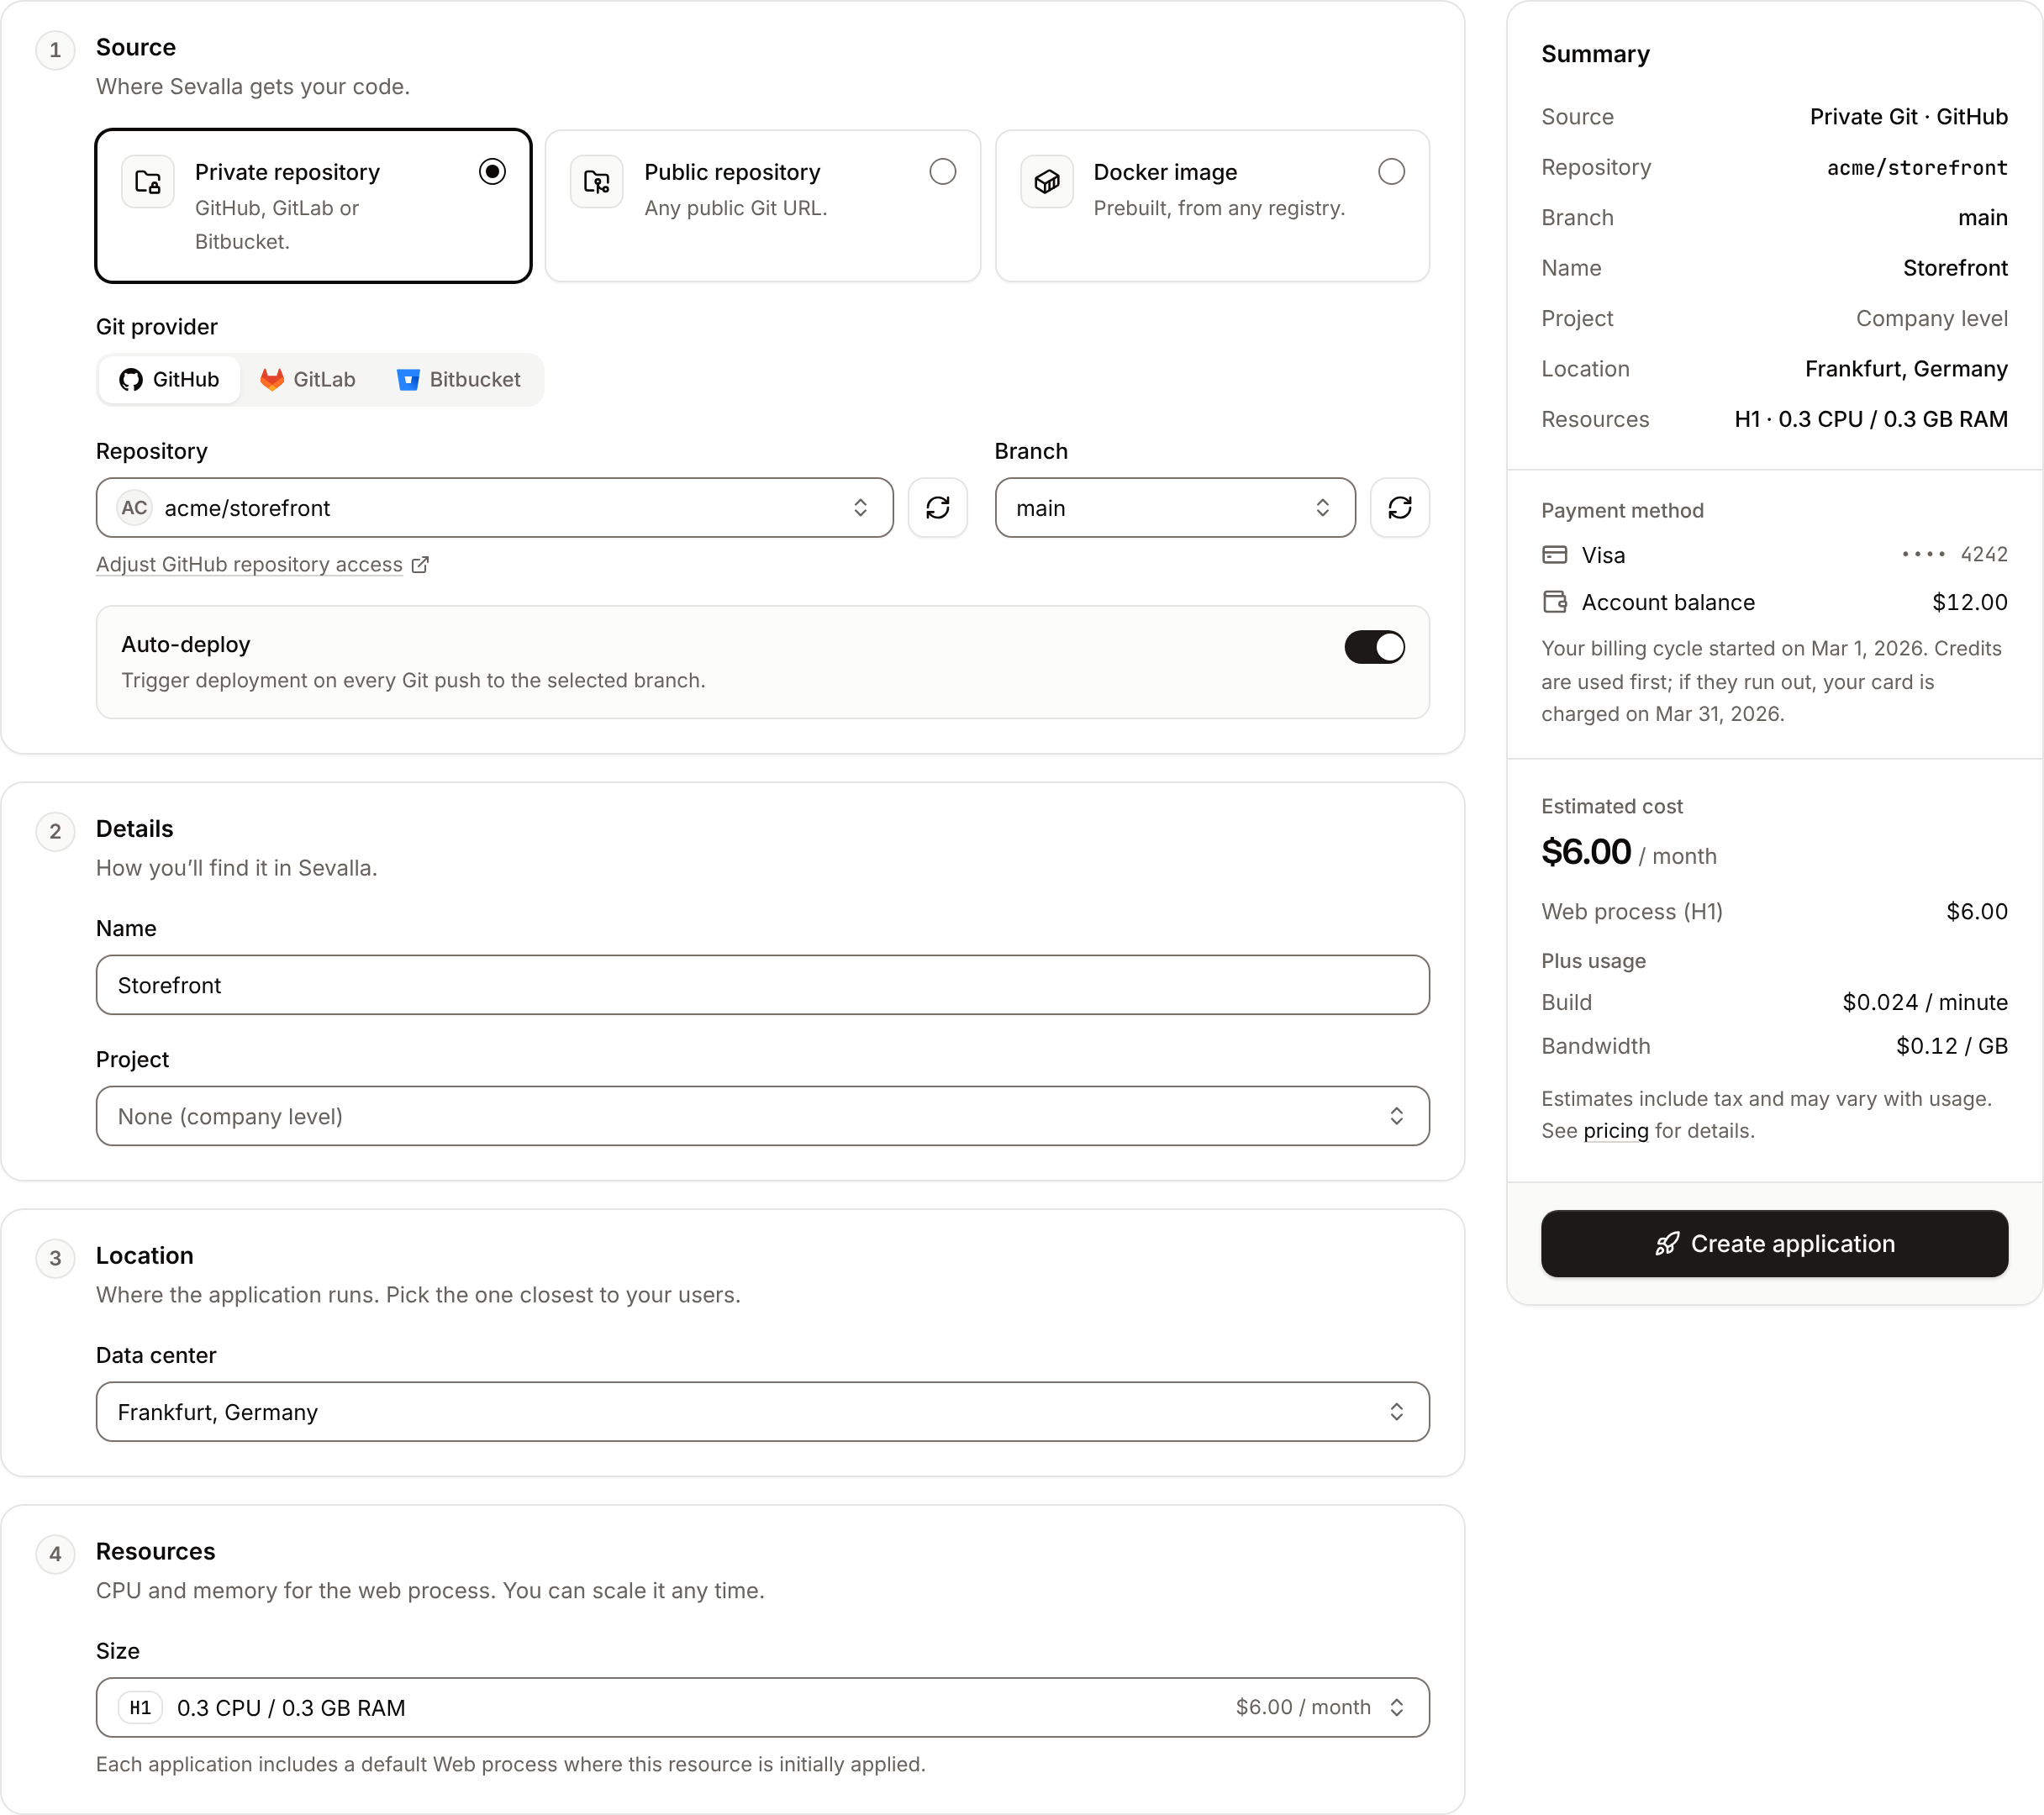
Form fields
Source
For GitHub, Adjust GitHub repository access under the repository list opens GitHub, where you choose which repositories the Kinsta GitHub App can read. Public repositories don’t need a connected account, but they can’t deploy automatically on push.
A new application doesn’t deploy on push, whatever the Auto-deploy switch shows. To deploy every push to the branch, open the application’s Settings tab, click Update auto-deploy in the Auto-deploy section, turn on Auto-deploy, and click Update auto-deploy. The section’s Status then reads Enabled.
Details
Sevalla also derives the application’s permanent Name (used in its hostname and in URLs) from the display name: lowercase, special characters removed, spaces turned into hyphens, cut to 27 characters, plus a random suffix, for example
storefront-x7k2m. The application’s default domain is <name>.sevalla.app. You can update the display name later; the permanent name never changes.
Location
The location can’t be changed after you create the application. Internal connections to databases and other applications work only within the same location, so create the application where its database is. See Choose a location.
Resources
The web process starts with 1 instance. You can change its size, add instances or turn on autoscaling at any time; see Scaling. A web process on the H1 size can’t have custom domains: move it to a larger size first.
Summary
The Summary card repeats what will be created (Source, Repository, Branch, Name, Project, Location, Resources), shows the company’s Payment method, and the Estimated cost:- The monthly price of the web process at the chosen size.
- Plus usage: Build time per minute (Git sources only) and Bandwidth per GB.
What Sevalla sets up
A new application from a Git repository starts with these settings. Change any of them before or after the first deployment.
Your application must listen on the port in the
PORT environment variable, which Sevalla sets to the web process’s port. Add the environment variables your build and your application need before the first deployment, so the first build has them.
Troubleshoot creating an application
API and CLI
Applications created through the API also start with automatic deployments off; turn them on with Update application (
auto_deploy). To find the cluster_id of a location, run sevalla resources clusters.