

sevalla.net domain, but no destinations: you add them from its Overview tab once it exists. This page covers the whole life of a load balancer, from creating it to deleting it.
Before you begin
- The company needs a valid payment method: the dashboard doesn’t let you add destinations without one. See Payment methods and invoices.
- Deploy the applications and static sites you want to route to first, so they have a domain.
- You need permission to create load balancers in the company, or in at least one project. See Users and roles.
Create the load balancer
1
Open the create page
In the sidebar, click Load balancers, then click Create load balancer.
2
Choose the routing
Under Routing, click Default to spread traffic randomly, or Geo to send each visitor to the closest destination. See Routing.
3
Name it
Under Details, enter a Name, such as
Storefront edge. If your company has projects, pick one in Project, or keep None (company level).4
Create it
Check the Summary and the Estimated cost, then click Create load balancer.
<name>.sevalla.net domain is in the diagram, next to Domain.
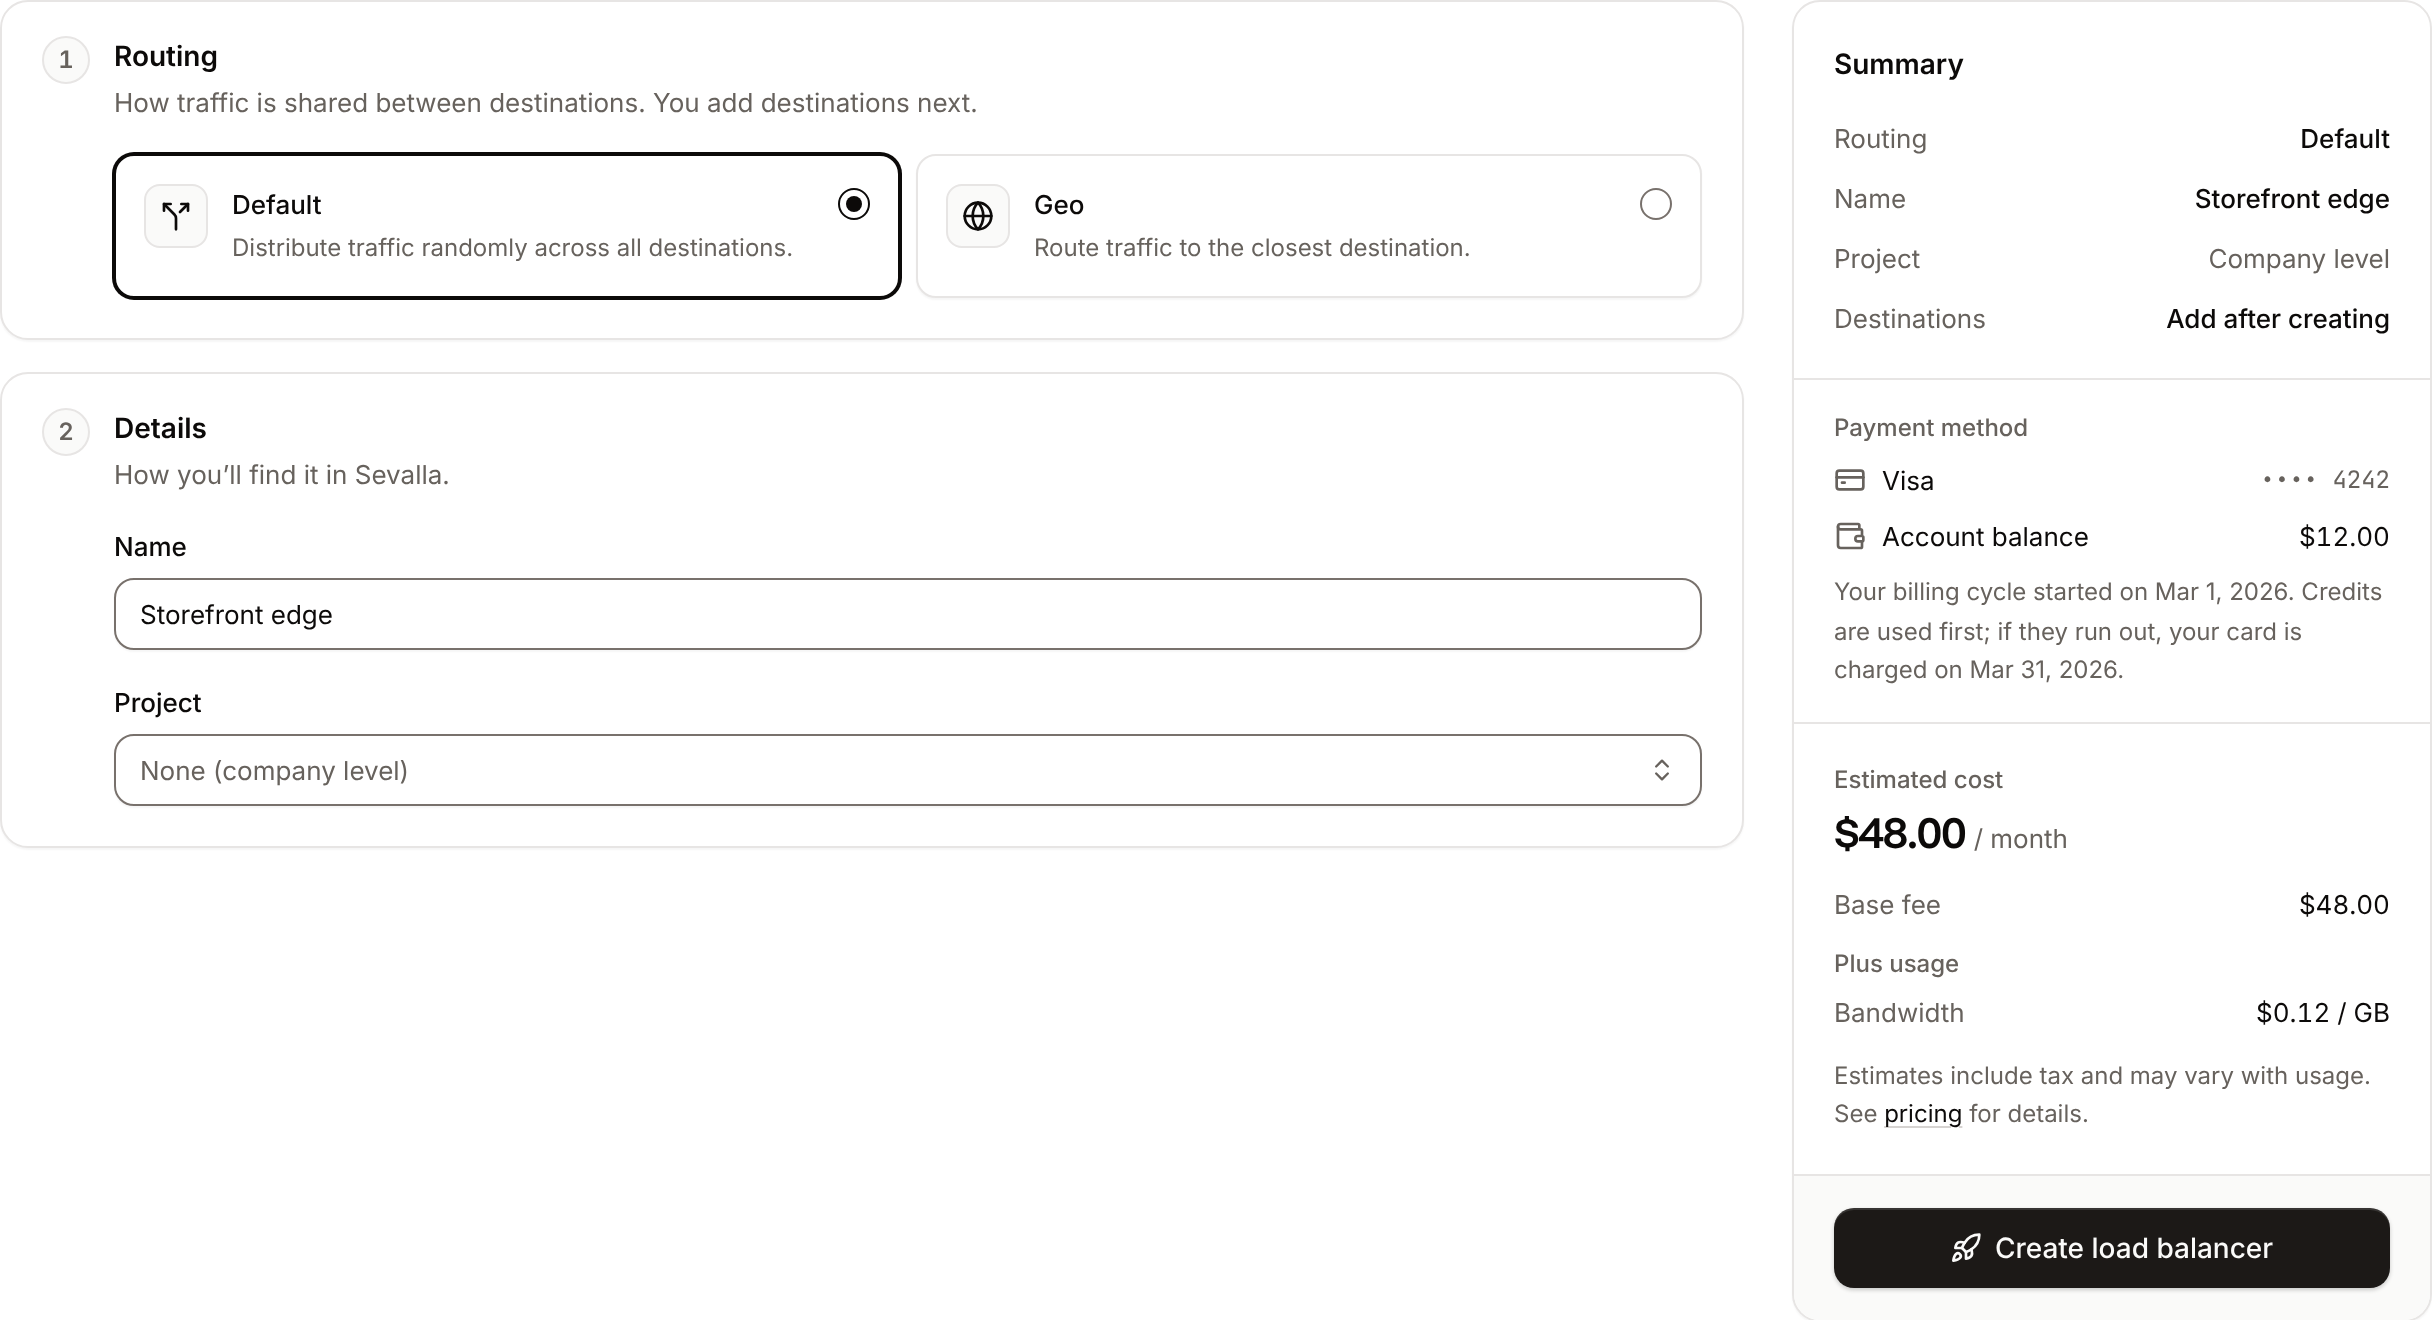
The Estimated cost is the 0.10 per GB of bandwidth, both with your company’s tax.
Add a destination
1
Open the load balancer
In the sidebar, click Load balancers, then click the load balancer. The Overview tab opens.
2
Open the sheet
Click Create destination (the + in the diagram’s toolbar). While the load balancer has no destinations, you can also click Add destination in the diagram.
3
Choose the destination type
Under Destination type, click App, Static site, Load balancer or External service.
4
Pick the destination
For a Sevalla service, pick it in Application, Static site or Load balancer; you can search by name or domain. For an external service, enter its URL, and its Latitude and Longitude if you use Geo routing.
5
Create it
Keep Enabled on to send it traffic right away, then click Create destination.
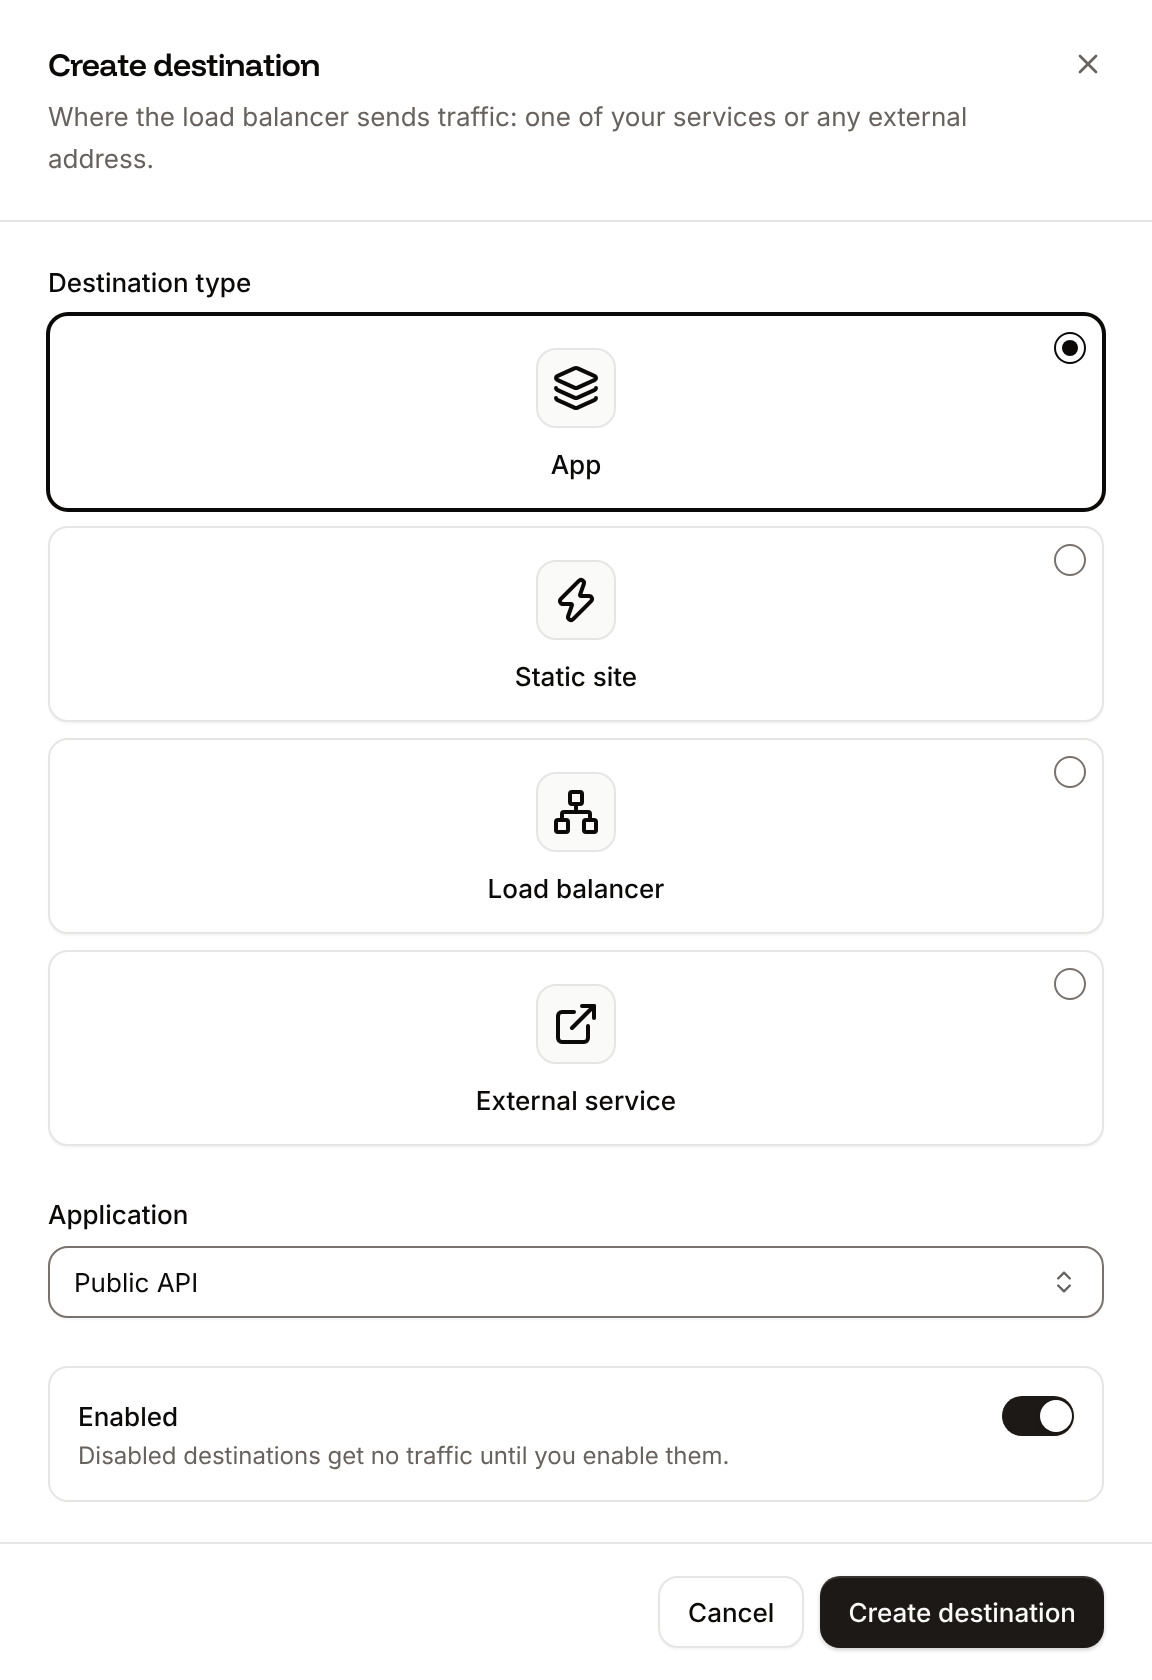
Applications get their location’s coordinates automatically. An external service without coordinates has no location for Geo routing.
Disable or enable a destination
Disabling a destination stops its traffic but keeps it on the load balancer, so you can enable it again later.1
Open the destination's menu
On the load balancer’s Overview tab, click … on the destination’s card, then click Disable (or Enable).
2
Confirm
Click Disable destination (or Enable destination).
Remove a destination
1
Open the destination's menu
On the load balancer’s Overview tab, click … on the destination’s card, then click Remove from load balancer.
2
Confirm
Click Remove destination.
Update the routing or name
1
Open the sheet
On the load balancer’s Overview tab, click Settings on the load balancer’s card, or Load balancer settings in the diagram’s toolbar.
2
Change the values
In the Update load balancer sheet, choose a different Routing, or change the Name.
3
Save
Click Update load balancer.
sevalla.net domain. A load balancer with Multi tenancy routing shows its routing as a note: you can only change its name.
To move a load balancer into or out of a project, use the project’s Services tab. See Projects.
Delete a load balancer
1
Open the dialog
On the load balancer’s Overview tab, click More actions (the … in the diagram’s toolbar), then click Delete load balancer.
2
Confirm with its name
Type the load balancer’s name as the dialog shows it, such as
storefront-edge-k2m9x, then click Delete load balancer.API and CLI
For an external service, use
--service-type EXTERNAL --url https://origin.example.com, with --latitude and --longitude for Geo routing.