

Before you begin
- You’re a company owner or admin in Sevalla.
- You can create enterprise applications in the Microsoft Entra admin center.
- Your Sevalla account uses an email address on your company’s domain, and you have an Entra user with the same address. The setup test signs you in with it.
Values to copy
From Sevalla’s Create SAML app step into Entra:
From the application’s Single sign-on page in Entra into Sevalla’s Sevalla setup step:
Start the setup in Sevalla
1
Open the wizard
In the sidebar, under Company, click Single sign-on. On the Single sign-on card, click Enable (or Continue setup).
2
Go to the values
Click Continue to reach Create SAML app. Keep this tab open: you’ll copy its values into Entra.
Create the SAML app in Microsoft Entra ID
1
Create the application
In the Microsoft Entra admin center, go to Entra ID > Enterprise apps and click New application. Click Create your own application, enter
Sevalla as its name, select Integrate any other application you don’t find in the gallery (Non-gallery), then click Create.2
Choose SAML
In the new application, click Single sign-on, then select SAML.
3
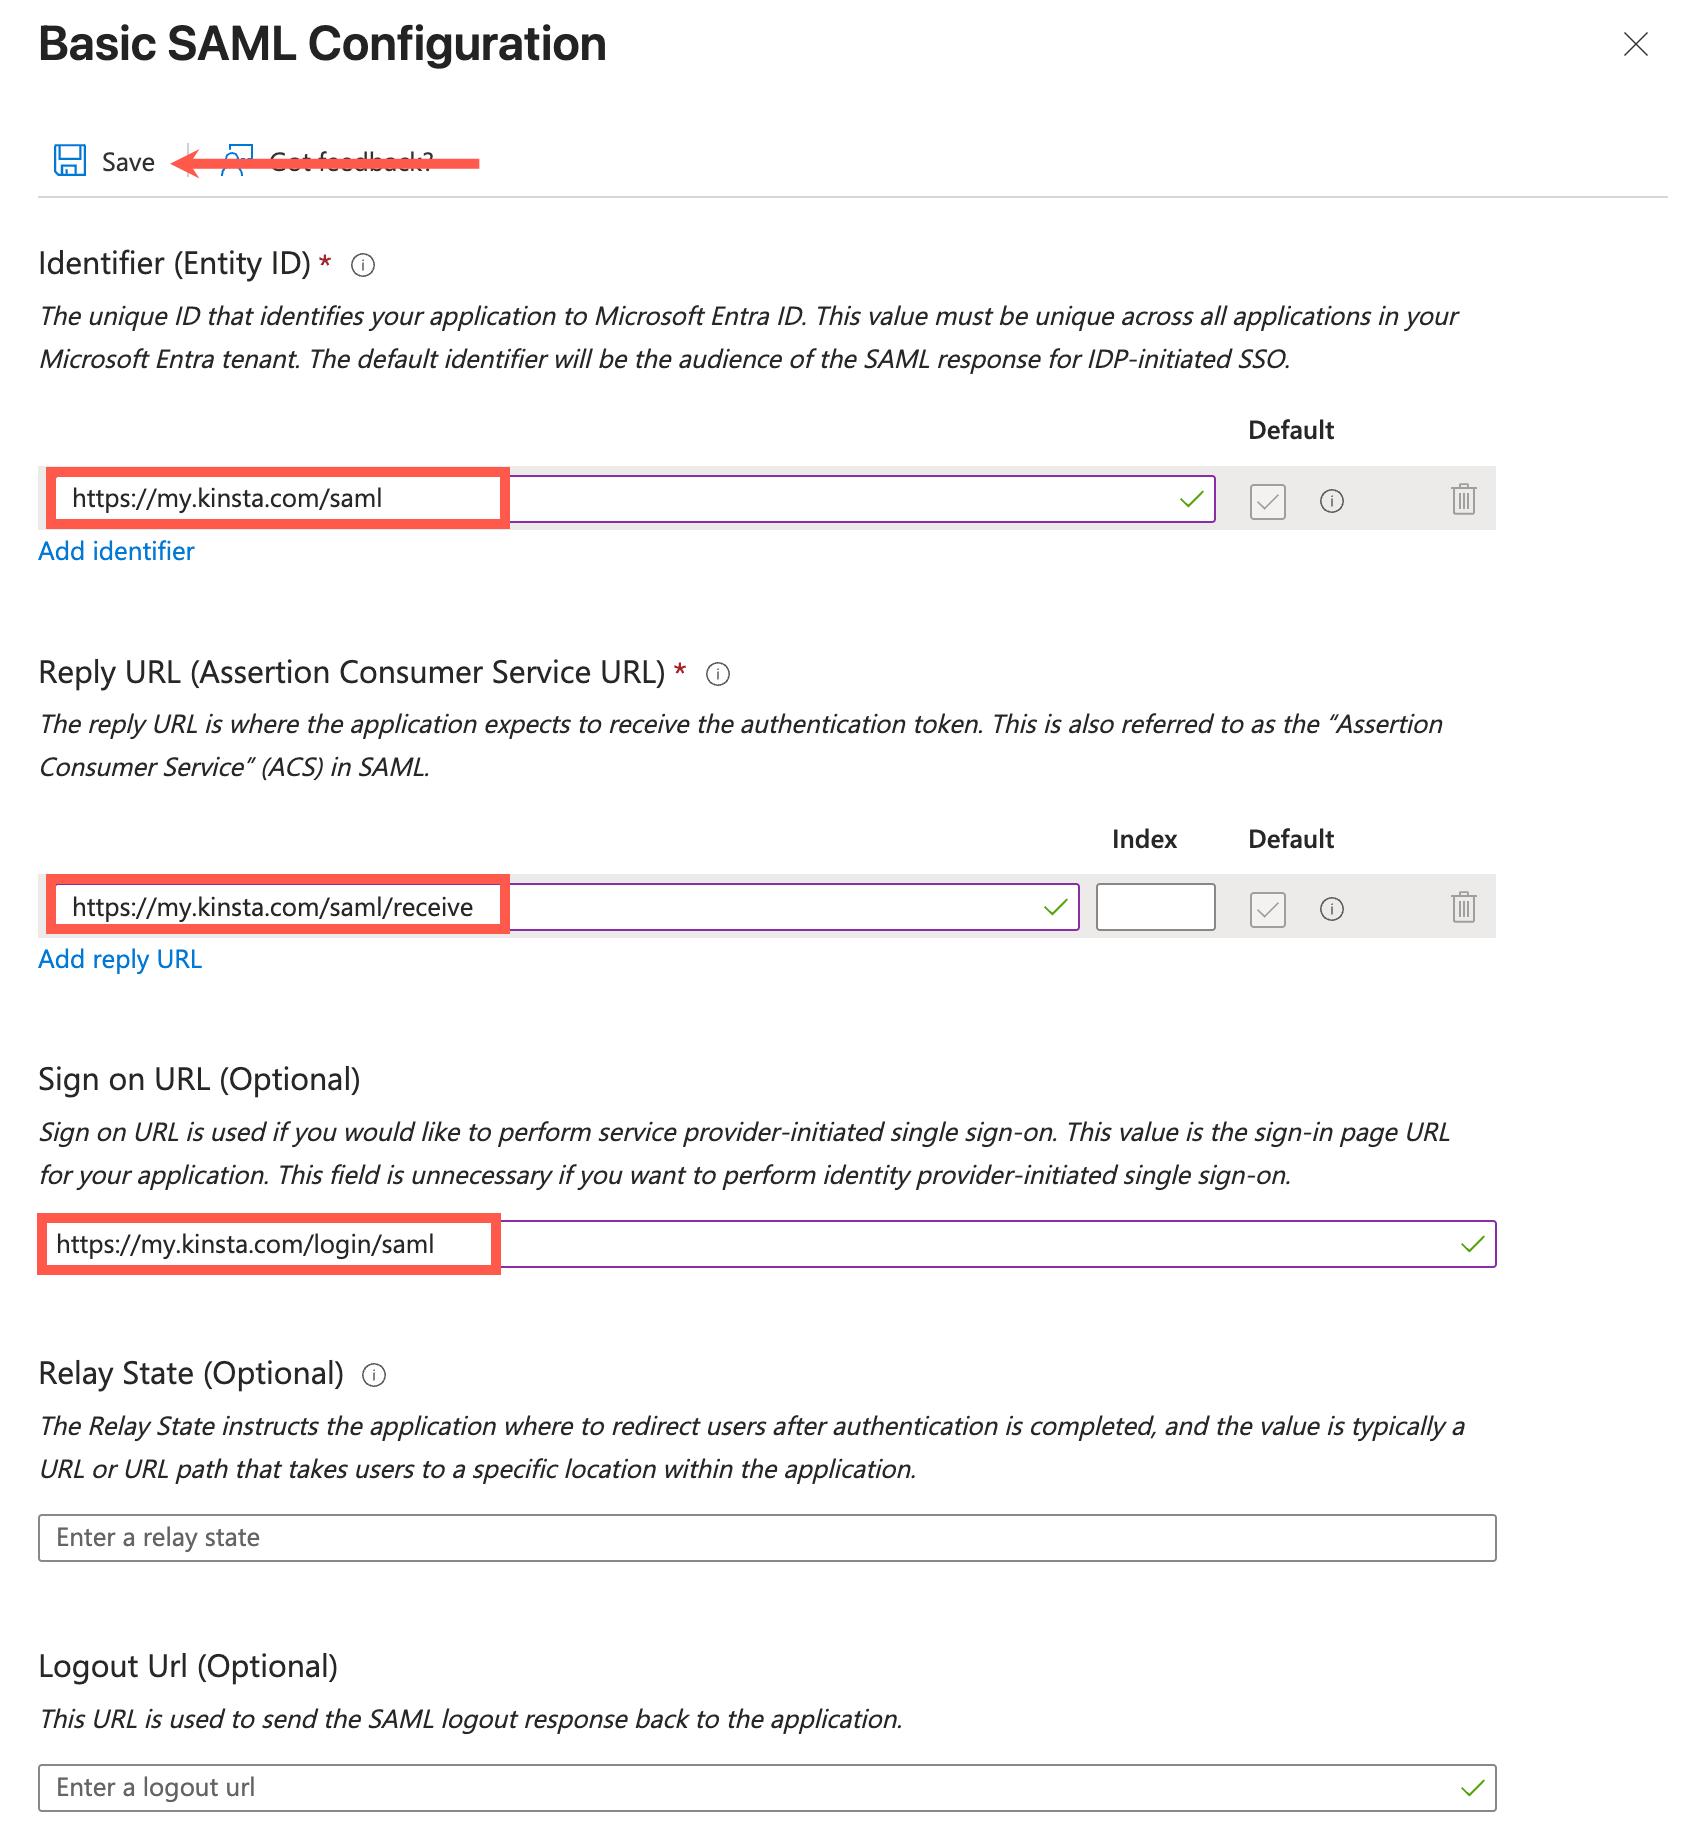
Fill in the basic SAML configuration
In Basic SAML Configuration, click Edit, then:
- Under Identifier (Entity ID), click Add identifier and enter
https://my.kinsta.com/saml. - Under Reply URL (Assertion Consumer Service URL), click Add reply URL and enter
https://my.kinsta.com/saml/receive. - In Sign on URL, enter
https://my.kinsta.com/login/saml.
4
Add the claims
In Attributes & Claims, click Edit. Click Add new claim for each of these, leave Namespace empty, and click Save:
email claim, so it must hold the address each person uses in Sevalla. See Microsoft’s guide to customizing SAML claims for more about claims.
Signing in from the My Apps portal isn’t supported, so you can hide the app from your users in the application’s properties.
Give people access to the app
Only people assigned to the application can sign in to Sevalla with Microsoft Entra ID.1
Open users and groups
In the application, click Users and groups, then click Add user/group.
2
Pick the people
Under Users (or Users and groups), click None Selected, select the people or groups, then click Select. Include yourself, so you can run the test.
3
Assign them
Click Assign.
Add the Entra details to Sevalla
1
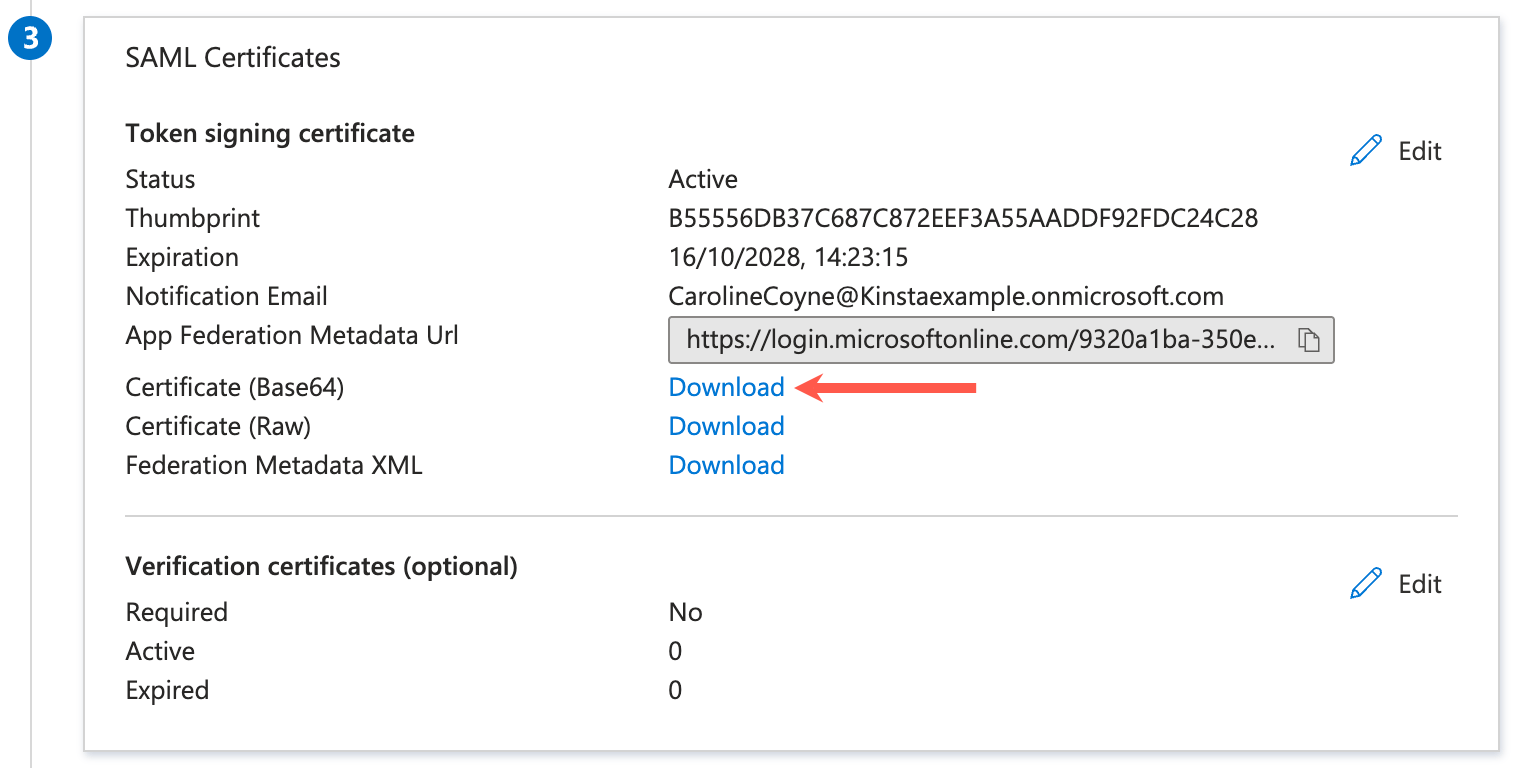
Download the certificate
In the application’s Single sign-on page, under SAML Certificates, click Download next to Certificate (Base64). Open the file in a text editor.
2
Verify your email domain in Sevalla
In the Sevalla tab, click Continue to reach Sevalla setup. Under Email domain, add and verify your domain. See Verify your email domain.
3
Paste Entra's values
Under Set up Sevalla SAML, paste:
- SSO URL: Entra’s Login URL, from the Set up Sevalla section of the Single sign-on page
- Entity ID: Entra’s Microsoft Entra Identifier, from the same section
- Public certificate: the whole contents of the certificate file, including the
BEGIN CERTIFICATEandEND CERTIFICATElines
Test and set SSO live
On Test and finish, click Test authentication and sign in to Microsoft. When Sevalla showsAuthentication test was successful., click Save and set SSO live. If the test fails, see Troubleshoot SSO sign-in.
Next, you can make SSO mandatory and turn on just-in-time provisioning.